By Jan Miller
Jan Miller is an Art and Design Technology teacher and magazine editor with 25 years’ experience. In this resource, Jan demonstrates the process of creating imaginative and unique medals using recycled materials.
Introduction
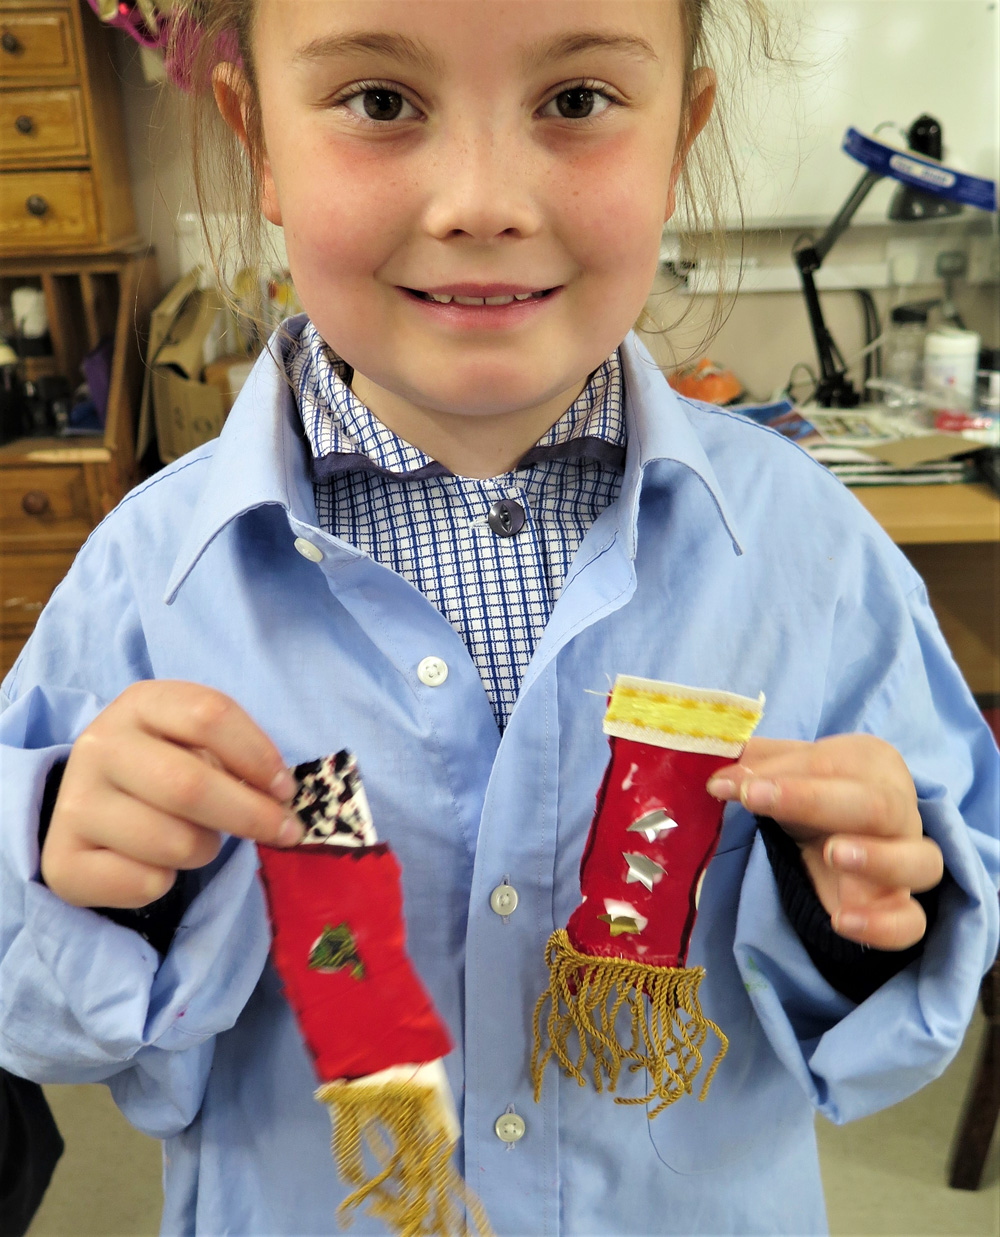
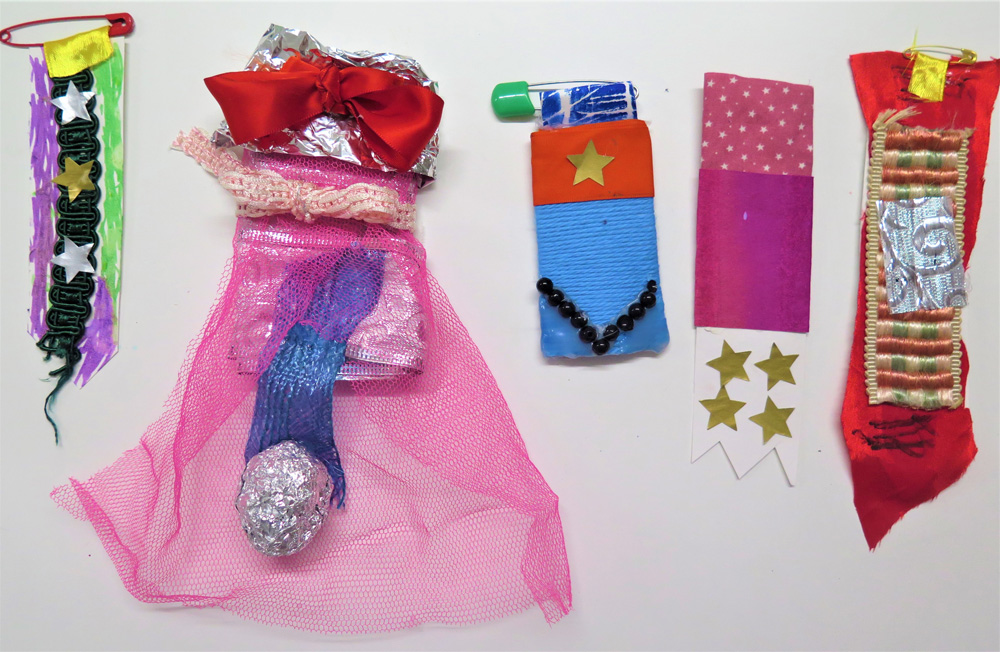
My pupils, like the rest of the country, feel they have been brave to have survived the lockdown. My lessons with them continued online during distance learning, and I was continually impressed with their creativity and inventiveness in using materials they had to hand. They wanted to recognise and reward themselves with a medal or special badge, but not just any medal – one that is similarly handmade, unique and imaginative. These would be worn and then displayed to celebrate their creativity. They felt it was important to recycle and so used small offcuts of material, old ribbons and braiding, spare buttons, packaging, etc.

Activity Objectives
The project has given pupils an opportunity for creative decision making, independent thought and to be part of a collaborative project. They have worked spontaneously, informed by materials and will develop fine motor skills, whether developing cutting skills for the youngest learners or using detailed embroidery for older students.
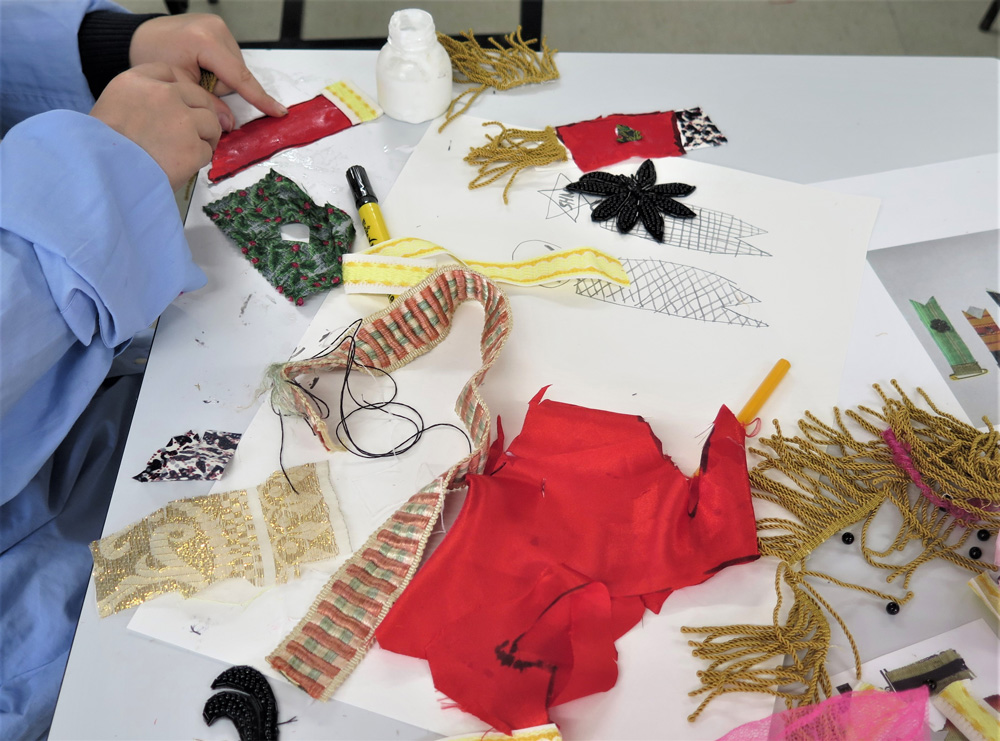
Materials
-
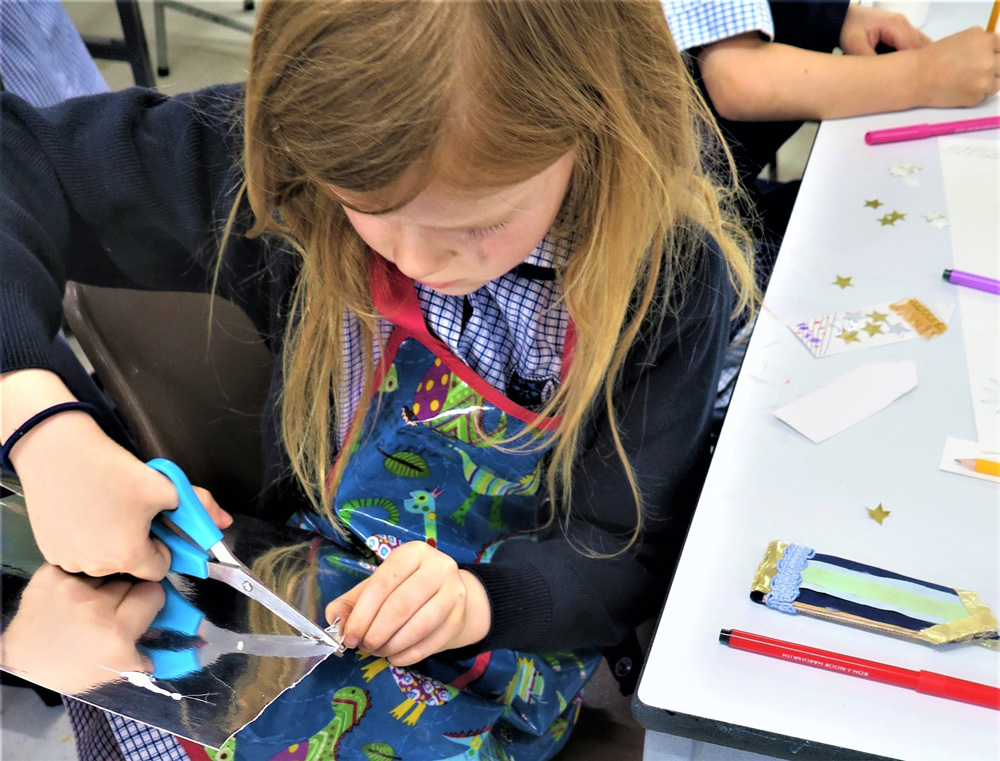
Glue and scissors
-
A glue gun (this proved handy for quickly adding a loop of ribbon for the safety pin at the end!)
-
Cereal box card
-
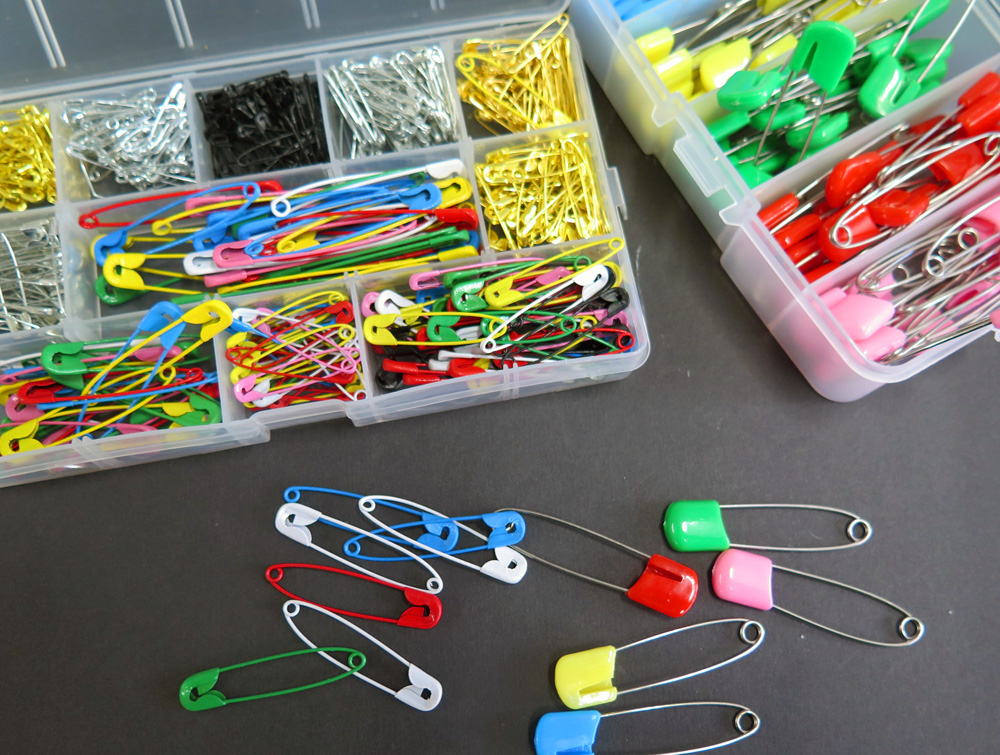
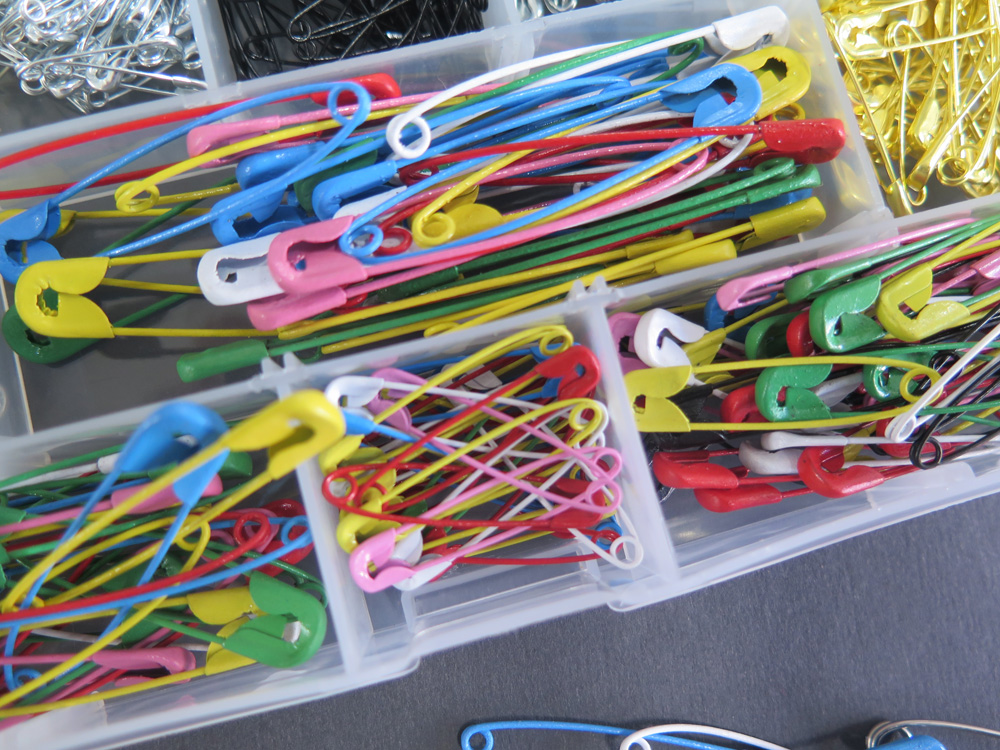
Safety pins, scotch pins, paper clips, split pins
-
Paper and pencils
-
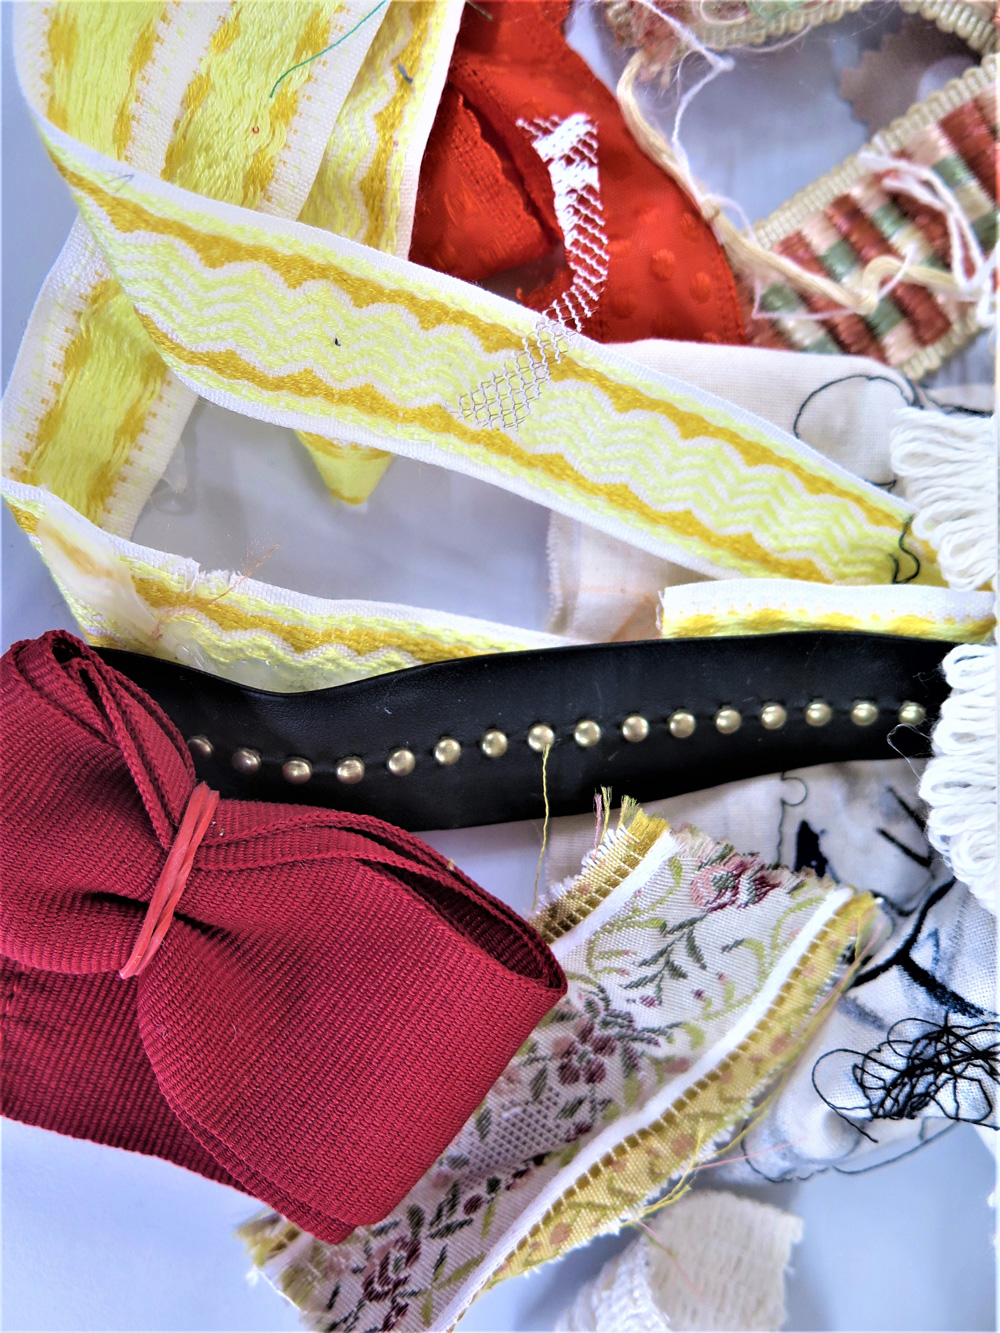
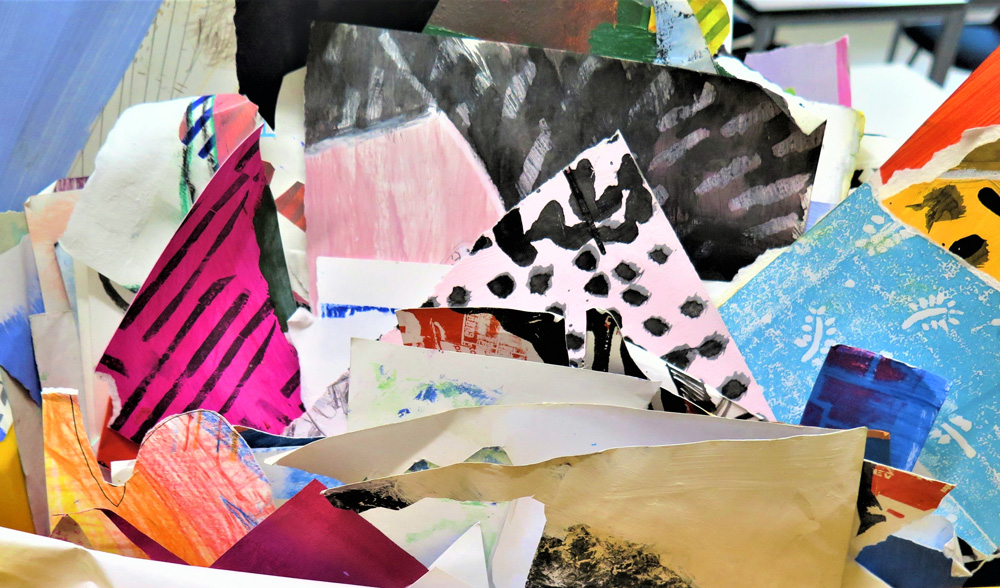
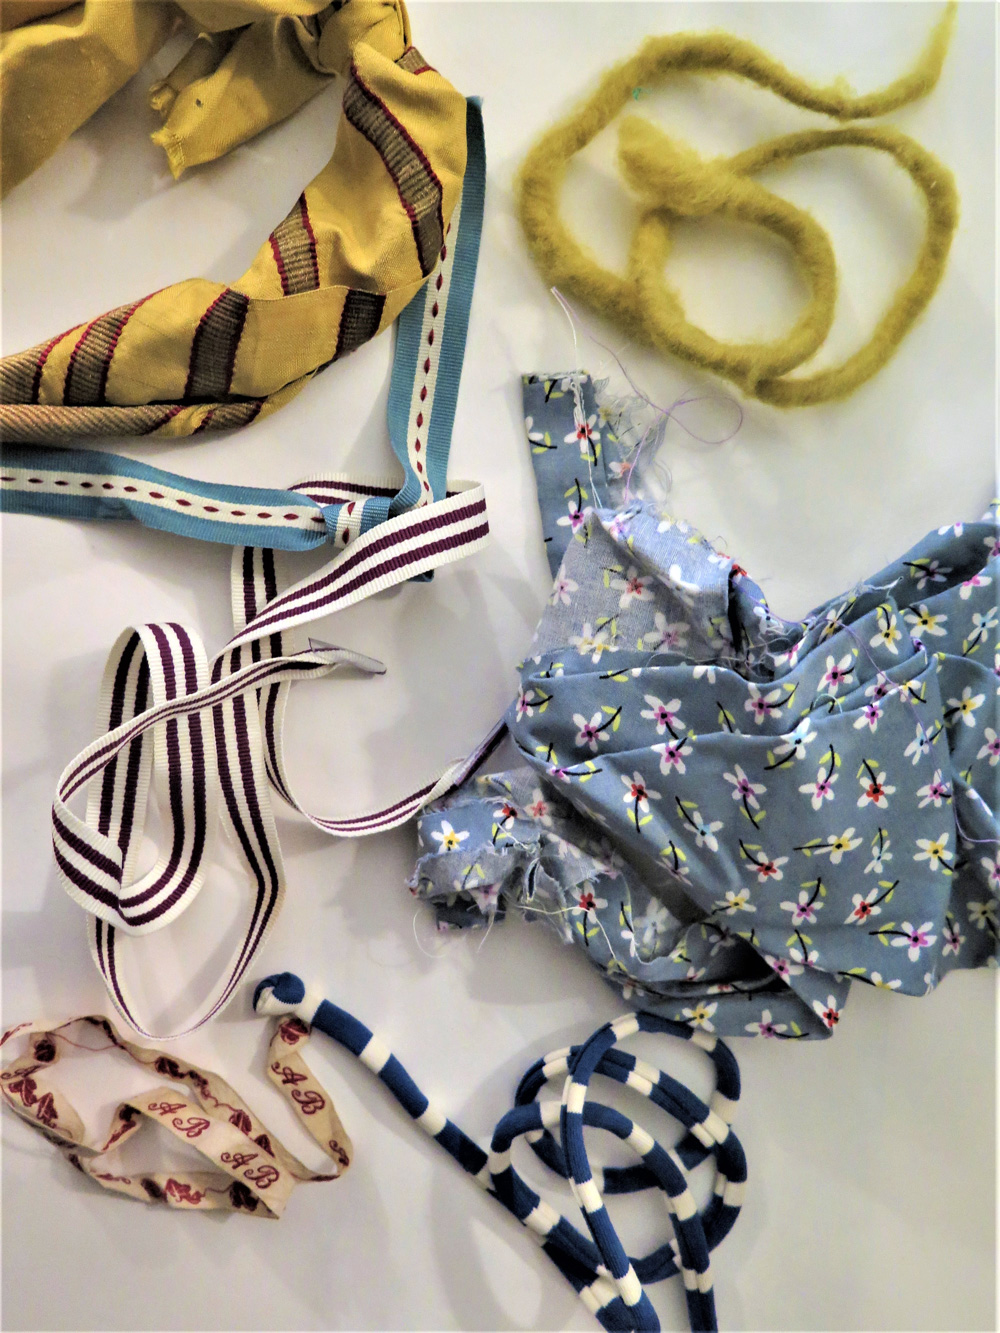
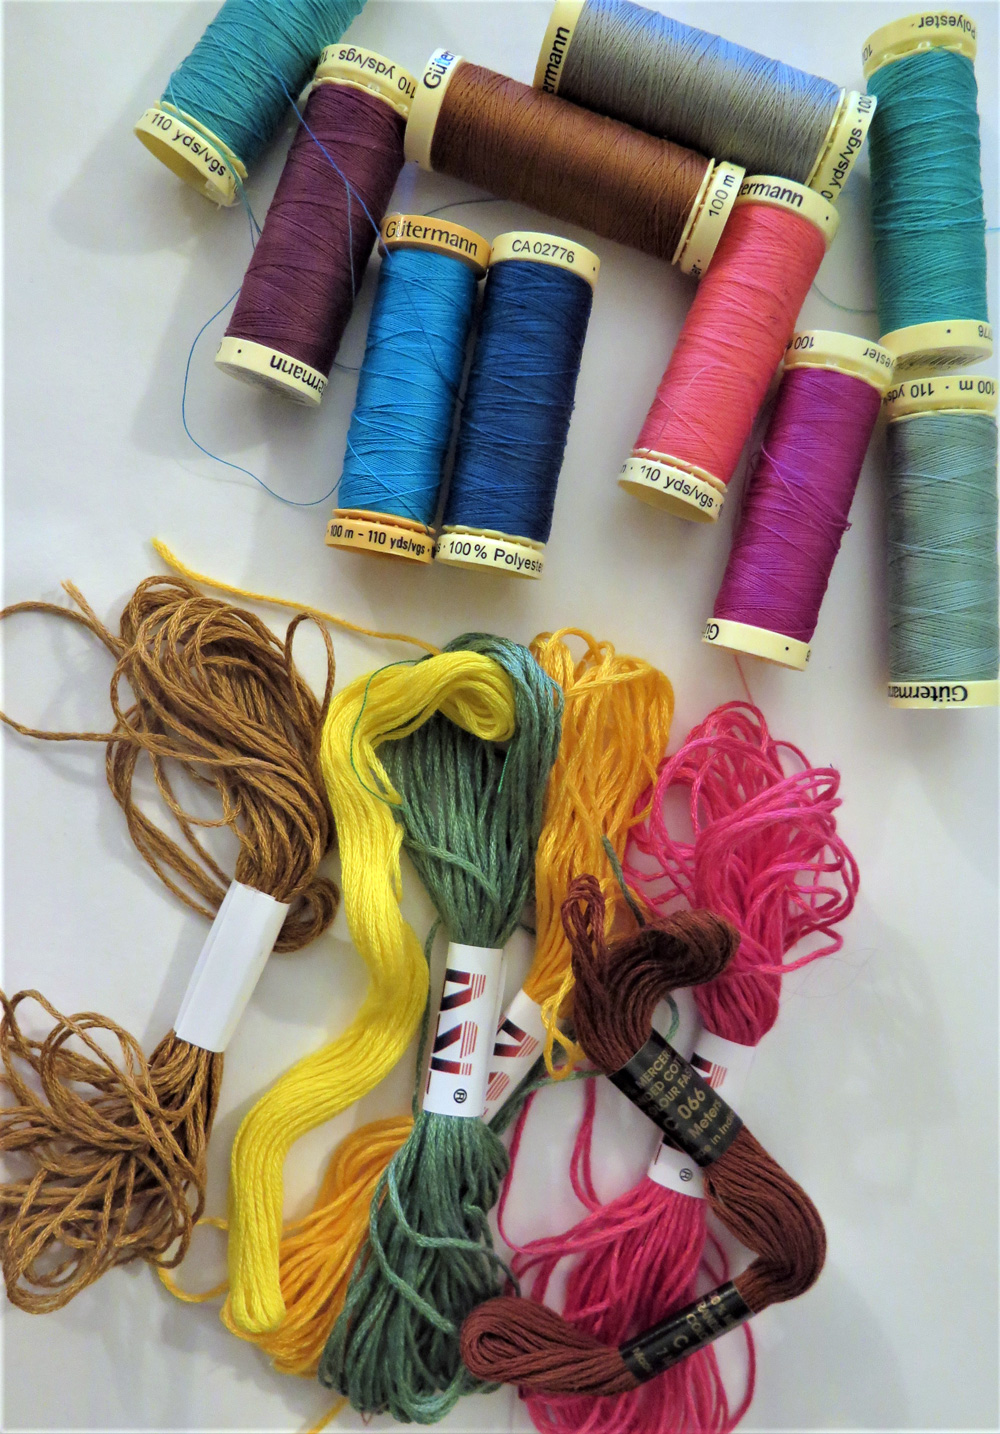
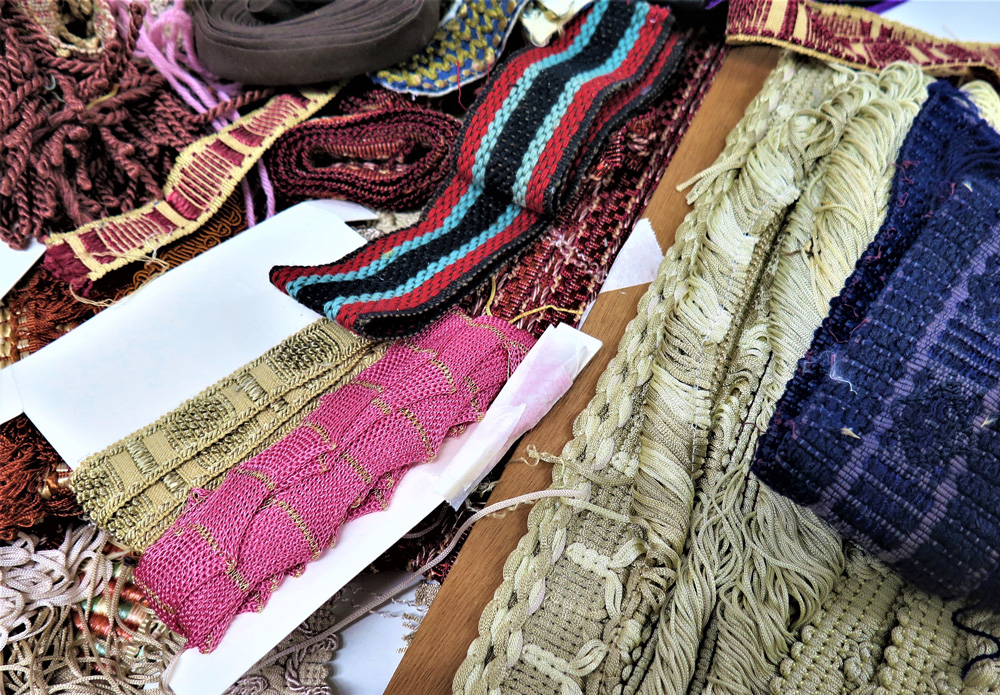
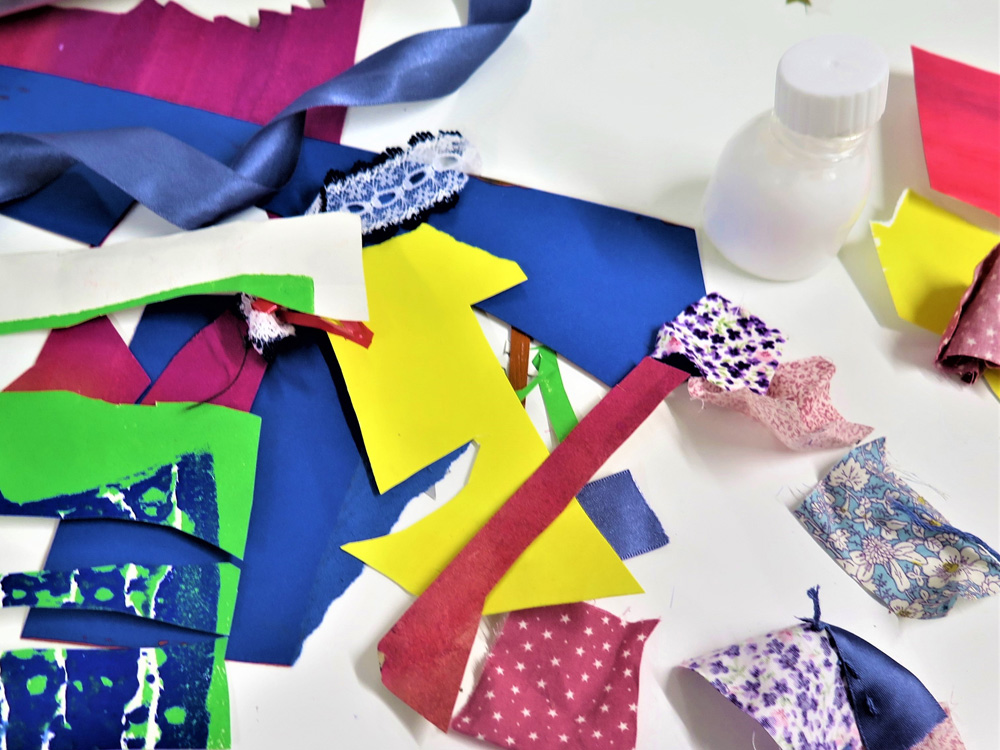
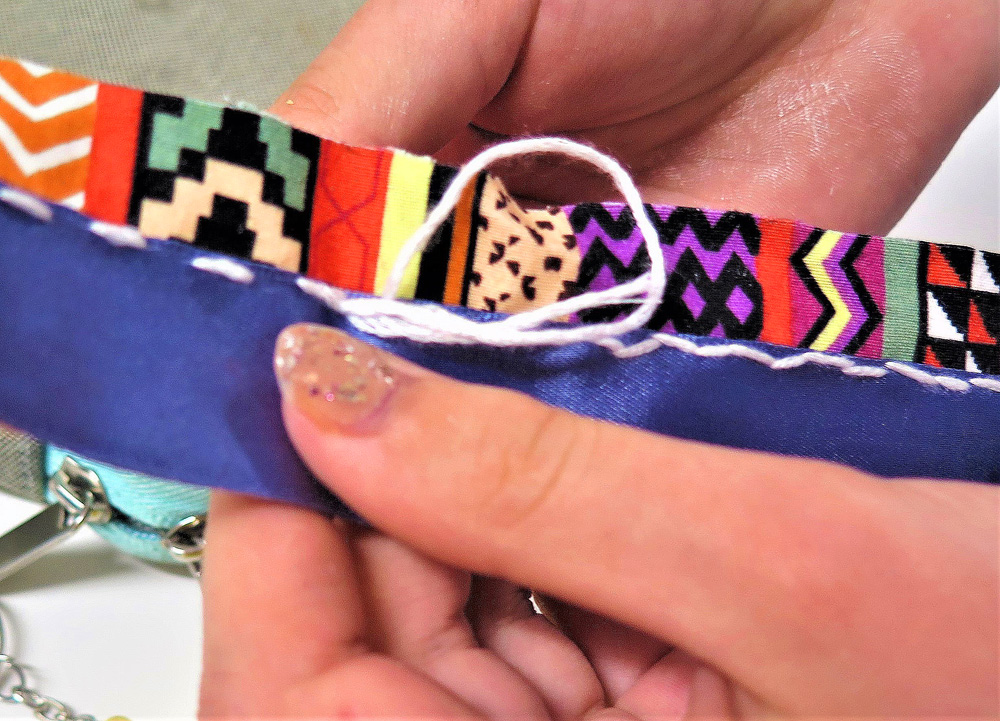
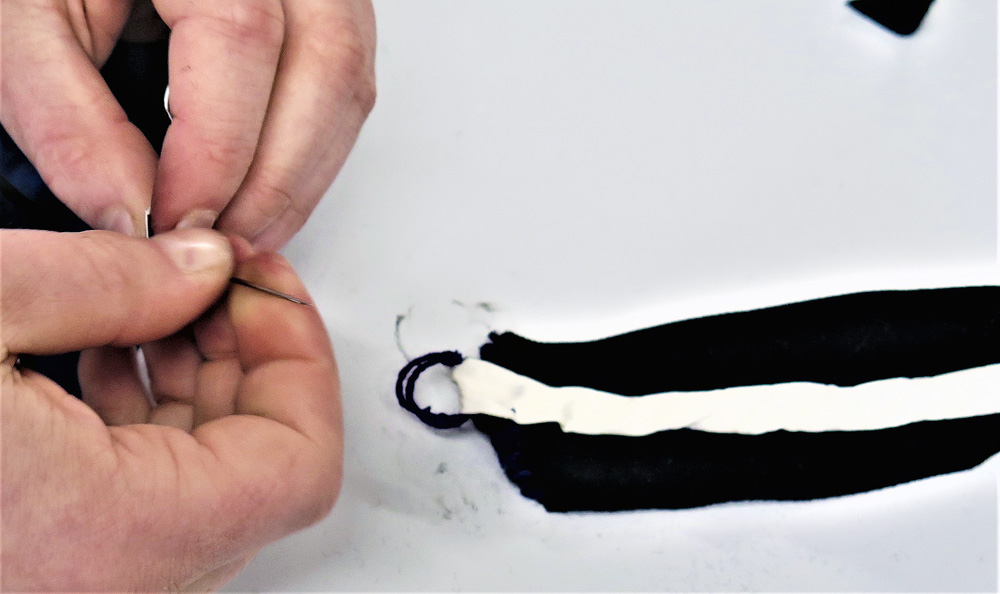
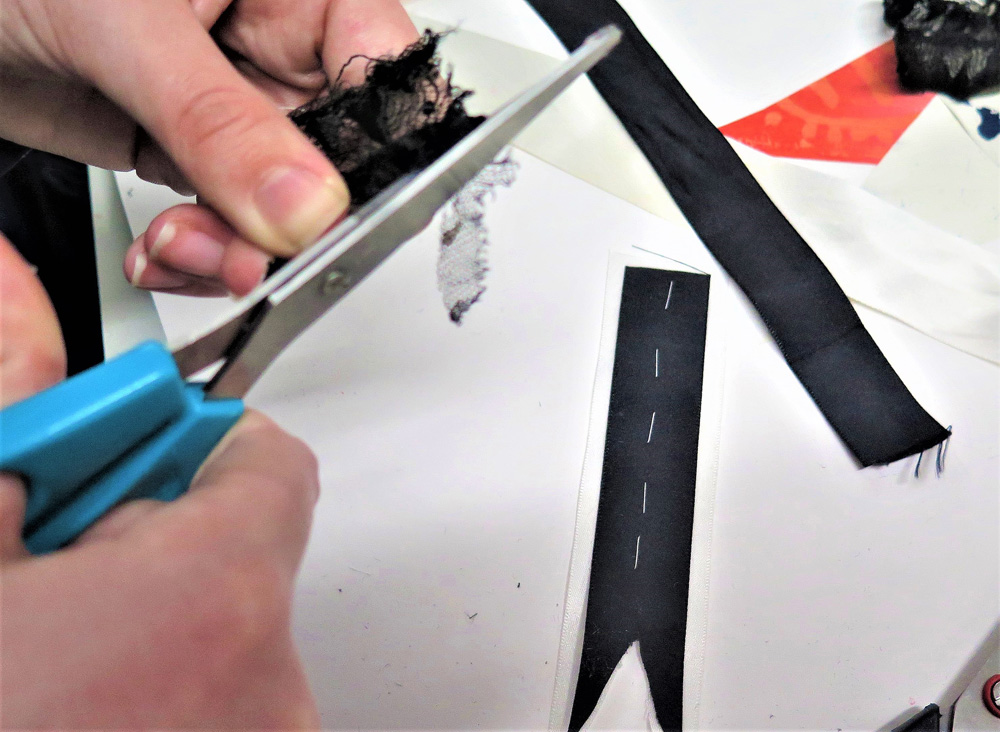
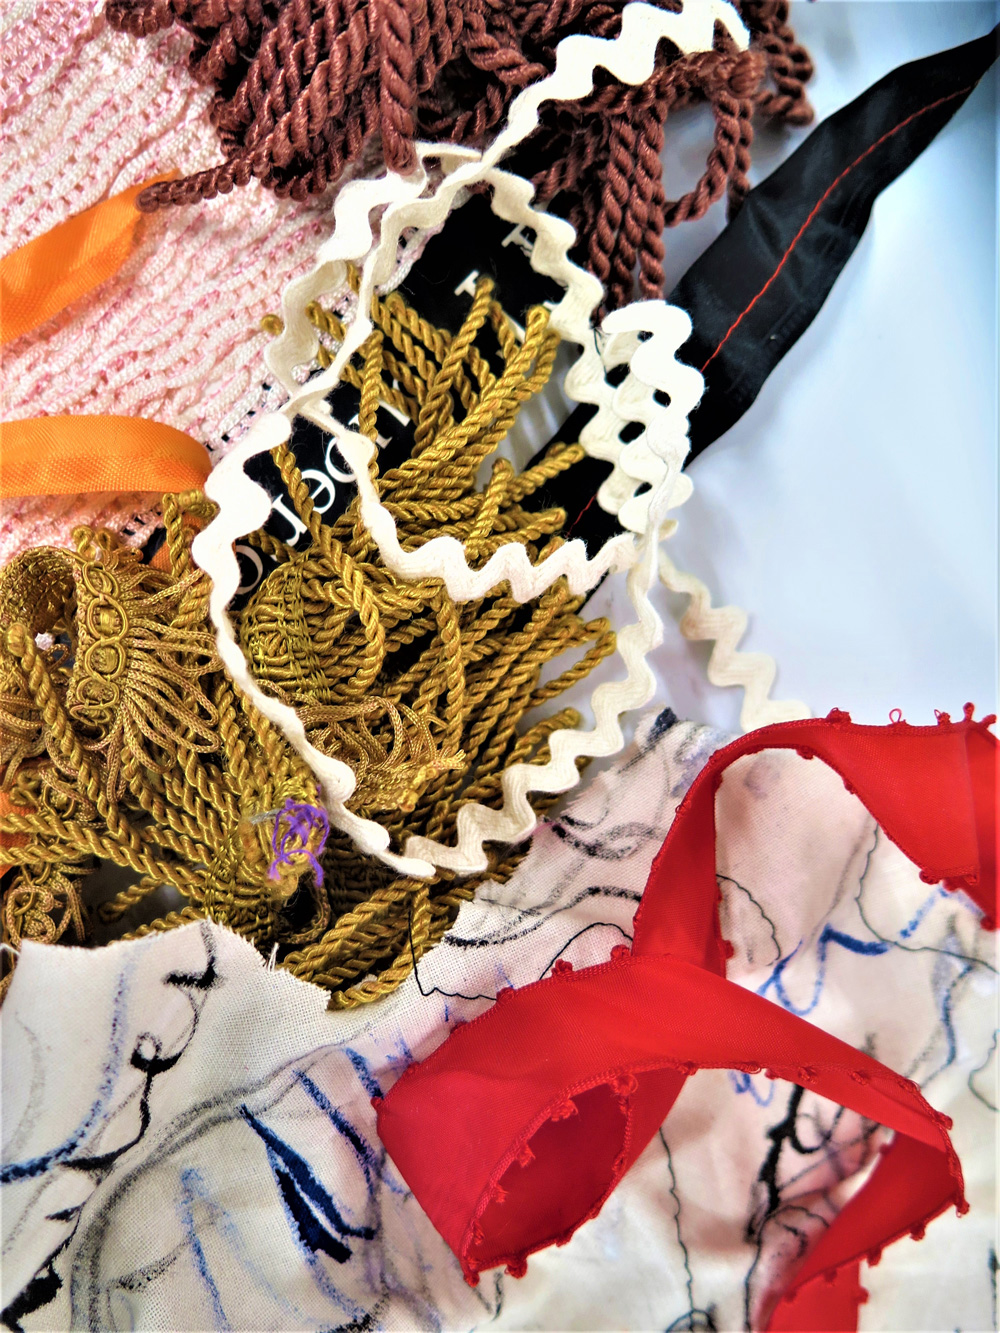
Haberdashery: Assorted fabrics off-cuts, ribbons, pom-poms, braiding, wool, cottons, needles
-
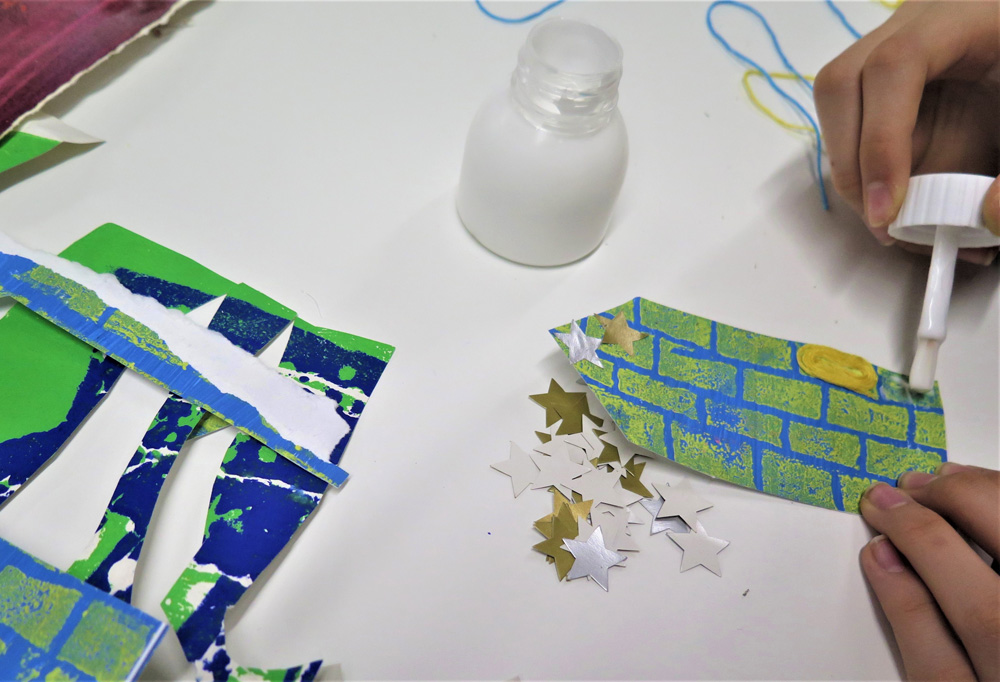
Collage – assorted coloured/patterned papers, sweet wrappers, recycled wrapping paper, tin foil
-
Photographs of medals
-
Some pupils brought in special items to include, like a small shell, a button, some sea glass, etc.
Process
We looked at photographs of medals and discussed the shapes, colours, types of medals and reasons medals are awarded. We drew some medals to look at the shapes. We also questioned if any children have family members with medals, and contemplated what it feels like to be presented with a medal for sport, competition, etc.
We discussed how creative we had all been in recent months when learning from home, what creative things we had made and how family members had also found time to be creative. We asked ourselves questions: How important is it to be creative? How do we feel when we are making and being creative in Art?
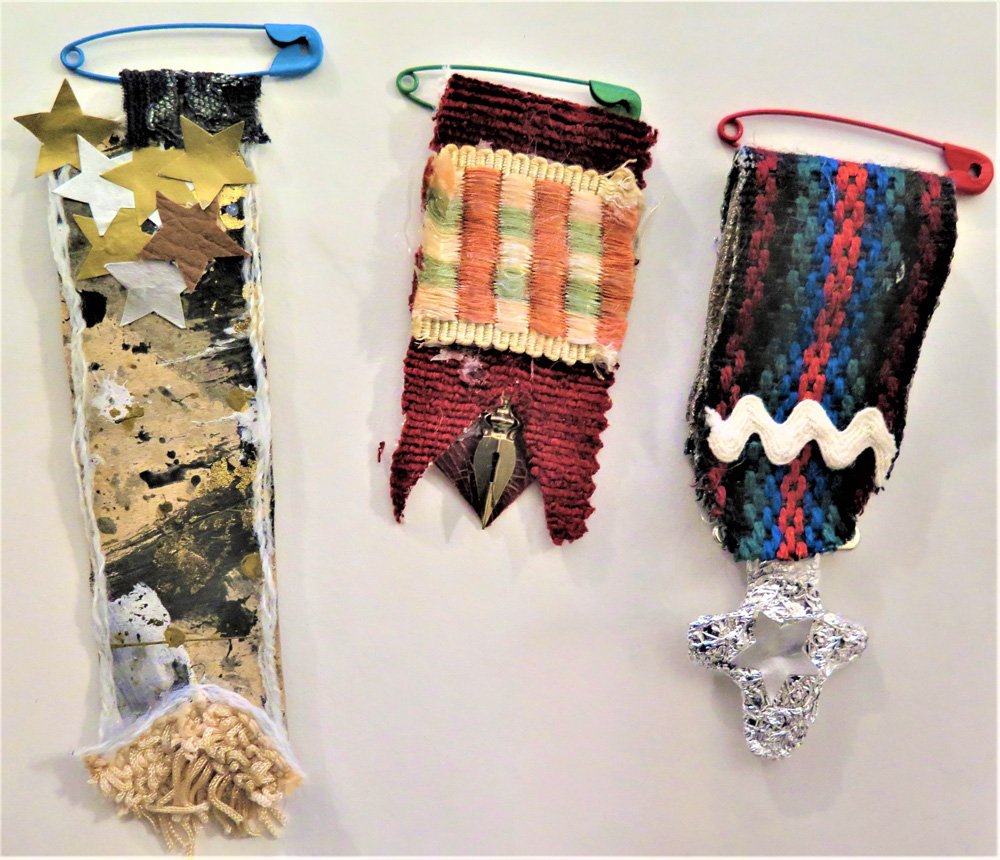
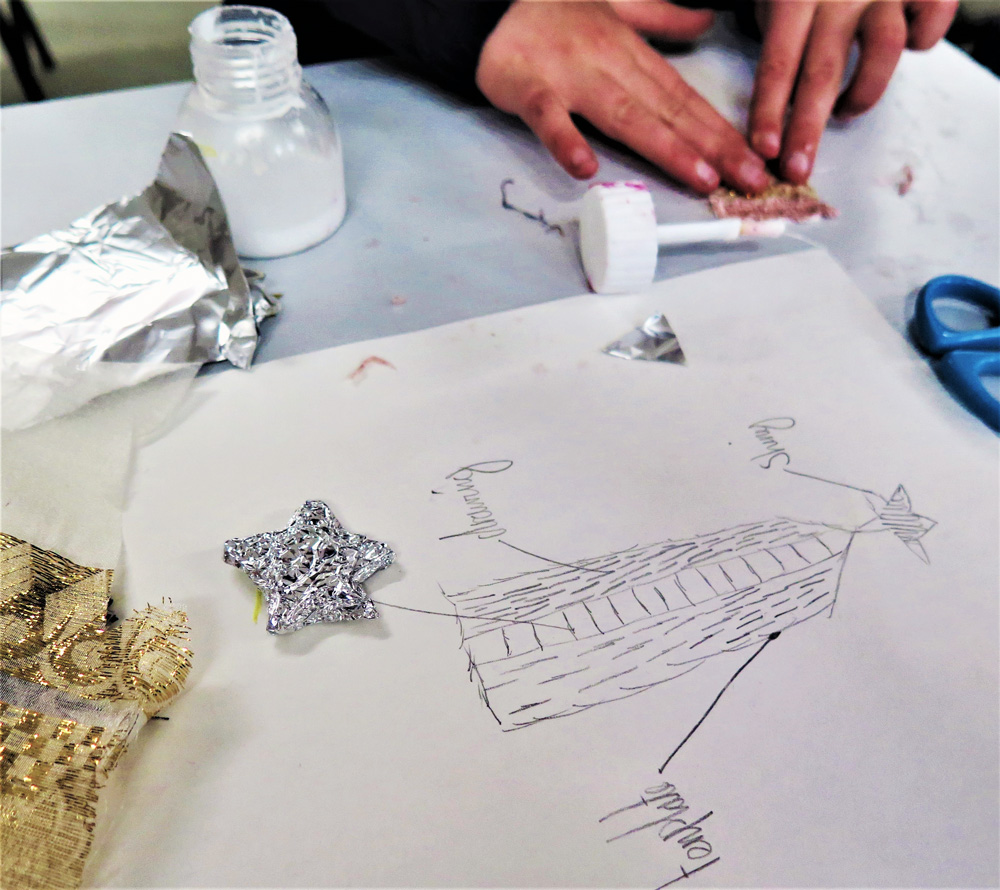
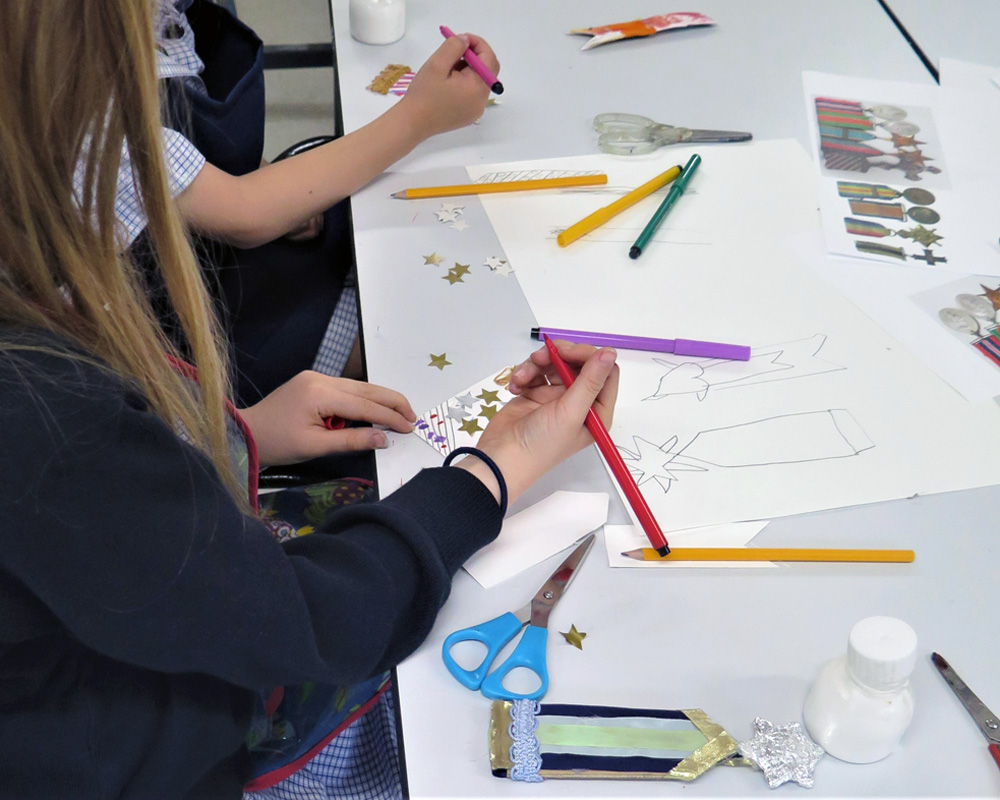
We used our creativity to make our own medals to award ourselves. We started by sketching medal ideas, thinking about shape, colours, patterns, size, and theme.
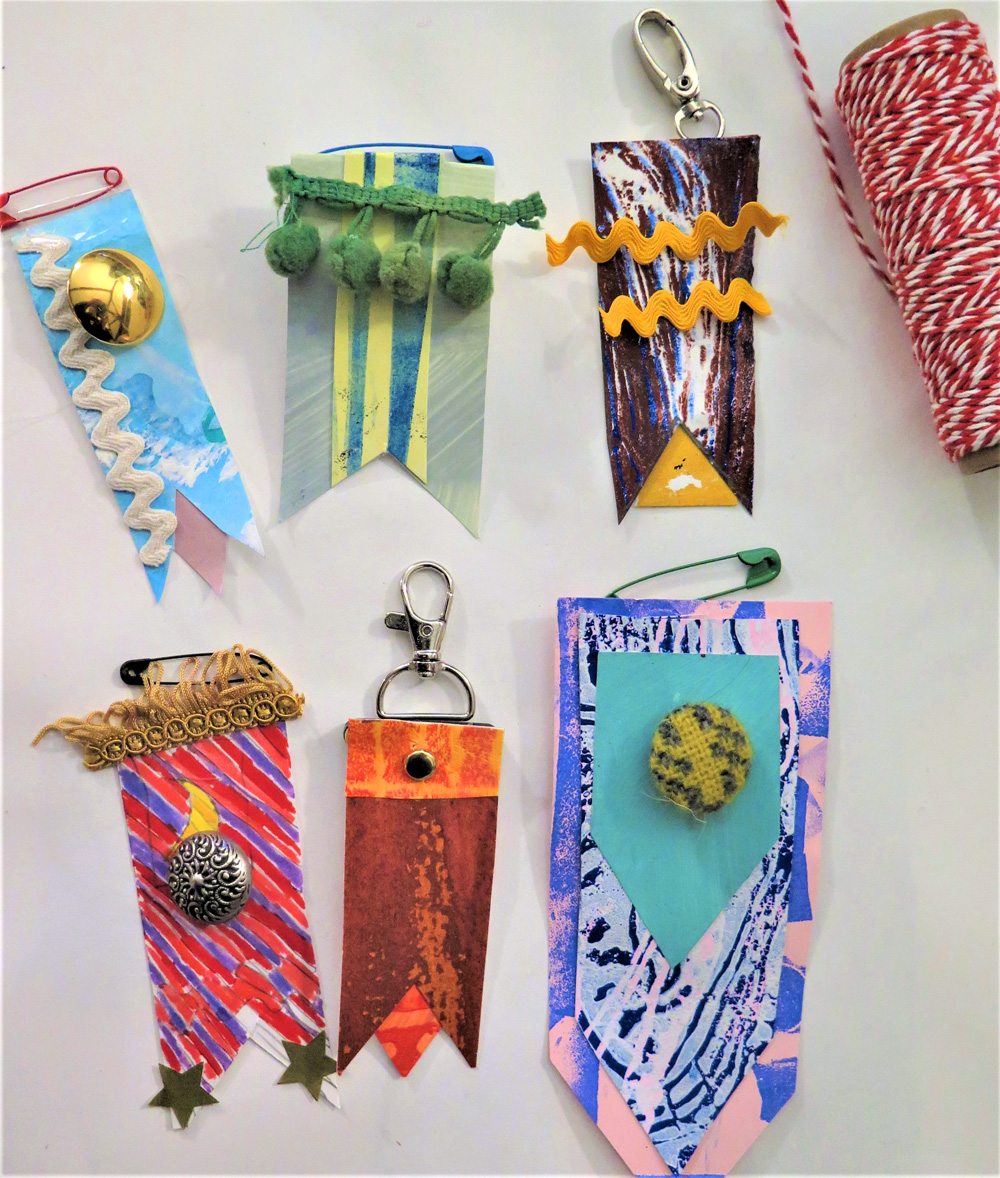
We looked at materials available, before choosing collage or fabrics, as well as embellishments and a pin fastening.
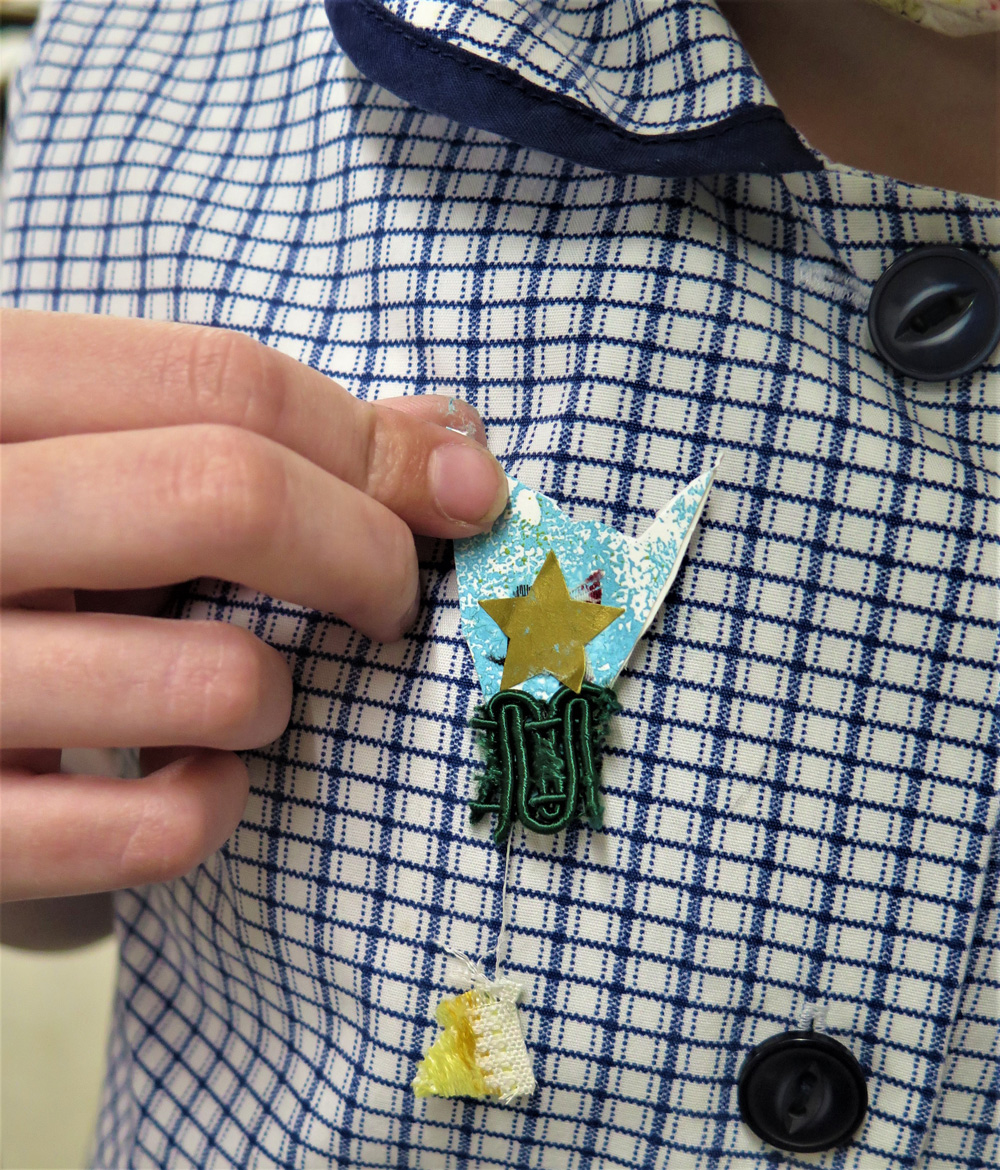
Rectangular card templates can be pre-cut and worked on with felt pens, or materials can be cut and glued. The outcome may appear very different to their original design/idea. A pin fastening can be taped on or a loop of ribbon.
Some learners wrote a tag to accompany their work for display, explaining what they were most proud of making during lockdown.
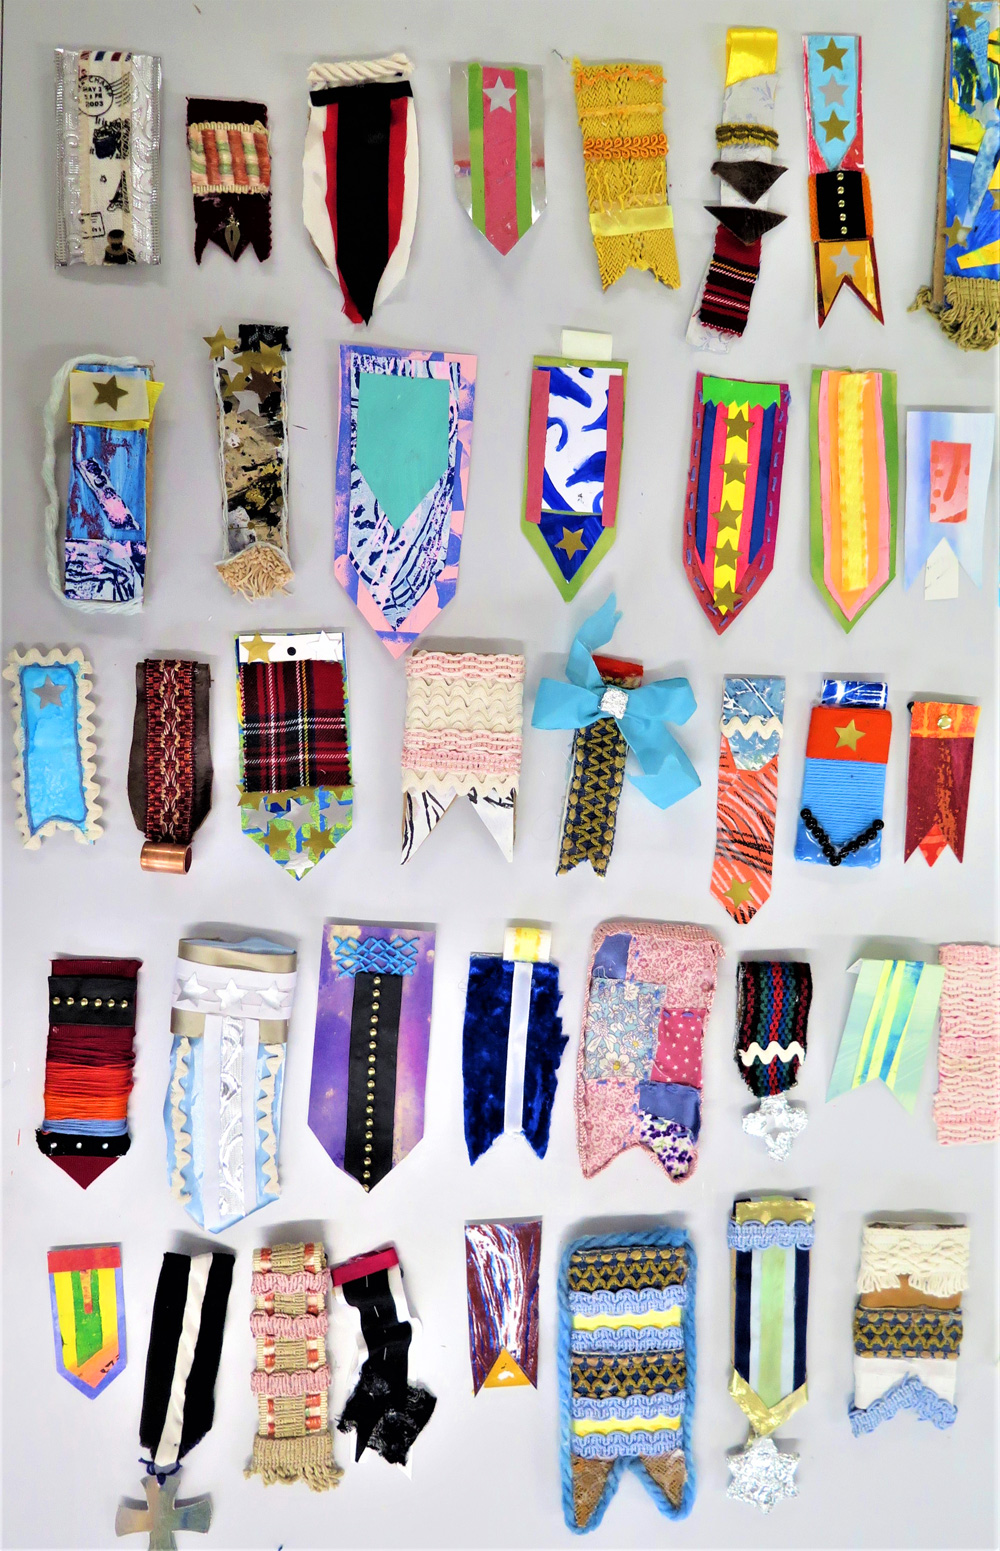
Outcomes of the activity
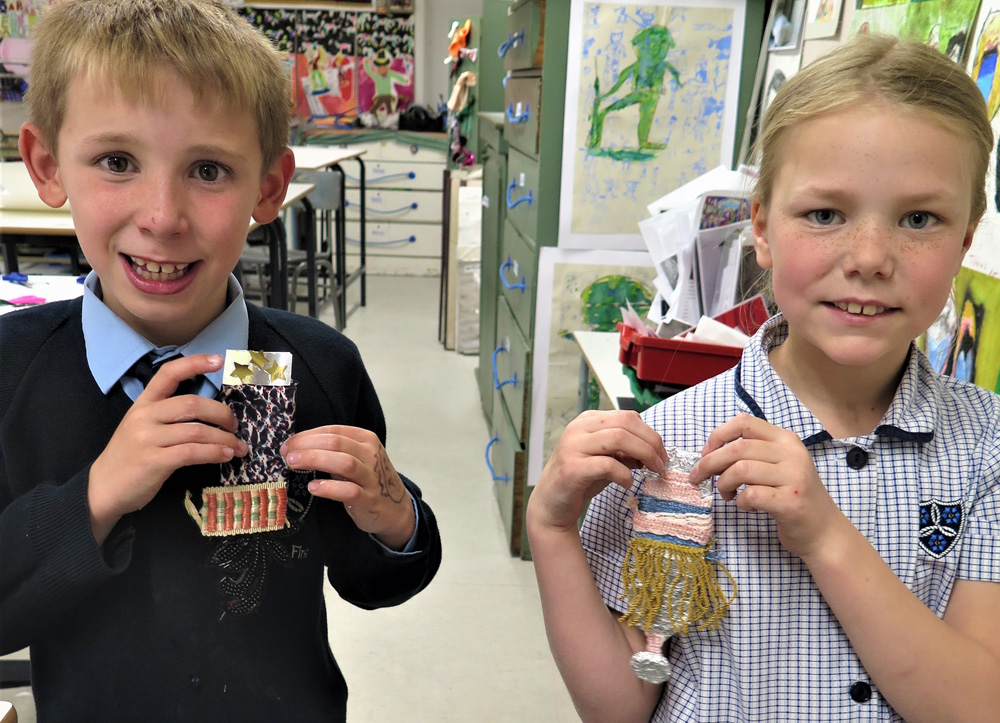
Designs varied and celebrated individuality. The children could all pick out their own, and it made a colourful display with interest for the viewer.

Displaying and gifting the medals
This became a whole school project from Reception to Year 9. The medals would make a lovely display pinned to a board, but only following a day when all children proudly wore their medals in assembly and around the school!
Some children made medals for family or friends who had also been creative or those who supported and encouraged them in their making. They shared photos of themselves wearing their medal and told inspiring stories of what they had created during the lockdown.
Adapting the activity to suit learners’ needs
For younger pupils: Card templates in assorted shapes were prepared, ready to glue shapes on. Felt tips were available to begin their design and build confidence. Shapes of tissue, wrapping paper and shiny sweet wrappers could all be cut into smaller pieces.

For older pupils: The opportunity for embroidery with cottons was popular, sewing through and adding initials inspired by embroidered love tokens made during the war. Some stamping lettering on leather or metal. Some finger-knit and attached the samples. Some included the rainbow symbol.
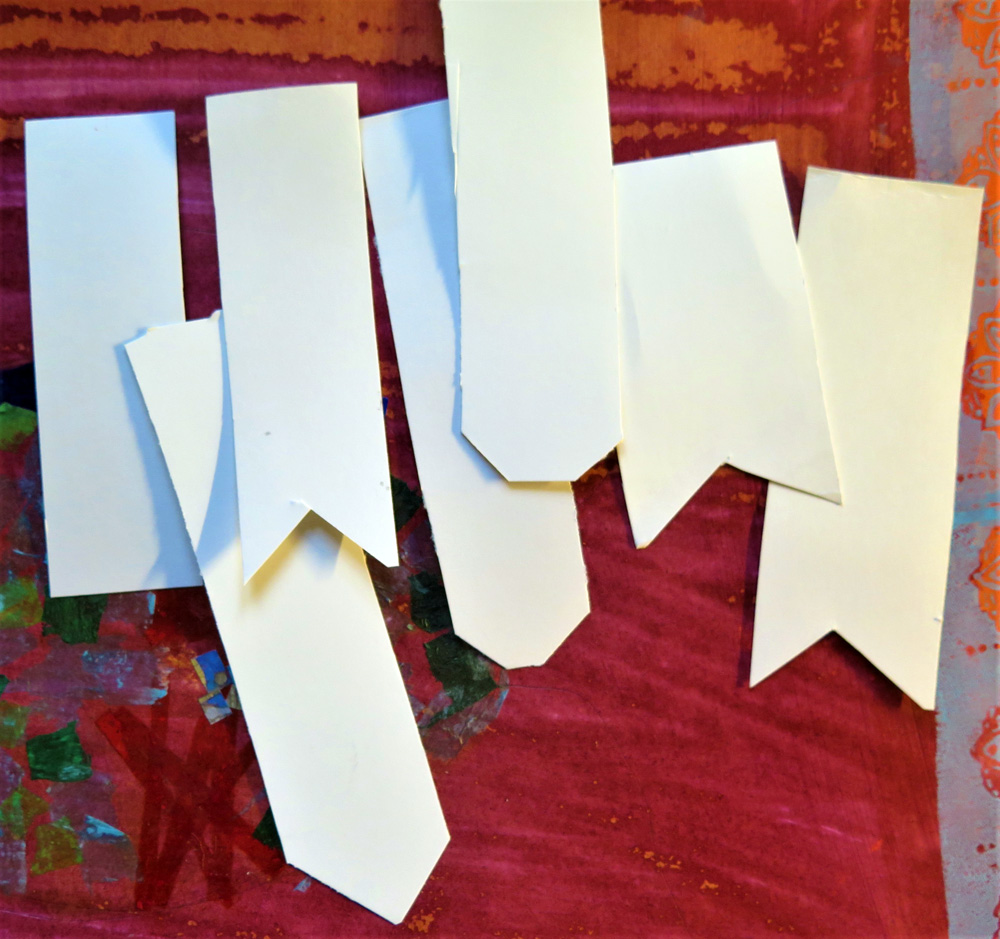
Some learners extended the project by crafting bunting, using the same materials and techniques of card templates and ribbon to finish the display and bring the crafting project full circle. It would be an ideal project for older children, teaching and supporting younger children.
Pins: Crafting pins come in many colours and styles. They can be left visible. If you don’t have safety pins, a paper clip, a sticky pad or a split pin can be used. The medals can be glued to old birthday badges. Long ribbons can be added to the presentation in assembly.


Cross-curricular links of the project
There are opportunities for cross-curricular links.
History: We looked at medals borrowed from a parent and linked them to their work in World War II. By drawing the medals, it helps them to look carefully.
ICT: They can use the opportunity to use computers to research the shapes of medals and patterns of ribbons.
Design & Technology: Some groups designed their medal in the style of a D&T drawing with labels and planning lists of materials and writing the stages of making.
Maths: Pupils could be given dimensions, measuring using rulers.
English: Making parcel tags to attach to their medal on display, explaining what creative achievement they were celebrating and are most proud of.
Mental Health: It could be used as part of a mindfulness focus, playing quiet music.
Tips for making this session effective
Set-up: I did back-to-back workshops with different groups. I set the room up and had groups visit the room. Each was inspired by the previous work. Materials were in boxes, and pupils independently collected them. Each table was set up with PVA, scissors, paper, pencils & photographs of medals.
Collage: We used off-cuts of printed, coloured and patterned card and paper. We collect pieces of card, discarded when artwork is not taken home or from trial printing, etc.
Tools: Zig-zag scissors/glue gun are useful.
Preparation: Cereal box card can be used for templates.
Recycled Materials: Parents may want to contribute recycled materials, or charity shops are good places to source the project.
Time: Activity starters can be reduced, time-dependent.
Notes for Teachers
Are there cross-curricular opportunities?
Design & Technology (designing and making for a purpose), History (war medals), Literacy (if gifting the medal- writing a card to explain why you are gifting the creativity award. Writing step-by-step instructions.)
Does the activity need specialist materials/equipment?
No, it’s an opportunity to recycle -fabric scraps, pieces of art, collage etc. A glue gun is handy but not essential.
What are the safety issues?
Using scissors, safety pins, older students can use needles/thread.
What age is this activity aimed at?
The activity is suitable for any age, any setting – kitchen table craft, activity group or lesson. I made them from year 1 to year 9 in Art lessons. Card templates can be prepared for the youngest to work on.
How long will the activity take?
It can be completed in a 50-minute lesson, or it can be developed and extended over a couple of lessons if using timely embroidery techniques.
This is a sample of a resource created by UK Charity AccessArt. We have over 1500 resources to help develop and inspire your creative thinking, practice and teaching.
AccessArt welcomes artists, educators, teachers and parents both in the UK and overseas.
We believe everyone has the right to be creative and by working together and sharing ideas we can enable everyone to reach their creative potential.
See the Resource Used in Schools…


What We Like About This Resource….
“The sentiment behind this resource idea is lovely and it provides an opportunity to really develop some fine motor skills as well as independence of approach. Taking ownership of the medal design means the sense of achievement is heightened beyond the children just being given one. You can really imagine the positive energy that would surround this activity within a classroom, with each child working on a shared project but embarking on their own creative journey.” – Rachel, AccessArt
You May Also Like….
Pathway: Playful Making

Featured in the ‘Playful Making’ pathway
Talking Points: Introduction to sculpture

Clay Art Medals

Talking Points: Nnena Kalu

Talking Points: Linda BEll


, 1913, 1931.511, Art Institute of Chicago.jpg\" by Wassily Kandinsky is marked with CC0 1.0.")


 Date: probably 1613 Medium: Oil on wood Dimensions: 33 1/2 x 24 5/8 in. (85.1 x 62.5 cm) Classification: Paintings Credit Line: Purchase, 1871")


