By Eilis Hanson
Artist and teacher Eilis Hanson loves nurturing young learners’ creativity through art activities. In Part 2 of this resource, Eilis shows how origami puzzle purses created in Part 1 can be personalised and decorated based on popular children’s books – the activity combines origami and storytelling in an engaging and creative way. Part 1 of this resource can be found here.
What is the aim of this exercise?
This resource offers a creative way to interpret books and poems, by using origami and drawing. The activity can be linked to other curriculum areas, such as English, Geography and History.
What age can this exercise be used with?
This resource is suitable for primary and secondary school age learners, and particularly suits KS2 children (aged 7-11).
How long does this exercise take?
Part 1 of this resource – making the origami purse – may take 10-15 minutes. Part 2 of this resource – adding content to the origami purse – may take several lessons, depending on the complexity of your learners’ ideas.
How do I measure success?
Success will be measured by the learners’ involvement and their ability to translate the plot/storylines from books into their own poems, and then into drawings.
More able or engaged children may demonstrate a more thorough approach to creating their puzzle purses. They may consider the placement of different elements of their purse more carefully, with the readers/viewers in mind.
Encourage learners to make their own creative decisions, and to experiment with the combination of words and images. Younger learners may need more help with the origami part as well.
What can we try after this exercise?
Other resources exploring paper craft, and art based on poetry and books.
Try other DrawAble exercises and projects.
Which artists might we look at?
Carson Ellis
Tom Phillips
You may also want to see Eilis’s other projects.
Introduction
Now you have made your origami puzzle purse, this activity will show you how to personalise it, based on your own poem. The instructions take you step-by-step through the writing and drawing process and before you know it, you’ll have people puzzling at your amazing creations!
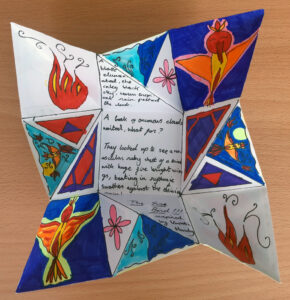
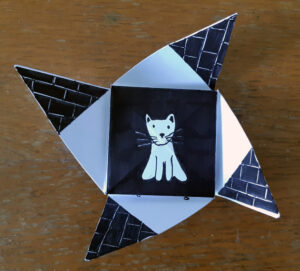
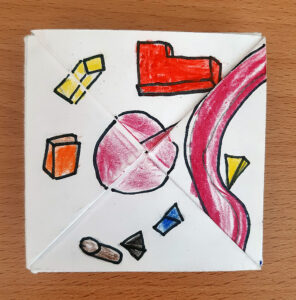
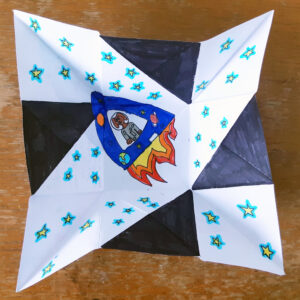
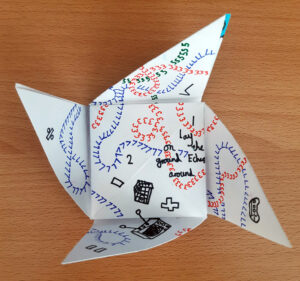
Puzzle purses by Year 6 children inspired by: Brightstorm: A Sky-Ship Adventure; The Curious Incident of the Dog in the Night-time, Harry Potter and the Philosopher’s Stone and The Great Rocket Robbery.
You will need:
-
A fiction book that you like and know well (chapter books work best)
-
Paper or jotter to write your poem on
-
2 squares of thin white card or cartridge paper (21cm x 21 cm)
-
Pencil
-
Ruler
-
Rubber
-
Drawing materials of your choice e.g. pens, sketching pencils, coloured pencils, felt tips, ink
Writing a poem from the story
This is a fun and unusual way of writing poems, which works by selecting words and phrases from a story to create a new meaning, a bit like blackout poetry. I love writing poems in this way because by following these easy rules, everyone can write something interesting and you’ll never be lost for words. All you need is a book that you really like and know well.
I used the story Moonfleet (1898) to write my poem. It’s the story of a boy’s adventures with smugglers, shipwrecks and a cursed diamond. I love this exciting book because it’s full of twists and the description makes me feel like I’m in the story. I used the chapter where he finds the diamond in the well to write my poem:
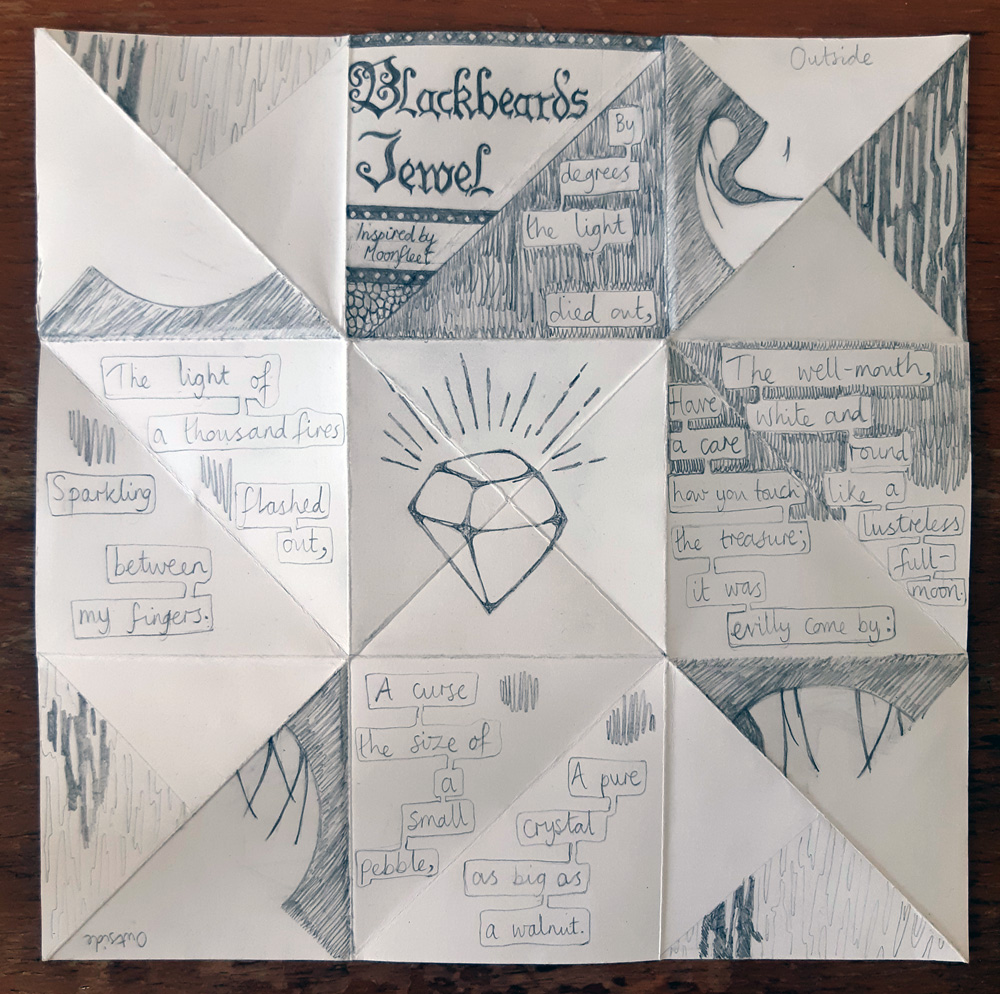
Blackbeard’s Jewel
By degrees the light died out,
The well-mouth, white and round like a lustreless full-moon.
Have a care how you touch the treasure; it was evilly come by:
A curse the size of a small pebble,
A pure crystal as big as a walnut.
The light of a thousand fires flashed out,
Sparkling between my fingers.
Method
1. Choose a page or chapter from your story to work from. Your poem will be based around this so think about a part of the story which leaves vivid pictures in your mind, where there is interesting description or action-packed passages.
2. Read the part of the story that you are working from.
3. Select your favourite words, phrases and/or sentences from the page, writing them down in the order that they appear in the book. Each time you write a new word, phrase or sentence, start a new line.
4. You should aim for your finished poem to be between 5 and 10 lines long but at this stage, it’s better to have more words than you need.
5. When you have finished writing the words down, you are ready to edit:
-
Re-read what you have written, your poem should flow and it might even tell a story, which is different to the one it’s based on.
-
Take out any lines which don’t seem to fit or flow.
-
Decide where to start new lines in your poem.
-
Punctuate your poem (add and remove as you choose). Remember: punctuation affects the whole feel of the poem so play around with it.
-
Title your poem.
Top tip: the poet Michael Rosen says that a good way to think about writing poetry is to imagine that you are creating a series of talking pictures. When you select words for your poem, choose ones which create vivid pictures in your mind.
Step 2: Making the prototype
This stage is very important in helping you to work out the layout of your puzzle purse. Your ideas might change a lot as you go along and you might find yourself puzzling over what to do but you’ll learn a lot along the way.
Method
1. Using the instructions in Part 1, make 2 blank origami puzzle purses, using the card squares. You will use these for your prototype and the final version of your puzzle purse.
2. Plan how to illustrate and write your poem in the puzzle purse. Always try to keep the viewer in mind, what do you want them to see and think as they open each part of the puzzle purse? You could sequence your images to help illustrate your poem. You might also include illustrations inspired by parts of the story, which aren’t in your poem. Think about:
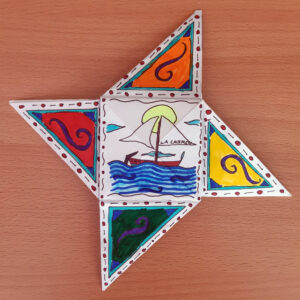
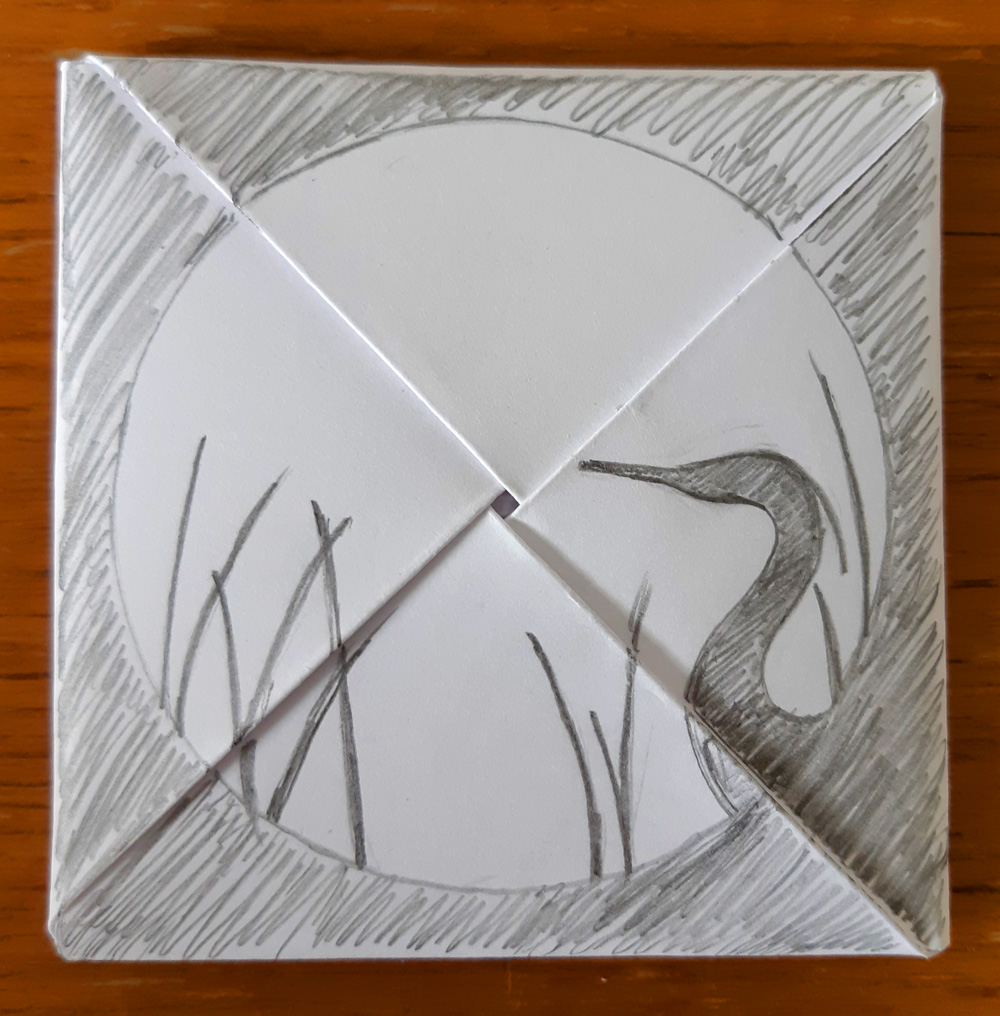
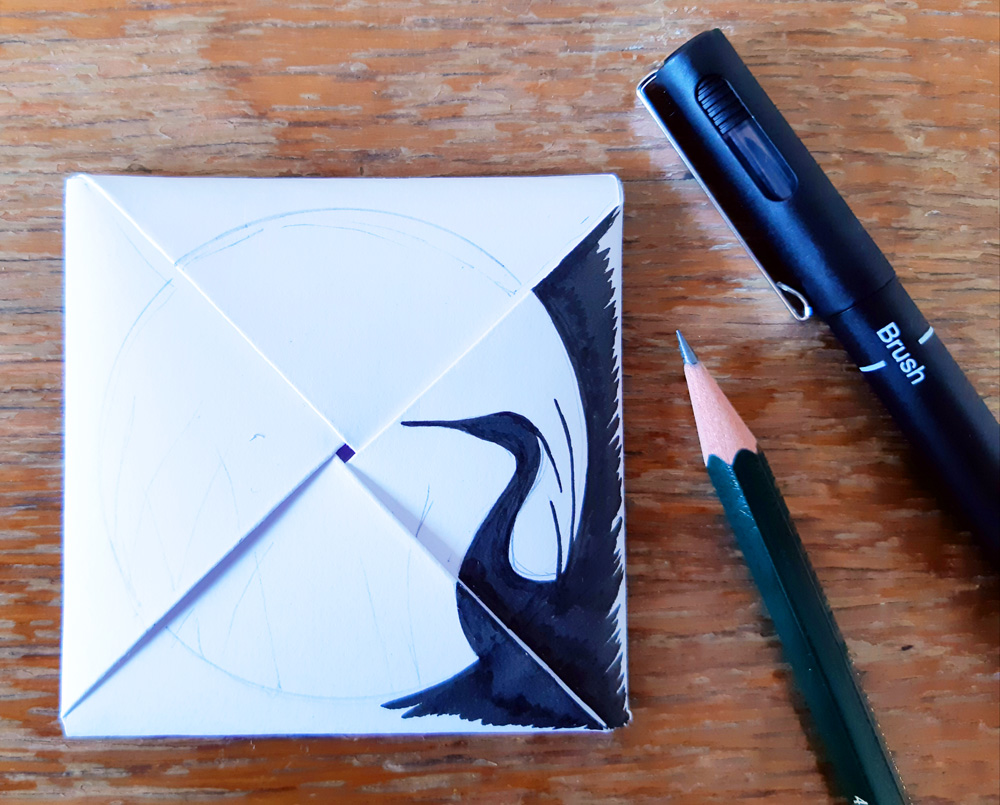
The outside of the puzzle purse – this should be intriguing to make a person want to find out what’s inside. (I drew a heron against a moon because Moonfleet opens with a description of the birds, moon and marshes around the village. The moon is also a recurring theme in the story.)
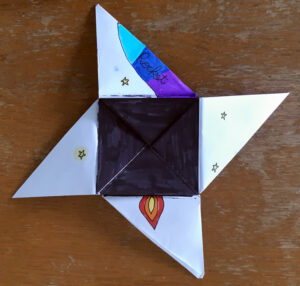
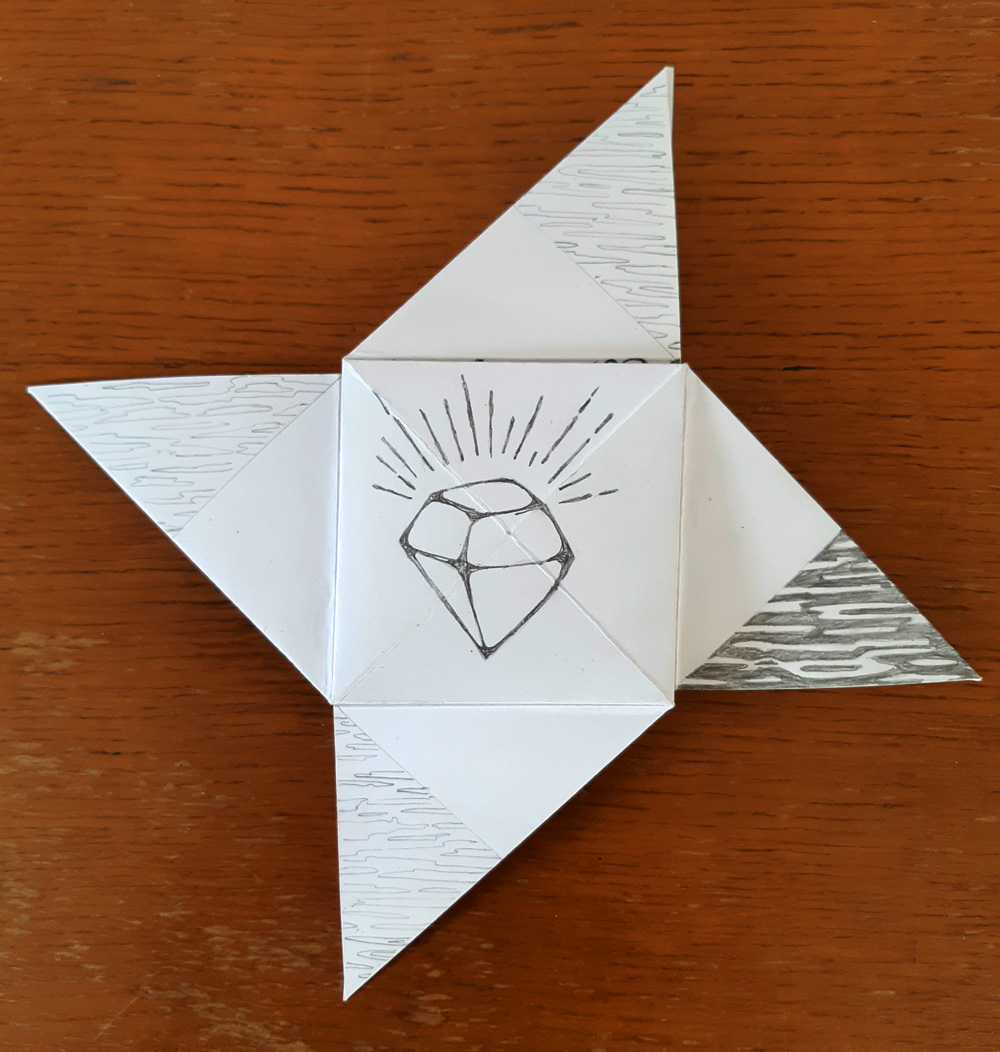
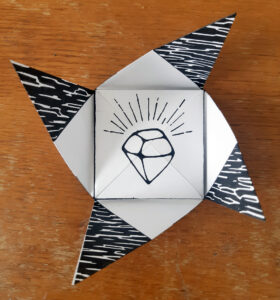
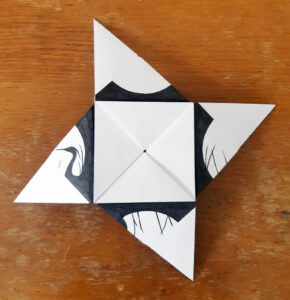
The centre of the windmill. You could decorate the arms of the windmill too. (I drew a diamond here because it’s the subject of the poem and I wanted it to be a surprise. The water ripples link to the well in the poem.)
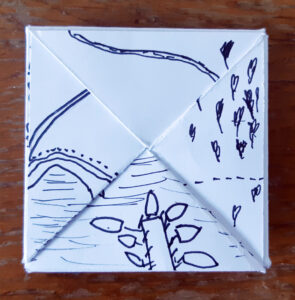
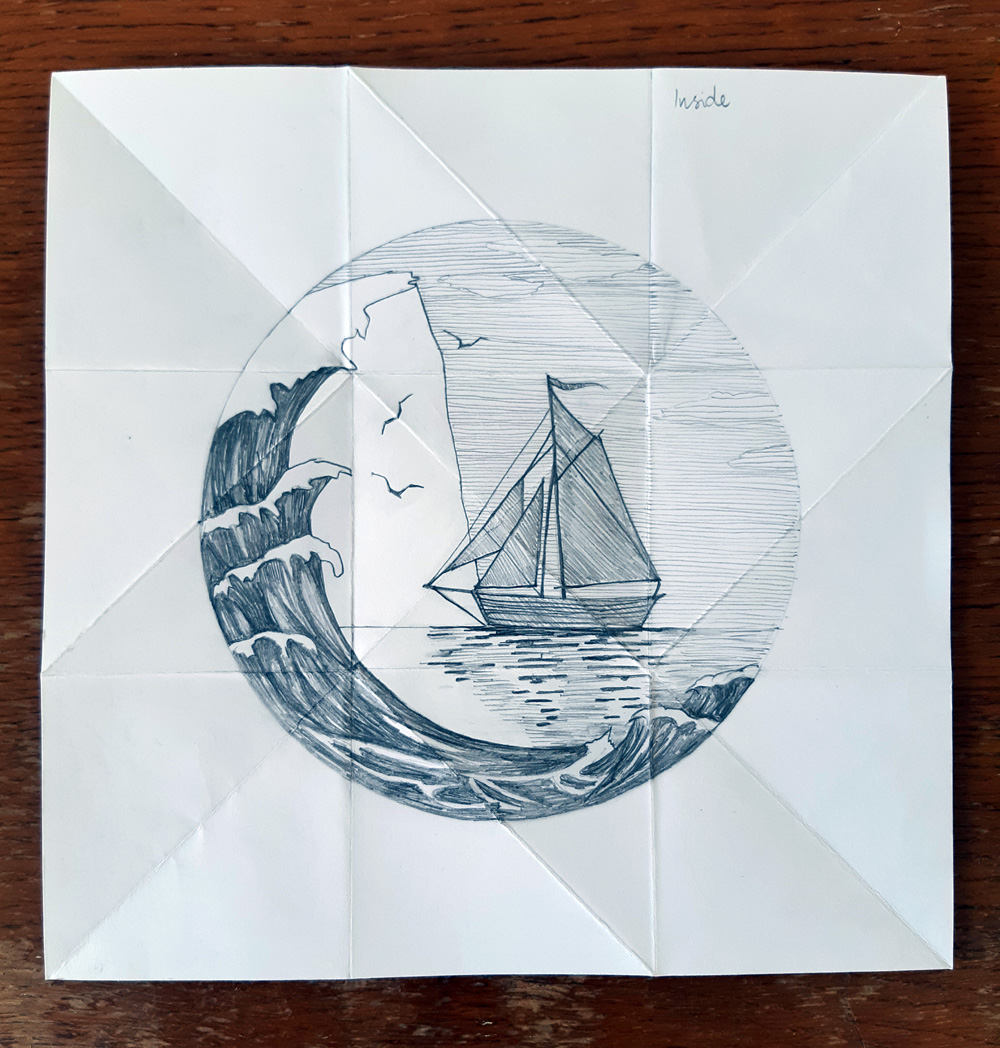
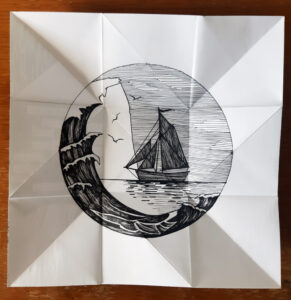
The inside of the puzzle purse when it’s opened out – what should stay hidden until last? What do you want people to discover? (I combined ideas from different parts of the story here. I made the illustration circle shaped as part of the moon theme.)
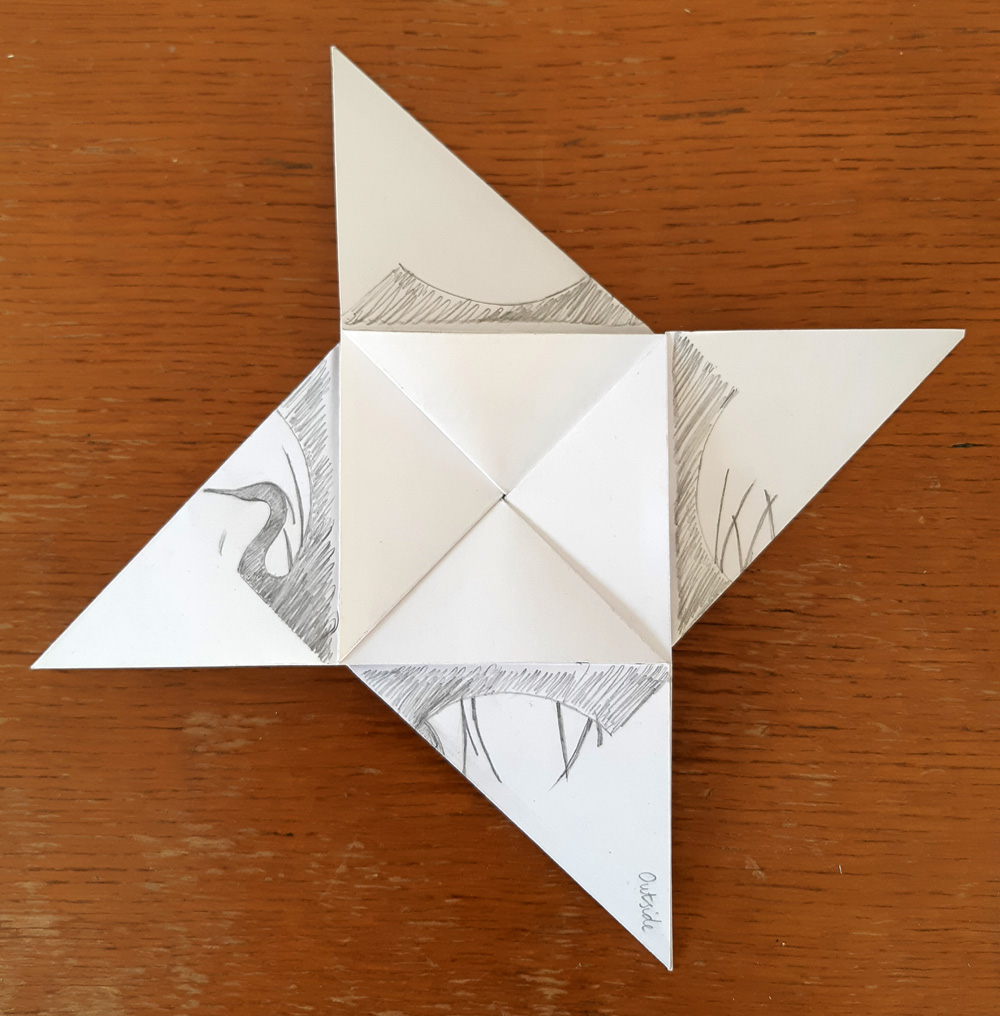
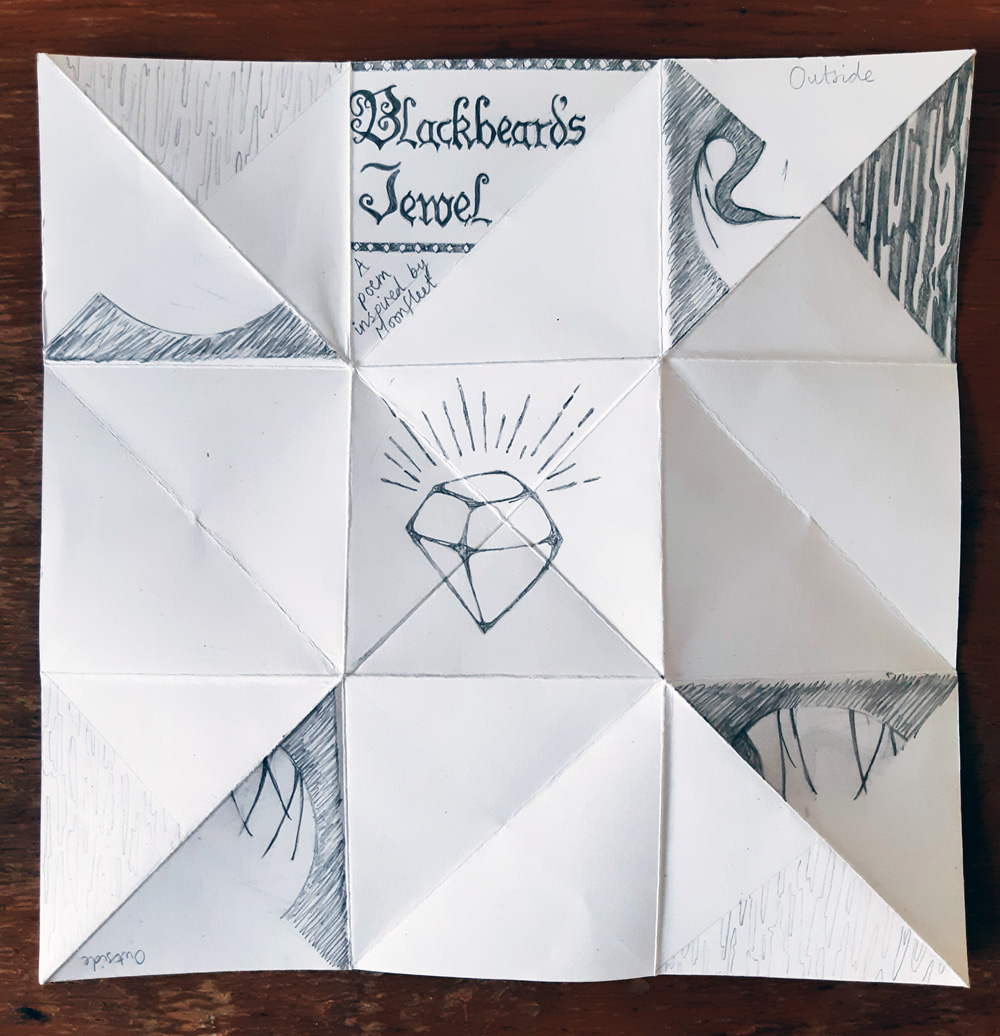
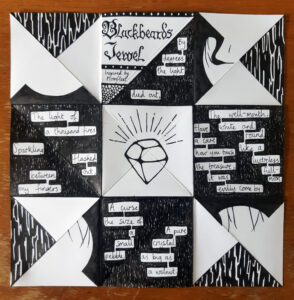
The outside of the puzzle purse when it’s opened out. This is the side where you will see sections of your design mixed together. (I used the blank spaces that were left for my poem. I liked the idea of the words appearing in the dark, like the diamond down the well.)
3. Have a look at the examples in the gallery for different ideas of how to arrange your images and poem.
4. When you are ready, draw out your design onto one of the blank puzzle purses. The easiest way to get the layout right is to refold the puzzle purse and draw/write out each part as you unfold it.
5. You might also want to experiment with colour and pattern on your prototype. Remember: this is just a draft version so only do as much as you need to develop your ideas.
6. Refold your puzzle purse and open it up, checking that all your writing and illustrations appear where you want them. Make any changes that you need to.
Top tips: use a theme to link ideas and pictures; if you are using colour think about the mood that you want to create; if you are working in monochrome, experiment with different textures and patterns; consider leaving some parts of your puzzle purse blank to contrast with busier areas.
Step 3: Making the final version
When you are satisfied with your prototype, you are ready to make a final version of your puzzle purse. Some small things might change again at this stage but the final version should look a lot like the prototype.
Method
1. Use the spare blank puzzle purse that you made in step 2, to lightly draw out the design from your prototype in pencil. If you have access to a window or lightbox, you could trace it from the prototype.
2. Using materials of your choice, add colour or black (if you are working in monochrome) to your design. Here, I went over my design with black fine liners and a brush pen.
Congratulations – your puzzle purse is ready for you to enjoy and share. I hope you found this activity engaging and fun!


This is a sample of a resource created by UK Charity AccessArt. We have over 1500 resources to help develop and inspire your creative thinking, practice and teaching.
AccessArt welcomes artists, educators, teachers and parents both in the UK and overseas.
We believe everyone has the right to be creative and by working together and sharing ideas we can enable everyone to reach their creative potential.
You May Also Like…
Pathway: Exploring pattern

This is featured in the ‘Exploring Pattern’ pathway
Talking points: Andy Gilmore
