
DrawAble: Making a Puzzle Purse with Eilis Hanson Part One


By Eilis Hanson
Artist and teacher Eilis Hanson loves nurturing young learners’ creativity through art activities. In Part 1 of this resource, Eilis demonstrates a method for creating an origami puzzle purse. Part 2 of this resource can be found here.
Notes for Teachers
What is the aim of this exercise?
This resource offers a creative way to interpret books and poems, by using origami and drawing. The activity can be linked to other curriculum areas, such as English, Geography and History.
What age can this exercise be used with?
This resource is suitable for primary and secondary school age learners, and particularly suits KS2 children (aged 7-11).
How long does this exercise take?
Part 1 of this resource – making the origami purse – may take 10-15 minutes. Part 2 of this resource – adding content to the origami purse – may take several lessons, depending on the complexity of your learners’ ideas.
How do I measure success?
Success will be measured by the learners’ involvement and their ability to translate the plot/storylines from books into their own poems, and then into drawings.
More able or engaged children may demonstrate a more thorough approach to creating their puzzle purses. They may consider the placement of different elements of their purse more carefully, with the readers/viewers in mind.
Encourage learners to make their own creative decisions, and to experiment with the combination of words and images. Younger learners may need more help with the origami part as well.
What can we try after this exercise?
Other resources exploring paper craft, and art based on poetry and books.
Try other DrawAble exercises and projects.
Which artists might we look at?
Carson Ellis
Tom Phillips
You may also want to see Eilis’s other projects.
Introduction
Puzzle purses have been intriguing and delighting people around the world for hundreds of years. The Victorians used these origami riddles as secret friendship tokens and love notes (one even appeared in the film Emma), while in Japan, they have been used as little storage containers. Cheap and easy to make, puzzle purses offer all sorts of creative possibilities and these instructions will start you off on that journey. This activity will show you how to design and make a puzzle purse, which you can then decorate and personalise in Part 2.
You will need:
-
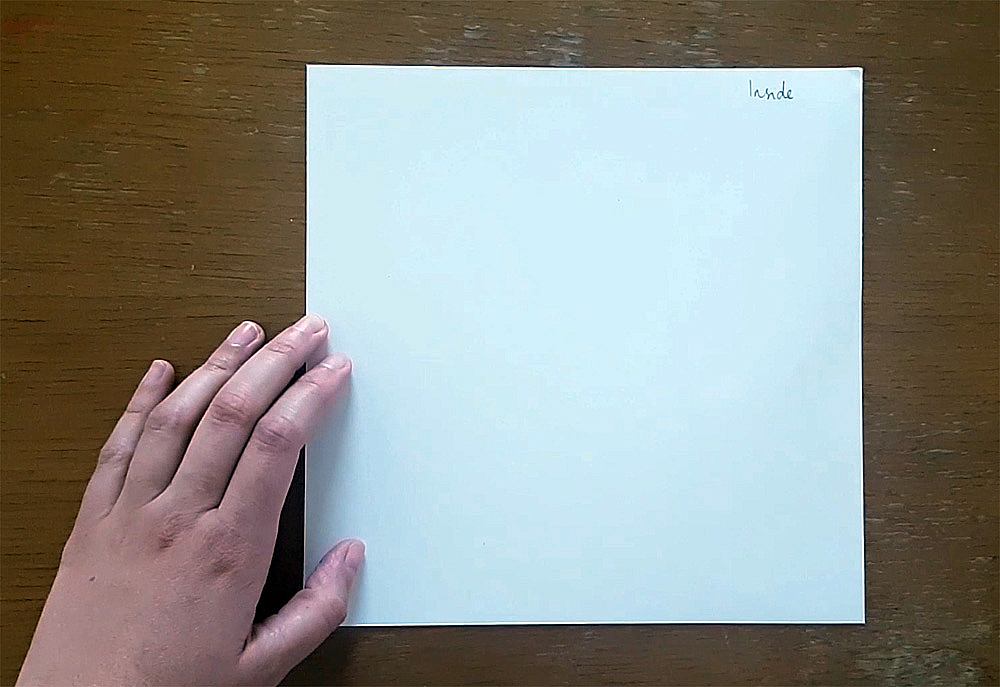
1 square of thin card or cartridge paper (21cm x 21 cm)
-
Pencil
-
Ruler
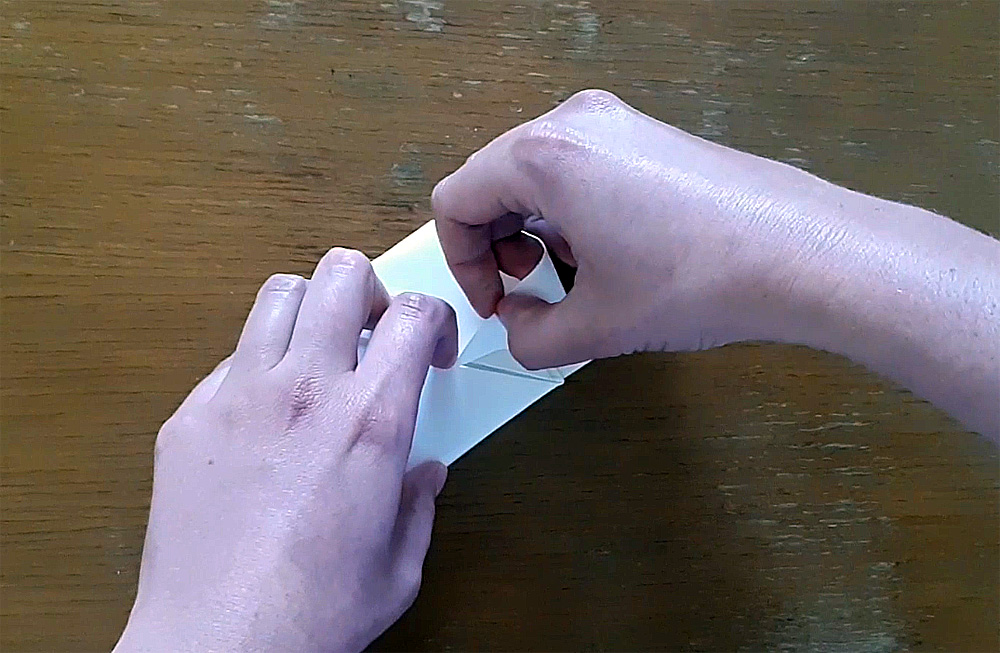
Making your puzzle purse
These intriguing puzzle purses might look complicated but with step by step instructions, they are surprisingly simple to make. It’s all about folding in the right place and the right direction.
You will use just 1 type of origami fold to make the puzzle purse: the valley fold. This is the most basic folding – you simply take the edge of the paper and fold it to the opposite edge, then unfold.
Method
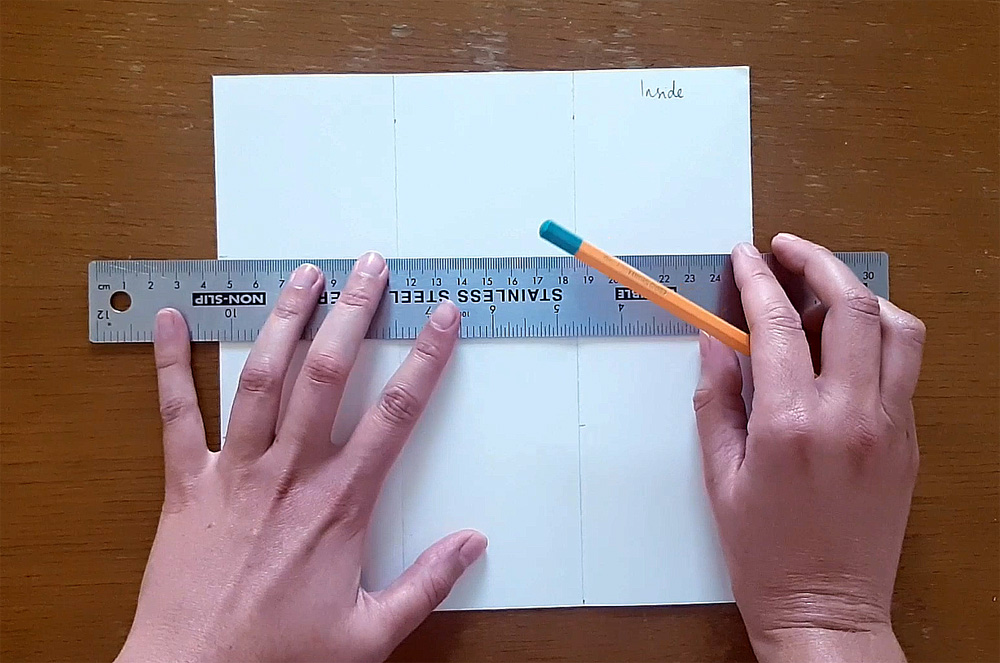
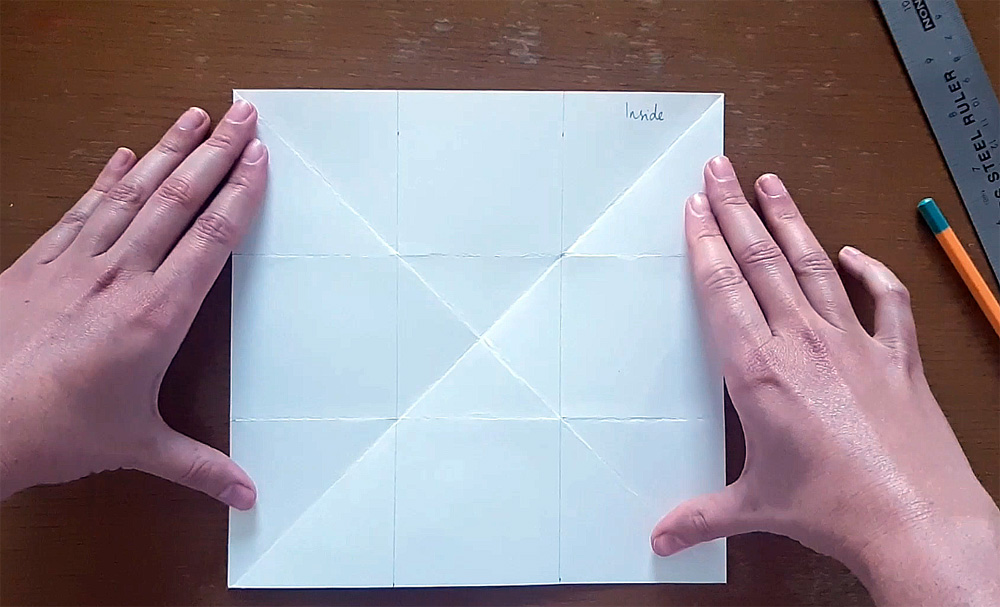
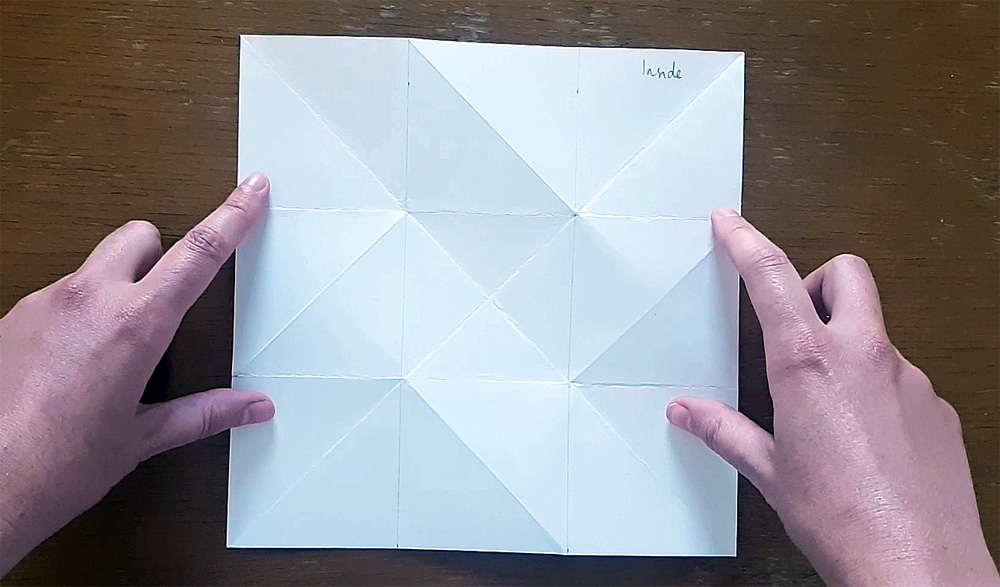
1. At the top of the card square write ‘inside’. This will help you later.
2. Divide your square into 3 equal vertical sections and draw the lines lightly with a ruler.
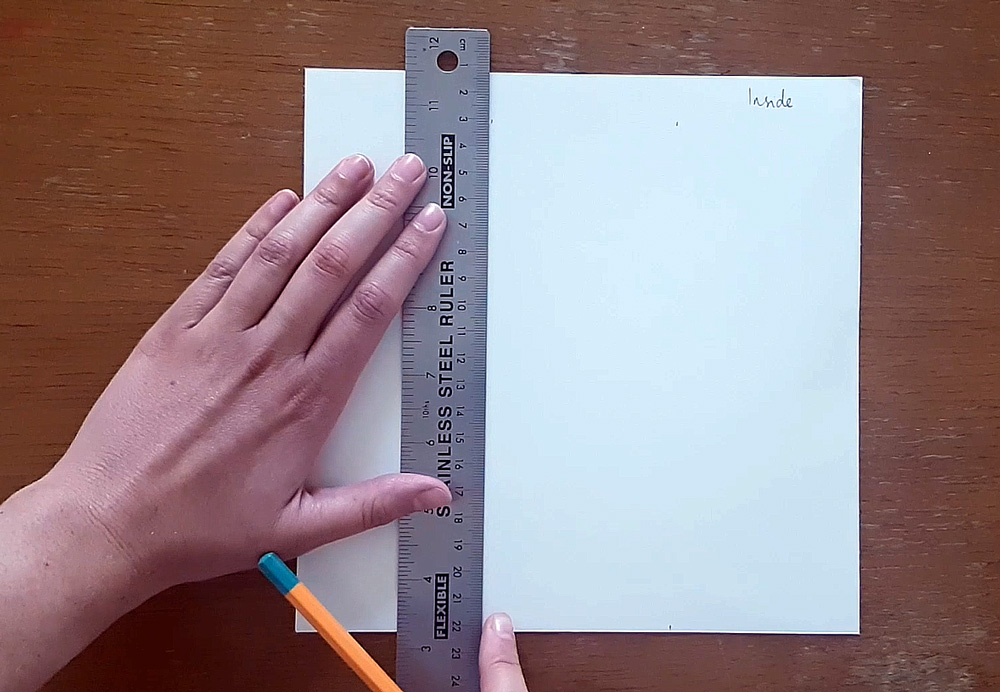
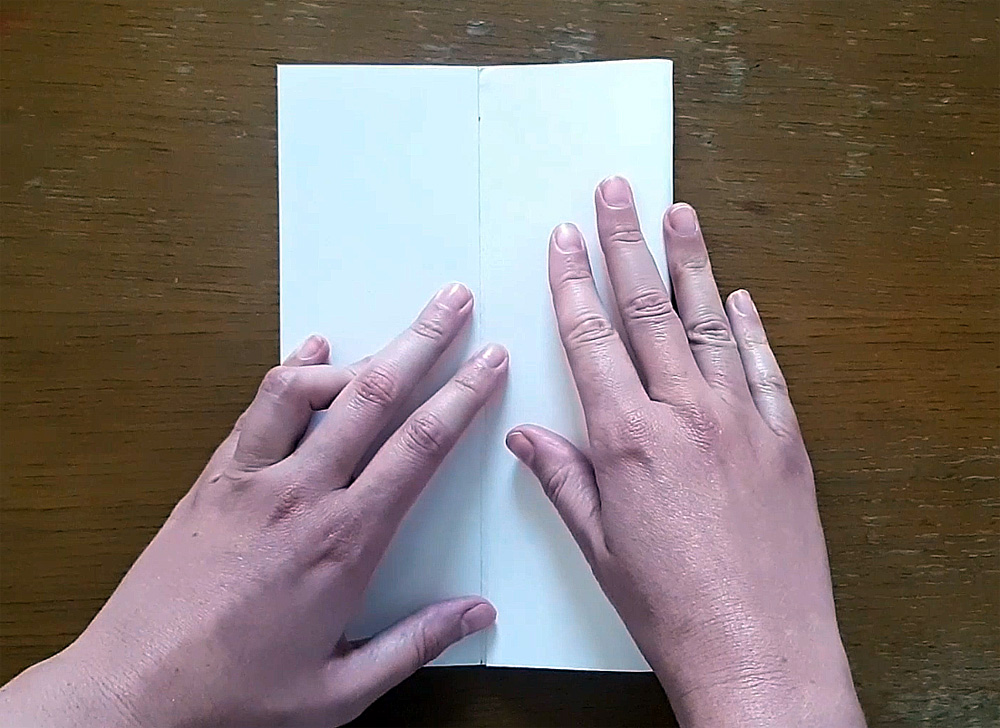
3. Valley-fold along the lines and then unfold them.
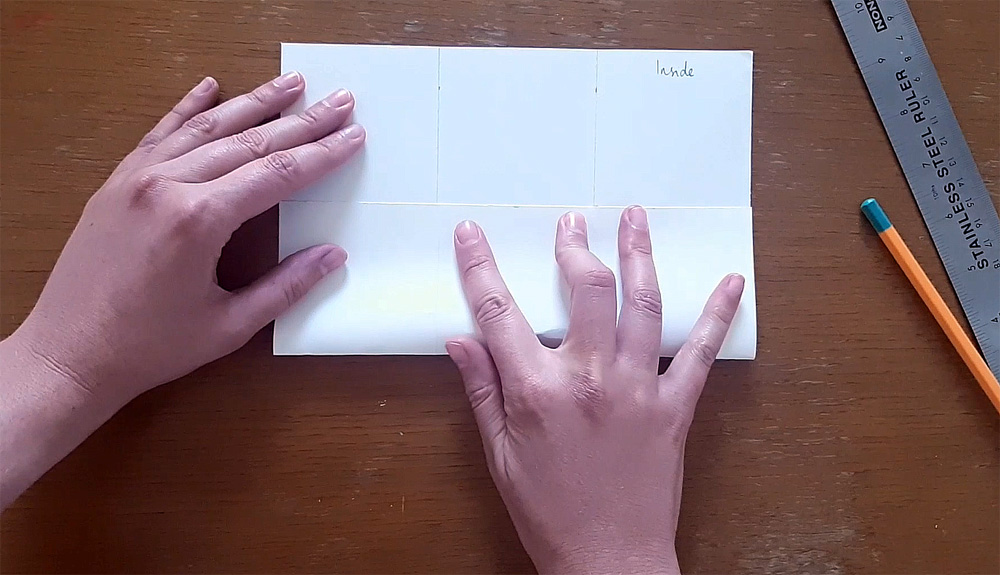
4. Divide your square into 3 equal horizontal sections and draw the lines lightly with a ruler.
5. Valley-fold along the lines and then unfold them.
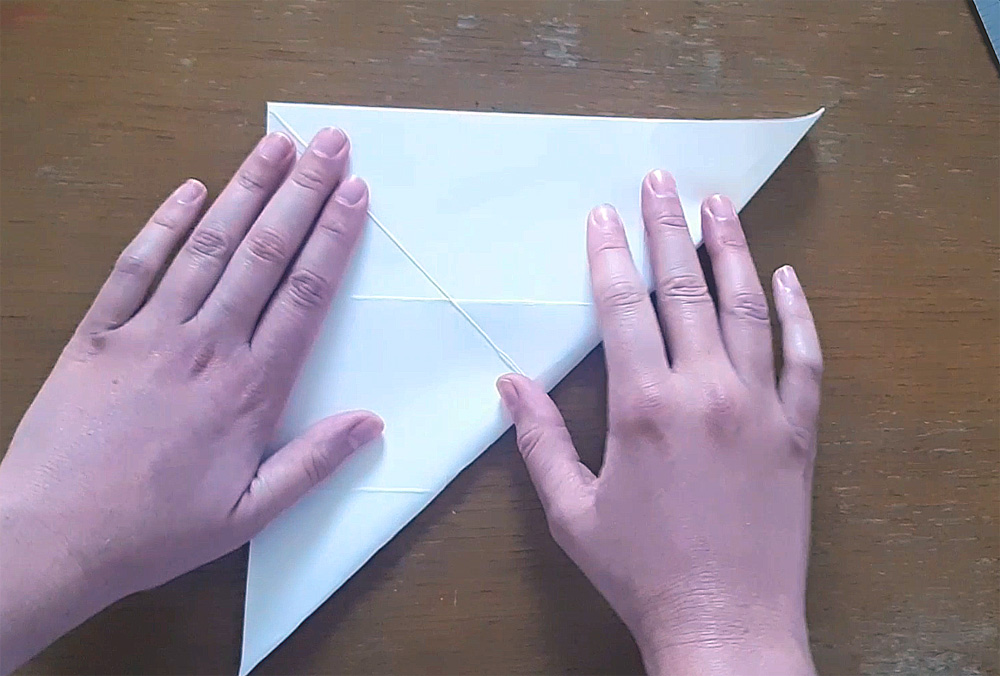
6. Valley-fold your square in half so that the corners meet and make a triangle. Do this in both directions. Then unfold.
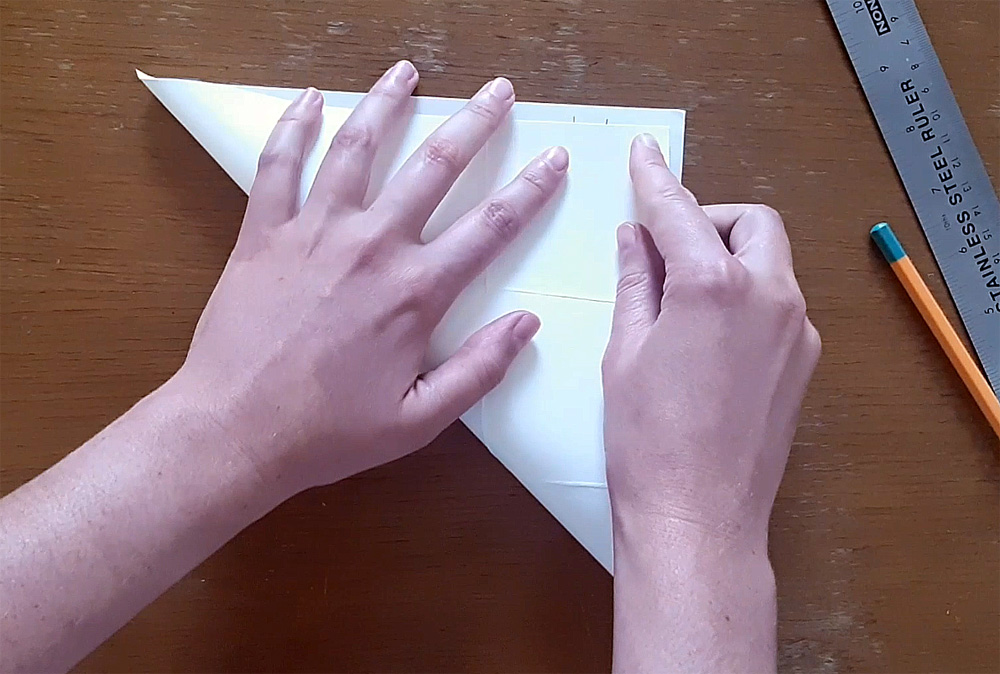
7. Turn the paper over and at the top of the square write ‘outside’.
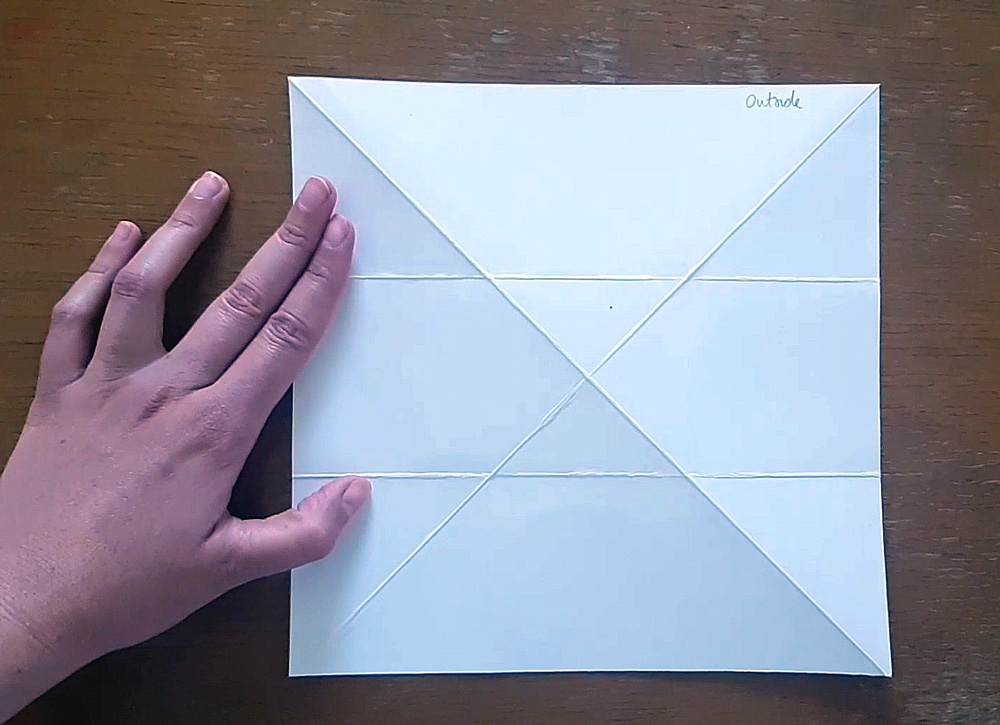
8. Using your ruler, draw in the 4 diagonal lines as shown below.
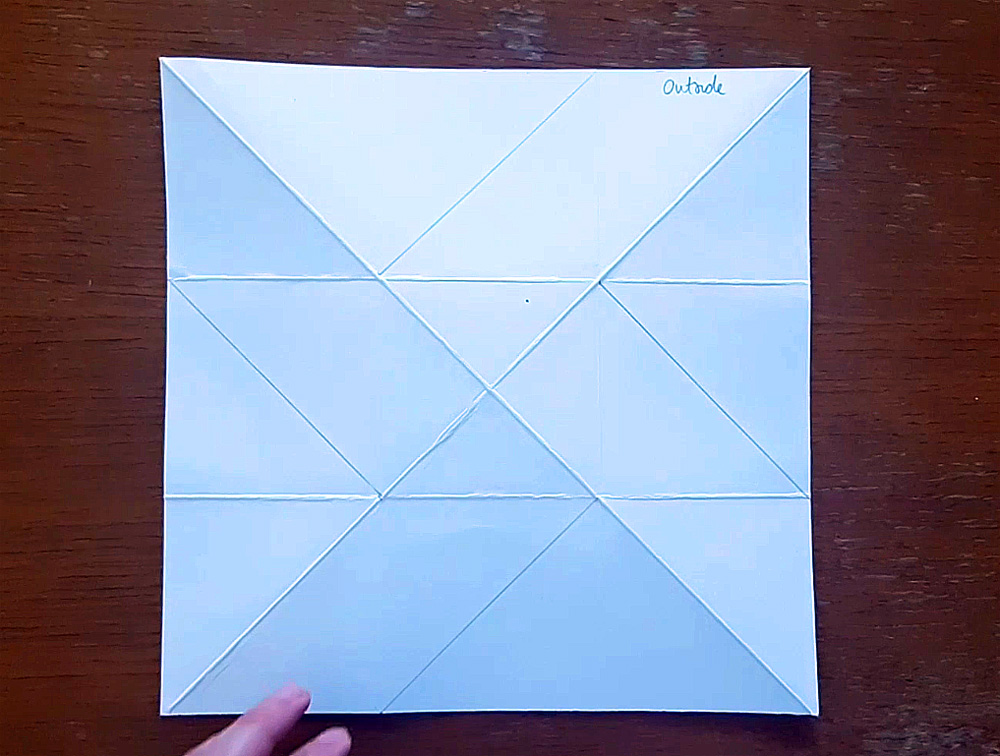
9. Valley-fold along each of the lines. You can use the corners of the smaller squares to help you make the fold in the right place.
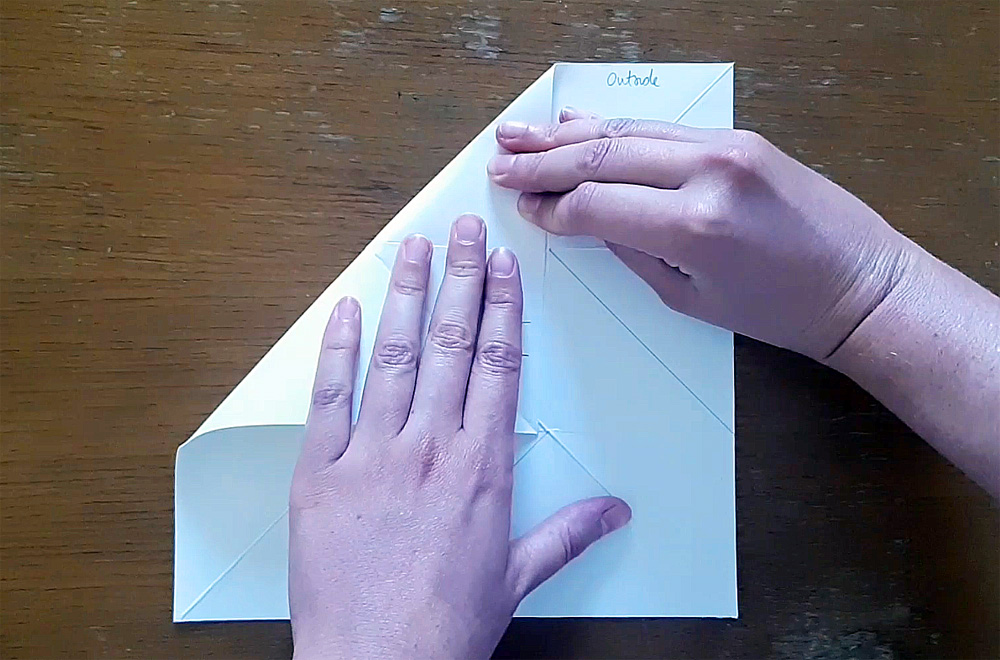
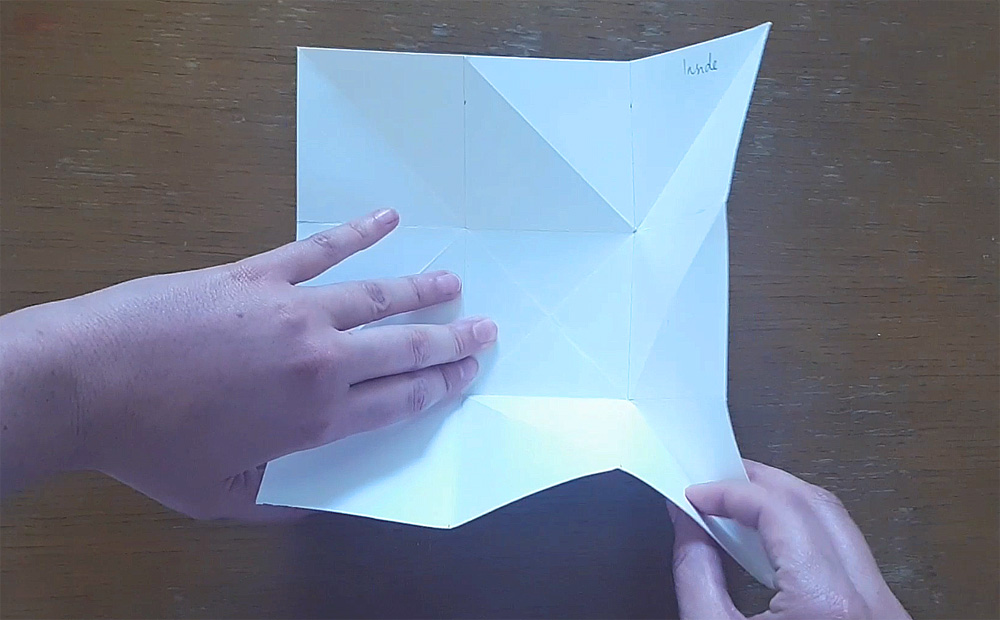
10. Turn the card square over so you are looking at ‘inside’.
11. Reinforce the 4 creases around the middle square. As you do this, the 4 sides of the paper will stand up from the central square.
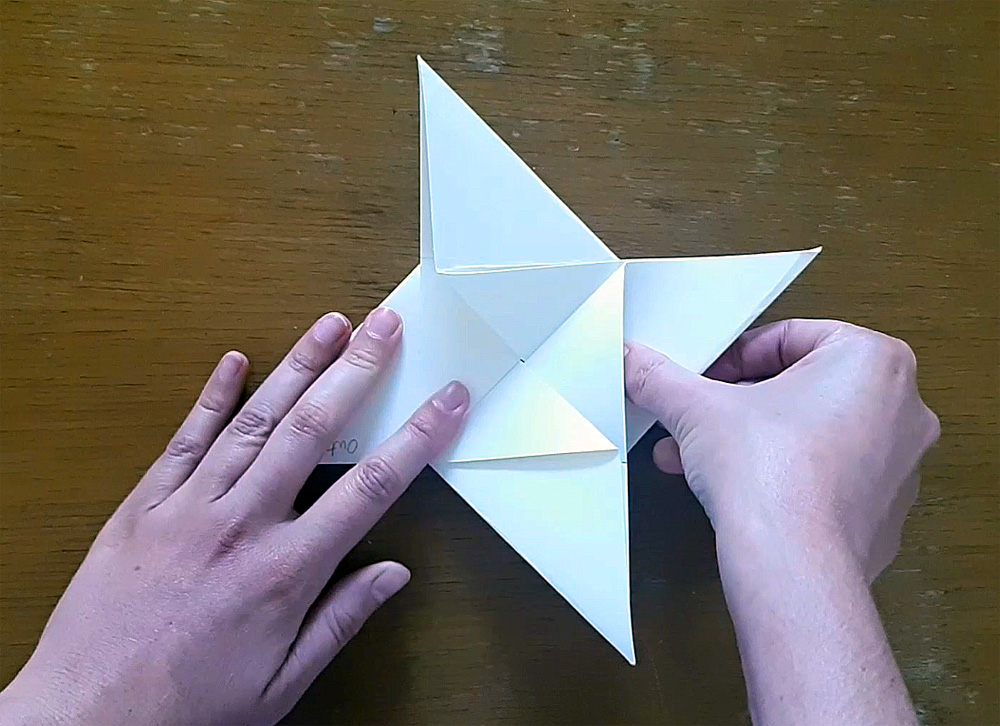
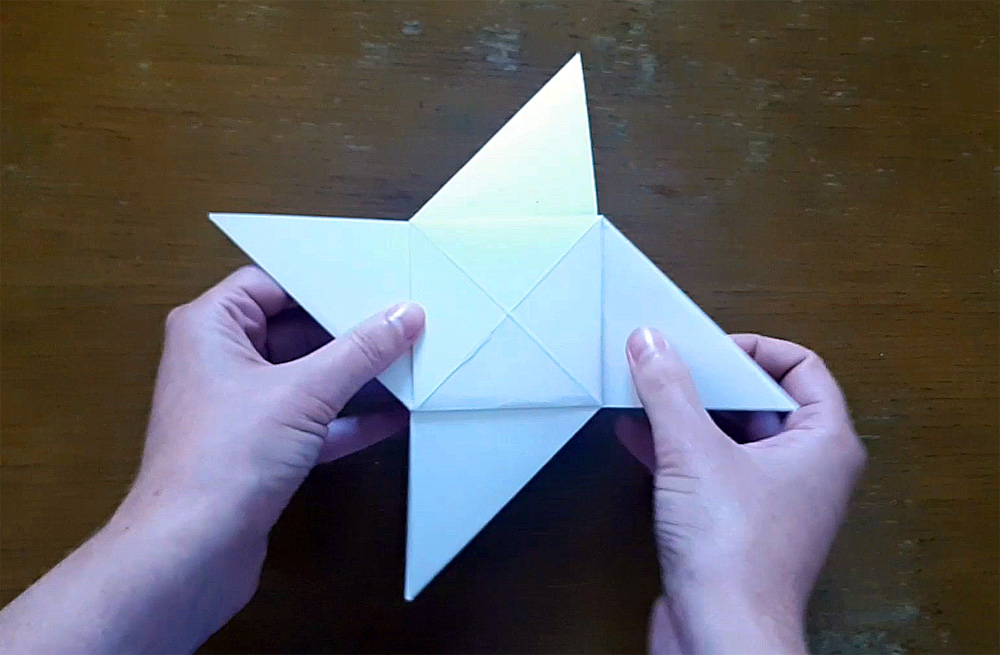
12. Pinch a pair of opposite corners and twist anti-clockwise along the fold lines to make a windmill.
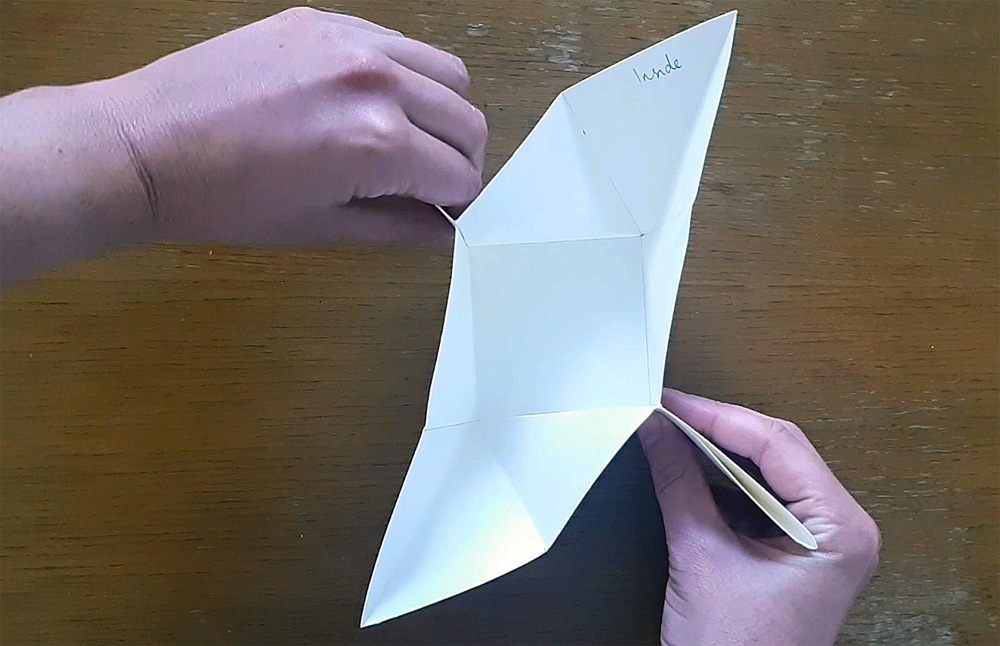
13. Re-crease the edges to flatten and smooth out the windmill.
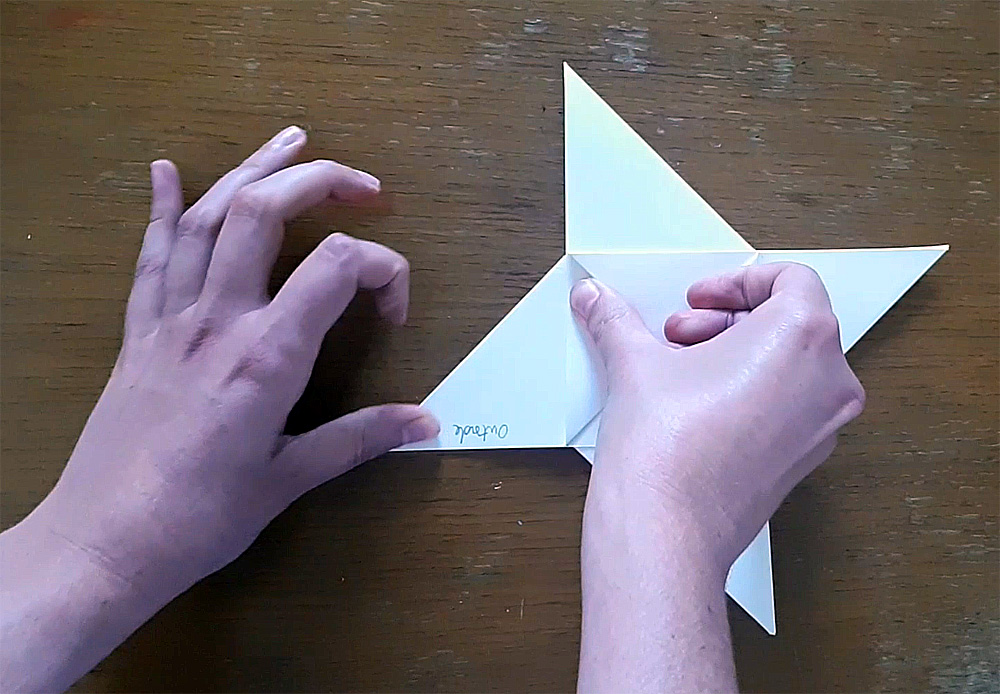
14. Turn the windmill over so that you cannot see any folds in the central square.
15. Fold the windmill arms into the centre of the square, starting with the right arm.
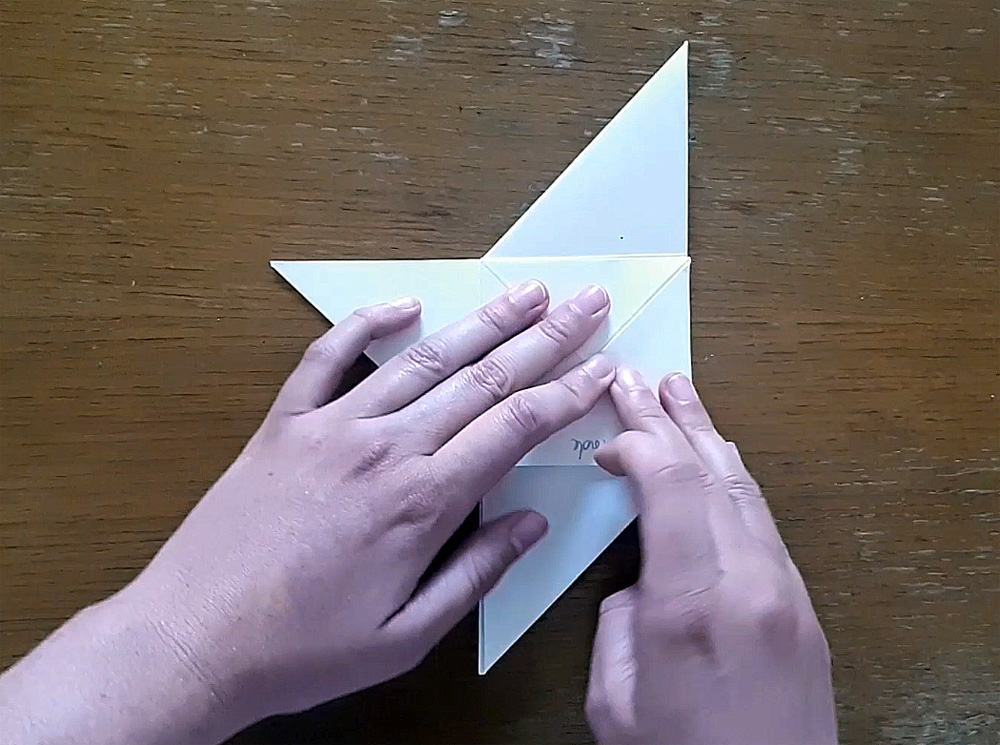
16. Going clockwise, continue to fold the arms inwards, letting them overlap.
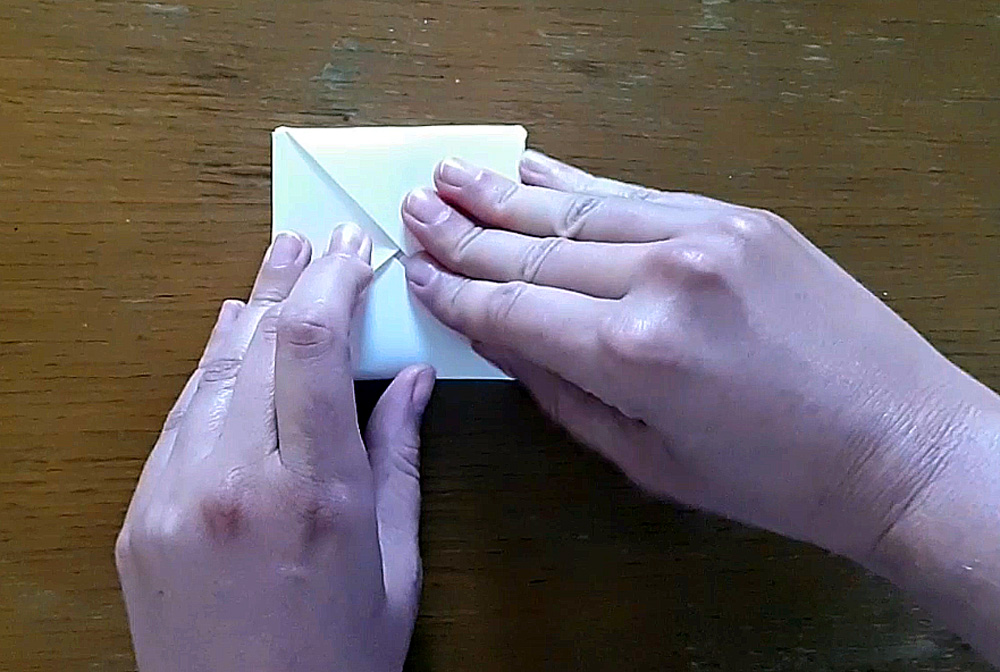
17. Tuck the last arm in under the first.
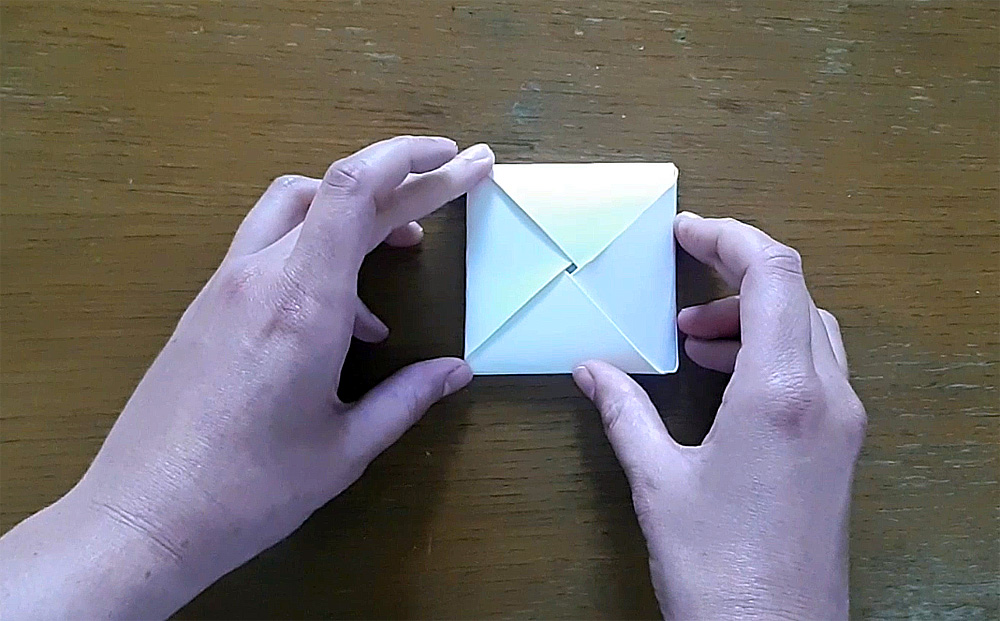
Now your origami puzzle purse is ready! Go to Part 2 of this resource to see how to personalise it and add your own content to it.
This is a sample of a resource created by UK Charity AccessArt. We have over 1500 resources to help develop and inspire your creative thinking, practice and teaching.
AccessArt welcomes artists, educators, teachers and parents both in the UK and overseas.
We believe everyone has the right to be creative and by working together and sharing ideas we can enable everyone to reach their creative potential.
You May Also Like...

Talking points: Andy Gilmore

Joseph P
November 21, 2022 @ 2:17 pm
I feel this is way too complicated for Y4, I’m struggling with the final folding step!
Joyce
February 2, 2025 @ 10:04 pm
The only instructions that I have ever understood! Thank you!
Afnaan Hamdi
March 12, 2025 @ 5:24 pm
I appreciate this advice; many thanks.
Catherine P
October 6, 2025 @ 5:34 pm
Excellent instructions and easy to follow for students.
Laurel Paulson-Pierce
October 31, 2025 @ 6:48 pm
IS THERE A PART 2?
Rachel
November 3, 2025 @ 11:07 am
Hi Laurel, yes! Part two is here: https://www.accessart.org.uk/puzzle-purse-with-eilis-hanson-part-2/
Sarah Johnstone
November 24, 2025 @ 4:17 pm
My Year 4 group loved this project and we linked it to their current text. Thanks so much.