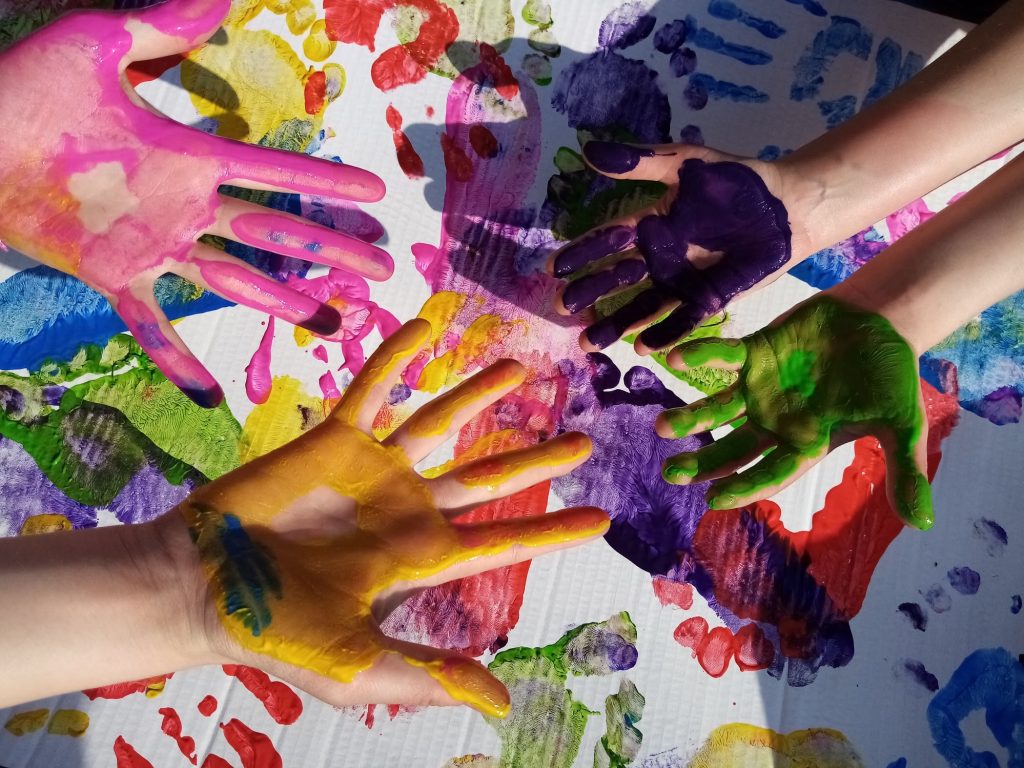
Shakespearean Sock Puppets

By Kate Gorely from The Belham Primary School, Peckham.

Puppet showing the hands


This is a project that I created with a Year 6 cohort. We were studying Macbeth in Literacy and working towards a performance for our whole-school Shakespeare Week.

The puppets were made in our DT sessions, which took place over 3 days. The students researched Tudor fashion and costume design before designing and making their own textile puppet. They used a variety of stitches to secure, join and embroider, as well as creating a structure onto which their puppet was formed. They made choices in fabrics, design and embellishments, each creating a unique character. It is a project that would also work very well for myths and legends, historical figures and fairy tales.

Session 1 – Research and Design

We shared a variety of images of Tudor clothing and costume as well as looking at some well known paintings. We discussed the work by John Singer Sargent and his 1889 depiction of Lady Macbeth which is on display in Tate Britain in London. Together, we established common themes and details in the clothing. The students then chose the character they wished to make from Macbeth. They came up with a number of designs before choosing their final costume design for the puppet. They annotated their sketches and chose the fabrics and braiding they wished to use.

Session 2 – Creating the Head

two rods joined in a cross shape
Two rods were cut, approximately 30cm and 10cm and joined in a cross position using wool.


cutting the pop sock end
Each student was given a ‘pop sock’ or a cut-off tights foot to stuff. I modelled stuffing the sock to make a potato shape, by tearing small sections of the craft filling, stuffing and moulding as I went along. This potato shape was then tied and secured at the base.


stuffing the cut off sock with wadding


The features could then be fashioned by pinching the potato head, to form a nose and securing this by stitching through the pinch to form eyes. It is worth reminding students at this stage about the natural spacing of features – eyes approximately halfway down the head, and the spacing of the nose, to avoid eyes being placed in the forehead area!

pushing a needle and thread through the stuffed head
The nose is then formed by stitching up each nostril and into the eye stitches.


stitching the form of the nose


Once the features are in place, then wool can be added for the hair, stitching through the hairline and continuing down the back of the head to the lower hairline. Eyebrows and any facial hair can be added, plus small beads for the eyes. At this point, the puppets really begin to develop a character of their own.

starting the thread the hair


facial hair and beard sewn on with wool


over stitching a rod to the back of the head
The vertical rod is then carefully held against the back of the puppets head, the sock fabric pinched over it and then over-stitched to hold it in place.


A little stuffing can be added to the loose stocking chest area. This is then stretched and hooked over the horizontal rod to form the shoulders.

stuffing the body and shaping over the horizontal stick


Session 3 – Creating the Costume

At this stage, students can review their designs. Is there anything they would like to add to the costume or adjust? Using squared paper, students can create their tunic pattern. This is then pinned to the chosen fabric and cut out twice – one for the front and one for the back.

Cutting a paper pattern for a tunic


the cut out tunic ready for assembling


Using a simple running stitch, the sides of the tunic and the sleeves are secured. Leave the neck of the tunic wide enough to slip up over the shoulders and then secure at the neck.

Following their designs, the students chose different textures, patterns and embellishments to create their costumes. Some folded kilts over the tunic base, others added hooded cloaks, knitted armour, sashes and belts.

adding embellishments to the cut out tunic
To finish – felt hands were stitched to the end of the sleeves. To animate the puppets, rods can be glued to the hands.


Puppet showing the hands


Each puppet was so different, with its features and character evolving over the course of the workshops. The students became very involved with the development of their puppets; one girl reflected, she felt she had created ‘a friend’.

If you would like to deliver more puppetry sessions in your school, you can find more inspiration here.


This is a sample of a resource created by UK Charity AccessArt. We have over 1500 resources to help develop and inspire your creative thinking, practice and teaching.

AccessArt welcomes artists, educators, teachers and parents both in the UK and overseas.

We believe everyone has the right to be creative and by working together and sharing ideas we can enable everyone to reach their creative potential.

See This Resource Used In Schools…

Year 5, Sutton Valence Preparatory School

You May Also Like…

Visual Arts Planning Collections: Toys, puppets, dolls

Puppet showing the hands

AccessArt explore shakespeare

Drawing feathers

Prop Making for Toys

Suitcase for a toy by Tobi Meuwissen


One Roll of Paper, Two Activities


Botanical Fairies


Get Connected! Cardboard Robots with Movable Joints

You May Also Like…

Pathway: Making Animated Drawings

This is featured in the 'Making Animated Drawings' pathway

This is featured in the ‘Making Animated Drawings’ pathway

Talking points: Making drawings move

Firekites - AUTUMN STORY - chalk animation by Lucinda Schreiber

Talking Points: paper cut puppets

Paper Puppet Showreel by Holly Summerson https://vimeo.com/689215908

Talking Points: Lauren child

Lauren Child video

Talking Points: Lotte reiniger

Lotte Reiniger - The unsung heroine of early animation BBC Ideas by Infocandy


Galaxy Painting


Mono Printing Session with ‘Change, Grow, Live’

You May Also Like…

Pathway: Exploring the world though mono print

This is featured in the 'Exploring The World Through Mono print' pathway

This is featured in the ‘Exploring The World Through Mono print’ pathway

Talking Points: Xgaoc’o Xare

Two giraffe and two birds II 50x65sm by Qhaqhoo Xgaoc'o X'are

Video enabled monoprint resources

Final Monotype by Tobi Meuwissen


Rainbows and Waves for Grey Days


Unesco: Celebrating the Power of Making!


Children’s Community Project


Bubble Drawings


Flying Minpin Birds

See This Resource Used In Schools…

Nine Mile Ride Primary School in Finchampstead in collaboration with South Hill Park Arts Centre

You Might Also like…

Pathway: Telling Stories through drawing and making

This is featured in the 'Drawing Stories Through Drawing and Making' pathway

This is featured in the ‘Drawing Stories Through Drawing and Making’ pathway

Visual Arts Planning Collections: Birds

Drawing Birds with Oil Pastels and Washes

MAKING BIRDS FROM CARD, PAPER AND WIRE

Drawing feathers


Pastel and Rubber Chiaroscuro Drawings


Thinking Silhouettes


Abstract Face – Relief Sculptures


Anthropomorphic Animal Paintings


‘Meet and Make’ Teacher CPD Event and Resource Share


Nursery Night Time Collage


Use Scrapstores!


Art in Schools: Linton Heights Junior School


Talking Points: Lucy Engelman

A collection of sources to explore the art of Lucy Engelman.

Please note that this page contains links to external websites and has videos from external websites embedded. At the time of creating, AccessArt checked all links to ensure content is appropriate for teachers to access. However external websites and videos are updated and that is beyond our control. 

Please let us know if you find a 404 link, or if you feel content is no longer appropriate. 

We strongly recommend as part of good teaching practice that teachers watch all videos and visit all websites before sharing with a class. On occasion there may be elements of a video you would prefer not to show to your class and it is the teacher’s responsibility to ensure content is appropriate. Many thanks. 

ages 5-8
ages 9-11
ages 11-14
ages 14-16

Lucy Engelman

Lucy is an illustrator living in Pittsburgh, PA in the USA. She is an illustrator using traditional methods of line drawing. Her work often shows her fascination and love for the natural world. Her work has appeared in magazines and books and often beyond the printed page through collaborations with chefs and farmers, creating imagery for clothes, home goods wallpapers.

Explore images of Lucy’s hand drawn maps on her website here.

Watch the video below to learn more about Lucy, the way in which she works and her ideas surrounding maps.

Questions to Ask Children

Can you describe some of the landscapes Lucy was in during this video? How did those places make you feel?

Can you think of a place near where you live that is similar?

Do you think a map always has to tell you where to go? Why? Why not?