
Published by Black Dog Press, Drawing Projects for Children is a beautifully illustrated collection of activities that will expand the mark making abilities and imagination of children of all ages, and help fuel their passion for drawing.
The book features a collection of drawing exercises and projects taken from the AccessArt website, presenting them in a beautiful and inspirational format.
“A beautiful book, full of ideas and a vivid sense of materials – truly appetising and stimulating.” – Sir Quentin Blake
“Drawing Projects for Children is fantastic and I know it will be an inspiration to many educators.”
“I am so thrilled with the book! Thank you for your inspiration and excellence.”
Philosophy
I have been teaching drawing for many years, and my approach is based upon:
-
Providing children with simple exercises and inspiring projects which give them a focus for their drawing exploration.
-
Providing non-specialist adults with the tools to enable them to facilitate drawing in others.
-
Helping children understand and experience the potential of different drawing materials.
-
Balancing experimental mark making with exercises which promote careful looking and thoughtful drawing.
-
Helping children understand the importance of risk-taking in drawing.
-
Building confidence and experience to enable children to undertake their own drawing journeys.
The book provides a series of modular exercises and projects which can be used alone or in cominbation to build an exciting collection of work. Warm-up exercises are used extensively to help introduce the projects. The projects themselves are suitable for all ages of children, for use at home, in the school, in an art club, gallery or museum context. The book also shares ideas to enable parents, teachers or facilitators to devise their own warm-up exercises.
 £14.95
Author Paula Briggs Paperback 144 pages 120 b/w and colour ills 26.0 x 20.0 cm 10.0 x 8.0 in ISBN13: 9781908966742
Bulk Buy
Network coordinators wishing to buy this resource in bulk should contact us here for direct purchase and discount rates.
Eileen Adams, NSEAD

The chunky (8’’x10’) Drawing Projects for Children is a beautiful book: 144 pages, printed on thick paper, with colour illustrations on nearly every page. Well done designers Freddy Williams and Vanessa Wong! It is robust both in content and presentation, a book that will be of use for a long time. Black Dog, the publishers, claim to take a daring, innovative approach to our titles, to maintain high production values and authoritative content and to produce books that challenge, provoke and entertain. There is much here to inspire children to develop their love of drawing, to stimulate them and to engage them. This is not merely a ‘how to do it’ book: it is also ‘how to think about it’.
The book is in three main parts:
• Materials, drawing surfaces and faciltators’ notes
• Warm ups
• Projects
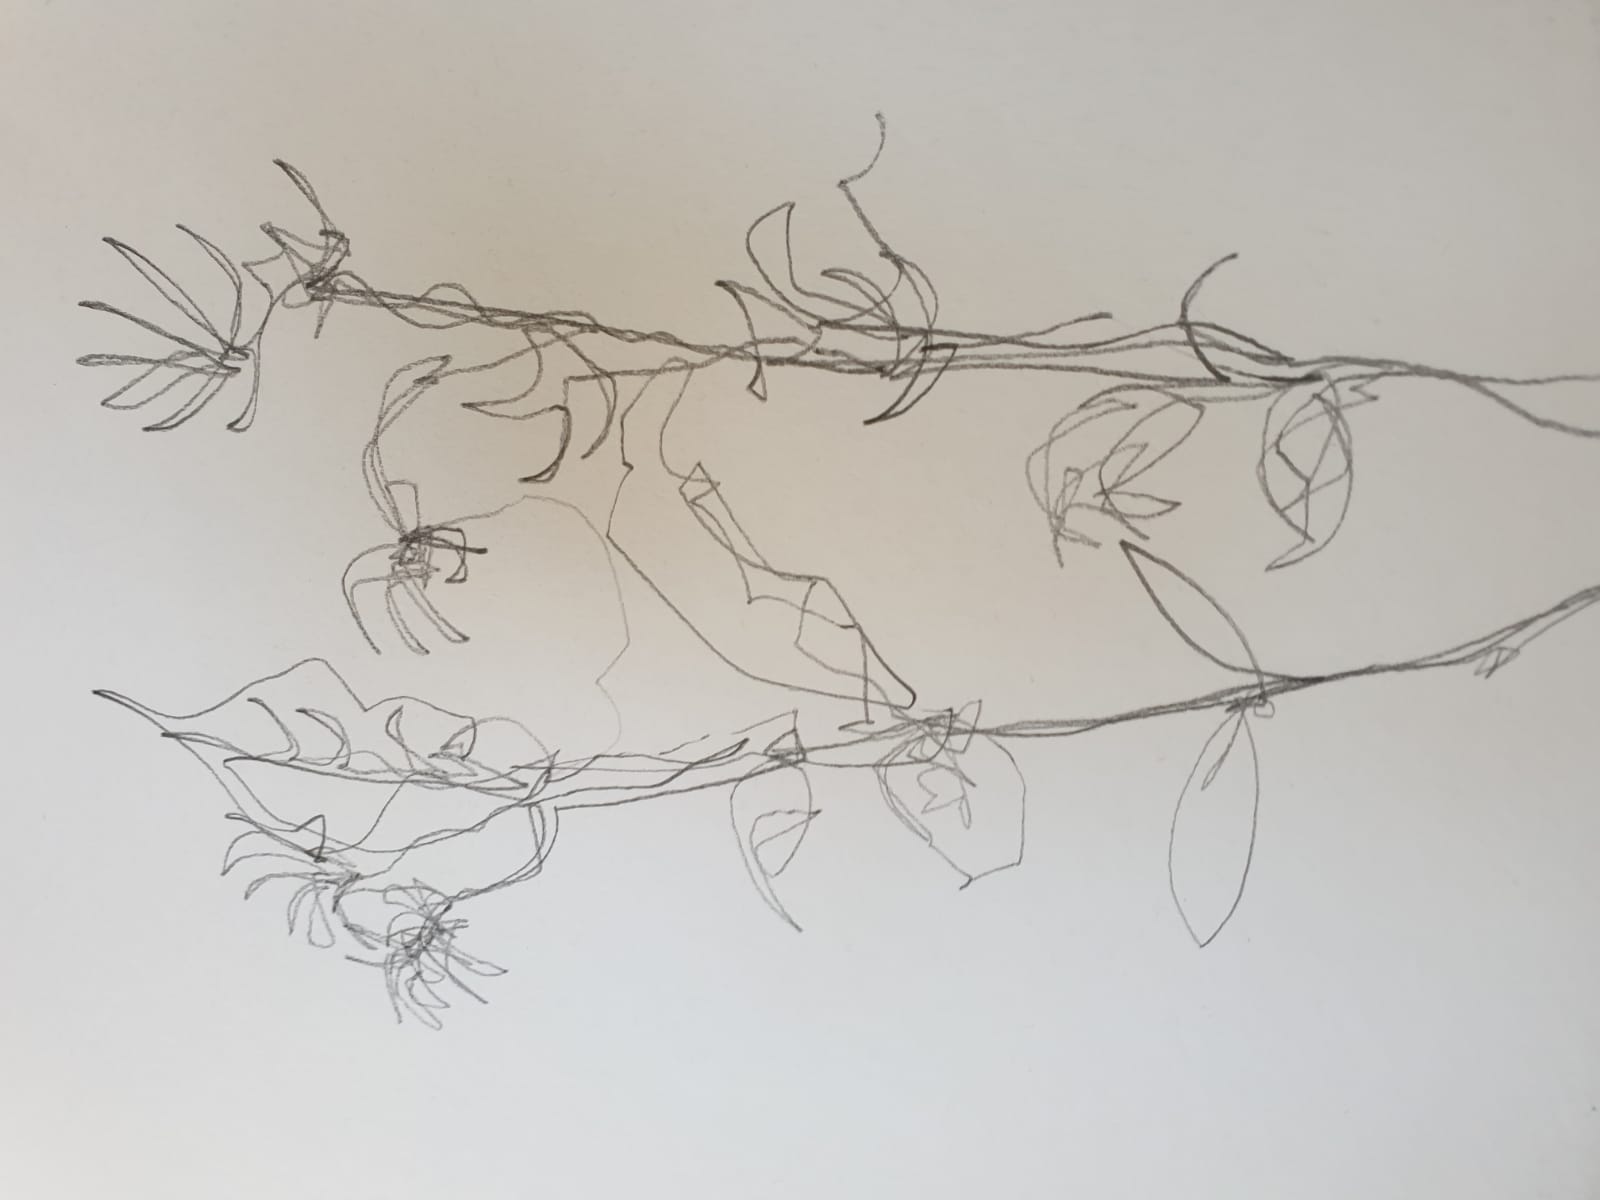
The section on warm ups provided a range of prompts for children to start drawing: exploring line, shape, tone, texture and rhythm to create different kinds of marks that could be manipulated in a variety of ways to create drawings.
The 26 projects vary in complexity and difficulty. Many are based on drawing from observation such as moving water and natural form. Some are prompted by experimenting with marks and materials. Some are concerned with drawing from imagination, such as animal cartoon characters. Some are about storytelling. Others bring new excitement to the activity, such as drawing by torchlight, making carbon paper prints or drawing on plaster. Some drawings come off the page and are developed in 3D. Some drawings turn into books.
Teachers, parents and other facilitators will welcome this book, chock full of ideas for drawing activities. They will also appreciate the explanations, instructions and advice that will help them support children’s efforts. I particularly valued explanations as to the purpose of each drawing activity. What was the intention? What might children experience? What might they explore – ¬ a material, a technique or a concept? What might they learn as a result? This book is not just about learning to draw: it is about drawing to learn.
All the advice is sound, based on Paula Briggs’s long experience of working with her colleague, Sheila Ceccarelli, in AccessArt, to support children and teachers. The projects have been trialed and tested at drawing workshops in Grantchester. They are transferable to other situations and other age groups – secondary students would benefit from exploring many of the activities. They have the potential to inspire young people and build their confidence and competence in drawing.
The whole tone of the book is about enabling children to experiment and take risks so that they are encouraged to push beyond what they consider ‘safe’ (safe drawings are those in which we know what the outcome is going to be before we have even started making them). This is such a relief when teachers and children in schools are being constrained and mis-directed by inappropriate assessment procedures and ways of valuing children’s work.
Prehaps the author should have the last word. \”One thing I am certain of is that we need to raise our expectations of the level of artwork children are capable of making. We need to give children access to more materials, more time and space, provide more focused support, and we need to feed them with projects to give them a reason to explore further. In return, they will demonstrate how fundamentally important drawing is to us as human beings, and they will reward us with the most beautiful, eloquent and remarkable drawings.”
Artful Kids
There are no shortage of practical books about art out there for children, but speaking as someone whose first love in art is drawing, I was curious to review Drawing Projects for Children by Paula Briggs, (published by Black Dog) as there are not so many which focus on the act of drawing itself.
This is not a book about ‘how to draw’ in the traditional sense, and is, I personally thought, all the better for it. Instead it is a truly creative book – the projects are aimed at encouraging children to explore different aspects of drawing for themselves – inviting them to think and create in different ways.
Well-structured, the introduction of the book includes notes about art materials, and is followed by some facilitator’s notes for parents or teachers (there are further facilitator’s notes added for some of the individual projects). There then follows a series of 10 simple warm up exercises devoted to different aims. So for example there are exercises in mark making, continuous line drawing, and activities aimed at encouraging children to work larger, or produce bolder or ‘stronger’ drawings.
The next section is the heart of the book where there are 26 drawing projects. These are unusual and imaginative, many of them with a fun element designed to appeal to children, while at the same time fulfilling a specific learning objective. There are projects which explore the properties of different art materials, and others which encourage children to ‘think differently’ founded on the author’s extensive experience of conducting drawing workshops with children of all ages.
Not just for teachers of art, the book could just as easily be used by parents who are interested in genuinely teaching their children some of the fundamentals of art practice – to explore, observe and be creative, and also by older children who already have an interest in art. One of the strengths of the book however is the range of projects which encourage collaboration, sharing or simply exploring and learning together. The activity from the book which we tried together (Drawing by Torchlight, which you can read about here) turned out to be quite successful on a number of different levels.
The book is lavishly illustrated and produced in paperback format, using quality paper, and at £14.95 I thought it was pretty good value for the quantity of inspiring material it contains.
Julianne Negri
How would you like a drawing book that encourages risk taking in art? A book that emphasises process over product? A book that encourages experimentation within guidance? A book that is full of messy-get-your-hands-dirty drawing projects? In short, a book with smudgy fingerprints all over it? Well if these things tick your boxes like they tick mine, Paula Briggs’, Drawing Projects for Children published by Black Dog Publishing is the art book for you.
Paula Briggs has not only created a beautiful object with this book. She has created a welcome antidote to a world (wide web) full of outcome based children’s activities that seem to be all about the photo opportunity to display on whatever platform – blog/insta/facebook/twitter – a parent chooses.
This is very much a gorgeous(smudgy) hands on book, divided into two sections – warm up drawing exercises and more in depth projects. So the only real way to review this book was to try it out. First – rustle up some children (fortunately not a challenge for me).
The book is firmly aimed at children but without any dumbing down of language or “fun speak” or the sort of cutesy Dr Suess sort of language you often find with this target audience. For example:
“All of the projects in this book also use a huge range of drawing materials from inks and watercolours to graphite and pastels. Remember, great drawing experiences are not always about the outcome, but often about the things you learn when you experiment. So get ready to try out some new techniques, and make some wonderful creations!”
This tone generates respect for the child artist, for the materials being used and for the activity being undertaken. I read sections aloud to the kids first and we discussed some of the concepts – risk taking, process, not worrying about “mistakes”, no rubbing out etc. These are hugely neglected concepts in the world of a 7-almost-8-year old’s art practice. They are at an age where they lose the earlier wildness of creativity and have been firmly indoctrinated into school ideas of right and wrong and drawing like the person next to you, with a seemingly strong preoccupation on getting eyes and noses especially “right”!
While Paula Briggs suggests this book is aimed to be used independently by children, I found it does benefit from focused facilitating. And for kids this age? Fairly strong facilitation is required. Fortunately I had a background in art and understood the materials and requirements of the tasks, but it is written with point by point instructions, a colour coded idea of levels of intensity and a material list like a recipe and is therefore very accessible. For preparation we made a trip to the local art shop with a list in hand – lots of newsprint paper, various pencils, charcoals and pastels and some ink – and we were ready.
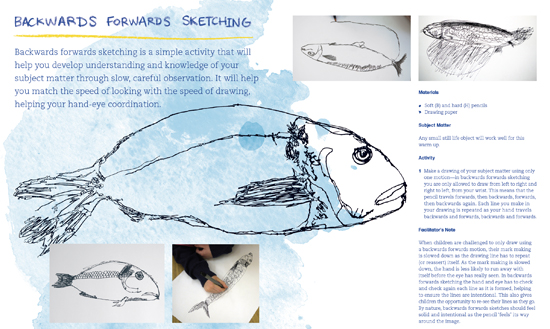
We began with some warm ups which were wonderfully fun and challenging. This “continuous line drawing” warm up was a terrific way to display process over outcome. Pens, paper, still life and go. The kids had to look at the object and draw it while not lifting their pen from the page. They were happy to keep trying this for ages! Our second warm up was “backwards-forwards sketching”. This was a good way to focus on looking and observing while slowing down the hand and creating texture.
My kids are very physical and these drawing ideas are also very physical – hand-eye coordination, large gestural mark making and sustained concentration. We interspersed the activities with kicking the footy in the back yard to freshen up.
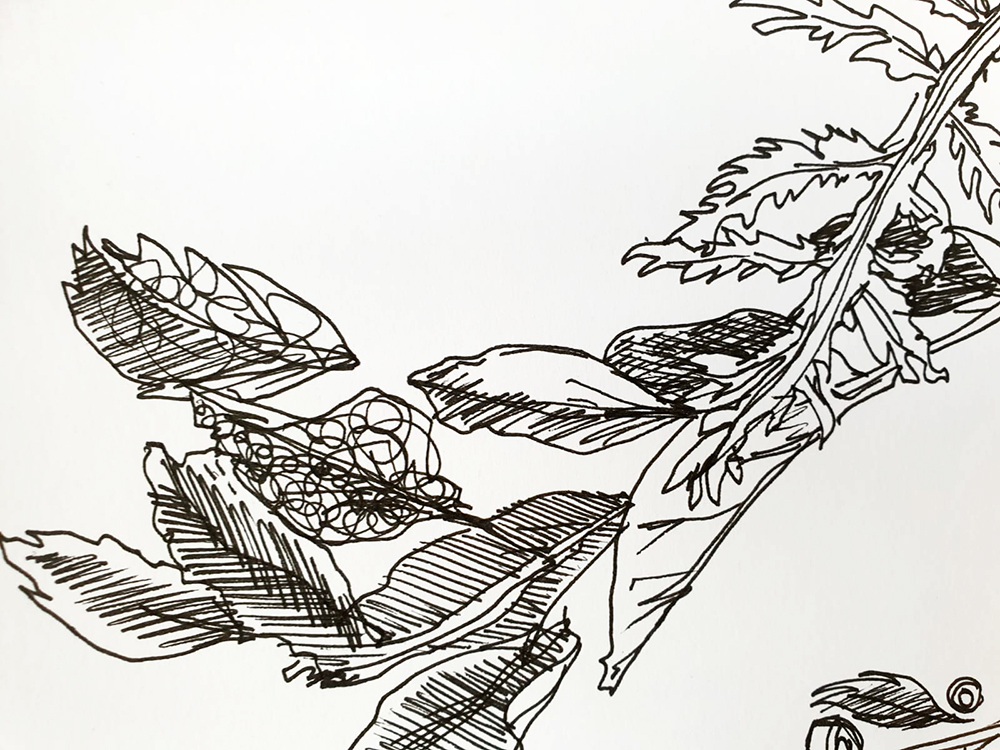
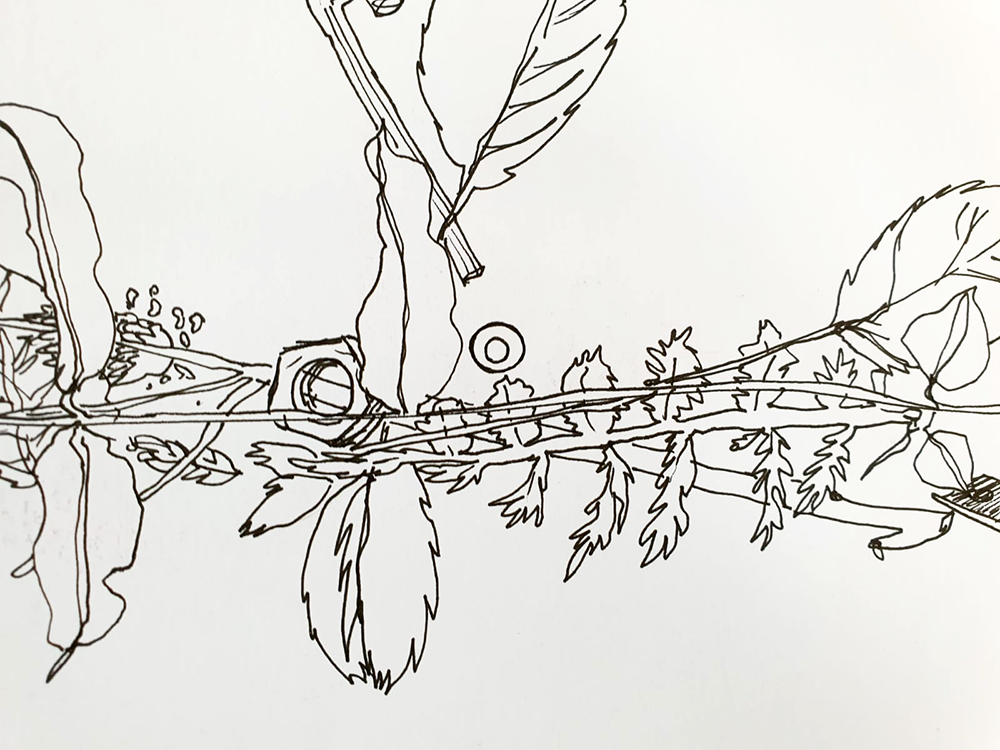
We enjoyed perusing all the projects in the book and the kids have ear-marked many they want to try asap. But the obvious “project” to undertake right away was the “Autumn Floor Drawing”. We ran around the house and street collecting leaves, seed husks, plants and all things Autumnal.
I found myself joining in and rediscovering the joys of charcoal and of delicate lines and shading in a way I hadn’t indulged in years. It was so relaxing, for me and for the kids, to play with the materials without any pressure on the result.
Drawing Projects For Children, while not completely independently accessible to younger children, actually benefits from involving a facilitator as well as the child. I found that Paula Briggs language and ideas generate an inspirational and stimulating practical art experience. Through warm ups and projects she extends children’s idea of mark making and drawing into a new realm. It challenges children (and teachers and parents) to explore, take artistic risks and to discover the fun inherent in drawing when there is no pressure for the outcome. It is a book we will return to and from just one day of experimenting it has already inspired these two kids to observe things a little differently and to think more about how to represent their world through art.
Drawing Projects for Children is highly recommended for those who love messy art. For those who want to encourage careful observation, thoughtful mark making and inspire artistic processes. For those who understand that experimentation and sustained exploration of a medium is more important than a quick simple art activity that results in a picture perfect photo opportunity. Go get the book, some supplies, some kids and get your fingers dirty.
The BookBag
Drawing Projects For Children is a beautiful, full-colour guide that encourages children to use a range of materials to create stunning and thought-provoking artwork. As the author points out, the end result is not always as important as the journey and this book helps children to move away from the more traditional, or ‘safe’ type of drawing styles and indulge in a little more experimentation and risk taking. The book is ideal for parents to use with their children, but each chapter is a self-contained lesson plan that facilitators and teachers can use with groups.
The theme of the book is all about experimenting with materials, so it is a good idea to stock up on the basics in order to get the most out of the projects. The focus is on using different paper and drawing media to create effects, so items like graphite, charcoal and pastels, as well as papers of varying textures, are useful items to have on hand.
The book also has some engaging warm-up exercises to help the child become more aware and mindful of physical movements and rhythms involved in the drawing process. For example, drawing to a slow rhythm using a metronome, or trying to create a picture using a single, continuous line can improve hand-eye coordination and observation skills.
The projects are suitable for all ages and can be as simple or as detailed as the artist wishes them to be. Projects include turning paper into fur, drawing by torchlight and printing with carbon paper. Each project encourages a thoughtful approach and introduces a new aspect of drawing or mark-making.
There is something in the book for everyone and it is visually appealing. My daughter is a budding artist and loves perusing the pages for ideas and inspiration. It would also be a useful resource for home-educators and childminders.
Fran Richardson, Artist Educator
“Being both an artist specialising in drawing and a parent who wants to inspire my own children to draw, I was glad to have discovered this book. Although pitched at an older child to read and follow independently, it offers guidance for parents and teachers who want to lead activities at home or in the classroom.
The layout is simple and pleasing with contrasting fonts in different sizes. It is fully illustrated with colour photographs of children making the work alongside examples of materials and drawings at differing stages of completion, which makes it both engaging and easy to follow. No prior experience is required so anyone can start immediately with the items already available at home.
I particularly like the way the author moves away from the traditional model of seeking to make a finished product though a series of specific steps to a focus on different techniques and the enjoyment of using materials in an experimental way, gently pushing at the boundaries of what children can achieve.
Drawing in charcoal by torch light, the picnic drawing party, or being your own art installation are things that I would never have thought of doing. I haven\’t had any experience of teaching children so I feel much more confidant that I will be working with them at the right level. Packed with ten warm ups and 26 projects with three levels of difficulty it offers value for money for any adult who wants to enjoy some creative time with children – a must for the holidays!”
You may also like…


")


