
Decorative Clay Coil Pots


By Sharon Gale working with KS1 & KS2 students at the Weston Park Art Club
This simple clay pot making resource is not the traditional way of making coil pots but it’s lots of fun and by using different paint effects, the end results can be very interesting. We worked on this project for two, two hour sessions.
Materials
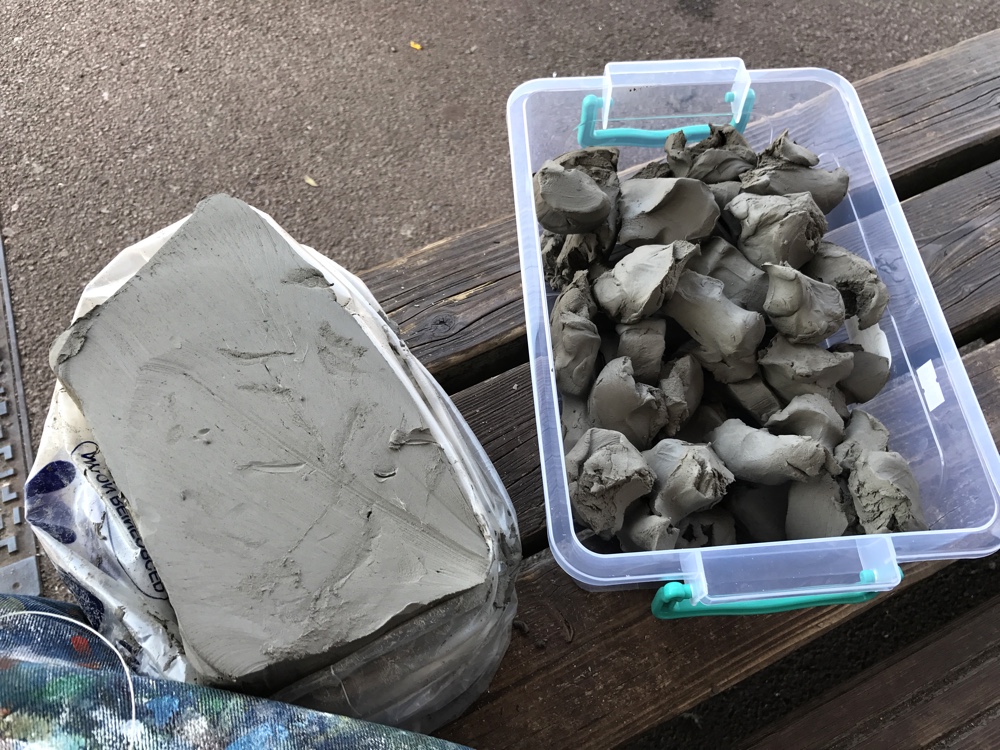
Clay (we used air drying clay, I would suggest 2 x 12.5kg bags for a class of 30 students)
Clay cutting wire
Plastic bowl (for the mould) – one per student
Cling Film
Sponge pieces – dampen with water, one piece per student
Large bowl or bucket (for washing clay off hands and tools)
Hand towel
Old damp cloths (to wipe table surfaces clean afterwards)
Poster or acrylic paints
Paint brushes
Water pots
Acrylic varnish to finish (optional)
Optional extras if adding a stand (foot) to the pot
Slip (clay ‘glue’, you can make this in advance by mixing water and clay to form a thick creamy consistency)
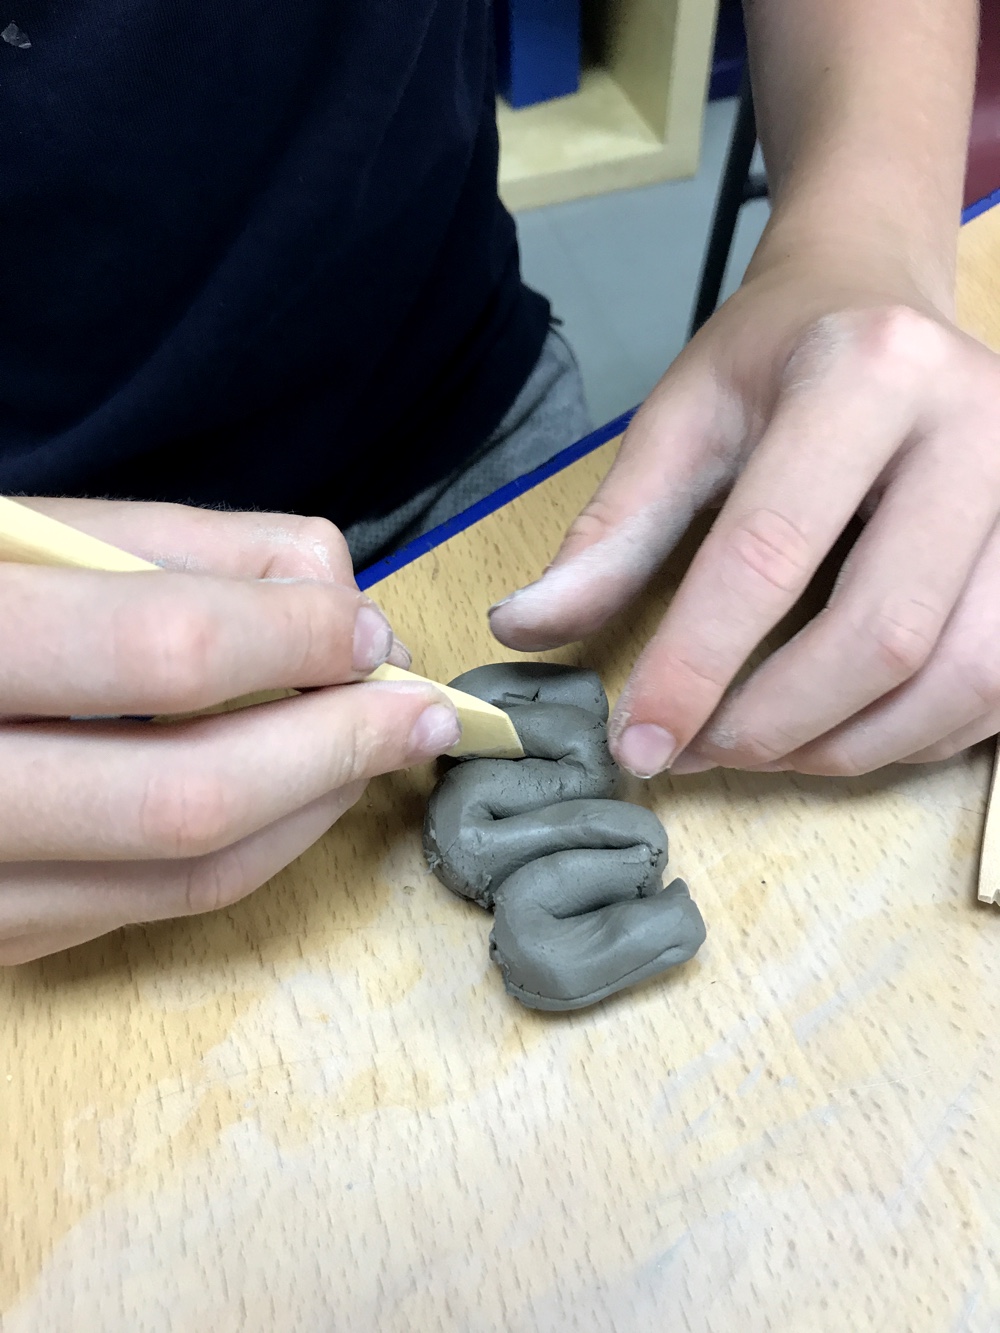
Wooden modelling tools for clay (improvise using wooden BBQ skewers and teaspoons)
Old paint brushes (to apply slip to the clay)
Handy to have
Saucer of water, (if needed, fingers can be dipped in water to help keep clay moist)
Hairdryer (to help speed up the paint drying time)
Preparation in Advance
Each plastic bowl needs to be fully lined with cling film
Using the cutting wire, slice manageable sized chunks of clay and store in a sealed box or the original bag the clay arrived in.
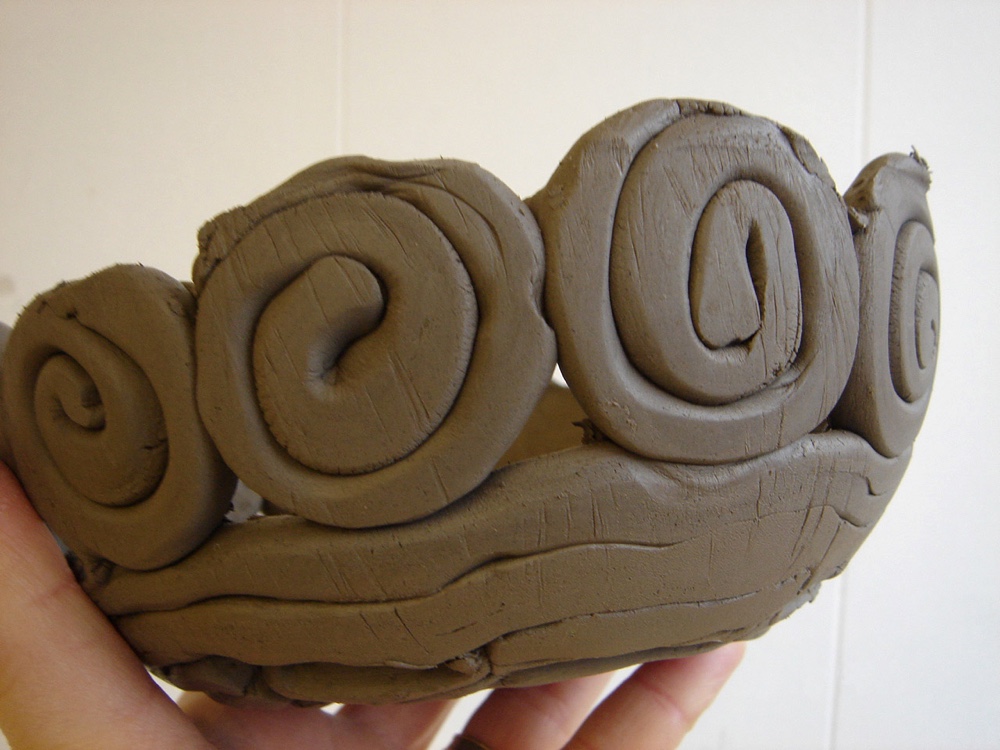
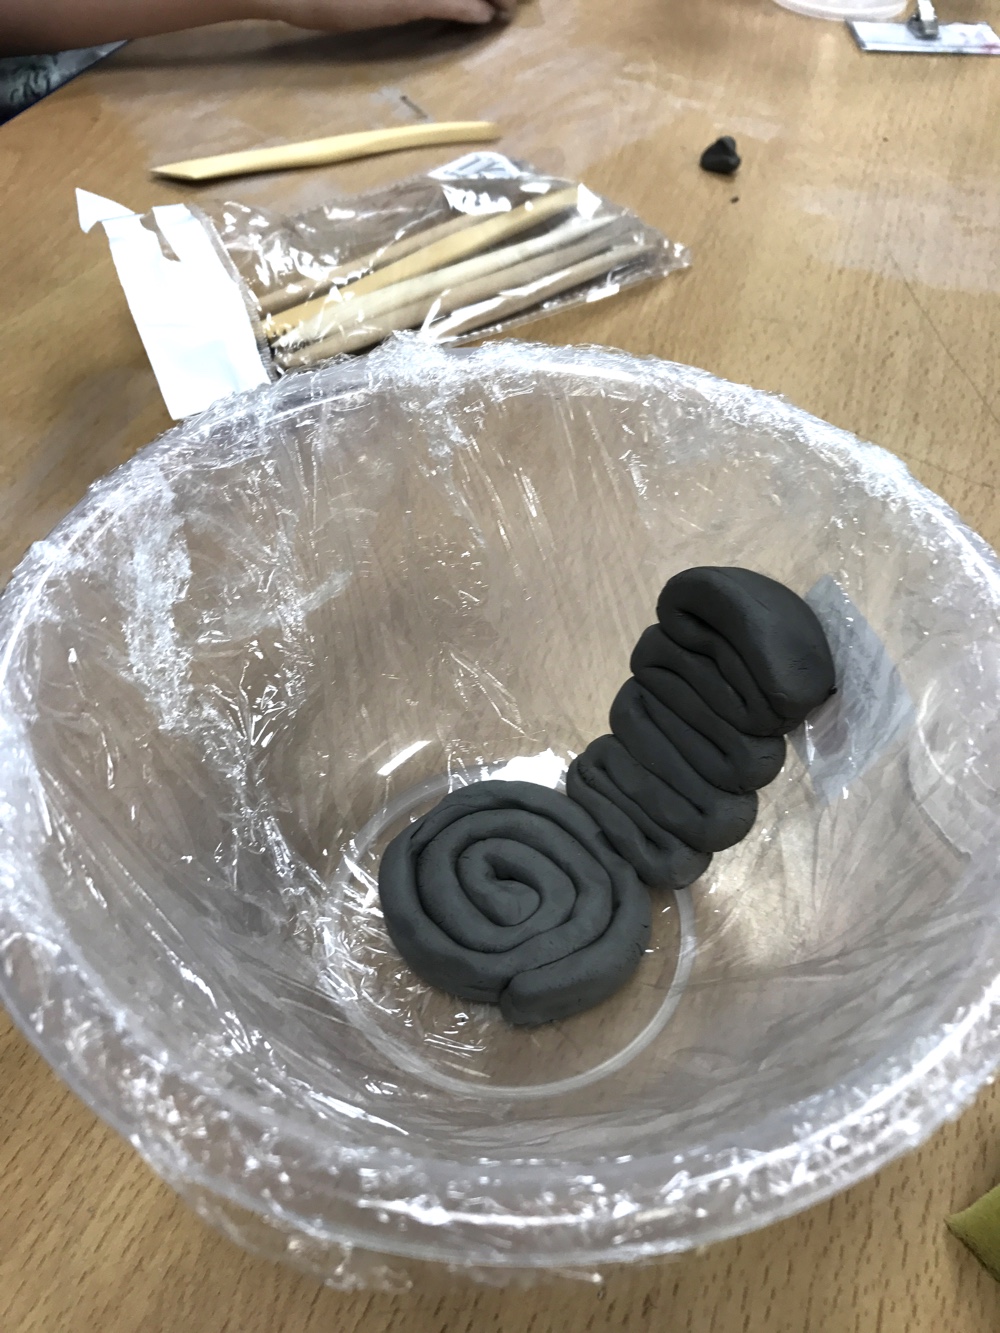
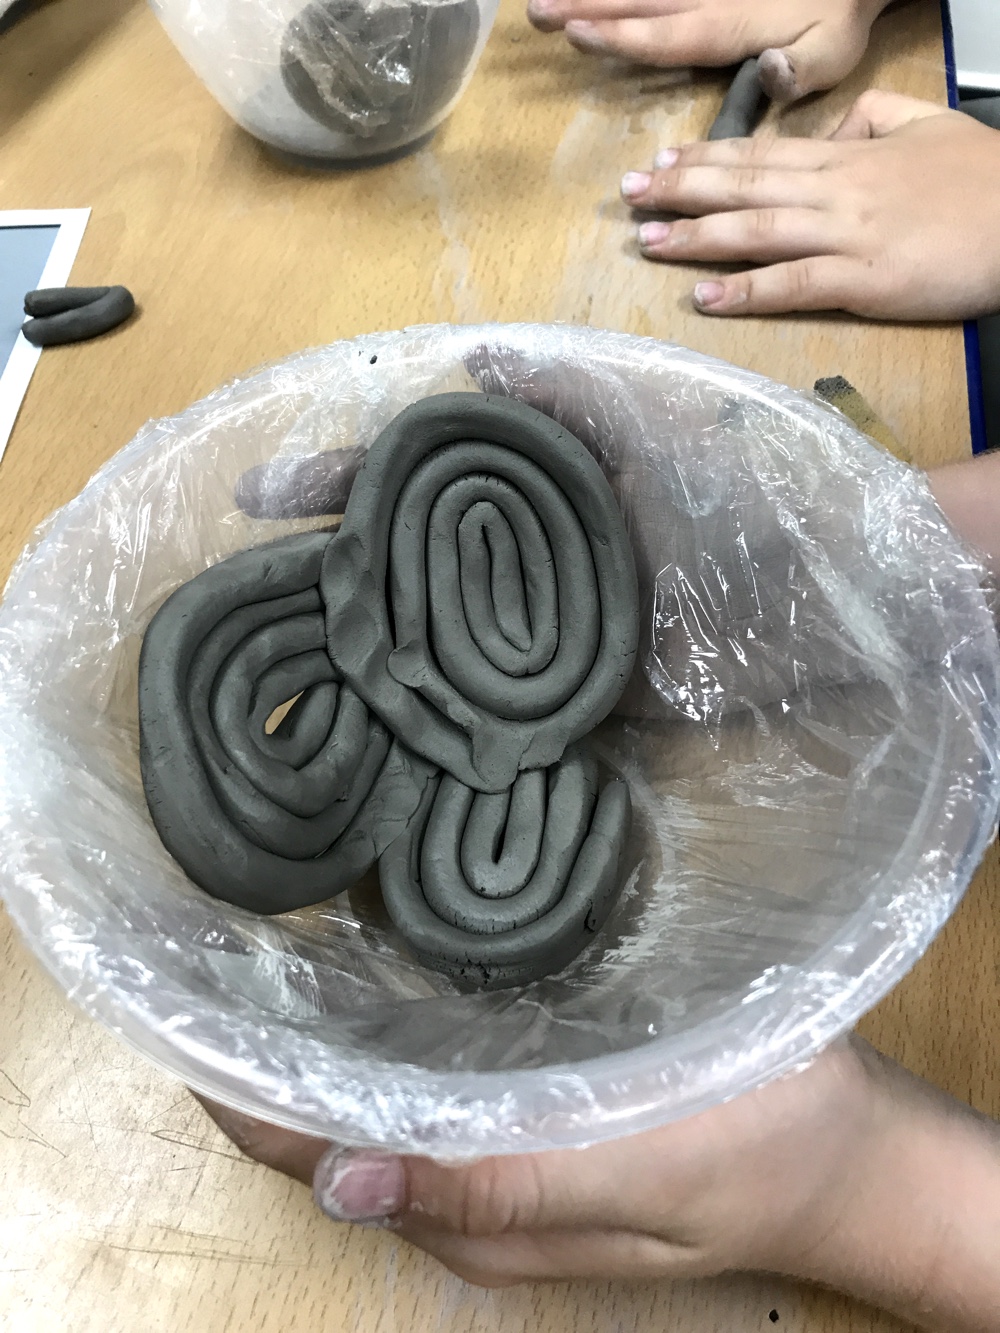
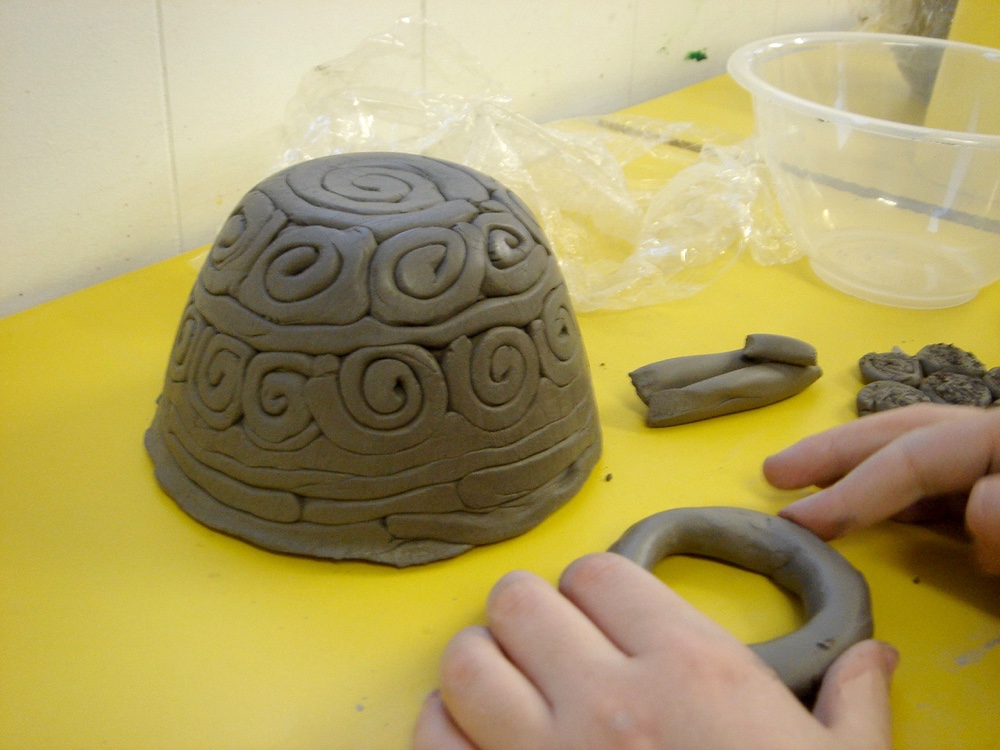
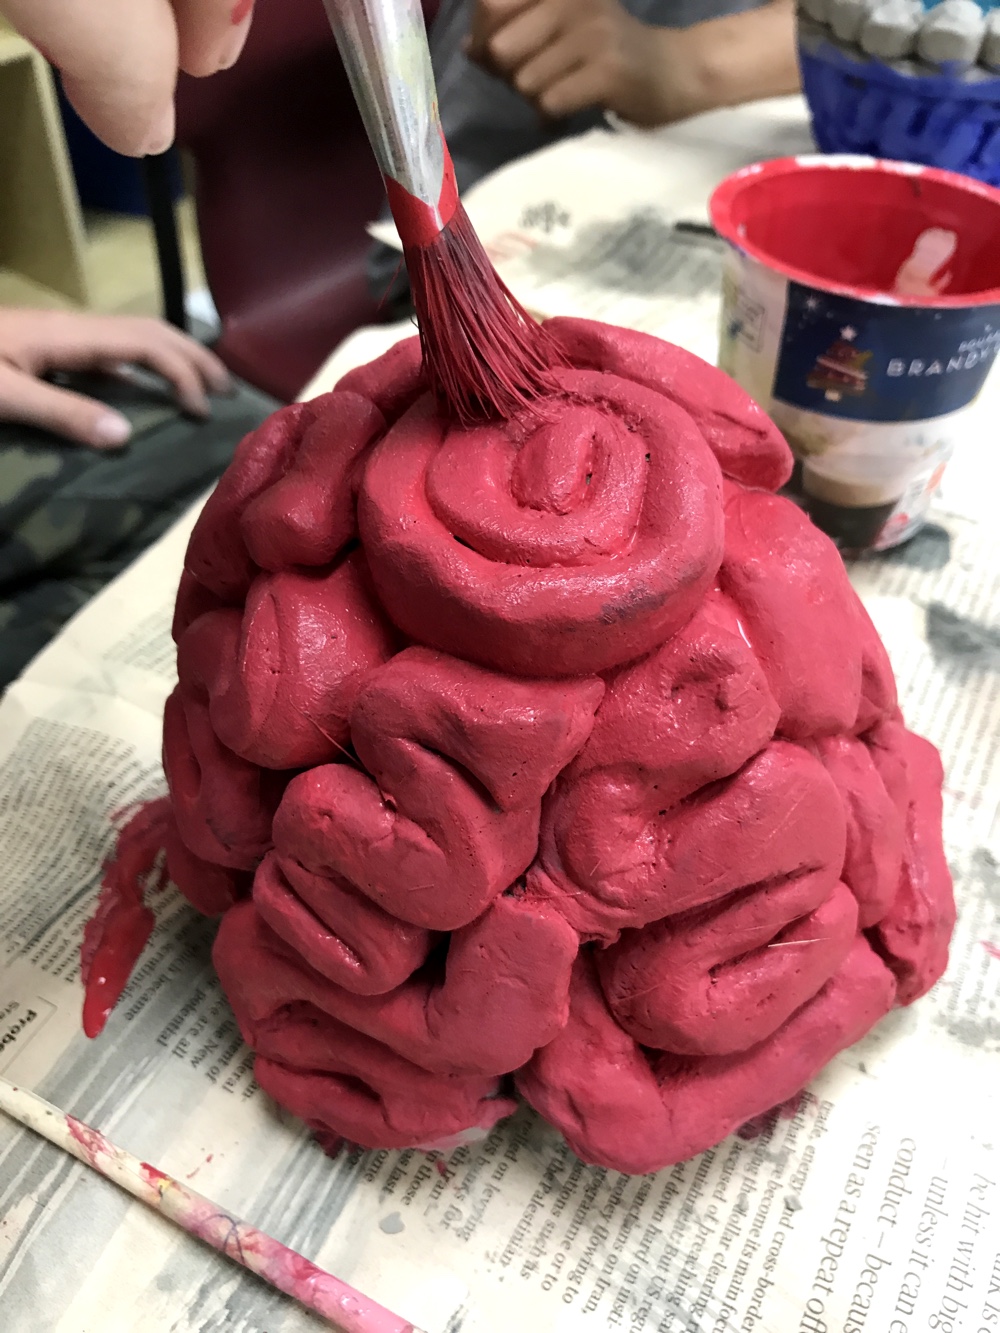
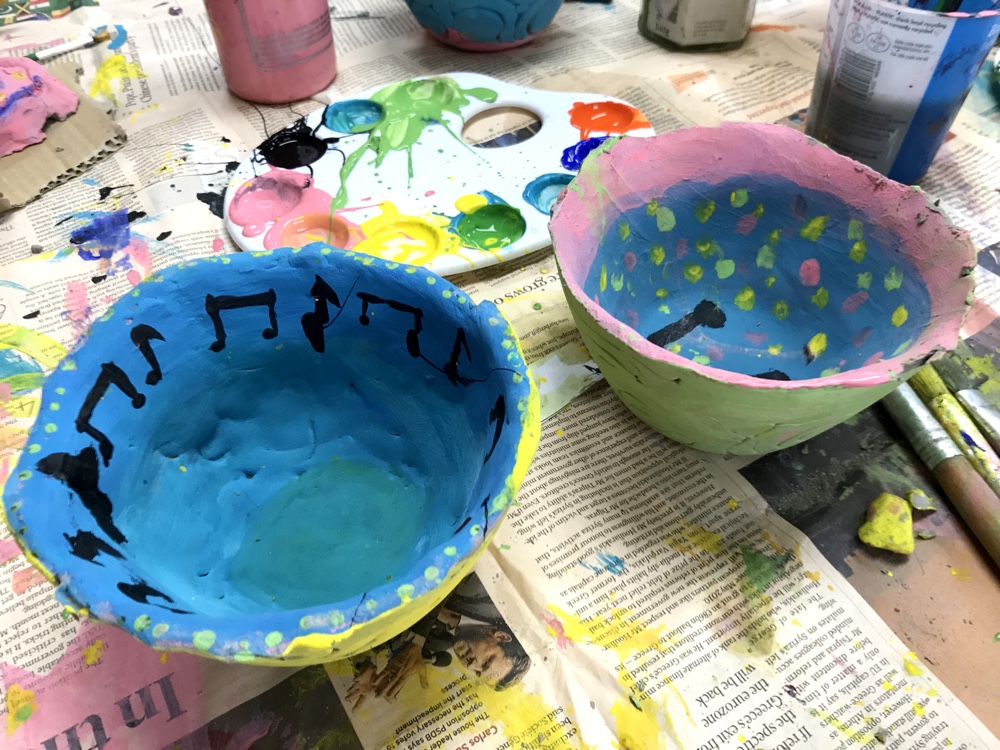
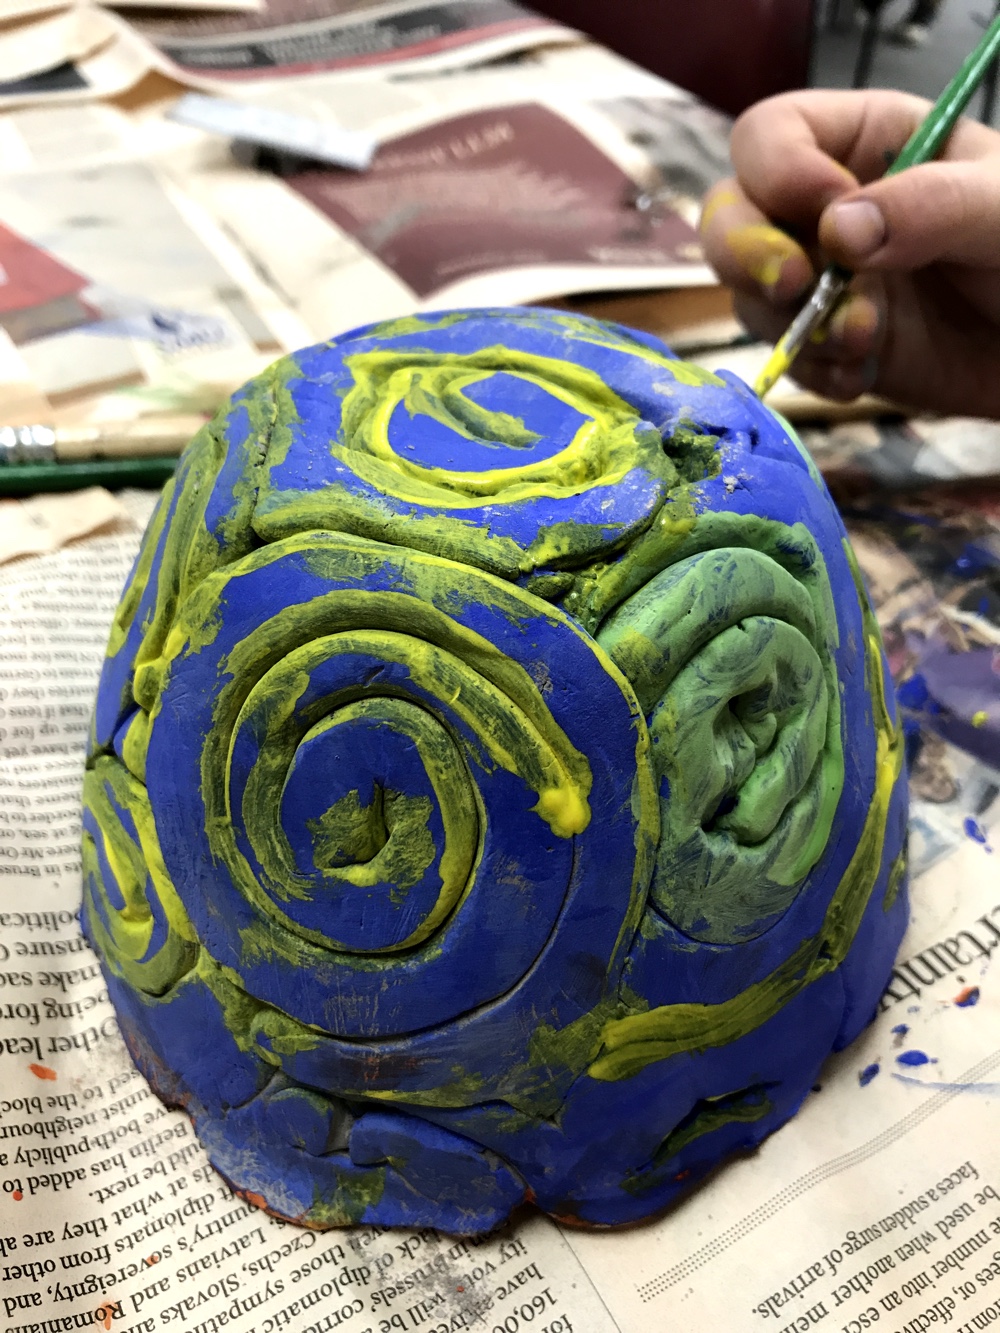
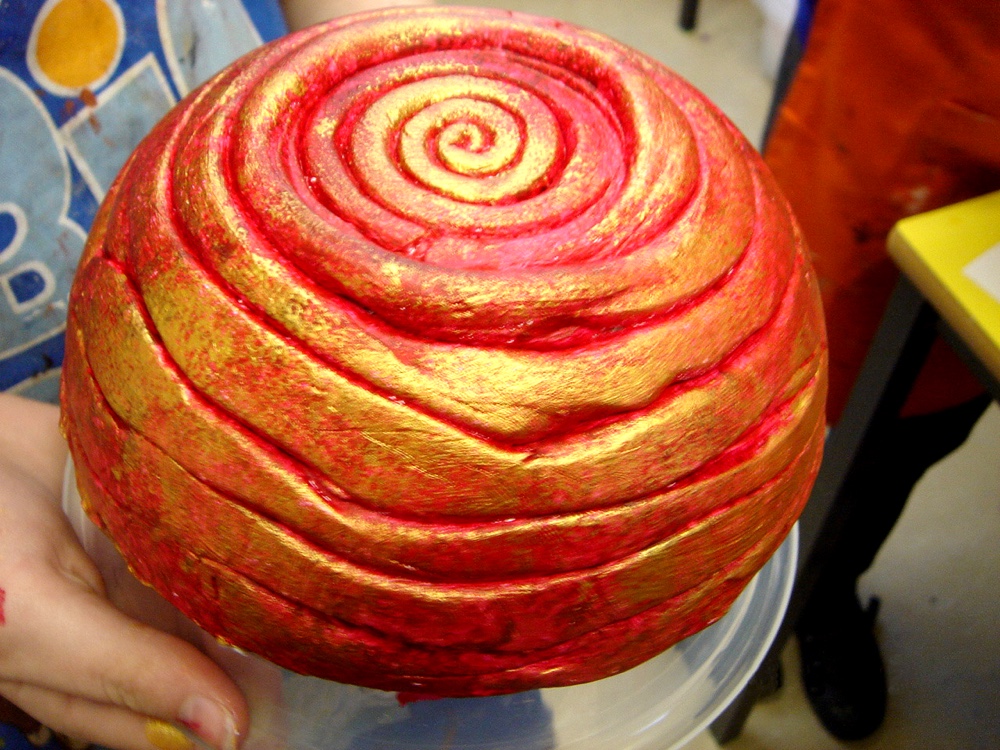
Coil is the name given to the long ‘sausage/worm’ shapes made from rolled out clay. Begin to roll a lump of clay on a flat surface, use your fingers, being mindful to keep the coil nicely even and slightly fatter than a sharpie marker pen. The coils can be modelled into lots of different shapes, students can experiment with spiral discs, zig-zag forms and wavy lengths, all of which can vary in size.
As the coil designs take shape, gently place them into the plastic bowl mould and arrange so that all the coils are touching each other. By softly pressing the coils in place, they will take on the shape of the bowl.
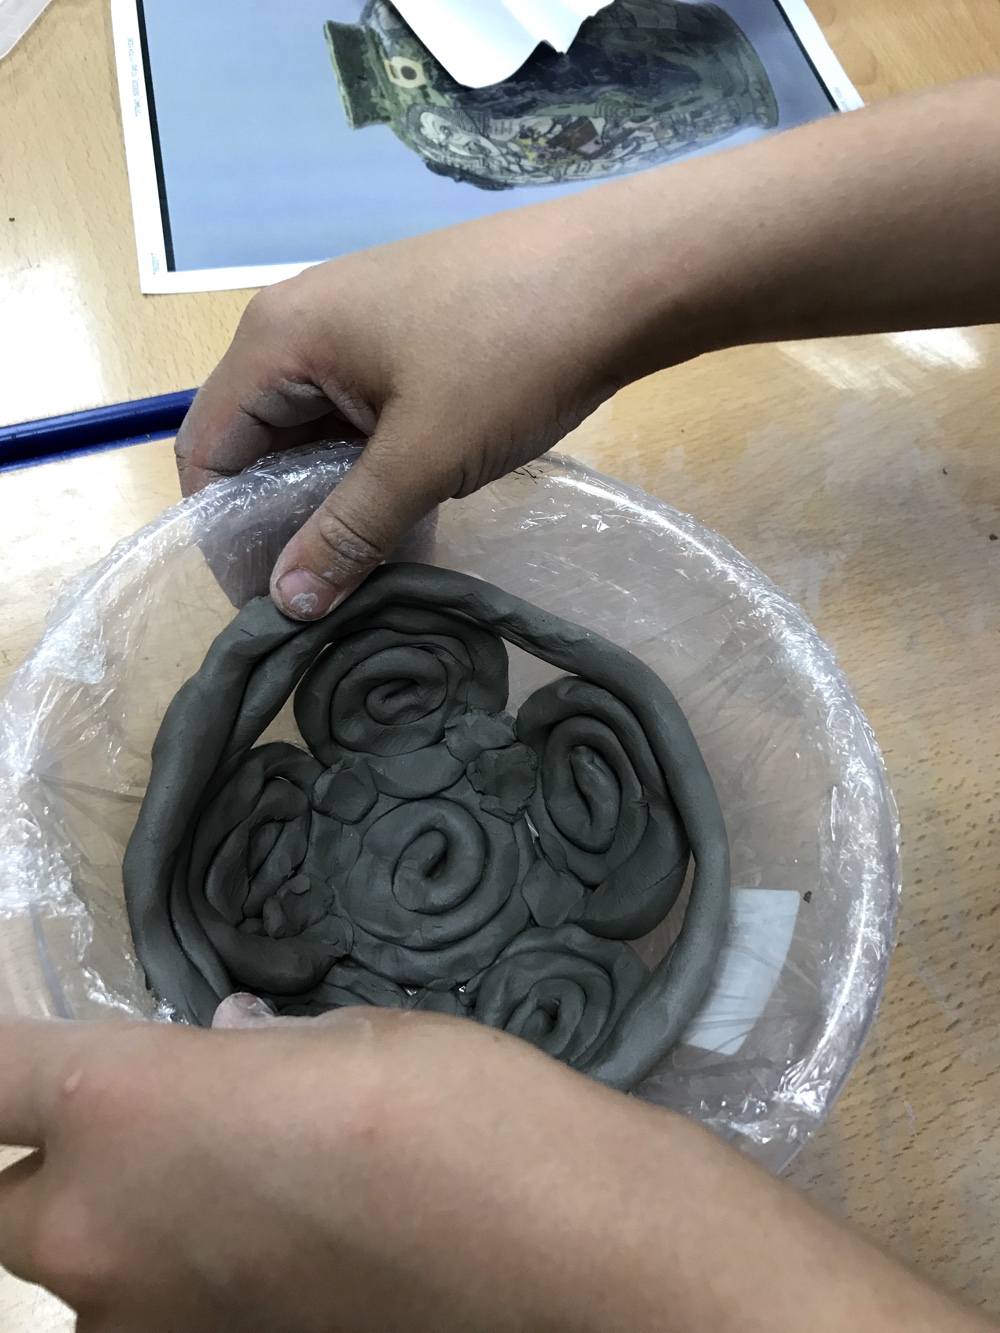
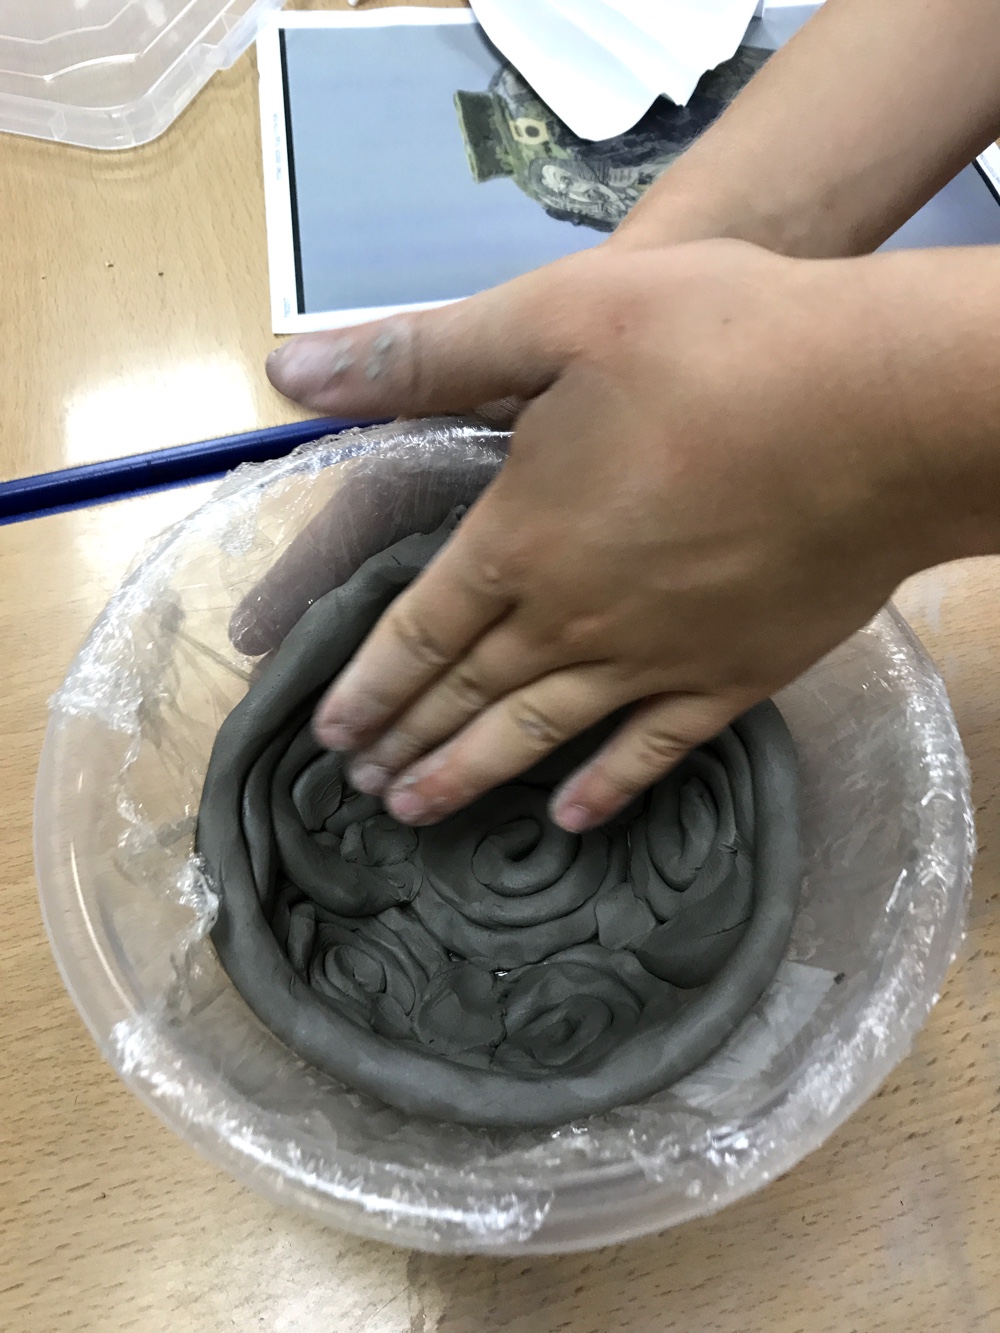
Once the bowl is filled with coil shapes, it’s time to smooth the inside of the clay pot (this ensures the coils adhere to each other and makes the pot more robust). Gently pull fingertips over the clay to blend the coil shapes, you’re aiming to get a lovely smooth finish on the inside of the pot, but still retain the coil patterns on the outside. It’s possible to leave small gaps in some coils to create an artistic effect without compromising the strength of the pot, so experiment! Once smoothed, wipe the inside of the pot with a damp sponge for a flawless finish.
TIP: Sometimes coils can be made too thin, should you find a thin area inside the pot which looks fragile, just take a small amount of soft clay, flatten it slightly and place it over the thin area and blend all the edges into the clay until smooth.
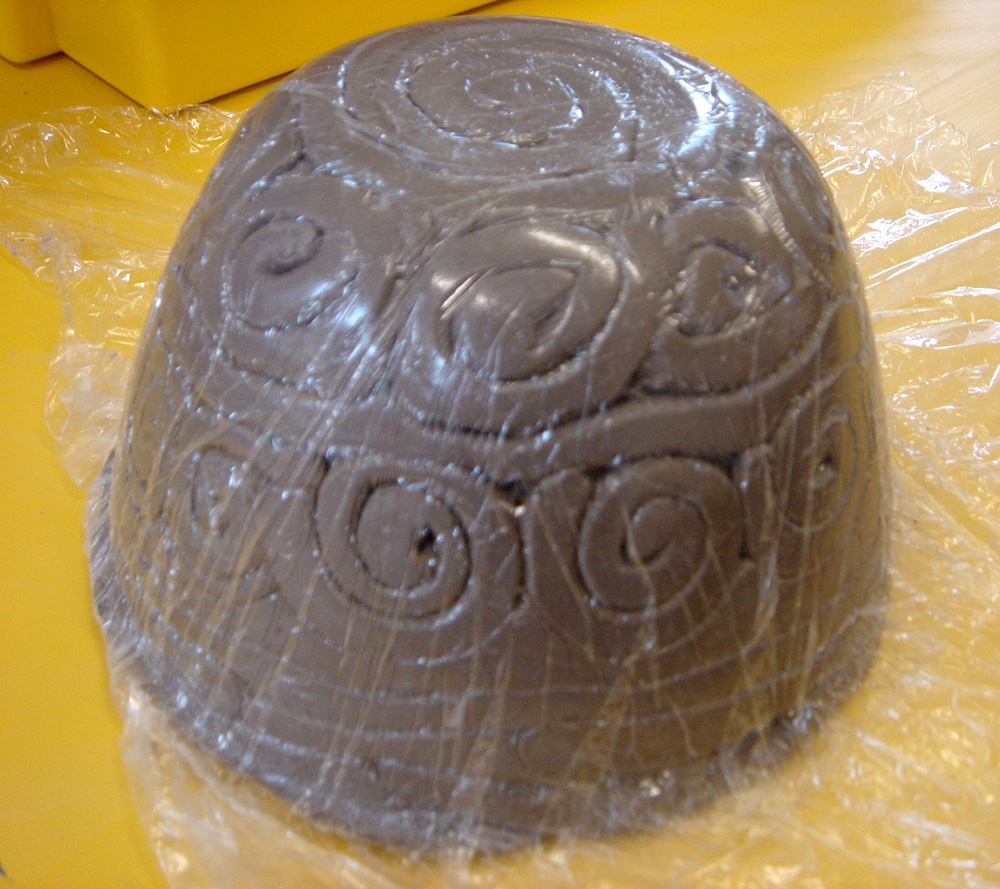
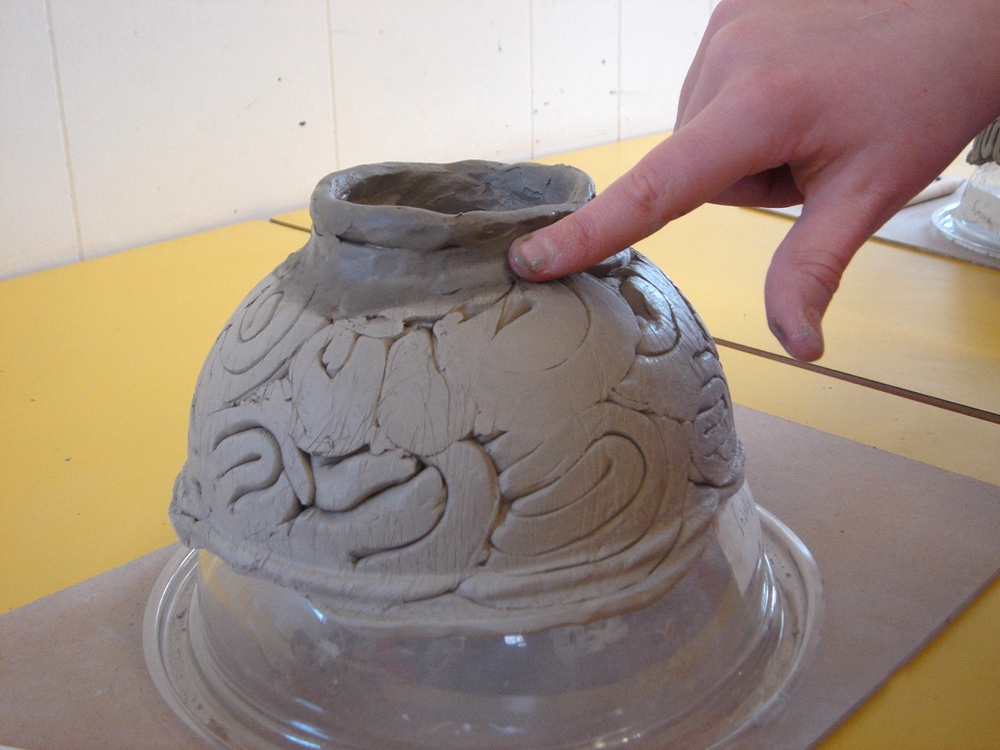
If the clay pot is not too soft, it can be removed from the plastic mould in order to dry thoroughly. Lift the cling film from the mould and peel it away from the clay pot. Leave the pot to dry on a shelf for a few days before painting.
Optional: If students wish to make a stand (foot) for their pot, this will need to be completed before the pot has dried.
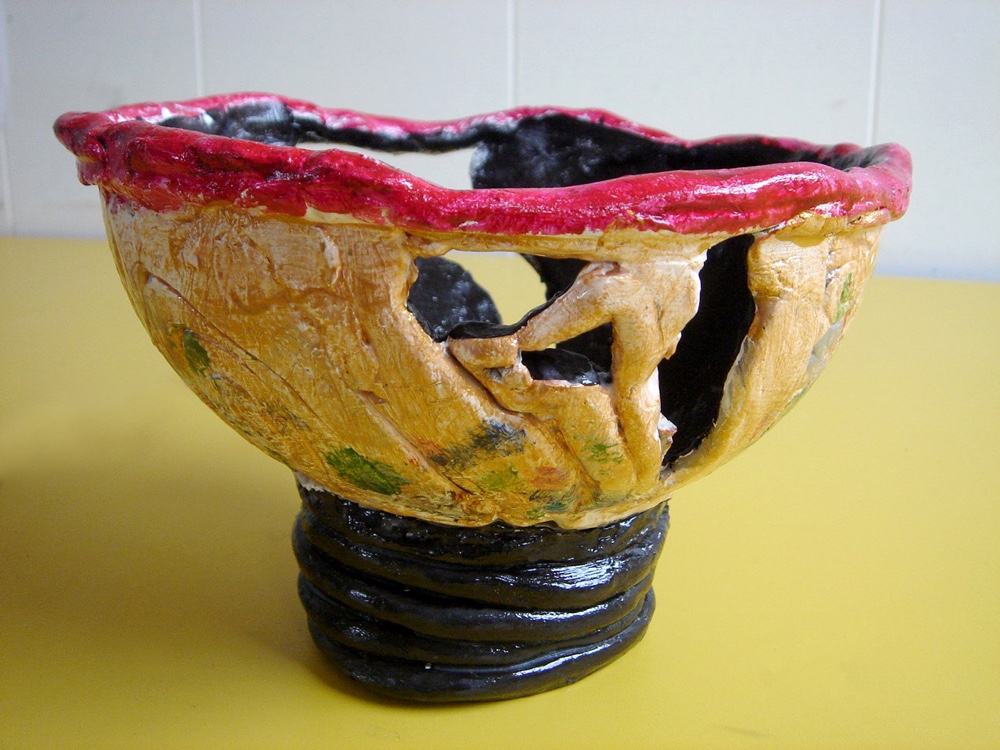
Making a stand (foot)
Begin by having the clay pot with the base uppermost. If the pot has a decorative or asymmetric top edge, then it’s best to place it onto the upside down plastic bowl mould (this will help to keep the pot steady while you work). Make a coil, long enough to fit on the perimeter of the pot base, this will be your stand. Weld the two coil ends together by applying a little slip on each end and smooth the join.
To attach the stand to the pot base it’s important to do some preparation. Begin by scratching lines on the perimeter of the pot base using a sharp tool, such as a bbq skewer. Do the same to the edge of the stand that will attach to the pot base. Using an old paintbrush, apply slip to the scratched lines on the pot base and the stand. Position the stand on the pot base with slip covered sides touching, using a modelling tool or your fingers, smooth clay from the stand onto the pot, creating a seamless join. It’s important to get a good join on the outside and inside of the stand to achieve a strong weld.
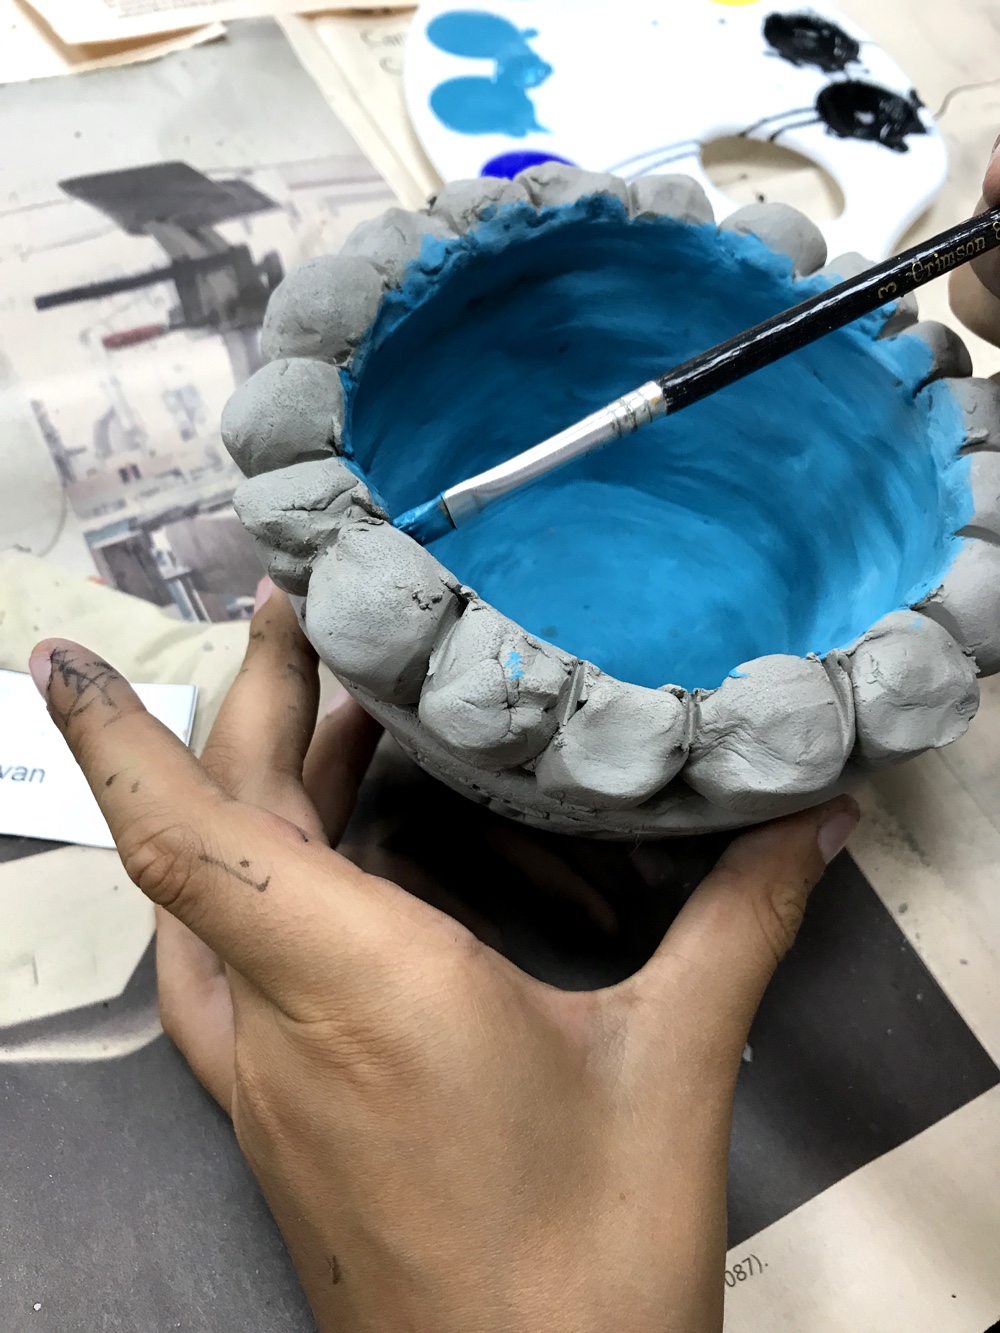
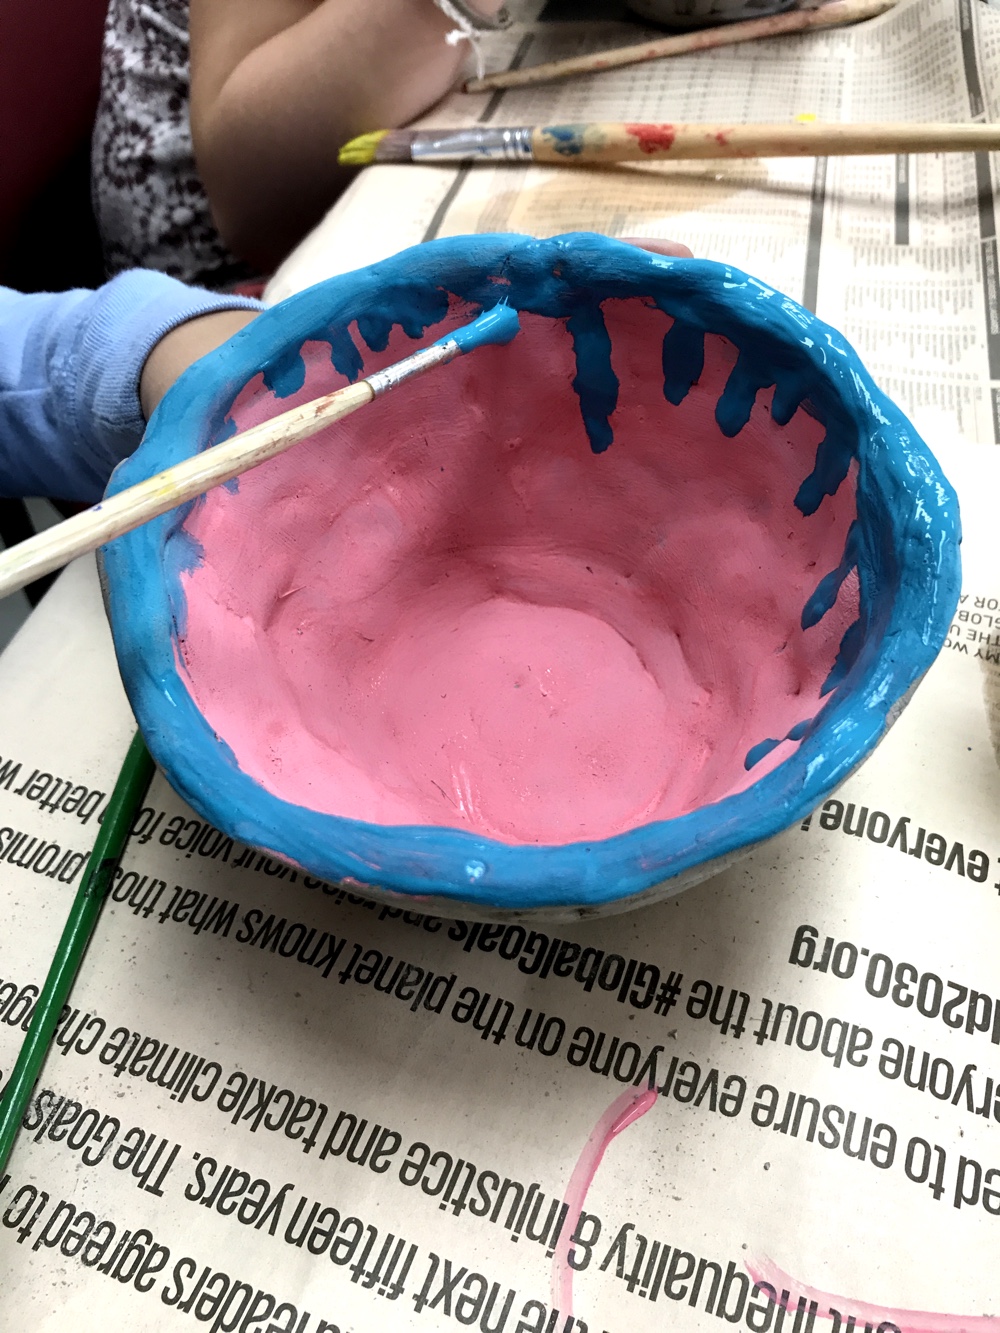
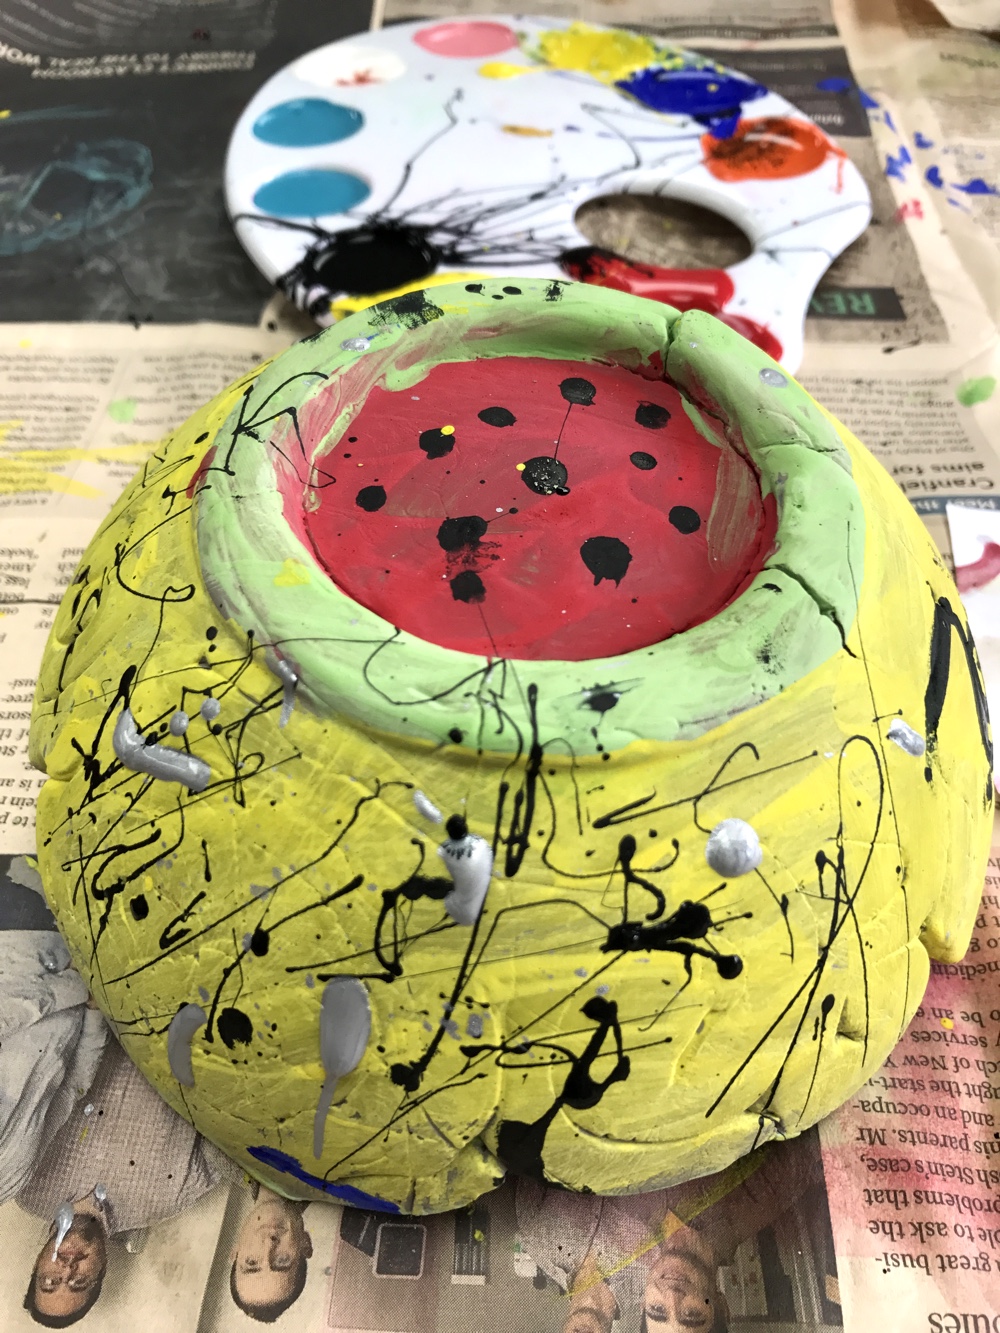
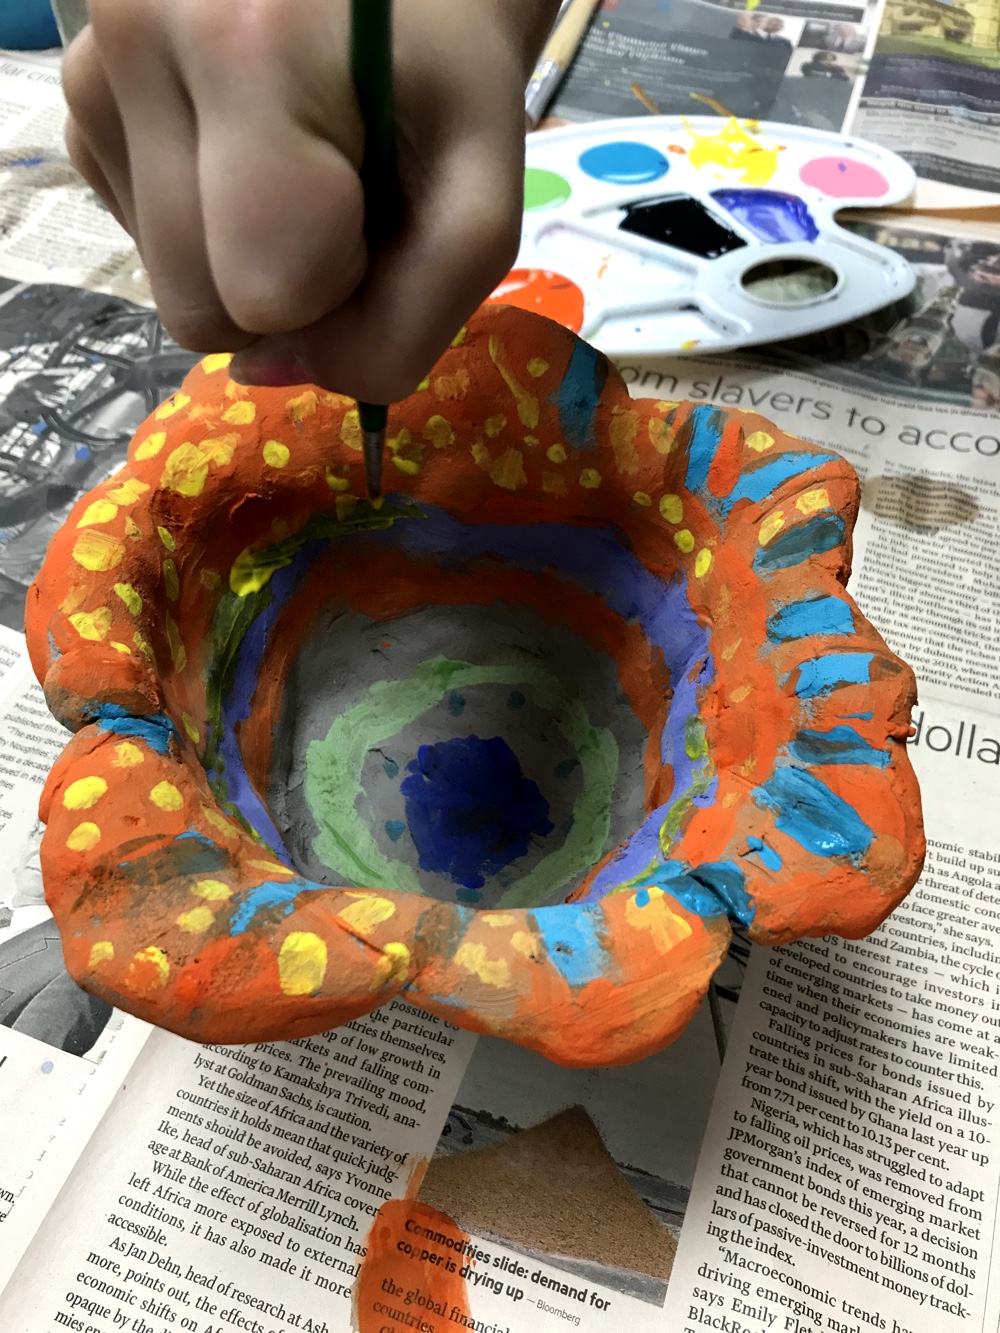
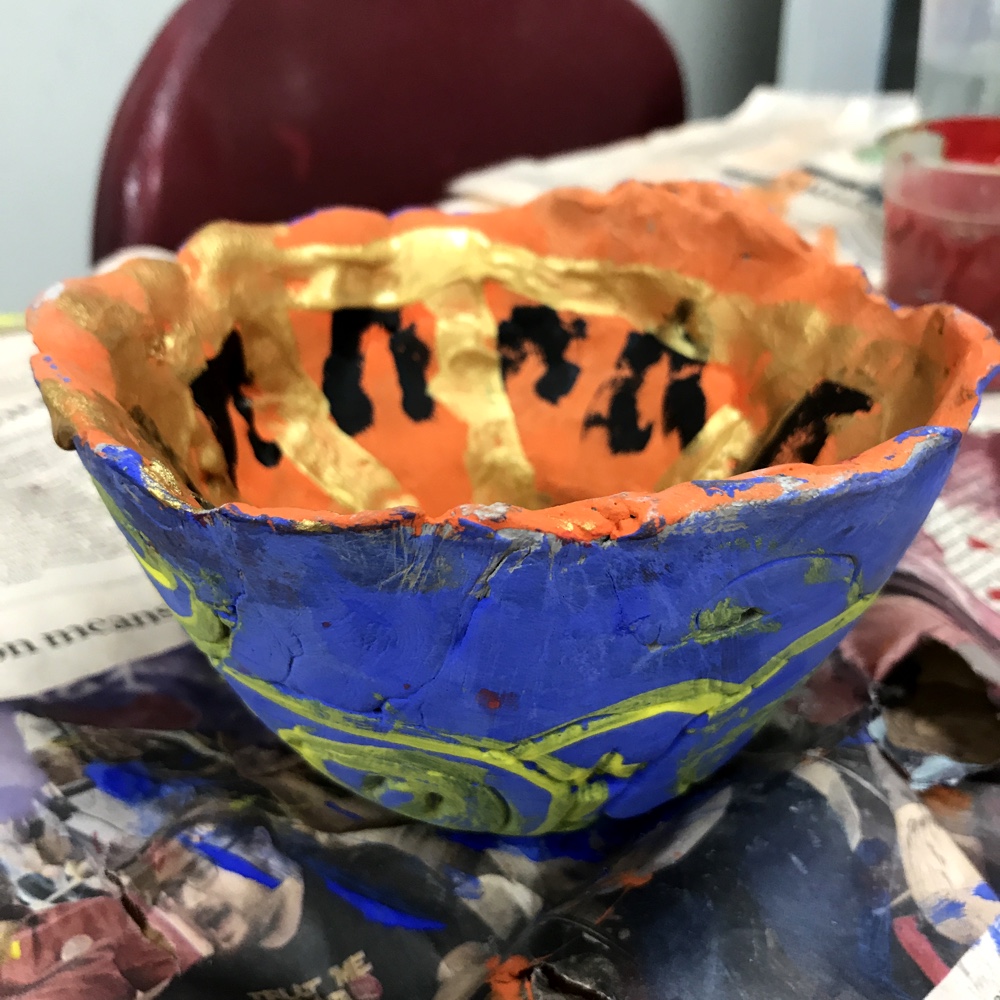
Once the pot is completely dry (this may take a few days depending on how thick the coils are), it can be painted. Students from the Weston Park Art Club painted their pots in their own design, using a selection of poster and acrylic paints, but you could have students paint their pots inspired by a particular art movement or artist that links to current classroom projects.
Handy hints for clearing up
Hands and tools should be cleaned in a bucket/bowl of water and not in a sink as clay will block the drainpipes. Clay dries to a fine dust and this is not good to breath in, wipe work surfaces and floors with a damp cloth rather than sweeping the dust away.
Big thanks to Weston Park Art Club for the use of their photos for this resource.
See more resources for AccessArt by Sharon Gale here
Hannah
August 24, 2022 @ 2:38 am
Do you remember which brand of air dry clay you used? I’m impressed with it’s strength and how it dried so much lighter in color.
Paula
August 25, 2022 @ 2:20 pm
Hello I don’t know which brand was used but try this brand https://www.scolaquip.co.uk/air-hardening-clay/ available through various school supplies