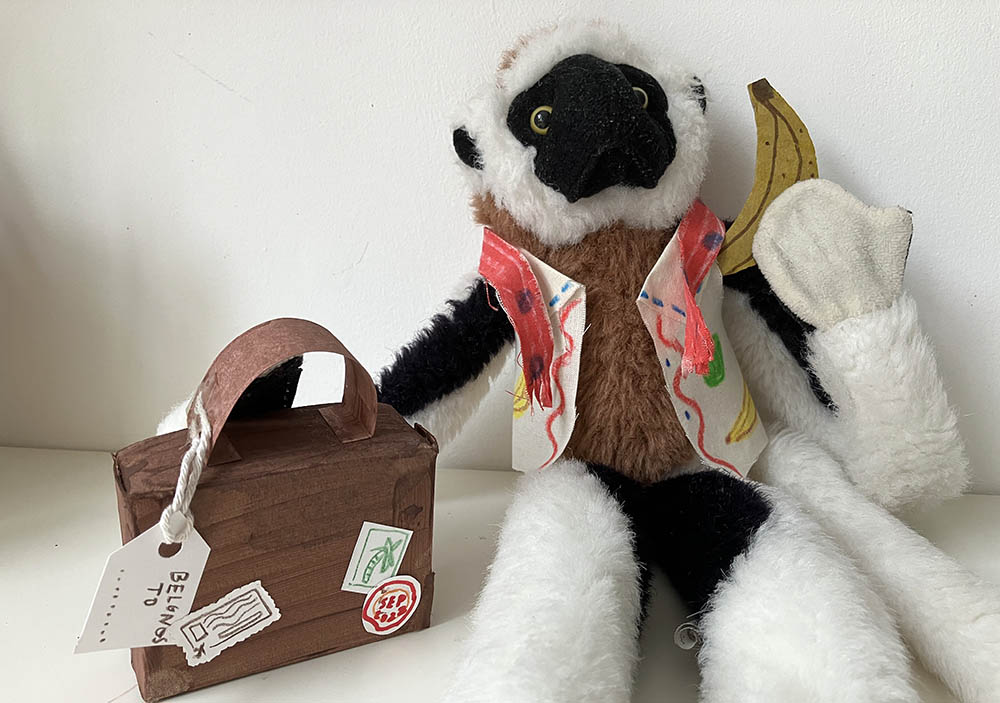
Exploring Macbeth Through Art: Witch’s Capes

By Rachel Thompson

In this second of six resources on Shakespeare’s Macbeth, children are invited to look closely at the witches and the role they play in the story.

The aim of this session is to build on the charcoal skills used in session one, and use further skills in paper manipulation/construction to create an imagined costume cape for the witches.

Back to all six sessions here.

Session Two: The witches
Warm Up: Approx 15 minutes
Main Activity: 45 minutes
Materials needed: Cartridge and sugar paper, newsprint, charcoal, pencils, coloured pastels, coloured chalks, wax crayons, fabric scraps, masking tape or glue, garden twine/embroidery thread and embroidery needles (if available)
Focus Theme/s: Appearances Vs Reality, The Supernatural

Time to Warm Up! Building layers of drawing materials and observing fabric.

Using what you’ve learnt from session 1 about using two materials together (charcoal and pencil) we’re going to do the same but adding in some new materials. We’re also going to learn a bit about observational drawing.

Take some scraps of fabric. Cotton, calico, and other natural fabrics work best for this. Tear and shred the fabric to ‘distress’ it. You can use scissors for this, or perhaps your hands. Then, either hang the fabric up so you can see it, or have some in front of you on the table. Take some paper and a drawing pencil. Look closely at the folds and draping of the fabric, observe the tonal changes where the fold catches the light or casts a shadow. What effect do the tears and distressed look have?

Begin to draw what you see.

Observing distressed fabric.

This doesn’t need to fill the white paper. You may prefer to start small and work up to a bigger drawing. You may want to ‘zoom’ in on tiny details and make a series of small sketches.

Looking close at torn fabric.
Once you have worked on the sketches with the pencils, choose another material. Let’s see what pastels and chalk can do. Can you shade in some shadow? Can you use pale colours to highlight the lighter areas?

A small detailed sketch of a piece of worn fabric.
Choose another material. What happens when you work this into your drawings? Does anything happen to the paper? How about wax crayons? They create a particular kind of surface on paper – can you draw over this or does it resist?
Keep the fabric to hand as you will need this in the main activity.

Observing a piece of fabric distressed with charcoal.

Starter Discussion:
In the play Macbeth, appearances are not quite what they seem. When Macbeth and Banquo, returning from battle, meet the witches on the heath Banquo is shocked at their appearance and wonders who they could be.

‘…What are these,
So wither’d, and so wild in their attire,
That look not like the inhabitants o’ the earth,
And yet are on ‘it? – Live you? Or are you aught
That man may question? You seem to understand me,
By each at once her chappy finger laying
Upon her skinny lips: – you should be women,
And yet your beards forbid me to interpret
That you are so’
(Act 1 Scene 3)

What images of the witches’ appearance are conjured by this description? How can we tell they are forces of evil rather than forces of good? Banquo’s physical revulsion at the witches is clear. What do you think Macbeth’s reaction to them says about him?

‘Stay you imperfect speakers, tell me more’
(Act 1 Scene 3)

Why does Macbeth want to hear more of what the witches have to say?

Context:
The witches use words that have a double meaning to fool Macbeth.
Shakespeare’s audience would have been very scared of witches and evil spirits – and would have held fear of supernatural powers beyond the real world. The opening scenes that introduce us to them would have set the tone of what is yet to come.
Without the use of modern staging methods such as electric lighting or sound effects, Shakespearean actors would have relied more on their voice and movement as well as their costume. The sound of thunder was sometimes made by rolling stones over lead sheets!

Main Activity: Making a Witch’s Cape

We are going to look at how a character’s appearance can inform us of who they are as person, and how we can use drawing to communicate this understanding.

You’re going to create the effect of the ‘wither’d and wild’ clothing worn by the witches using paper and layers of drawing materials.

Step 1: First, take a large sheet of A2 cartridge or sugar paper and scrunch it up gently in your hands. Open it out again and repeat the process. Do this until the paper becomes softer and more mailable.

Scrunching sugar paper to make a paper cloak.


Scrunching and smoothing paper.

Smooth the paper out flat. Then, choose some drawing materials – charcoal, pastels, chalks, pencils etc. Imagine your paper is going to become withered fabric worn by the witches. Using what you leant in the warm up about building materials, begin to work into the paper.

Working charcoal into sugar paper.

This time, you are not observing fabric while you draw – but taking the qualities of that fabric and creating your own impression of this using mark making on paper.

Adding charcoal to sugar paper.


Tearing and using charcoal.

Think carefully about the colours. What colours do you associate with the witches? What colours communicate evil, death, destruction? Notice how the texture of the paper changes as you keep building the layers.

Working colour into scrunched sugar paper.

Take another piece of paper and repeat this process. Once you are happy with your layers, move onto Step 2.

Step 2: Starting on one longer edge, gently tear strips of the paper towards the middle. Stop at the middle and repeat, working your way along one edge and tearing at varying distances towards the middle.

Try to make points in the loose/torn ends, rather than retaining the straight edges. Observe the distressed fabric from the warm up if it helps you develop your making.

Keep working into your two pieces of paper. Try not to rip it up completely – you should still be left with two single pieces of paper, albeit ripped and distressed.

If you think it needs it, work in some more drawing or painting materials.

Adding paint to ripped sugar paper.


Layering paper

Layering both materials and the paper itself is key to making an effective cape. Hold your two pieces of torn paper over one another. You now need to attach them together. You can either do this by using masking tape (folding it on itself and taping to the underside so it’s not seen), or you can use needles and thread. You will need an embroidery thread and needle for this as regular cotton will be too thin.

If you are stitching, do a loose running stitch along the edge of your overlapped paper. Your cape should begin to form as you gather the paper together, moving it along the thread as you work. Once you have stitched to the end and gathered enough, tie a knot in the thread to secure it. If you are using tape, try and scrunch and overlap the paper as you stick it to create volume and texture.

Try it on for size over your shoulders. Trim, tear, fold and scrunch the paper until it feels right. Don’t worry if it falls apart a bit – embrace the withered nature of it!

Trying on a paper cape.


Trying on a paper cape for size.

Keep trying them on as you make. Make your own creative choices on its appearances. Can any deeper colours enhance your cape?

The rhythm and rhyme of the witches’ lines sound like they are casting a spell. Try reading them out loud as you embody their character:

‘Fair is foul, and foul is fair:
Hover through the fog and filthy air’

Keep your capes safe as you’ll need them for session 3!


Reflection:

Pin the capes up or invite all the children to put them on.

Invite anyone who would like to, to show and talk about their cape.

Can you explain which drawing materials you used and what differing qualities they have? Which material did you prefer and why?
Can you think of some other ways to make a cape like this?

If you were an actor performing the role of one of the Witches in a production of Macbeth, how might wearing your withered cape help your performance?


This is a sample of a resource created by UK Charity AccessArt. We have over 1500 resources to help develop and inspire your creative thinking, practice and teaching.

AccessArt welcomes artists, educators, teachers and parents both in the UK and overseas.

We believe everyone has the right to be creative and by working together and sharing ideas we can enable everyone to reach their creative potential.


Learning from Permaculture Design Principles


Making a Treehouse

You May Also Like…

Pathway: Stick Transformation project

This is featured in the 'Stick Transformation Project' pathway

This is featured in the ‘Stick Transformation Project’ pathway

Talking Points: treehouses

Treehouse Vimeo Screenshot


Mixed Media Landscape Challenges

See This Resource Used In Schools…

Year 5, Whitchurch Primary
Year 5, Winslow CE School
Year 5, St Teresa’s Roman Catholic Primary School

You May Also Like…

Pathway: Mixed Media Land and city scapes

This is featured in the 'Mixed Media Land and City Scapes' pathway

This is featured in the ‘Mixed Media Land and City Scapes’ pathway

Talking Points: Kittie Jones

Layered Landscapes by Kittie Jones

Talking Points: Vanessa Gardiner

Vanessa Gardiner- Landscape Painter https://vimeo.com/211454959

Talking Points: The Shoreditch Sketcher

Royal Academy by The Shoreditch Sketcher


A Visual Poetry Zine with Monotype

See the Resource Used in Schools…

Littleport Community Primary School Year 5 Making Monotypes - these were inspired by Sea Fever the poem by John Masefield

You May Also Like…

Pathway: Making Monotypes

This is featured in the 'Making Monotypes' pathway

This is featured in the ‘Making Monotypes’ pathway

Talking points: What is a monotype?

Monotype Vimeo Screenshot

Talking Points: Kevork Mourad

Kevork Mourad: the making of Seeing Through Babel https://vimeo.com/347106795


Osakana


Making Sculptural Birds

See This Resource Used In Schools…

Birds made by Year 3 Selbourne Primary School
Year 4
Year 1
Year 2 Trumpington Park Primary School
Year 2, Aboyne Lodge Primary School
Year 1 at Sydenham High Prep School
Year 2, Ruth at Carden Primary School

You May Also Like…

Pathway: Making Birds

Featured in the 'Making Birds' pathway

Featured in the ‘Making Birds’ pathway

Talking Points: Inspired by Birds

Fulmar Petrel from Birds of America (1827) by John James Audubon


Which Artists: Tatyana Antoun

What We Like About This Resource….

“The research phase of a creative project can be presented in many different ways, and can even be an art form in itself. Here, Tatyana demonstrates how her sketchbooks became a medium through which she expressed her thoughts, refined her ideas and explored materials. We believe sketchbooks to be a powerful tool for children to take ownership of their ideas and travel on their own creative journey, without necessarily knowing the destination. Take a look at our sketchbook journey for more sketchbook inspiration” – Rachel, AccessArt.

You Might Also Like….

Sketchbooks and Thinking Skills

Sketchbooks and Thinking Skills

Sketchbooks for Designers - an Introduction for Children

Sketchbooks for Designers – an Introduction for Children

Using Sketchbooks to Take Ownership of Ideas

Using Sketchbooks to Take Ownership of Ideas


Which Artists: The Life & Works of Madge Gill

What We Like About This Resource….

“The life of Madge Gill that Sophie Dutton recounts here gives us real insight into the challenges that Madge Gill experienced, and how these challenges would have been common among women at the time. When we study the work of Artists, it adds a rich context to our experience of their work to consider their personal history, and helps us ask questions like ‘why do you think the Artist painted in this way or was inspired by this subject matter?’ If you introduce your class to Madge Gill, begin with looking back over her younger life to try and better understand her motivations as an Artist” – Rachel, AccessArt

You May Also Like….

I am AccessArt: Ann Rippin

I am AccessArt: Ann Rippin

Making Batik Textiles in the Classroom

Making Batik Textiles in the Classroom

How I Use Drawing and Sketchbooks

How I Use Drawing and Sketchbooks


Transformation of Materials Inspired by El Anatsui

See This Resource Used in a Pathway…

cardboard structure 1b

Transforming Materials into Sculpture

This pathway shares how teachers might take inspiration from El Anatsui and encourage pupils to think how they might disassemble objects around them to transform them into sculptural pieces. Read More. 


The Transformation Project

You May Also Like…

cardboard detail 3b

Transforming Cardboard with Andrea Butler

Artist Andrea Butler shows how to explore simple design and construction using cardboard and jewellery. Read More


Collage Streets

What We Like About This Resource….

“This project provides a real opportunity for children to engage with a range of different processes to produce truly individual final results. Jan Miller is an experienced teacher and connects her projects well with learning outcomes. In this case, children are encouraged to have a loose approach and to make their own creative decisions – which is such a valuable part of any child (or adults!) creative education”. – Rachel, AccessArt

You Might Also Like….

Painted Houses

placing roof over house frame

One Line Street

Teaching Drawing

Responding to Place

Collaged landmarks of Oldham ready for display - Claire Mather


World War I Mail Art

What We Like About This Resource….

“This project links poignant subject matter with meaningful art processes and local history. What we learn about the re purposing of materials, (in this case spent ammunition) re affirms how we can use what is around us as a starting point to making and creating. You could extend or adapt this project by looking at broken pottery, re purposing that into new sculptures that link with Roman or other local historical cultures” – Rachel, AccessArt

You May Also Like….

Henry Moore's Shelter Drawings

Henry Moore’s Shelter Drawings

Remembrance Day Soldiers

Remembrance Day Soldiers

For Remembrance Day

For Remembrance Day


Which Artists: Theresa Easton

What We Like About This Resource….

“It’s interesting to hear Theresa describe Printmaking as a social activity, with the shared use of materials and equipment so central to the practice. This could be a positive way of working for lots of children in school, where instead of just working on individual art work, they can collaborate and embrace the creative sharing experience!” – Tobi, AccessArt.

You Might Also Like….

Monoprint Animals

Monoprint Animals

Screen printing Inspired by Matisse

Screen printing Inspired by Matisse

An Exploration of Shepherd Fairey

An Exploration of Shepherd Fairey


An Exploration of Pandora’s Box

You Might Also Like….

Ancient Greek Lyres

Ancient Greek Lyres

Decorative Coil Clay Pots

Decorative Coil Clay Pots

Visual Arts Planning: Clay

Visual Arts Planning: Clay


Creativity Medals

See the Resource Used in Schools…

Year 1, Ruth at Carden Primary School, Brighton

What We Like About This Resource….

“The sentiment behind this resource idea is lovely and it provides an opportunity to really develop some fine motor skills as well as independence of approach. Taking ownership of the medal design means the sense of achievement is heightened beyond the children just being given one. You can really imagine the positive energy that would surround this activity within a classroom, with each child working on a shared project but embarking on their own creative journey.”  – Rachel, AccessArt

You May Also Like….

Pathway: Playful Making

Featured in the 'Playful Making' pathway

Featured in the ‘Playful Making’ pathway

Talking Points: Introduction to sculpture

What is Sculpture

Clay Art Medals

Clay Art Medals by Sharon Gale

Talking Points: Nnena Kalu

Jennifer Lauren Gallery Work By Nnena Kalu

Talking Points: Linda BEll

Linda Bell at Arts Fringe


Making Musical Instruments

What We Like About This Resource….

“It’s great to see music being explored in this way, and combining it with making creates a really interesting immersive project. This activity would work well as part of an extended project looking at musical instruments around the world and some of the natural materials they are made from.” – Rachel, AccessArt

You Might Also Like….

Pathway: Music and art

This is featured in the 'Music and Art' pathway

This is featured in the ‘Music and Art’ pathway

talking points: wassily Kandinsky

"File:Vasily Kandinsky, Improvisation No. 30 (Cannons), 1913, 1931.511, Art Institute of Chicago.jpg" by Wassily Kandinsky is marked with CC0 1.0.

drawing source material: orchestras

Orchestra

A Cheerful Orchestra

One of our favourite musicians!

Talking Points: Linda BEll

Linda Bell at Arts Fringe

Talking Points: Nnena Kalu

Jennifer Lauren Gallery Work By Nnena Kalu


Touch Wood

What We Like About This Resource….

“You can get a real sense of the environment in this post and how this could provide so much inspiration for creative projects. We are aware there the challenges to exploring the outdoors when many schools are in towns and cities. A way around this could be to have a regular collection of natural objects within the classroom and using them as a stimulus to respond creatively in sketchbooks or in extended projects” – Andrea, AccessArt

You Might Also Like….

Woodland Exploration

Woodland Exploration

A Passion for Woodworking

A Passion for Woodworking

Visual Arts PLanning: Tees, Forest and Landscapes

Visual Arts PLanning: Tees, Forest and Landscapes


Which Artists: Cas Holmes

What We Like About This Resource….

“The sense of journey and feeling of movement is such an interesting part of Cas’ textile work here. We love how location and place is communicated through the variety of fluid and meandering textile marks used. Cas’ Romani background as well as early experience living in Japan make for a rich cultural backdrop to her work. The themes here could be explored in the classroom by asking children to use memories of places they’ve visited to produce a creative response using fabrics and mixed media” – Rachel, AccessArt

You Might Also Like….

Draw Your Home

Draw Your Home

Working With and In the Landscape

Working With and In the Landscape

Landscape Sculptures

Landscape Sculptures


Working with Dogwood

What We Like About This Resource….

“It’s lovely to see a resource that centres on a particular material and the scope it offers. I particularly like how the dogwood is used here to make wooden beads. This idea could be developed further by looking at how wood has been used to make jewelry throughout history and within many different cultures.” – Rachel, AccessArt.

You Might Also Like….

A Passion for Woodworking

A Passion for Woodworking

Woodland Exploration

Woodland Exploration

Visual Arts Planning: Trees, Forests and Landscape

Visual Arts Planning: Trees, Forests and Landscape