Disciplines: Architecture, Drawing, Sketchbooks, Collage, Making
Key Concepts:
That architects design buildings and other structures which relate to our bodies and which enhance our environment.
That architects take inspiration from the environment their building will exist in, and from the people they will serve, to design exciting structures.
That we can use drawing as a way to help us process and understand other people’s work.
That we can use digital tools such as drones and film to inspire us.
That we can use our imaginations to make architectural models to explore how we might design buildings relating to a particular need or stimulus.
That we can use “Design Through Making” (some call it Make First) as a way to connect our imagination, hands and materials.
This pathway gives pupils the opportunity to explore architecture. We start with an exploration of architects and some of the ways they work, and pupils then go on to create their own architectural model.
The pathway can be adapted so that the pupils make architecture which relates to their own environment, a chosen brief, or in response to another culture, country or era.
This pathway will take approximately half a term, based upon a weekly art lesson.
If you use this resource in your setting, please tag us on social media: #InspiredBy @accessart (facebook, twitter) @accessart.org.uk (instagram) and share the url. Thank you!
I have explored the work of some architects. I have seen that they design buildings, and that “architecture” can be large, incredible buildings, or smaller places near where I live.
I can share how architecture makes me feel, what I like and what I think is interesting.
I can use my sketchbook to help me look at architecture really carefully. I have used drawings and notes. I have explored line and shape.
I have seen how architects use their imaginations to try to design buildings which make people’s lives better and I can use my own imagination when thinking about architecture I might design.
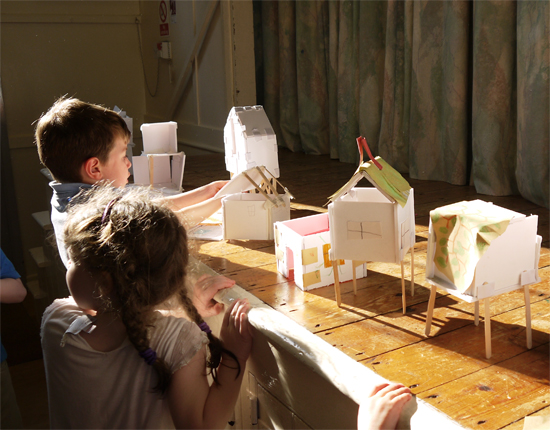
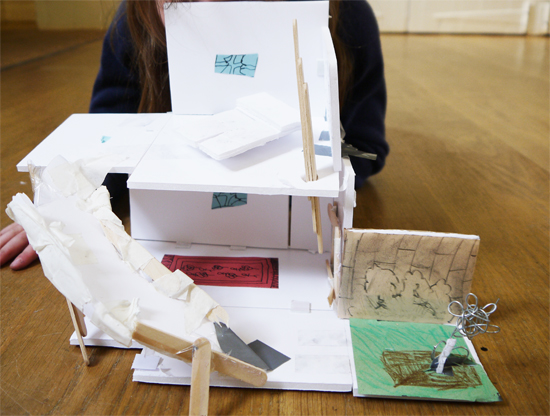
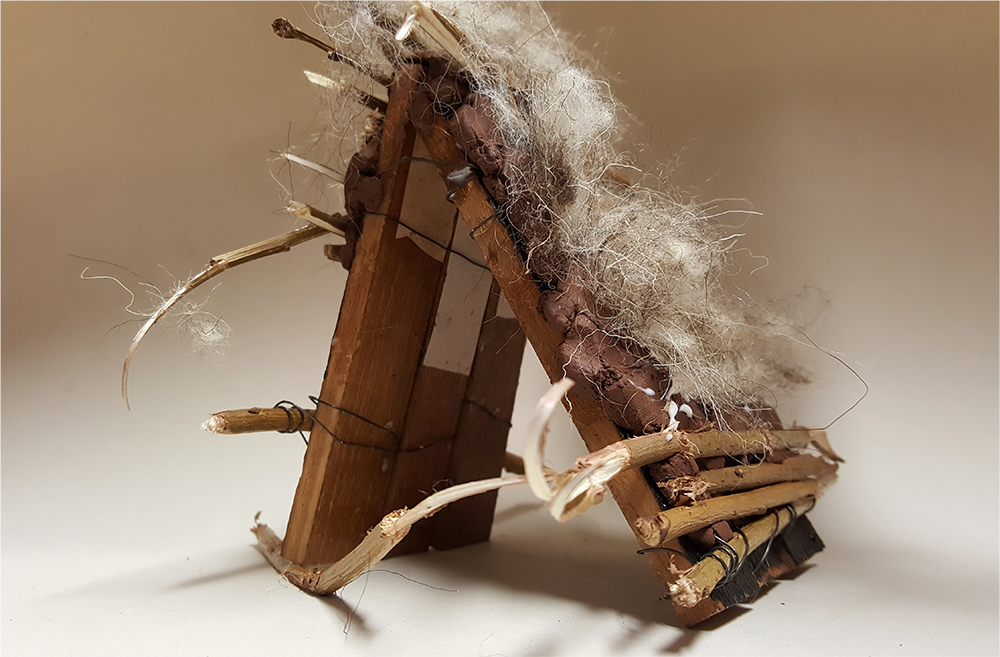
I can make an architectural model of a building around a theme thinking about form, structure and balance, and the way the model looks.
I can explore a variety of materials and explore how I can reshape the materials and fasten them together to make my model.
I have seen that I don’t need to design on paper first; that I can design as I make.
I have reflected upon what I have made, shared it with others, and been able to share my thoughts about my own piece and the models of my classmates.
I can used digital media to document my work, including taking photographs and short videos.
Time
This pathway takes 6 weeks, with an hour per week. Shorten or lengthen the suggested pathway according to time and experience. Follow the stages in green for a shorter pathway or less complex journey.
Materials
Soft B pencils, coloured pencils, felt tip pens, handwriting pens,
This pathway aims to introduce children to the idea that architects design and make buildings, and to give pupils the opportunity to explore architecture around them, and to create their own architectural models.
Create a conversation around more well known architecture and architecture in your local environment. What are the landmarks in your area – old or new?
Drawing to Aid Looking
Explore & Draw
Invite children to work in sketchbooks. Use the free to access “Drawing Source Material: Exploring Architecture” resource to inspire drawings using the pupil’s chosen drawing medium. We suggest using a handwriting pen, and challenging the pupils to make several drawings – perhaps taking no longer than 5 or 10 minutes each. Guide the children with your voice during the drawing session to the things you would like them to notice.
Use the images and videos to frame a discussion around his work and enable the pupils to articulate their response.
Drawing to Aid Thinking
Show Me What You See
Use sketchbooks and the “Show Me What You See” method to help pupils with “Making Visual Notes” about what they see and think. They might use pen, pencil, coloured crayons, felt tips, to gather information and collect ideas as they see the images on the whiteboard. Make sure any notes they write can be single words (i.e. they don’t have to write full sentences).
Weeks 3,4 & 5
Making Architecture
Use the “Be An Architect” resource to enable pupils to create their own architectural inventions.
Take your time with the making and give children time to start to understand what different materials can do for them, and how they can manipulate materials and fasten them together.
Remember children are not making pieces of architecture “in the style of” an artist or architect. Instead, they are making their own work, though they will have their minds opened by looking at the work of other creative practitioners.
Encourage children to be inventive about what kinds of shapes and structure they use and which three dimensional forms they want to create. How will their pieces of architect stand? What is their purpose? Who are they for?
Encourage the use of colour/coloured materials to further develop the pieces, and have sketchbooks open on desks and encourage children to reference them and add to them.
Link the project to architecture from other cultures, countries and eras if you would like to link it to other curriculum areas.
Or, if you would like children to make pieces of architecture more relevant to their local community, think about how you can bring in images or visits of local areas as a backdrop to their work. (see “You May Also Like” below for more resources to help this).
Interventions
Use one or more of the following “interventions” if you feel children need more stimulation.
Intervention 1
Being Imaginative
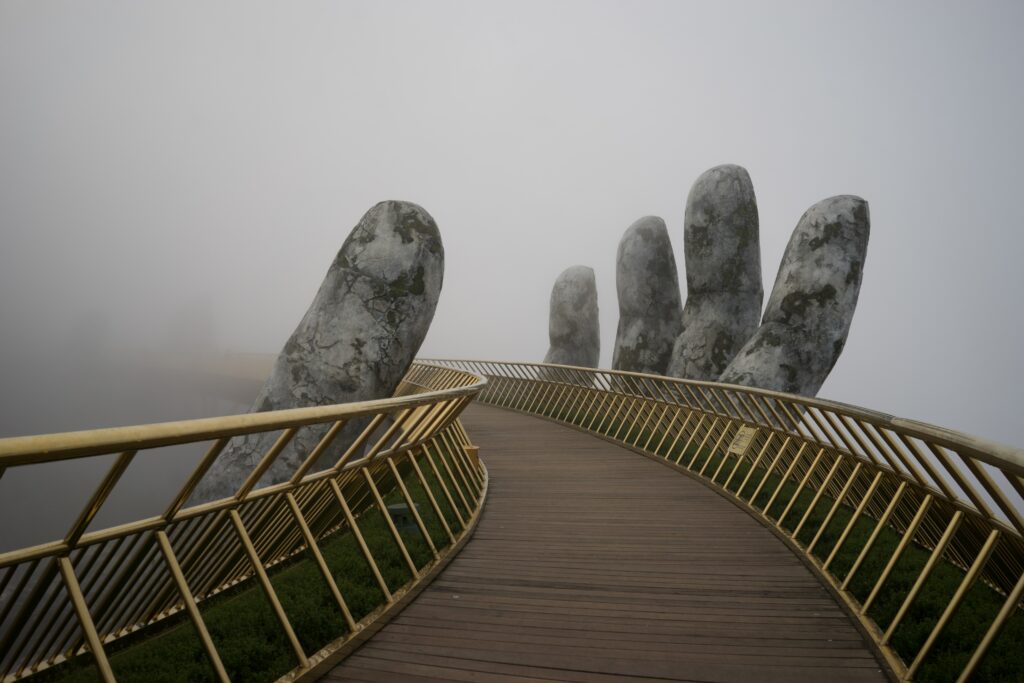
Use the free to access “Talking Points: Bridge Design” resource to help children see how architecture can be almost anything. You may not want them to design bridges (though you may!) but talk about these bridge designs as a way to open their minds to be brave and use their imagination.
Intervention 2
Inspired by Drones
Use the free to access “Drawing Source Material: Drone Footage” resource to give children a fresh perspective on the world. Does it change how they think about their own designs?
Week 6: Share & Celebrate
Present, Reflect, Review
Clean a space and present the finished architectural models next to the sketchbooks. Give all work the space it deserves and encourage children to walk around as if they were in a gallery – discussing the work with their partners before coming together as a class. Use the “Class Crit” resource to help.
Invite children to take photographs or films of their architectural models. Encourage them to really get down on eye level with their models to create interesting images, and use windows and doors as viewpoints. You might also like them to use lighting (torches) to create shadows.
Text and images to help you explore the idea of Chiaroscuro (light and dark) in art.
Please note that this page contains links to external websites and has videos from external websites embedded. At the time of creating, AccessArt checked all links to ensure content is appropriate for teachers to access. However external websites and videos are updated and that is beyond our control.
Please let us know if you find a 404 link, or if you feel content is no longer appropriate.
We strongly recommend as part of good teaching practice that teachers watch all videos and visit all websites before sharing with a class. On occasion there may be elements of a video you would prefer not to show to your class and it is the teacher’s responsibility to ensure content is appropriate. Many thanks.
*If you are having issues viewing videos it may be due to your schools firewall or your cookie selection. Please check with your IT department.*
This resource is free to access and is not a part of AccessArt membership.
What is Chiaroscuro?
Chiaroscuro is an Italian term which literally means ‘light-dark’. Artists have used it for centuries to help them describe form, and to create atmosphere or mood.
To appreciate that the artist is using the chiaroscuro technique, squint at the artwork. Half close your eyes and notice how you can now see the light and the dark, but not the mid tones. You can also use this technique to help you see light and dark when looking at a still life, landscape or interior which you are about to draw.
A Good Pool, Saguenay River (1895) by Winslow Homer. Original from The Clark Art Institute.
Questions to Ask Children
How does emphasising the light and the dark help create mood and atmosphere?
Can you always tell in which direction the light source is?
Has the artist actually used “black” and “white” or are the light and dark areas different tones of “grey”?
Using Chiaroscuro
Chiaroscuro replies on you being able to create tonal values on a page which have enough difference between them. For example, you need to be able to create a “dark dark” and a “light light”.
Depending on the medium you are using, there are different ways of achieving this. For example if you are using graphite (pencil) then you might create dark darks by cross hatching, repeat shading, intense pressure etc etc, and you might create light lights by using the pencil very softly – or even leaving the light of the paper to shine through. If you are using ink, you might like to use your ink undiluted for the dark darks, and diluted for the light lights.
Take a look at these resources to help you explore Chiaroscuro.
A collection of imagery and sources designed to explore cave art.
Please note that this page contains links to external websites and has videos from external websites embedded. At the time of creating, AccessArt checked all links to ensure content is appropriate for teachers to access. However external websites and videos are updated and that is beyond our control.
Please let us know if you find a 404 link, or if you feel content is no longer appropriate.
We strongly recommend as part of good teaching practice that teachers watch all videos and visit all websites before sharing with a class. On occasion there may be elements of a video you would prefer not to show to your class and it is the teacher’s responsibility to ensure content is appropriate. Many thanks.
*If you are having issues viewing videos it may be due to your schools firewall or your cookie selection. Please check with your IT department.*
This resource is free to access and is not a part of AccessArt membership.
Discovered on December 18, 1994 in south east France, it is considered one of the most significant prehistoric art sites and contains some of the best preserved figurative cave paintings in the world.
Questions to Ask Children
Describe what you can see in the cave paintings?
Which drawings are your favourites?
What material do you think they might have used to create these paintings?
Lascaux Cave
On 12 September 1940, the entrance to the Lascaux Cave was discovered by 18-year-old Marcel Ravidat when his dog, Robot, fell in a hole.
The deteriorating condition of the cave caused by an introduction to bacteria and changes in humidity the caves led to its closure.
Find out why the cave was closed to visitors in 1963.
Questions to Ask Children
How do you think it would feel to discover prehistoric cave paintings?
Why is it important that these paintings are preserved?
How do these paintings differ from those in the Chauvet Cave?
The White Lady
The white lady cave painting is located in The Brandberg mountains in Namibia dating back to at least 2000 years ago.
It is usually assumed that the painting shows some sort of ritual dance.
It’s thought that the painting was probably made of ochre, charcoal, manganese, hematite, with blood serum, egg white, and casein used as binding agents.
Questions to Ask Children
Describe what you can see.
What animals do you think are depicted?
What do you like about this cave art?
What materials might you use to recreate the colours and textures of this painting?
How do these paintings differ from those in the Chauvet Cave?
That when we draw we can use gestural marks to make work.
That when we draw we can use the expressive marks we make to create a sense of drama.
That when we draw we can move around.
That when we draw we can use light to make our subject matter more dramatic, and we can use the qualities of the material (charcoal) to capture the drama.
In this pathway, children discover how to make drawings that capture a sense of drama or performance using charcoal.
Children are freed from the constraints of creating representational drawings based on observation – instead they use the qualities of the medium to work in dynamic ways. Linking drawing to the whole body helps children see drawing as a physical activity, whilst a sense of narrative feeds the imagination.
This pathway will take approximately half a term, based upon a weekly art lesson.
Theme: Cave art, Movement, Human Body, Relationship of Body to Place
Medium: Charcoal, Paper, Body
Artists: Heather Hansen, Laura McKendry, Edgar Degas
If you use this resource in your setting, please tag us on social media: #InspiredBy @accessart (facebook, twitter) @accessart.org.uk (instagram) and share the url. Thank you!
Music & Drama: Listen to music to influence marks and movement while children do the “Dancing with Charcoal”.
I Can…
I have seen how artists use charcoal in their work. I have been able to talk about the marks produced, and how I feel about their work.
I have experimented with the types of marks I can make with charcoal, using my hands as well as the charcoal.
I can work on larger sheets of paper, and I can make loose, gestural sketches using my body.
I can understand what Chiaroscuro is and how I can use it in my work.
I can use light and dark tonal values in my work, to create a sense of drama.
I have used my body as a drawing tool to make drawings inspired by movement, and seen how other artists do the same.
I have taken photographs of my work, thinking about focus, lighting, and composition.
I have shared my work with my classmates and talked about what I felt was successful and what I might like to try again. I can voice what I like about my classmates work and how it makes me feel.
Time
This pathway takes 6 weeks, with an hour per week. Shorten or lengthen the suggested pathway according to time and experience. Follow the stages in green for a shorter pathway or less complex journey.
Watch Artist Lancelot Richardson to find out about the different types of charcoal and how you can use them in the “Introduction to Charcoal” resource.
Use hairspray as a “fixative” for the chalk drawings. Spray outside or in a well ventilated room.
Materials
A2 sugar paper, A4 paper for ‘pallets’, willow charcoal, erasers, hairspray (for fixing), white chalk.
Project 1: Drawing by torchlight – Torches, small toys/objects, charcoal, white chalk, buff sugar paper.
Project 2: Small cardboard boxes, charcoal, A2 sugar paper, scrap card/modelling materials, small toys/objects, tape, drawing materials as above.
Project 3: Charcoal Cave – Medium/large cardboard box, newsprint, charcoal (ideally both willow and compressed) rags, small toys or dollhouse furniture.
Project 1: Charcoal and Dance – A2 or A1 paper/wall paper, charcoal.
This pathway aims to introduce children to the idea of making gestural drawing, exploring charcoal as a medium. How can we use our bodies to inform how we make marks?
Week 1: Explore Charcoal
Introduction to Charcoal
The pathway begins with an an introduction to charcoal as a drawing medium.
Introduce an Artist
Introduction to Laura McKendry
Introduce children to the work of Laura McKendry who uses charcoal to make large gestural drawings of dogs, using the free to access “Talking Points: Laura McKendry” resource. Use the questions on the resource to help guide a class conversation.
Use the questions on the resource to help guide conversation.
Week 2: Explore Charcoal
Exploring Charcoal
For Weeks 2 and 3, invite children to draw on large sheets of sugar paper and fix the work using fixative or hairspray.
Next, children will begin to explore charcoal for themselves. Use the “Discovering Charcoal Warm-Up Exercise” resource to support their exploration.
Think about how they can experiment with mark making to create line, shape and tone. Explore the “Talking Points: What is Chiaroscuro” resource to get pupils to think about light and dark.
Push Further
Drawing Large
You may like to watch the “Drawing Large” resource video to understand how your drawings can become very gestural. If you use this resource think about how children can use charcoal to make big loose marks, and use rocks or fossils as their subject matter.
Week 3: Personalise the Journey
Drawing Like a Cave Person
Remind children of the beginnings of drawing with “Talking Points: Cave Art“, and inspire simple mark making, through the medium of charcoal and handprint art.
Be inspired by historic and contemporary images of cave art. Use the “Drawing Like a Caveman” resource to encourage children to explore how they can use charcoal and hands to explore mark making further.
Week 4 & 5: Find your Focus
Choose a Project
Choose one of the projects below, depending on how you want to link to other curriculum areas, experience, space and preferred approach.
Option 1
Charcoal & Drama
Explore how students can use charcoal to explore narrative and creating a sense of drama. Remind them of ‘chiaroscuro’ to deepen their exploration.
Explore the following resources. You may choose to follow one resource, or combine more than one:
If you feel the children need a warm-up, find out how dance can be used as a response to art with the “Talking Points: Dancing to Art“
Consider how you can enable the children to respond creatively in the space you have.
You may want to run the project in the hall or large space, using cheap wallpaper lining paper taped together as your drawing surface.
If you don’t have space for the above, notice how in the last video on the Heather Hansen resource, the schools work on smaller sheets of paper in pairs or groups using hands and arms rather than whole body.
Whichever you choose, think about using digital media to record the event, or performing to an audience. Think about recording sound and using light to make it a multimedia performance.
Week 6: Present and Review
Share, Reflect & Celebrate
Children can make a “Backwards Sketchbook” using the drawings made on loose sheets of paper.
Invite children to present all work in a clear space and take the opportunity to visit the work made like a mini gallery. Use the “Crits in the Classroom” resource.
See the Pathway Used in Schools…
If You Use AccessArt Resources… You might like to…
A collection of imagery and sources which you can use to prompt drawing in schools and community groups.
Please note that this page contains links to external websites and has videos from external websites embedded. At the time of creating, AccessArt checked all links to ensure content is appropriate for teachers to access. However external websites and videos are updated and that is beyond our control.
Please let us know if you find a 404 link, or if you feel content is no longer appropriate.
We strongly recommend as part of good teaching practice that teachers watch all videos and visit all websites before sharing with a class. On occasion there may be elements of a video you would prefer not to show to your class and it is the teacher’s responsibility to ensure content is appropriate. Many thanks.
Egyptian Artefacts
Use the film and imagery below to enable children to explore Egyptian artefacts. Try to create a sense of momentum – for example you might pause on an image or the video 4 times and ask the pupils to make a 1 minute, 2 minute, 3 minute and 4 minute drawing at each pause.
Encourage close and slow looking by talking as they draw – use your voice to attract their attention to qualities of the artefacts.
Try the same exercise using different materials, ie handwriting pen, ink and nib, pastel, watercolour…
Explore the collections of Rijksmuseum van Oudheden here.
Military Musicians Showing Nubian and Egyptian Styles, Nina de Garis Davies (1881–1965), New Kingdom, Dynasty 18, reign of Thutmose IV, ca. 1400–1390 B.C. From Egypt, Upper Egypt, Thebes, Sheikh Abd el-Qurna, Tomb of Tjeneny (TT 74) Tempera on paper, H. 44.5 × W. 93 cm (17 1/2 × 36 5/8 in.) Rogers Fund, 1931
Watch the clip with the volume off as you guide children’s attention to parts of the paintings
Bronze statuette of Osiris, Late Dynastic-Hellenistic 664–31 B.C. Egyptian Medium: Bronze Dimensions: H. 4 1/2 in. (11.4 cm) The Cesnola Collection, 1874–76
Tomb Chapel of Raemkai: South Wall, Old Kingdom, Dynasty 5, ca. 2446–2389 B.C., From Egypt, Memphite Region, Saqqara, North of the Djoser pyramid complex, Mariette D3, Egyptian Antiquities Service/Quibell excavations, 1907–08, Limestone, paint, Rogers Fund, 1908
A collection of imagery and sources designed to explore the work of Kevork Mourad.
Please note that this page contains links to external websites and has videos from external websites embedded. At the time of creating, AccessArt checked all links to ensure content is appropriate for teachers to access. However external websites and videos are updated and that is beyond our control.
Please let us know if you find a 404 link, or if you feel content is no longer appropriate.
We strongly recommend as part of good teaching practice that teachers watch all videos and visit all websites before sharing with a class. On occasion there may be elements of a video you would prefer not to show to your class and it is the teacher’s responsibility to ensure content is appropriate. Many thanks.
*If you are having issues viewing videos it may be due to your schools firewall or your cookie selection. Please check with your IT department.*
This resource is free to access and is not a part of AccessArt membership.
Kevork Mourad
Born in Qamishli, Syria, Mourad now lives and works in New York City.
Mourad employs his technique of live drawing and animation in concert with musicians – developing a collaboration in which art and music harmonize with one another.
A painter, printmaker and video artist, Mourad has performed his animated and live visuals internationally.
Mourad also uses monotype as a medium to explore middle eastern politics and history.
A collection of imagery and sources designed to explore the tradition of Wayang Kulit.
Please note that this page contains links to external websites and has videos from external websites embedded. At the time of creating, AccessArt checked all links to ensure content is appropriate for teachers to access. However external websites and videos are updated and that is beyond our control.
Please let us know if you find a 404 link, or if you feel content is no longer appropriate.
We strongly recommend as part of good teaching practice that teachers watch all videos and visit all websites before sharing with a class. On occasion there may be elements of a video you would prefer not to show to your class and it is the teacher’s responsibility to ensure content is appropriate. Many thanks.
*If you are having issues viewing videos it may be due to your schools firewall or your cookie selection. Please check with your IT department.*
This resource is free to access and is not a part of AccessArt membership.
That we can use line, shape and colour to create patterns.
That we can use folding, cutting and collage to help us create pattern.
That we can create repeated patterns to apply to a range of products or outcomes.
In this pathway, children have the opportunity to explore pattern and develop a range of technical skills and knowledge through drawing and collage.
The pathway also introduces them to the idea that working with pattern can be a mindful activity, and that as humans we respond to patterns made by other people.
This pathway will take approximately half a term, based upon a weekly art lesson.
Medium: Paper, Pens, Paint
Artists: Rachel Parker, Shaheen Ahmed, Andy Gilmore, Louise Despont
If you use this resource in your setting, please tag us on social media: #InspiredBy @accessart (facebook, twitter) @accessart.org.uk (instagram) and share the url. Thank you!
Science: Look at patterns in the structure of fruits or plants, reflections and shadows.
Music: Use music and sound when doing mindful drawing as part of this pathway.
I Can…
I can relax into making a sensory drawing using a pencil, making marks on the page without having a predefined outcome.
I have explored the work of an artist who creates artwork inspired by pattern. I have thought about where we use pattern in our life to make our worlds brighter.
I can work in my sketchbooks to explore how I can make drawings inspired by “rules.” I can generate lots of different types of patterns.
I can make a tessellated design and think about colour and shape, exploring positive and negative shapes.
or
I can explore the work of a surface pattern designer and make my own repeating pattern, exploring colour, shape and composition.
or
I can fold paper and use pattern to make an object which other people can respond to.
I can present and share my work. I can reflect and share my thoughts with others. I can listen to the reflections of my classmates and feedback on their work.
I can take photographs of my work.
Time
This pathway takes 6 weeks, with an hour per week. Shorten or lengthen the suggested pathway according to time and experience. Follow the stages in green for a shorter pathway or less complex journey.
Materials
Soft B pencils, handwriting pen, A2 cartridge paper, rulers, tape, string, coloured paper & card.
Option 1: Making Tessellated Designs – Thin cardboard or stiff paper, pencils, handwriting pens, felt tip pens, scissors, masking tape.
This pathway aims to enable a mindful approach to working with pattern. Pupils explore how artists and designers use pattern in their own work, and then go on to explore ways in which they can create pattern in a playful way.
Week 1: Slow Down & Tune In
Making a Sensory Drawing
The aim of the first session is to enable children to quieten and slow down into the process.
Use the “Making a Sensory Drawing” resource as a warm-up, enabling children to make sensory patterns without a theme or subject focus. The emphasis should be on the process not outcome.
The repetitive nature of the exercise will allow the children to not worry about outcome, but will encourage them to make decisions as they go along. Use needles and sharp pencils with a variation of width to create a rhythmic piece.
Work on thicker paper (cartridge or sugar paper is ideal). Work on sheets small enough to be stuck into sketchbooks at a later point.
Spend half an hour on this.
Look and Talk…
Shaheen Ahmed
Explore the free to access “Talking Points: Shaheen Ahmed” resource to discover an artist who explores patterns, signs and motifs that hold significance to her identity. Use the questions at the bottom of the resource to help guide your class conversation.
Week 2: Inventing & Exploring
Rules and Resolutions
Use the “Rules and Resolutions” resource to enable children to explore the idea that they can devise their own process criteria to help them make drawings.
Work in sketchbooks and encourage children to collaborate and discuss aims and outcomes.
Week 3, 4 & 5: Find your focus
Explore Tessellations, Surface Pattern or Puzzle Purses
For the next three weeks work on one of the projects below. Intersperse the projects by looking at the work of the artists below to help inspire your journey.
Option One
Making a Tessellated Design
Explore working in colour and making patterns which fit together over and over again by using the “Making Tessellated Designs” resource.
This activity links really well with maths. Begin by asking them to invent a shape. Push them further by asking them to look at an object and try to create a shape inspired by it.
Use the project to explore colour. What happens when they make a tessellated design using complimentary colours? How many colours do they need? How does the design change if they use cold colours, or warm colours?
Use sketchbooks to test colours and refine tessellation design, and then make final outcomes on larger sheets of cartridge or sugar paper.
Explore an Artist
Explore Andy Gilmore
Use the free to access “Talking Points: Andy Gilmore” resource to explore the work of an artist inspired by repeated shape and pattern. See where Andy finds inspiration. Remember, pupils are not aiming to reproduce Andy’s work – just introduce the artist to the children and build their creative thinking, visual literacy and oracy skills through conversation.
Or…
Option Two
Explore Surface Design with Rachel Parker
Explore the work of surface pattern designer Rachel Parker.
Make A Repeat Pattern
Use the “Creating Repeated Patterns” resource to enable pupils to think about colours and shapes, and the relationship between these components to create an overall balanced pattern. Using collage allows them to make these creative decisions as they work.
Get children to think about where they find patterns, what are they used for? Make it known that children can grow up to make patterns for a living if they enjoy the process.
Have their sketchbook open and ask them to make notes about their decision making, with swatches and thoughts as they go along.
For the second part of this session children will get the opportunity to scan their pattern into the computer and create a repeat pattern using a Word Document or an equivalent editing software.
Explore the work of an artist who makes meditative drawings through pattern with the free to access “Talking Points: Louise Despont“. Use the conversation to highlight to children how the act and outcome of drawing can help with feeling calm and in the moment.
Making a Puzzle Purse Part Two
Adapt the “Making a Puzzle Purse Part Two” resource, focusing on pattern rather than narrative. Explore colour, line, and shape to create patterns within the puzzle purse. Use the folded geometric structure to help inspire pattern making.
Week 6: Reflect & Discuss
Present, Talk, Share and Celebrate
End the pathway by taking time to appreciate the developmental stages and the final outcomes in a clear space.
Invite children to display the work in a way that best suits the project, have open sketchbooks. Use the “Crit in the Classroom” resource to help you.
Have children use tablets or cameras to take photographs of the work.
Encourage children to reflect upon all stages of the journey, and reference the artists studied.
See This Pathway Used in Schools…
If You Use AccessArt Resources… You might like to…
A collection of sources and imagery to explore exciting packaging design.
Please note that this page contains links to external websites and has videos from external websites embedded. At the time of creating, AccessArt checked all links to ensure content is appropriate for teachers to access. However external websites and videos are updated and that is beyond our control.
Please let us know if you find a 404 link, or if you feel content is no longer appropriate.
We strongly recommend as part of good teaching practice that teachers watch all videos and visit all websites before sharing with a class. On occasion there may be elements of a video you would prefer not to show to your class and it is the teacher’s responsibility to ensure content is appropriate. Many thanks.
*If you are having issues viewing videos it may be due to your schools firewall or your cookie selection. Please check with your IT department.*
This resource is free to access and is not a part of AccessArt membership.
Packaging design is really important for a products success. The packaging has to echo the values of a company through design.
Read this Waitrose case study to find out how they redesigned the ‘free from’ range to fit with the values of the company and customers.
See how packaging is used to unify the brand feel here.
Watch the videos below to find out what designers might consider when designing packaging.
Questions to Ask Children
Do you prefer the old design or the new design? Why?
Can you list the different things that designers factor in when they’re thinking about a redesign?
See how designers might create a mock up of their design to show the client how the packaging will look.
Watch a designer improve upon a packaging design.
Questions to Ask Children
Do you prefer the first design or the design that this designer created? Why?
Would you be more likely to pick up packaging with photos or with drawings on it? Why?
As a class, discuss how you might create packaging for pineapple juice. Think about the shape of the juice carton, colours and text.
Once a company has created packaging they need to think about advertising.
Questions to Ask Children
As a class discuss how you might advertise your pineapple juice.
Watch this video to find out how you can make a net for a packaging box.
A collection of imagery and sources designed to introduce pupils to the Artist Lubaina Himid.
Please note that this page contains links to external websites and has videos from external websites embedded. At the time of creating, AccessArt checked all links to ensure content is appropriate for teachers to access. However external websites and videos are updated and that is beyond our control.
Please let us know if you find a 404 link, or if you feel content is no longer appropriate.
We strongly recommend as part of good teaching practice that teachers watch all videos and visit all websites before sharing with a class. On occasion there may be elements of a video you would prefer not to show to your class and it is the teacher’s responsibility to ensure content is appropriate. Many thanks.
*If you are having issues viewing videos it may be due to your schools firewall or your cookie selection. Please check with your IT department.*
This resource is free to access and is not a part of AccessArt membership.
Lubaina Himid
“Born in Zanzibar in 1954, Lubaina Himid is a British painter who has dedicated her thirty-year-long career to uncovering marginalised and silenced histories, figures, and cultural moments. Himid creates paintings, drawings, prints and installations. She paints on a variety of surfaces, including ceramic and wood, often producing objects with performative potential intended to be encountered in a space”. RA
Watch the videos below to learn more about Lubaina Himid’s work and ideas.
Note for teachers on adult content: Please be advised that some of Himid’s work contains inappropriate imagery, some of which may be visible in the background of these videos. Please ensure you have watched them first to ensure you are happy to show to your class.
Note for teachers on adult content: We have tried to ensure that all videos below are suitable for use in schools, but please be advised that some of Himid’s work does address adult themes. Please ensure you have watched these videos first to ensure you are happy to show to your class.
Questions to Ask Children:
What different surfaces does Lubaina Himid work on? What type of paint does she use?
What can you read from the expressions on the two figures in the artwork called ‘Carrot Piece’? What do you think they are thinking or saying?
Do you think the man on the right is turning and standing still or is he walking away? Why might he want to do that?
Lubaina Himid describes the figures as “larger than life” – what do you think it would be like to see such a large artwork in real life?
Watch the video on Vimeo to find the playbar and controls.
Questions to Ask Children:
What warm or hot colours do you notice in some of the paintings displayed in the video?
Do you agree the paintings are vibrant? Why?
Some of the figures in the paintings appear to be quite flat and almost 2 dimensional. Do you think Lubaina Himid painted them in this way deliberately and what effect does it create?
Watch the video below from 2.00-3.30 minutes.
Questions to Ask Children:
What do you think it would be like to walk in and amongst all the painted wooden figures?
Some of the figures are playing musical instruments – what kind of music do you imagine they are playing?
A collection of sources and imagery to explore the colourful spaces created by Yinka Ilori.
Please note that this page contains links to external websites and has videos from external websites embedded. At the time of creating, AccessArt checked all links to ensure content is appropriate for teachers to access. However external websites and videos are updated and that is beyond our control.
Please let us know if you find a 404 link, or if you feel content is no longer appropriate.
We strongly recommend as part of good teaching practice that teachers watch all videos and visit all websites before sharing with a class. On occasion there may be elements of a video you would prefer not to show to your class and it is the teacher’s responsibility to ensure content is appropriate. Many thanks.
*If you are having issues viewing videos it may be due to your schools firewall or your cookie selection. Please check with your IT department.*
This resource is free to access and is not a part of AccessArt membership.
Yinka Ilori
Yinka Ilori is a multidisciplinary artist and designer with a bold bright visual language influenced by his British-Nigerian heritage. Three components that feature heavily in Yinka’s work are pattern, colour and storytelling.
Yinka uses his crafts as a way to communicate Nigerian parables and verbal traditions.
His work is described as a fusion between contemporary design and Nigerian tradition.
That when designers work with fonts and layout it is called Typography.
That we can use the way words look to help us communicate ideas and emotions.
That we can create our own typography and combine it with other visual elements to make artwork about chosen themes.
In this pathway children are introduced to typography design and they explore how they can create their own fonts and designs. Children explore how we can use visual letters and other elements to help convey ideas and emotions.
They are introduced to the work of an artist and a designer who have both used lettering combined with maps to produce maps which tell stories. Children then go on to create their own visual and often three dimensional maps.
Themes: Identity, Environment, Habitat
Medium: Pencil, Pen, Paper
Artists: Louise Fili,Grayson Perry, Paula Scher, Chris Kenny
If you use this resource in your setting, please tag us on social media: #InspiredBy @accessart (facebook, twitter) @accessart.org.uk (instagram) and share the url. Thank you!
Geography: Trade links, digital mapping, ordinance survey maps, detailed sketching of maps.
History: Create maps inspired by your chosen ancient civilisation topic e.g. an Anglo Saxon settlement or village.
Maths: Pictorial representations, 2D / 3D shapes.
PSHE: Collaboration, Peer Discussion.
English: Leaflets, posters
I Can…
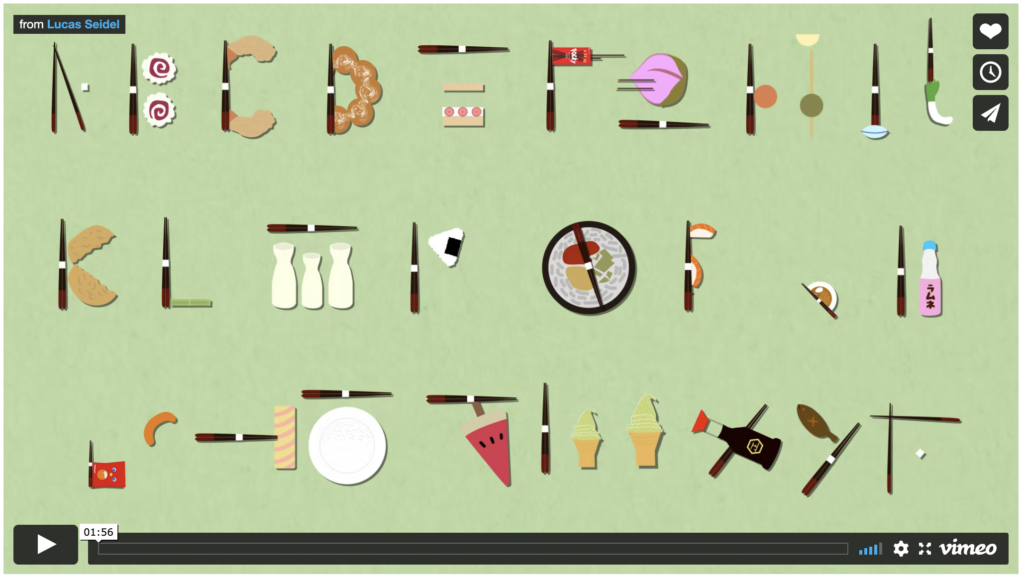
I have understood that Typography is the visual art of creating and arranging letters and words on a page to to help communicate ideas or emotions.
I have seen how other artists work with typography and have been able to share my thoughts on their work.
I have explored how I can create my own letters in a playful way using cutting and collage. I can reflect upon what I like about the letters I have made.
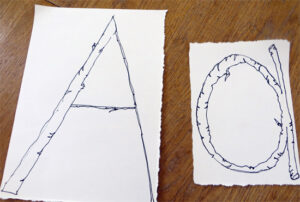
I have drawn my own letters using pen and pencil inspired by objects I have chosen around me. I can reflect upon why my letters have a meaning to me.
I have used my sketchbooks for referencing, collecting and testing ideas, and reflecting.
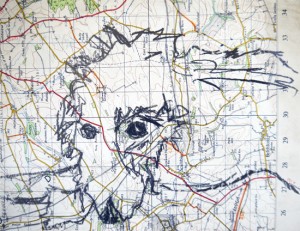
I can make my drawings appear visually stronger by working over maps or newspaper to make my marks stronger.
I have seen how some artists use their typography skills and drawing skills to make maps which are personal to them. I have been able to reflect upon what I think their maps mean, what I like about them, and what interests me.
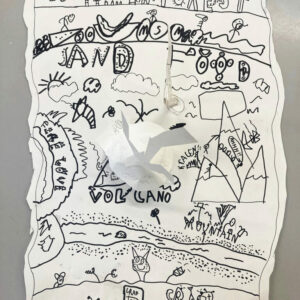
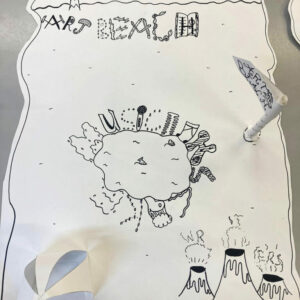
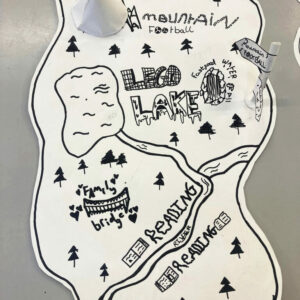
I can use my mark making, cutting and collage skills to create my own visual map, using symbols, drawn elements and typography to express themes which are important to me.
I have shared my work with the class, reflected upon what was successful and been able to give useful feedback on the work of my peers.
Time
This pathway takes 6 weeks, with an hour per week. Shorten or lengthen the suggested pathway according to time and experience. Follow the stages in green for a shorter pathway or less complex journey.
Materials
Soft B pencils, handwriting pens, cartridge paper, black sugar paper, assorted papers/cards, old maps or newspapers, A1 cartridge paper, assorted small objects and plants, PVA glue, tape, scissors.
This pathway aims to give pupils the opportunity to explore the work of designers who work with font and typography. Pupils go on to create their own typography and develop their skills further in a visual map project.
Week 1: Introduce Typography
What is Typography?
Visit the free to access “Talking Points: What is Typography” resource. Enable children to understand how typography can be used creatively to express thoughts and communicate ideas visually. Make some “Visual Notes” in sketchbooks.
Introduce an Artist
Louise Fili
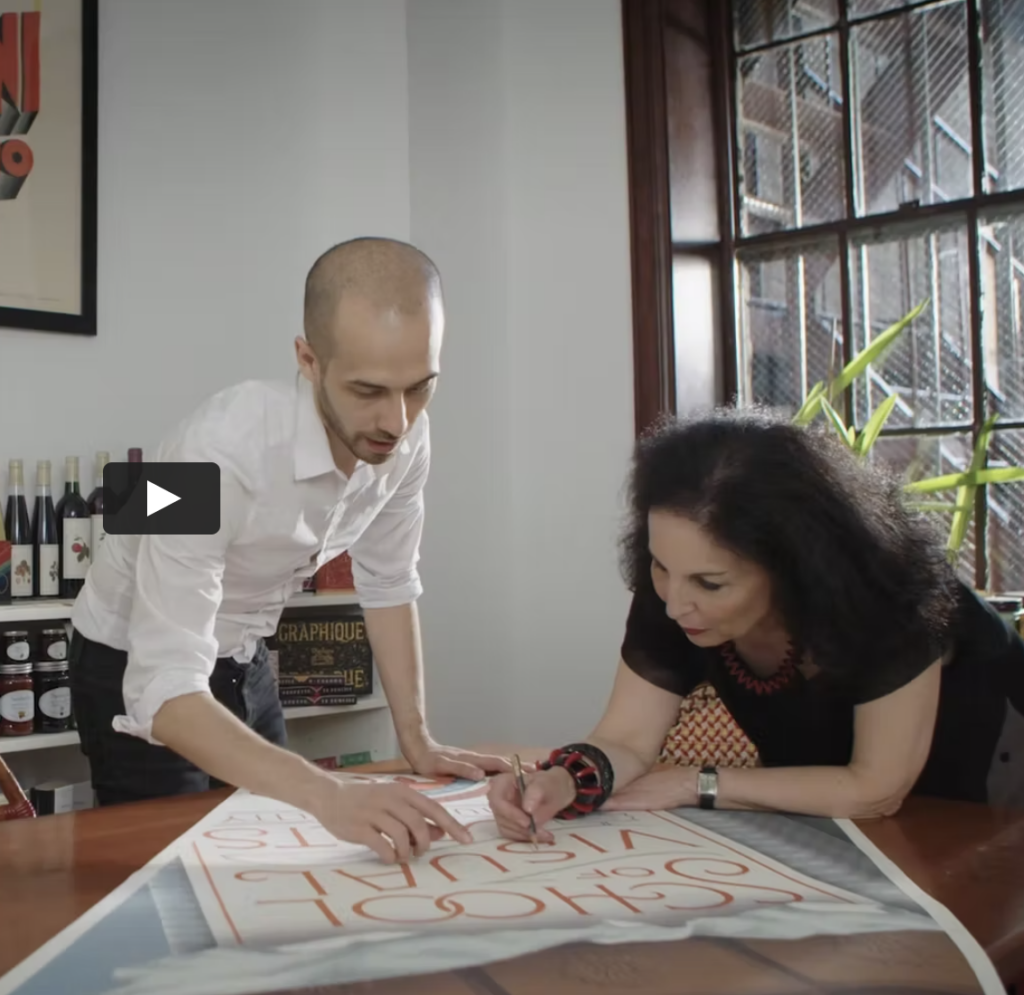
Explore the work of Louise Fili who is a pioneer in establishing herself as a woman working in Typography. Use the free to access “Talking Points: Louise Fili” resource to see how she and her team created a poster for the New York Subway.
Play & Experiment
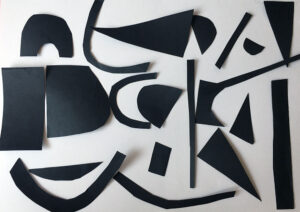
Play with Cut Out Typography
Invite the children to create their own letters in a playful way to discover arrangements they like. Use the “Cut Out Typography” resource.
Stick the outcomes in your sketchbook. Think about what you like about the letters you create, and what you might like to develop further.
Work on large sheets or in your sketchbooks. Explore as many variations of letters as you can.
If you have time, develop a whole word or even phrase, but pay just as much attention to each letter.
Pupils will be drawing on previous knowledge and skills in creating varied mark-making. For a recap on mark-making explore “Finding Marks Made by Artists“.
Week 3: Developing Stronger Drawings
Explore Making Powerful Visual Imagery
Sometimes we need help to make our drawings visually powerful.
If you don’t have maps to work on you can do the same exercise working on newspaper or other paper which is pre-printed.
Week 4 & 5: Creating a Visual Map
Messages in Maps
The next stage of the project is to apply your new typography skills and your powerful drawing skills to make a visual map.
See How Artists Create Maps
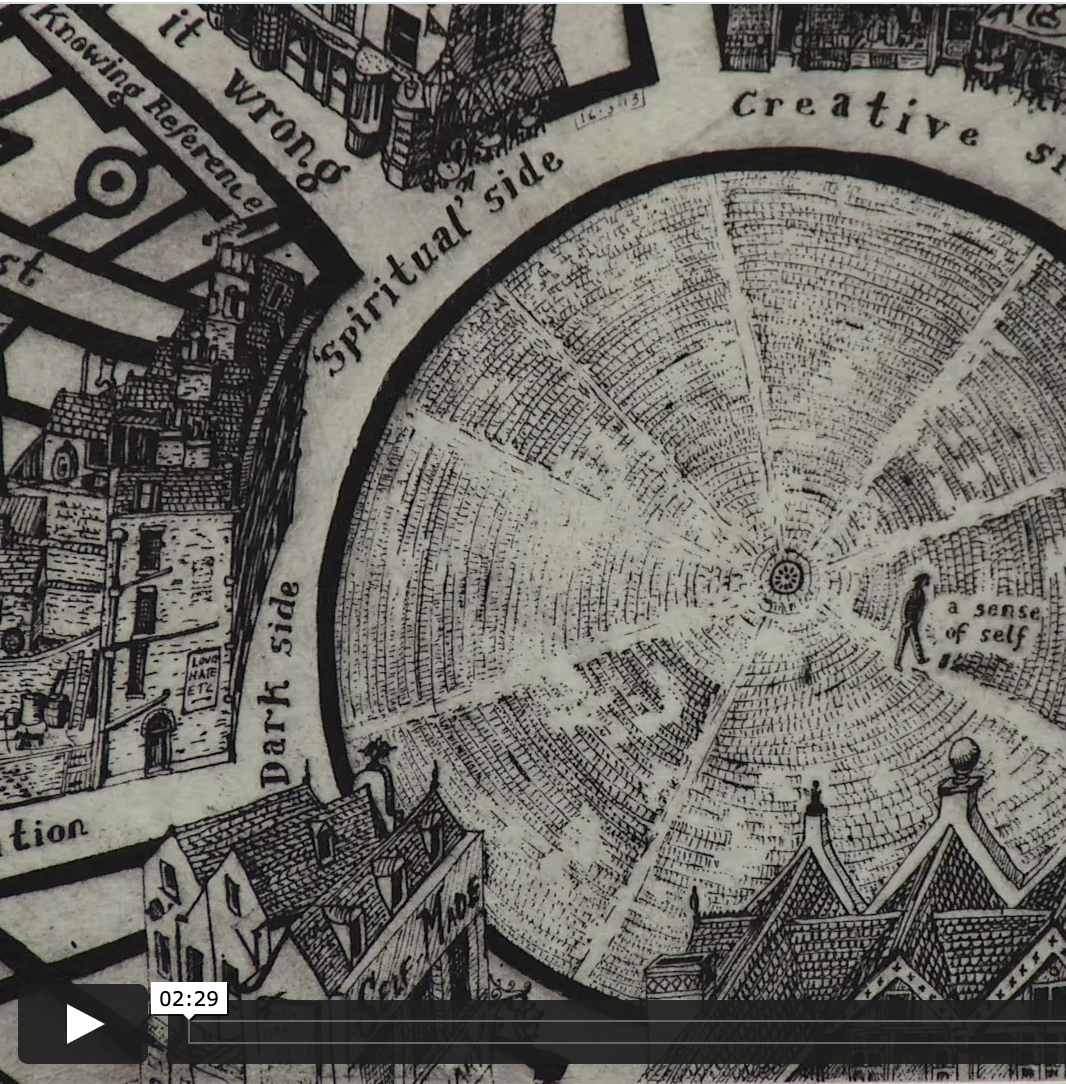
Grayson Perry & Paula Scher & Chris Kenny (and the Marauder’s Map)
Maps don’t just have to tell us where to go. They can also be very personal places which reveal things about the artist that made them, or they can be comments about culture, place and time. They can also be a place where messaging is concealed and revealed. They can be based upon reality or imagination, or both.
Introduce children to a selection of artists who use maps in their work to express identity. Create “Visual Notes” in sketchbooks inspired by your choice of artists.
Choose from the following of free to access Talking Points:
“Talking Points: Grayson Perry ‘Map of Days’” Please Note: Please be advised that at 1.51 of the video via this link there is inappropriate language shown on the map. You may wish to show up to this point or to skip past the shot of the language in question.
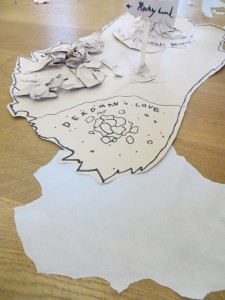
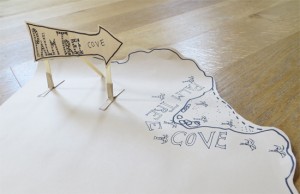
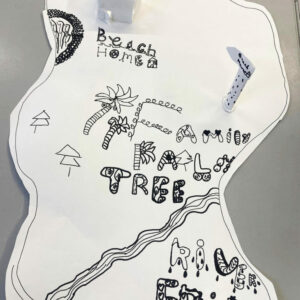
Using ideas developed from the Typography activity in Week 2, follow the “3D Visual Maps” resource to understand how we build on the idea of creating visual text, and how this can be applied to map making.
Develop
Annotate Your 3D Visual Maps
Ask the children to use explorations of identity to annotate their 3D Visual Maps with typography, references, thoughts, ideas and associations. They can do this both in 2D and 3D, using cut out paper. See “Manipulating Paper from 2d-3d” for inspiration.
Questions to ask:
Where am I in my map? Why have I chosen to place myself here and what is around me?
What words do I associate with home and where I live?
What things or places am I surrounded by and why is this important to me?
Week 6: Reflect and Discuss
Share and Celebrate the Outcomes
Lay the maps out on the floor if possible. You could even use the playground or school hall if the weather/space allocation permits.
Ask the children to walk around each other’s work. Take time to absorb and discuss.
A collection of sources and imagery to explore the work of Morag Myerscough.
Please note that this page contains links to external websites and has videos from external websites embedded. At the time of creating, AccessArt checked all links to ensure content is appropriate for teachers to access. However external websites and videos are updated and that is beyond our control.
Please let us know if you find a 404 link, or if you feel content is no longer appropriate.
We strongly recommend as part of good teaching practice that teachers watch all videos and visit all websites before sharing with a class. On occasion there may be elements of a video you would prefer not to show to your class and it is the teacher’s responsibility to ensure content is appropriate. Many thanks.
*If you are having issues viewing videos it may be due to your schools firewall or your cookie selection. Please check with your IT department.*
This resource is free to access and is not a part of AccessArt membership.
Morag Myerscough
Artist & Designer Morag Myerscough creates installations and immersive spatial artworks that transform places and champion community and public interaction.
From schools and hospitals to cultural hubs and town centres Morag transforms public spaces by creating engaging experiences for everyone.
A collection of sources and imagery to explore the work of Fausto Melotti.
Please note that this page contains links to external websites and has videos from external websites embedded. At the time of creating, AccessArt checked all links to ensure content is appropriate for teachers to access. However external websites and videos are updated and that is beyond our control.
Please let us know if you find a 404 link, or if you feel content is no longer appropriate.
We strongly recommend as part of good teaching practice that teachers watch all videos and visit all websites before sharing with a class. On occasion there may be elements of a video you would prefer not to show to your class and it is the teacher’s responsibility to ensure content is appropriate. Many thanks.
*If you are having issues viewing videos it may be due to your schools firewall or your cookie selection. Please check with your IT department.*
This resource is free to access and is not a part of AccessArt membership.
Fausto Melotti
‘It wasn’t until the early 1980s that he designed set pieces for the actual stage. This exhibition looks back throughout Melotti’s lifetime to consider how theatre – conceptually as much as a dramatic art – informed the artist’s own creativity. –Galleries Now
Watch the videos below to find out more about the exhibition.
Apologies if you cannot watch one of the videos because your school has blocked YouTube.
Pause the video on stills of Melotti’s work and ask children the following questions…
Questions to Ask Children
Describe what you can see.
How does the set make you feel?
What do you like/dislike about the set?
Describe the atmosphere of the set. How do you think this has been achieved?
A collection of sources and imagery to explore the work of Chris Kenny.
Please note that this page contains links to external websites and has videos from external websites embedded. At the time of creating, AccessArt checked all links to ensure content is appropriate for teachers to access. However external websites and videos are updated and that is beyond our control.
Please let us know if you find a 404 link, or if you feel content is no longer appropriate.
We strongly recommend as part of good teaching practice that teachers watch all videos and visit all websites before sharing with a class. On occasion there may be elements of a video you would prefer not to show to your class and it is the teacher’s responsibility to ensure content is appropriate. Many thanks.
*If you are having issues viewing videos it may be due to your schools firewall or your cookie selection. Please check with your IT department.*
This resource is free to access and is not a part of AccessArt membership.
Twigs
Chris Kenny works with humble, found materials: fragments excised from books or maps, discarded photographs or books, and fine twigs. He transforms these constructing fragile pertinent worlds that provoke wonder, humour or pathos.
Please note that that there are swear words on the artists website so you may not want to ask pupils to research by their own accord.
Twenty Twigs 2021 36 x 36 x 5inches Construction with cut twigs By Chris Kenny
Twelve Twigs 2012 construction with twigs 22 x 22 x 3” by Chris Kenny
Questions to Ask Children
Describe what you see.
What could the stick people be doing?
Which is your favourite stick man? Why?
Noli Me Tangere (After Veronese) 2016 construction with found twigs 27 x 27 x 3″ by Chris Kenny
Questions to Ask Children
What do you think is happening in this image?
How does this image make you feel?
How do you think the artist created this stick image? Do you think he planned the image with a pencil or just start making?
Maps
Mexico Triptych, Second Panel 2018 Construction With Map Fragments 36 x 36 x 3 by Chris Kenny
Maidenhead Thicket 2011 construction with map fragments by Chris Kenny
Elsewhere 2014 18 x 18 x 3 construction with map fragments by Chris Kenny
Questions for Children…
Describe what you can see.
Do you like this work? Why?
How does it make you feel?
Which map is your favourite and why?
How much does Chris Kenny reveal about himself through the map?
A collection of sources and imagery to explore the work of The Shoreditch Sketcher.
Please note that this page contains links to external websites and has videos from external websites embedded. At the time of creating, AccessArt checked all links to ensure content is appropriate for teachers to access. However external websites and videos are updated and that is beyond our control.
Please let us know if you find a 404 link, or if you feel content is no longer appropriate.
We strongly recommend as part of good teaching practice that teachers watch all videos and visit all websites before sharing with a class. On occasion there may be elements of a video you would prefer not to show to your class and it is the teacher’s responsibility to ensure content is appropriate. Many thanks.
*If you are having issues viewing videos it may be due to your schools firewall or your cookie selection. Please check with your IT department.*
This resource is free to access and is not a part of AccessArt membership.
Tips from The Shoreditch Sketcher
The Shoreditch Sketcher has kindly provided the following tips for your own drawing. Read the tips and then explore his drawings below. Can you see his tips some to life in the drawings he makes?
Travel light You don’t need to have lots of expensive equipment for urban sketching. I find the less kit I have, the easier it is to focus on the drawing. If you always travel with a small selection of pens and an A5 sketchbook, you will be able to set up camp anywhere and get drawing quickly wherever you are.
Pick a subject that interests you There is absolutely no point in sketching something that doesn’t excite you. The fact is, you’re more likely to get a great result with something that interests you. Start with whatever catches your eye!
Get comfortable For beginners and people who work at a slower pace, a seated position may be more comfortable and allow for more accuracy. Find a location where you can easily sit on a wall or chair to give yourself more time to capture the scene.
Remember that a drawing is not a photograph Don’t fall into the trap of trying to faithfully capture the scene you are drawing as if it were a photograph. A sketch is an expression of what you’re looking at, not an exact reproduction. Celebrate the mistakes!
Set yourself a time limit It can be useful to give yourself a time limit on your live drawings. This helps to focus your mind and instil your drawings with energy, and it forces you to move on to another view. Quick sketches often capture much more than an overworked piece!
Work in a medium that you feel comfortable with I love drawing with pen – straight in, with no pencil. But I’m very aware this requires a lot of confidence and my advice to beginners is always to start with a medium you feel comfortable with. This might well be pencil or charcoal, both of which are quite forgiving.
Stop and come back to it later Don’t be afraid to call time on a sketch even though it’s not ‘finished’. Remember, you are the one to decide what’s finished and what’s not. A great tip is to take a quick photo of the view you’re sketching on your phone and then use the image as a reference for adding more detail, tone or colour later on!
Keep at it Practise makes perfect, and a sketch a day is a great way to train your eye. Draw everyday things such as bus journeys, sandwich shops, mugs on desks and drab buildings. You’ll quickly become adept at looking for interesting views, and soon your sketchbook will become a record of your travels!
Piccadilly London by the Shoreditch Sketcher
Questions to Ask Children
Describe what you see.
Look at the artwork as a whole – which words would you use to describe the whole piece?
Tell me about the details you like.
How does it make you feel?
Chinatown London by the Shoredtich Sketcher
Questions to Ask Children
Describe what you see.
Which details are missing?
How do you think he decided how much detail to include or leave out?
Tell me about the details you like.
Westminster by the Shoreditch Sketcher
Questions to Ask Children
What can you see?
Do you recognise any of these buildings?
Why do you you think he chose to include details of those specific buildings and leave others out?
Tell me about the details you like.
Royal Academy London by the Shoreditch sketcher
Questions to Ask Children
What can you see?
Which details do you like?
Leicester Square London by the Shoreditch Sketcher
Questions to Ask Children
What do you see?
How has the artist given the image perspective?
How would you describe the atmosphere?
Do you think that the blank space adds anything to the overall composition?
A collection of sources and imagery to explore tiny houses.
Please note that this page contains links to external websites and has videos from external websites embedded. At the time of creating, AccessArt checked all links to ensure content is appropriate for teachers to access. However external websites and videos are updated and that is beyond our control.
Please let us know if you find a 404 link, or if you feel content is no longer appropriate.
We strongly recommend as part of good teaching practice that teachers watch all videos and visit all websites before sharing with a class. On occasion there may be elements of a video you would prefer not to show to your class and it is the teacher’s responsibility to ensure content is appropriate. Many thanks.
*If you are having issues viewing videos it may be due to your schools firewall or your cookie selection. Please check with your IT department.*
This resource is free to access and is not a part of AccessArt membership.
Apologies if you cannot watch some of the videos because your school has blocked YouTube.
Questions to Ask Children
What do you think of the materials used to build this home? Name some of the materials you can see.
Would you live in this microhome?
What are the pros and cons to living in a tiny home?
Questions to Ask Children
Could you live in this space?
Do you like the interior space? Why?
Would you prefer to have a tiny house in the countryside or in a city?
Can you think of a clever way to design a chair so that it can be stored away easily.
Questions to Ask Children
What do you think of this home?
Would you live in this microhome?
What premade structure could you make a tiny home out of?
AKT II and OFIS Arhitekti
Questions to Ask Children
Does this microtome have enough space?
Would you like to live in a microtome that could be moved around?
Do you like the design of the home? Why?
Could you fit all of your belongings in this home?
Questions to Ask Children
Could you live in this space?
Do you think that all homes should be made like this in the future? Why?
Do you like the interior space? Why?
What would you miss if you had to live in this space?
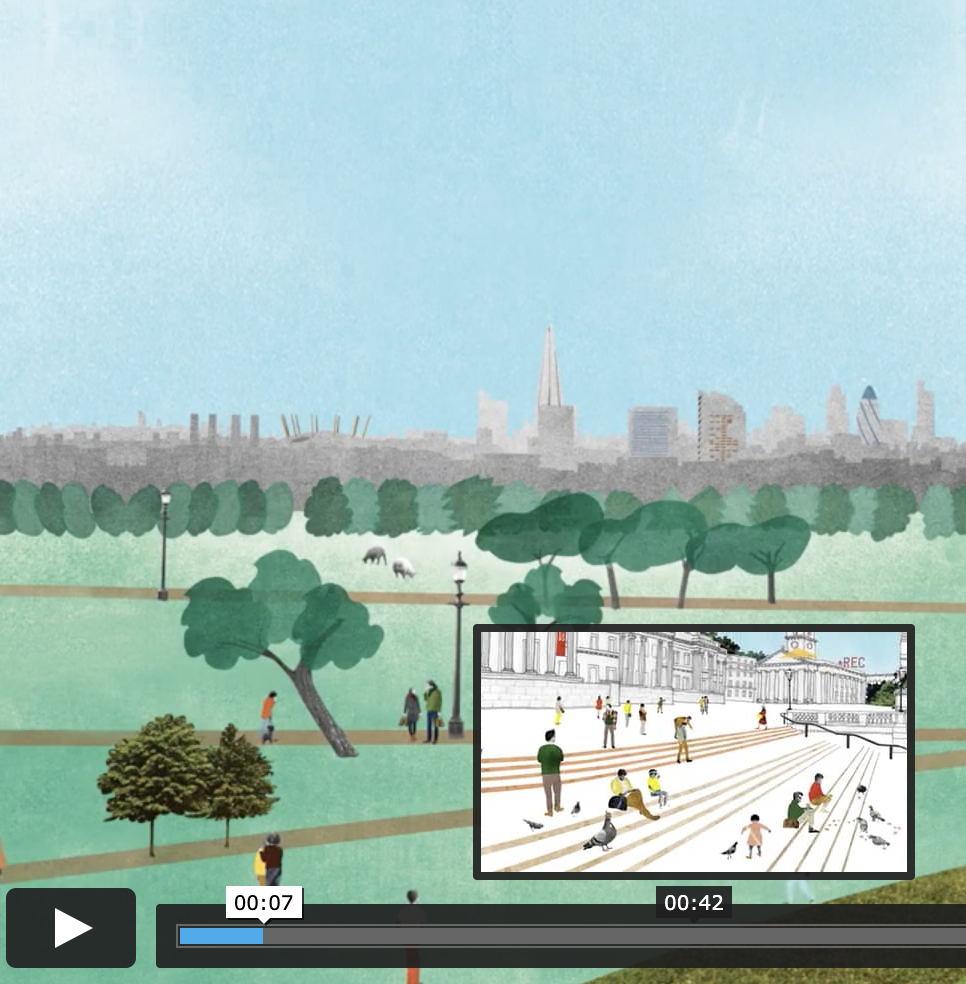
Drawing Source Material: Amazing Architectural Homes
A collection of imagery and sources which you can use to prompt drawing in schools and community groups.
Please note that this page contains links to external websites and has videos from external websites embedded. At the time of creating, AccessArt checked all links to ensure content is appropriate for teachers to access. However external websites and videos are updated and that is beyond our control.
Please let us know if you find a 404 link, or if you feel content is no longer appropriate.
We strongly recommend as part of good teaching practice that teachers watch all videos and visit all websites before sharing with a class. On occasion there may be elements of a video you would prefer not to show to your class and it is the teacher’s responsibility to ensure content is appropriate. Many thanks.
This resource is free to access and is not part of AccessArt membership.
Amazing Architectural Homes
Use this collection of films as source material for pupils exploring amazing architectural homes. In the first instance you might want to pause the videos as suitable points to enable the children to carefully look at the main forms and details. Try to create a sense of momentum – for example you might pause the video 4 times and ask the pupils to make a 1 minute, 2 minute, 3 minute and 4 minute drawing at each pause.
Encourage close and slow looking by talking as they draw – use your voice to attract their attention to features of the building.
When pupils are more experienced, you can also try getting them to make their drawings as the videos play – making quick gestural sketches.


")
 (1880) by Odilon Redon. Original from the Art Institute of Chicago")


 Dynasty 18 Reign: reign of Thutmose IV Date: ca. 1400–1390 B.C.")
 Classification: Bronzes Credit Line: The Cesnola Collection, Purchased by subscription, 1874–76")


 2016 construction with found twigs 27 x 27 x 3\" by Chris Kenny")


