
Pathway: Working with Shape and Colour


Pathway for Years 3 & 4
Disciplines:
Printmaking (Stencil/Screen Print), Collage
Key Concepts:
-
That we can be inspired by key artworks and make our own work in creative response.
-
That we can use shape and colour as a way to simplify elements of the world.
-
That shapes have both a positive and negative element.
-
That we can arrange shapes to create exciting compositions.
-
That we can build up imagery through layering shapes.
-
That we can use collage to inspire prints.
In this pathway children use close looking and the “Show Me What You See” technique to explore artwork from a particular artist, movement or era. Children then explore how they can use shape and colour to simplify elements, inspired by the Cut-outs of Henri Matisse.
Using first collage, then simple printmaking methods, pupils play with positive and negative shapes and spaces to create meaningful compositions in response to the original artworks they looked at.
Medium:
Paper, Printmaking Ink, Stencils & Crayons
Artist: Henri Matisse, Claire Willberg
If you use this resource in your setting, please tag us on social media: #InspiredBy @accessart (facebook, twitter) @accessart.org.uk (instagram) and share the url. Thank you!


Teaching Notes
Find the MTP for this pathway here.
Find the Zoom CPD session introducing this pathway here.
See the recording of the Zoom CPD session exploring Screen Printing in the classroom.
Curriculum Links
History: Choose a painting as inspiration which typifies a particular historical period, for example, a painting from Ancient Egyptian.
Maths: 2D/3D shapes, pattern.
PSHE: Peer discussion.
I Can…
-
I can explore an artwork through looking, talking and drawing.
-
I can use the “Show Me What You See” technique to help me look closely, working in my sketchbook making drawings and notes using pencils and pens.
-
I can cut shapes directly into paper, using scissors, inspired by the artwork.
-
I can collage with my cut elements, choosing colour, shape and composition to make my own creative response to the artwork.
-
I can add to my collage, using line, colour and shape made by stencils.
-
I can explore negative and positive shapes.
-
I can take photographs of my work.
-
I can share my work with my class. I can reflect and share what I like, and what I would like to try again. I can look at the work of my classmates and give useful feedback through class or small group discussion.
Time
This pathway takes 6 weeks, with an hour per week. Follow the stages in green for a shorter pathway or less complex journey.
Materials
Soft B pencils, coloured pencils, oil/chalk pastels, A3 or A2 sugar or cartridge paper, collage papers, PVA glue, scissors.
Option 1: Monoprinting with Carbon Paper – Carbon paper, sharp pencil or pen, oil pastels.
Option 2: Explore Stencils – Card, oil pastels, scissors.
Option 3: Screenprinting mesh, water-based printing ink, tray, acrylic printing medium, scrap card for squeegee, embroidery hoop (optional), newsprint.
Pathway: Working with Shape & Colour
A PDF of this pathway can be found here.
-
Week 1: What's Your Focus?
Choose an Artwork to Focus Your Exploration
Choose a painting or artwork which you would like to explore.
This might be a painting in a local museum or gallery, a painting available online, or a painting from another era or culture which ties in with a curriculum area.
Here are some free to access ideas:
-
Focus upon the Bayeux Tapestry
-
Focus upon Egyptian Painting
-
Focus upon an art work from Google Arts & Culture
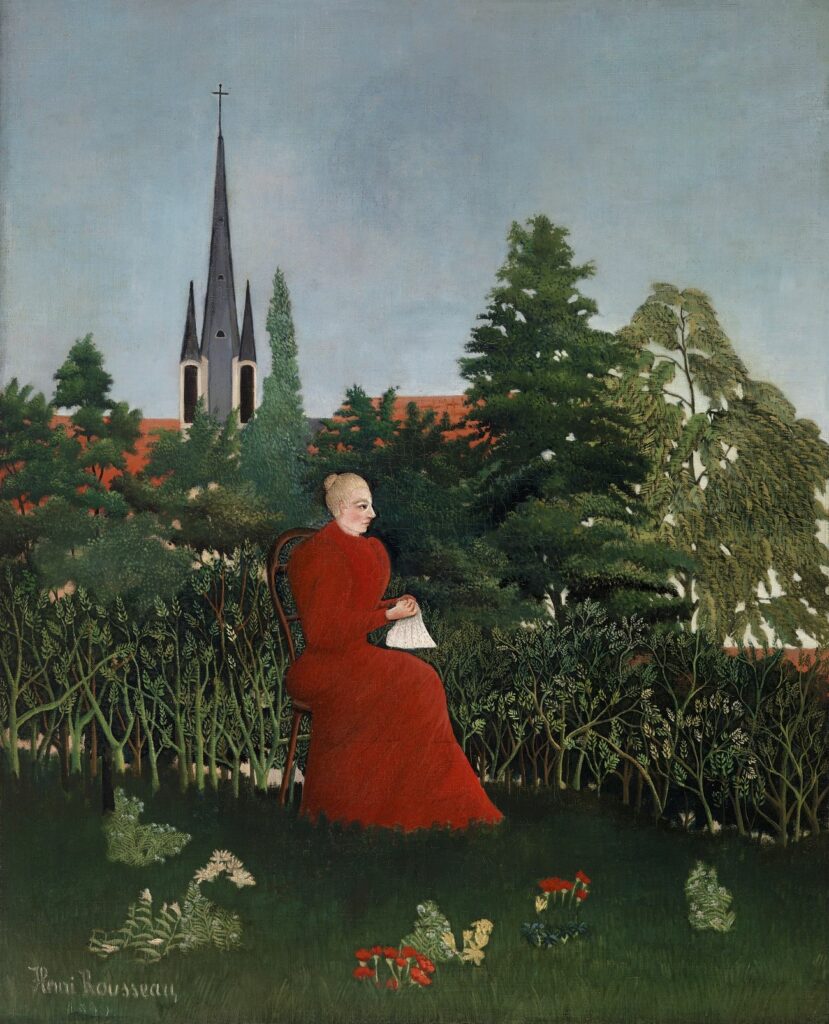
Portrait of a Woman in a Landscape (Portrait de femme dans un paysage) (ca. 1893–1896) by Henri Rousseau. -
-
Week 2: Look and Talk
Painting With Scissors
Visit the free to access “Talking Points: Henry Matisse Cut Outs” resource to introduce pupils to the idea of “painting with scissors”.
Use the free to access “Talking Points: Romare Bearden” resource to introduce pupils to the work of African American artist Romare Bearden who was influenced by patchwork quilts derived from African-American slave crafts and the work of Matisse. Bearden illustrated Homer’s Odyssey using collage.
Refer to the “Drawing With Scissors” resource to see how to explore a historic (or contemporary) painting through printing. (Using just the part of the resource about collaging with cut elements).
-
"Paint with Scissors"
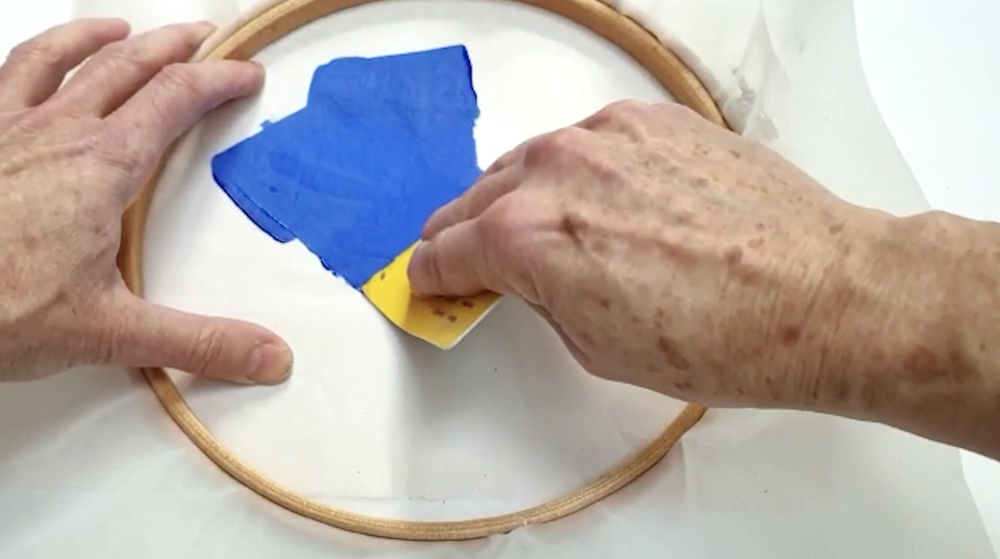
Begin to Cut Shapes
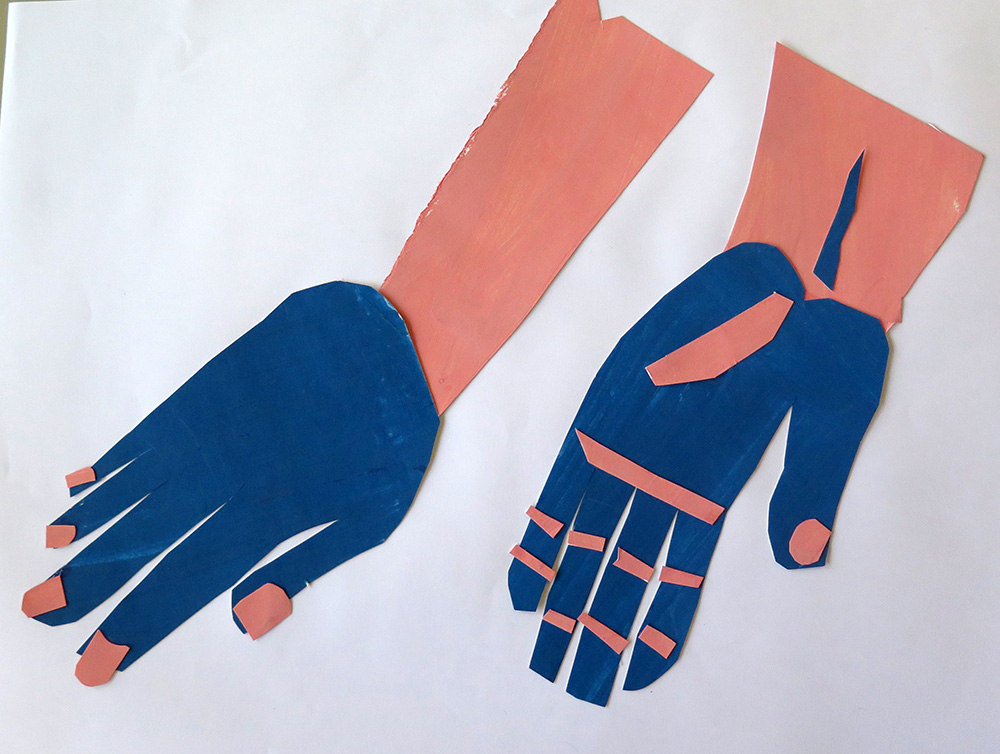
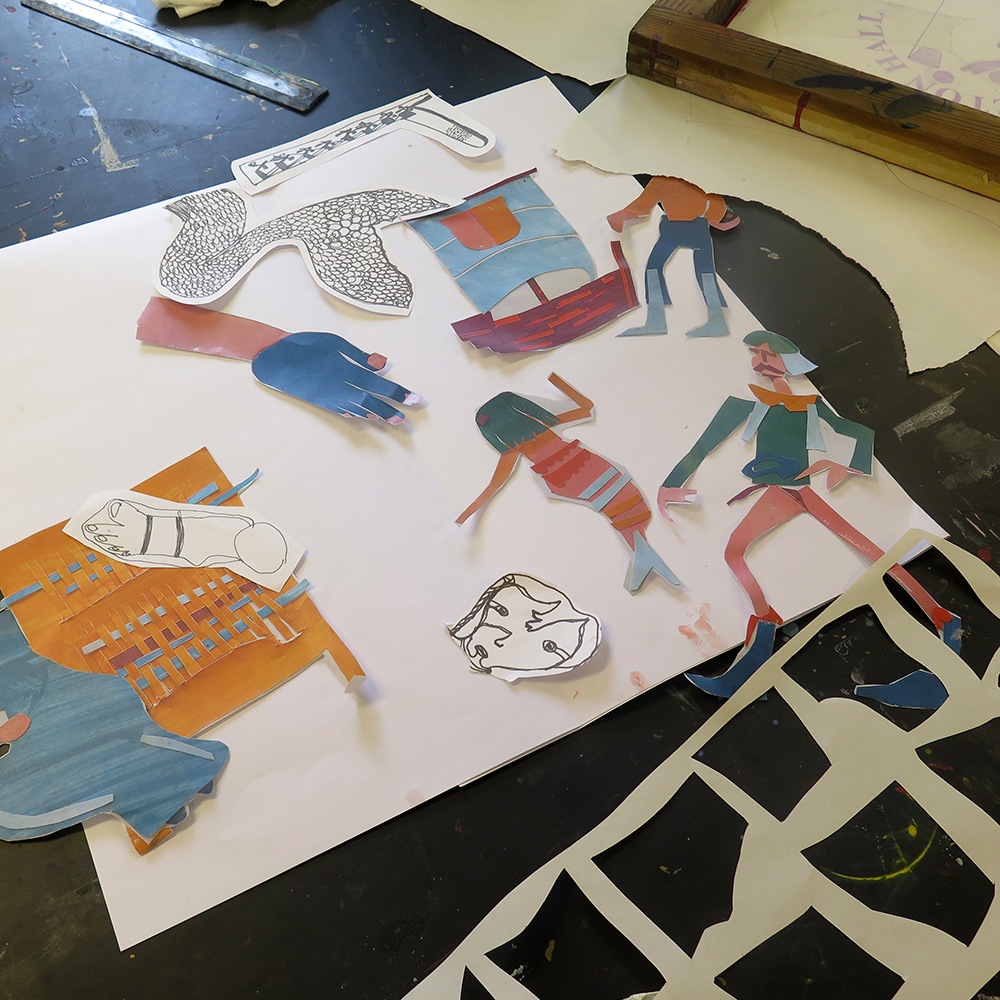
With the original artwork on the white board and sketchbook work from Show Me What You See, provide pupils with coloured paper (sugar or coloured paper, or even old paintings which can be cut up) and invite them to start cutting out shapes made in response to the original artwork. You may want to refer back to “Drawing With Scissors“ resource.
You might like to split the class into groups – each taking a section of the original artwork, or you might like to give pupils more space to choose elements they particularly like.
Don’t waste any paper – at the end of the session encourage pupils to keep the paper which has been cut away (you can sort it into sizes) as well as the positive “shapes”.
“Envelopes” can be made/stuck in sketchbooks to keep paper elements safe until next week.
You might like to see the “Positive and Negative Shapes” resource (to be done).
Continue this work into week three.
-
Week 3: Continue "Painting with Scissors"
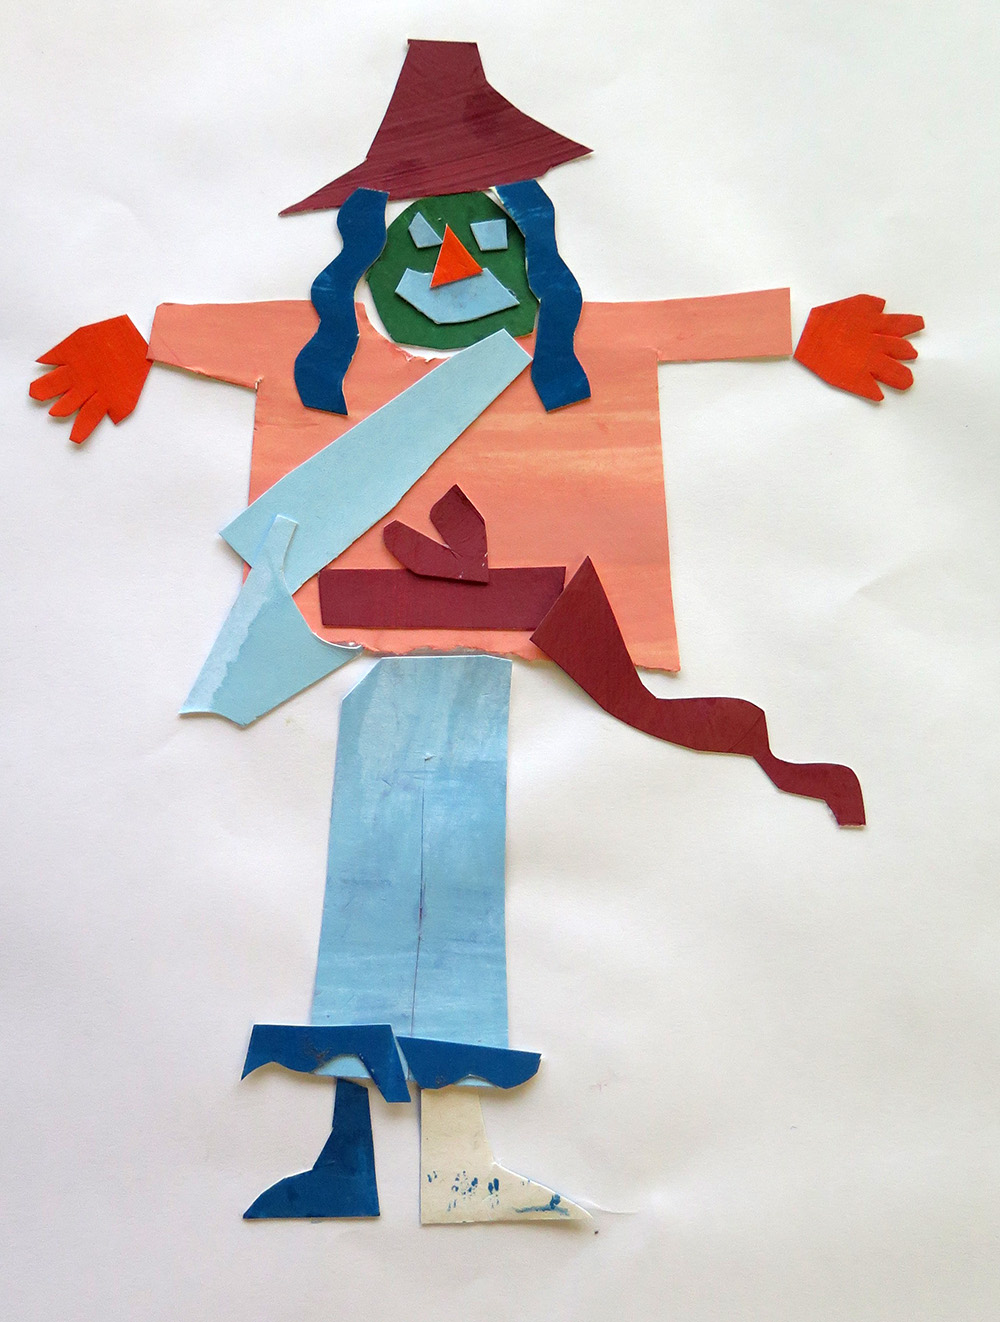
Collaging with Cut Elements
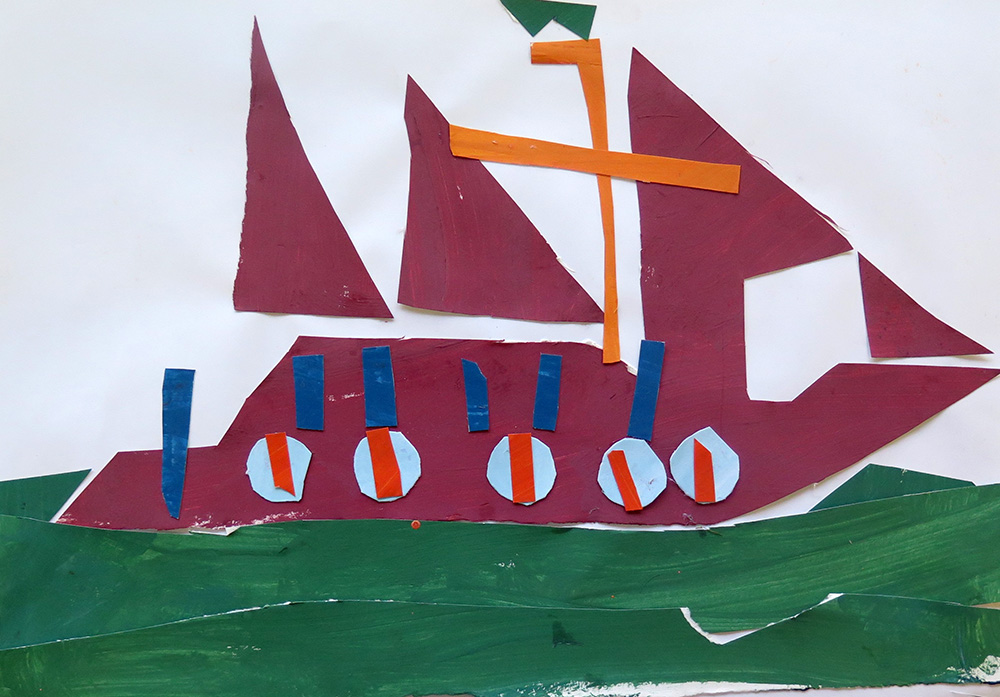
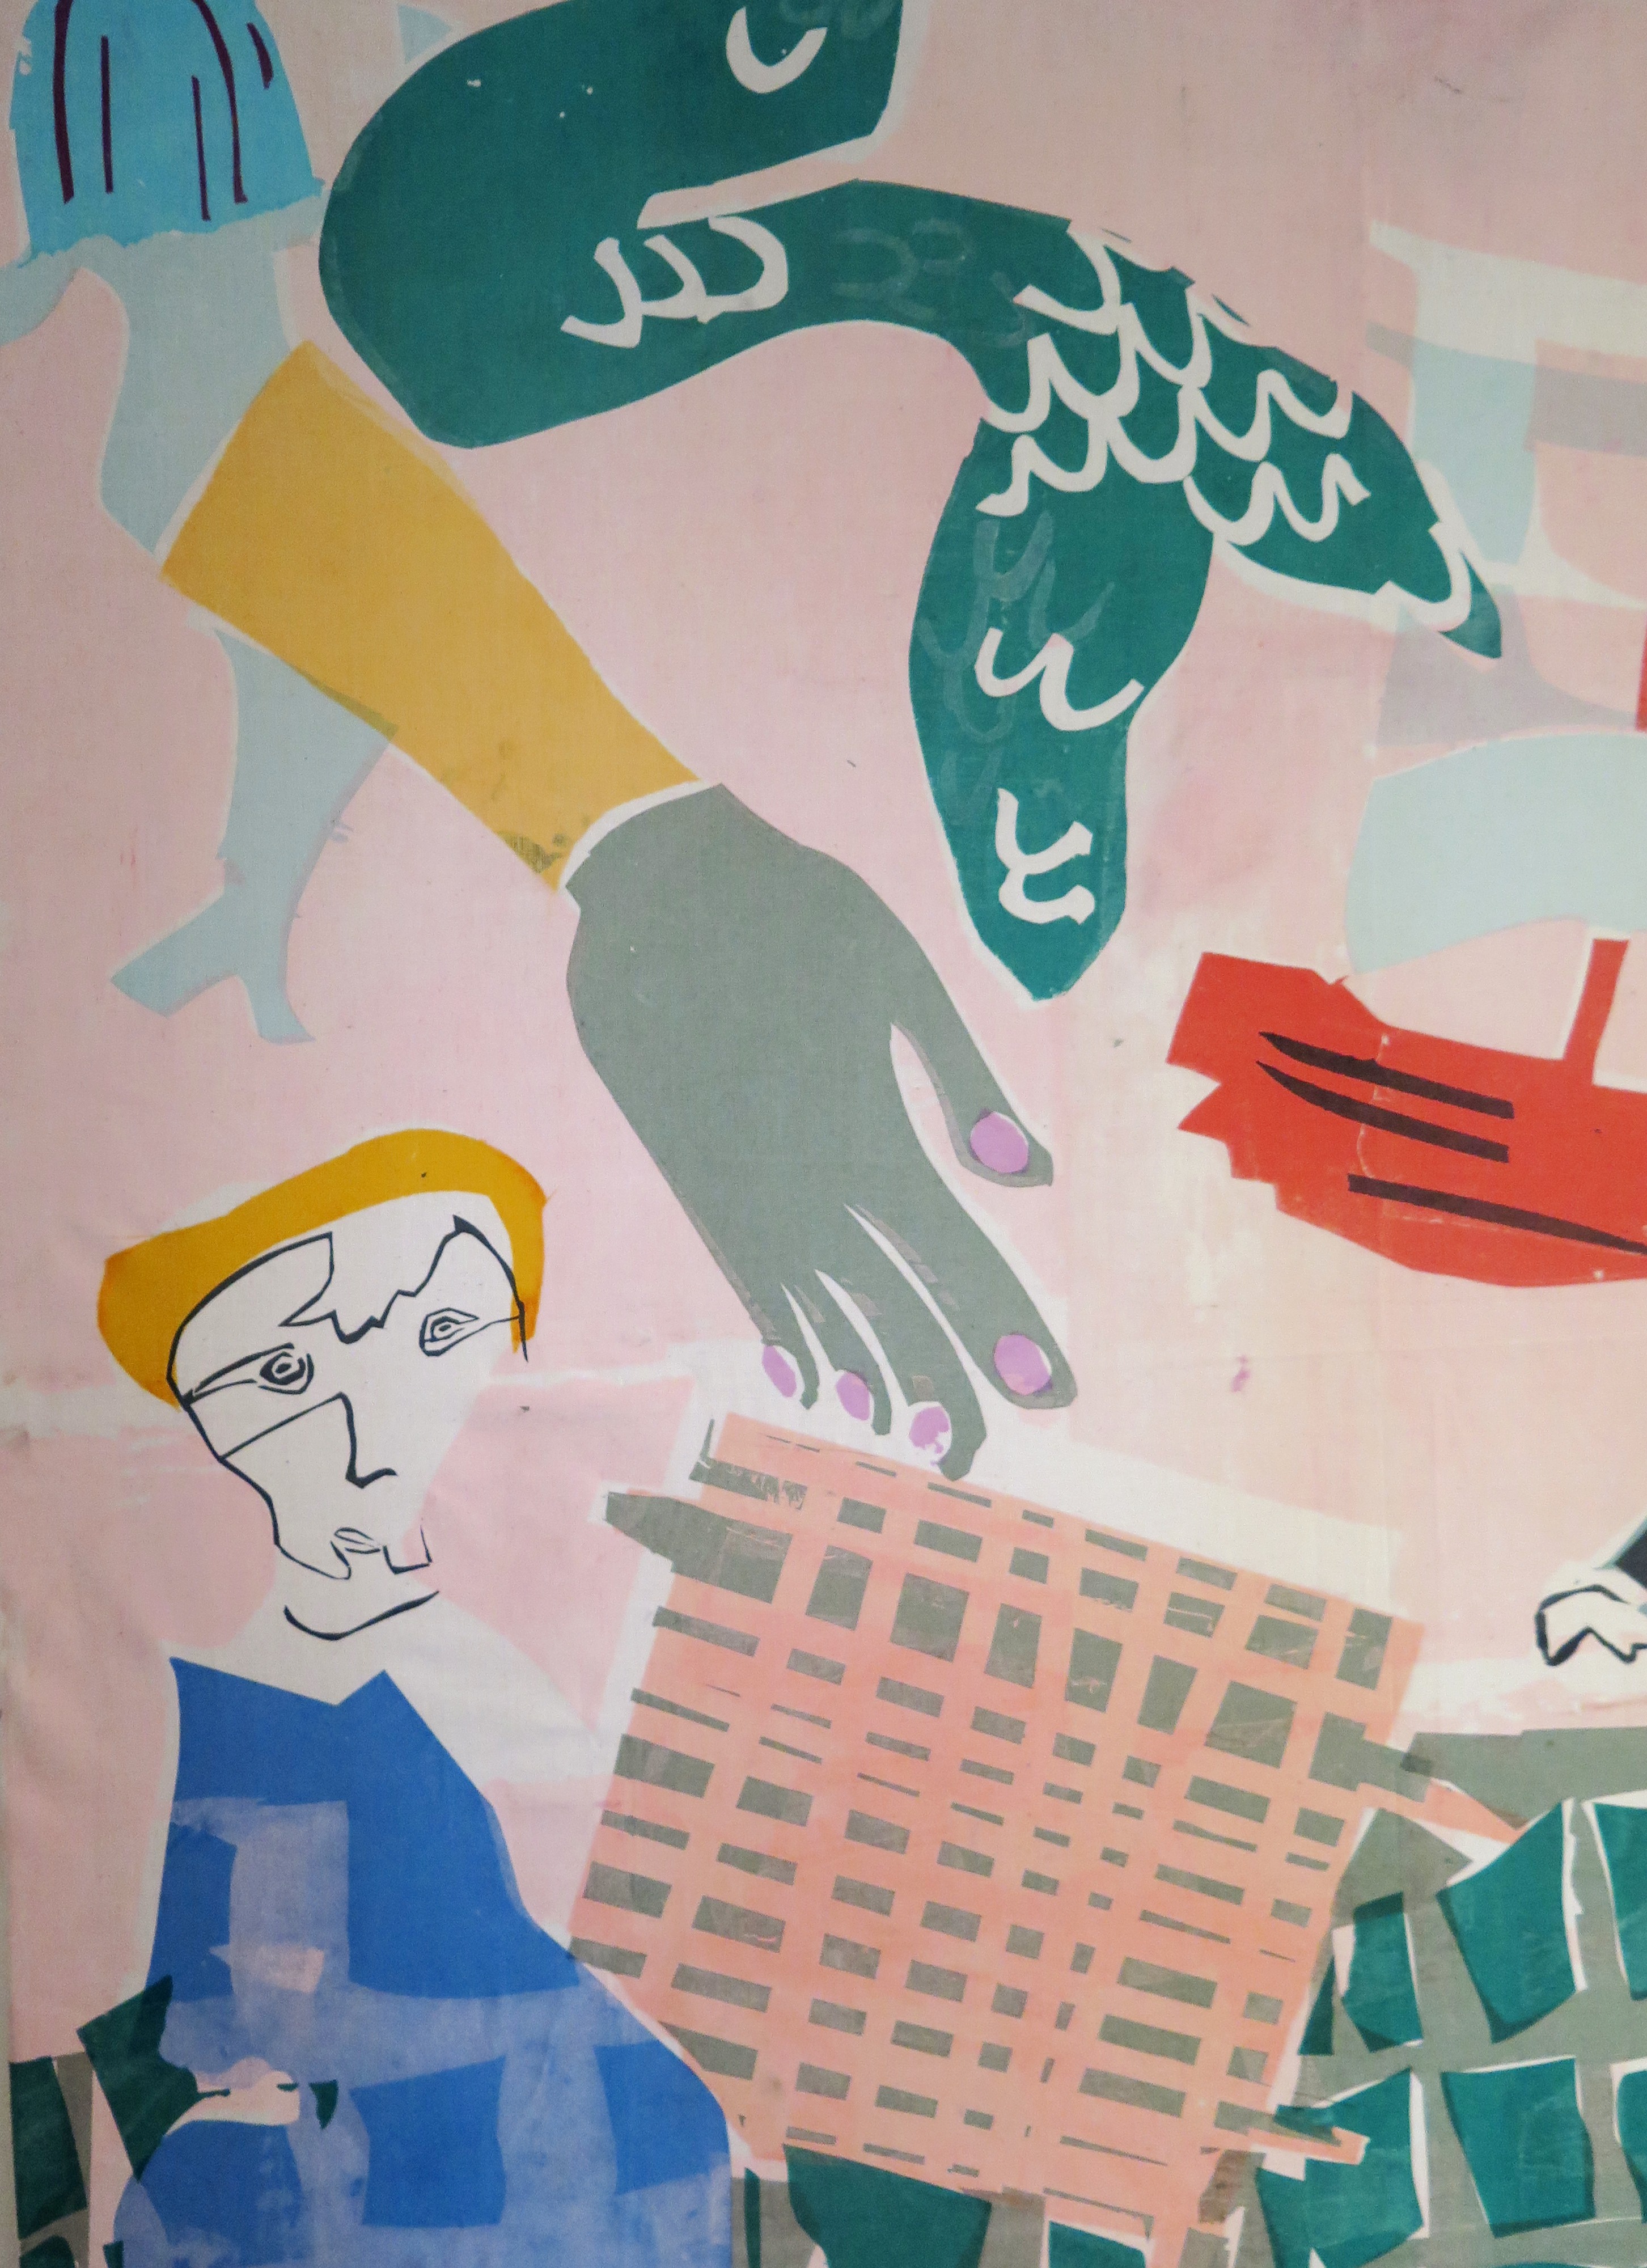
Continue the process described in the “Drawing with Scissors” resource. Invite pupils to begin to lay down their cut elements to make collaged compositions, working on A3 or larger paper.
Encourage children to explore playfully before they decide where to stick shapes down on the page. Think about composition and meaning. Remember they are not trying to recreate the original artwork, instead they are making a creative response (which is personal) to the artwork.
Remind pupils they can use the pieces of paper which have had shapes cut out of them, and so introduce negative shapes into their work.
Continue into week four.
-
Continue with Collage
Finalise Collages
Continue the process described in the “Drawing with Scissors” resource.
Finalise first stage of collages ready for second part of the project. By this point all cut elements should be stuck down onto each pupil’s piece of paper.
-
Week 4 & 5: Add Further Detail
Stencils, Masks or Line
Continue the process described in the “Drawing with Scissors” resource.
The final stage of the project is to add further detail to the artwork by working over the collaged elements.
You can choose which method you want children to use from the 3 options below. Choose the option you think will best help pupils respond to the original artwork.
The aim of this final stage is to add further definition or clarity to the collaged composition, using a different medium to make the artwork feel more dimensional (collage can be quite a “flat” medium).
-
Option 1
Printed Line
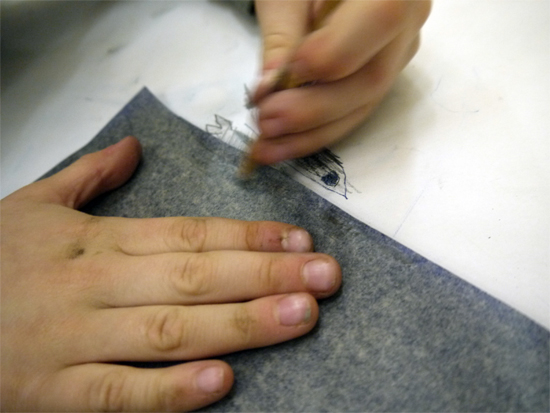
Revisit the original artwork and get pupils to look closely at the qualities of line the artists used.
Use the “Mono Printing with Carbon Paper” resource and use carbon paper to add line drawings over the top of the collaged sheets.
Remember the drawings do not have to line up with the exiting imagery. Layering imagery of different types will give exciting results.
-
Option 2
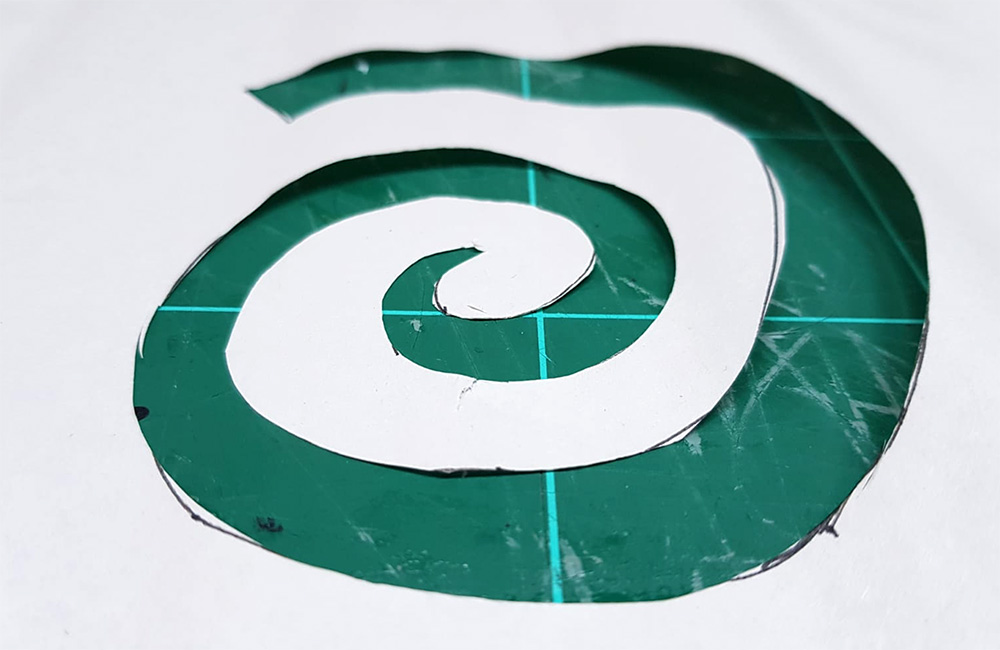
Explore Stencils
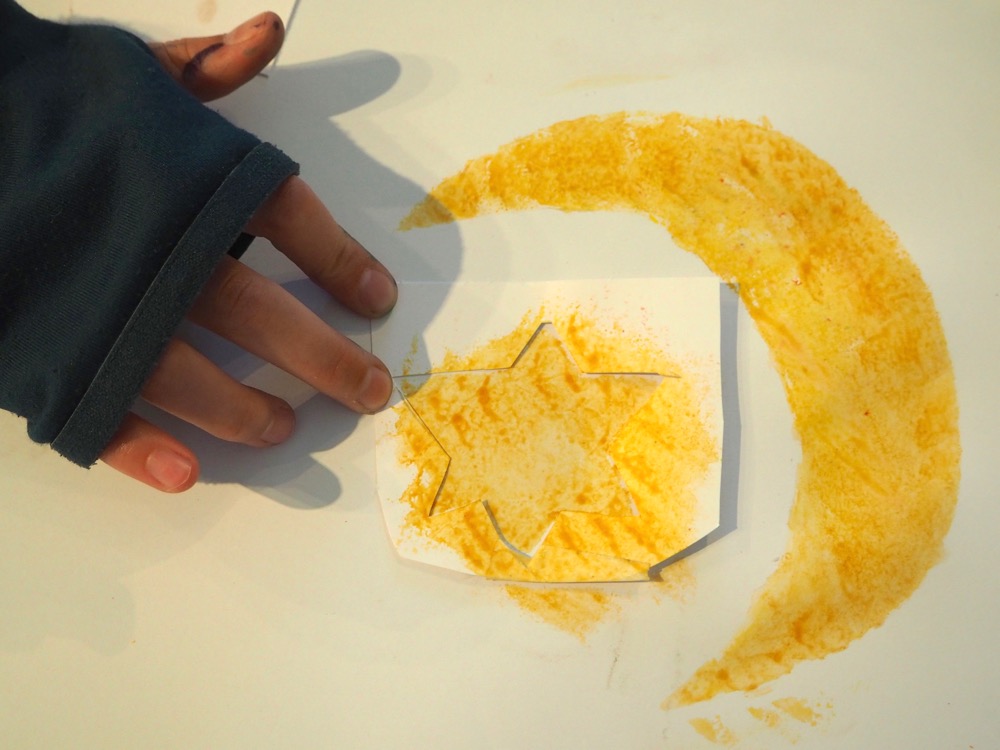
Use the “Explore Stencils, Composition and Expressive Mark Making with Oil Pastels” resource and invite children to create masks and stencils out of card, thinking about negative and positive shapes. Use the masks and stencils over the original collaged artwork, using oil pastel as a medium.
Encourage the children to use a range of mark making and experiment with colour blending so that they get an understanding of the qualities of oil pastels.
-
Option 3
Simple Screen Printing Hack
If you are feeling more confident, you may want to give pupils the opportunity to explore simple screen printing as an alternative way to explore masks and stencils. See our “Talking Points: Screenprint“
Give children the opportunity to try out screen printing with this “Simple Screen Print Hack“. Watch all 3 videos before starting.
Ask children to prepare their stencils and masks prior to printing. Remember that they will need stencils and masks of every element including clothing, face detail or any big shapes within the background.
As with Option 1 and 2, be inventive about the shapes which are overlaid over the collaged elements – remember the shapes do not have to line up with the collaged composition – exciting and surprising outcomes can be achieved by creating new shapes and lines over the first collage.
-
Week 6: Reflect & Discuss
Share, Reflect, Discuss
Time to see the work which has been made, talk about intention and outcome.
Invite pupils to display the work in a clear space, and walk around the work as if they are in a gallery. Give the work the respect it deserves. Remind the children of their handwork.
If you have class cameras or tablets, invite the children to document their work, working in pairs or teams.
Use the resource here to help you run a class “crit” to finish the project.
-
Extension
Extension: Animating With Used Masks, Stencils, Or Left Over Shapes
Claire Willberg repurposes the paper that she uses in her printing process to create visually exciting animations. See her animations in “Talking Points: Claire Willberg“.
Get your children to keep their stencils and masks once they’ve been used and make a stop motion.
See the “Animation Software” resource for support.
See the Pathway Used in Schools...


If You Use AccessArt Resources You May Want To...
Join our Facebook Group


You May Also Like...
Using Sketchbooks, Drawing and Reflective Tools in the 20th Century Gallery at the Fitzwilliam Museum, Cambridge

Using Drawing to Get Closer to 18th Century Portraits at the Fitzwilliam Museum, Cambridge
