
Pathway: 2D Drawing to 3D Making


Pathway for Years 5 & 6
Disciplines:
Drawing, Sculpture, Graphic Design, Collage, Sketchbooks
Key Concepts:
-
That drawing and making have a close relationship.
-
That drawing can be used to transform a two dimensional surface, which can be manipulated to make a three dimensional object.
-
That when we transform two dimensional surfaces we can use line, mark making, value, shape, colour, pattern and composition to help us create our artwork.
-
That we can use methods such as the grid method and looking at negative space to help us draw.
-
That there is a challenge involved in bringing two dimensions to 3 dimensions which we can solve with a combination of invention and logic.
This pathway contains two choices: 1) working towards a piece of sculpture, or 2) working towards graphic design/packaging.
Both options allow children to explore the idea that drawing as a 2 dimensional activity can be used to transform surfaces which can then be manipulated into a 3 dimensional object.
Along the way, children explore how mark making, line, tonal value, colour, shape, and composition can be used to inform the final piece.
The sculptural project additional includes two methods to help build drawing skills: looking at negative space and grid drawing.
The graphic design packaging project includes typography.
Medium:
Card, Paper, Drawing materials.
Artists: Lubaina Himid, Claire Harrup
If you use this resource in your setting, please tag us on social media: #InspiredBy @accessart (facebook, twitter) @accessart.org.uk (instagram) and share the url. Thank you!


Teaching Notes
Curriculum Links
English: Create characters inspired by literature.
History: Create characters inspired by theme.
Maths: 2D and 3D shapes, measuring, symmetry, angles, plot points.
PSHE: Collaboration, Peer Discussion.
I Can…
-
I have explored artists who use their drawing skills to make objects, and I can share my responses to their work, thinking about their intention and outcome.
-
I can use my sketchbook to record and reflect, collecting the ideas and approaches I like which I see other artists use.
-
I can use line, mark making, tonal values, colour, shape and composition to make my work interesting.
-
I can use negative space and the grid method to help me see and draw.
-
I can explore typography and design lettering which is fit for purpose.
-
I can transform my drawing into a three dimensional object.
-
I can share my work with others, and talk about my intention and the outcome. I can listen to their response and take their feedback on board.
-
I can appreciate the work of my classmates. I can listen to their intentions and share my response to their work.
-
I can photograph my three dimensional work, thinking about presentation, lighting, focus and composition.
Time
This pathway takes 6 weeks, with an hour per week. Shorten or lengthen the suggested pathway according to time and experience. Follow the stages in green for a shorter pathway or less complex journey.
Materials
Option 1: Flat/Sculptural Drawings: Corrugated cardboard, silhouette images of dogs, handwriting pens, soft B pencils, collage papers/newspapers/photocopies, PVA glue, tape, scissors.
Option 2 Packaging: Cardboard food packaging, ink, brushes, handwriting pens, sharpies, acrylic paint/poster paint mixed with PVA, coloured paper, coloured crayons, scissors, string, big needles, glue, tape, wire.
Pathway: 2D Drawing to 3D Making
A PDF of this pathway can be found here.
-
Option 1
Sculpture
Sculpture – Explore drawing techniques such as grid drawing, using negative space, and mark making (including tonal value), before transforming your drawings into sculpture.
-
Option 2
Graphic Design
Graphic Design – Explore typography, line, shape, colour and composition to recreate food packaging, turning the flat graphics into 3d nets.
-
Option 1: Week 1: Introduce
Introduce the Work of Lubaina Himid

Introduce pupils to the work of Lubaina Himid, an artist working in London, using the free to access “Talking Points: Lubaina Himid” resource.
Note for teachers on adult content: Please see the advisory on the Talking Points page above.
Lubaina paints on wood to create flat, standing images which viewers can walk amongst.
With sketchbooks open use the “Making Visual Notes” resource so that pupils can note down things that they notice during the exploration. Use the questions on the resource to start discussion.
-
Option 1: Weeks 2 & 3: Draw
Use Negative Space and the Grid Method
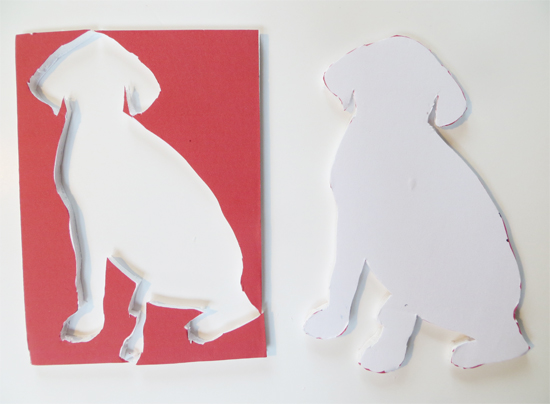
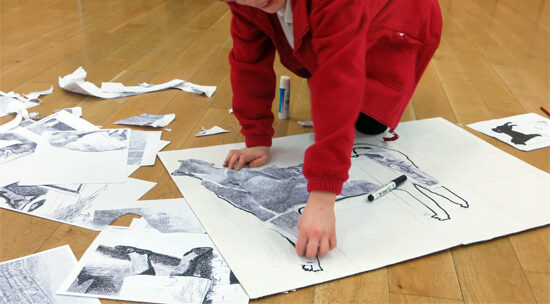
Pupils will start to create their own “flat yet sculptural” artwork.
In the resource we feature, we framed our exploration around dogs – but you can choose any focus you like.
Begin by introducing children to two key techniques which will help them both see and draw: 1) using negative space and 2) the grid method.
Use the “Use Negative Space to Believe What You See (and Scaling Up)” resource to help pupils understand these methods and begin their project work.
-
Option 1: Weeks 4 & 5: Draw
Explore Mark Making, Tonal Value & Structure
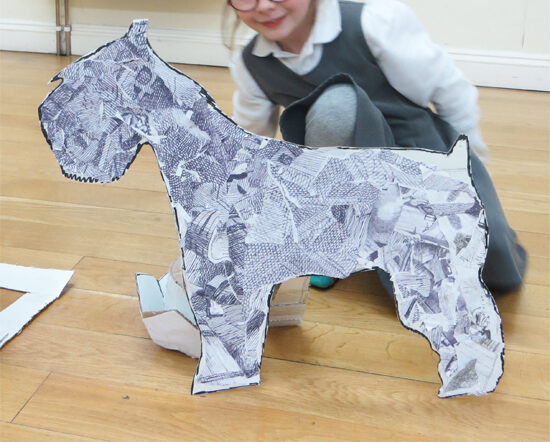
Continue the project by collaging and making the drawings into sculptures. Full instructions via the “Flat Yet Sculptural” resource.
-
Option 2: Week 1: Introduction
Graphic Designers and Food Packaging
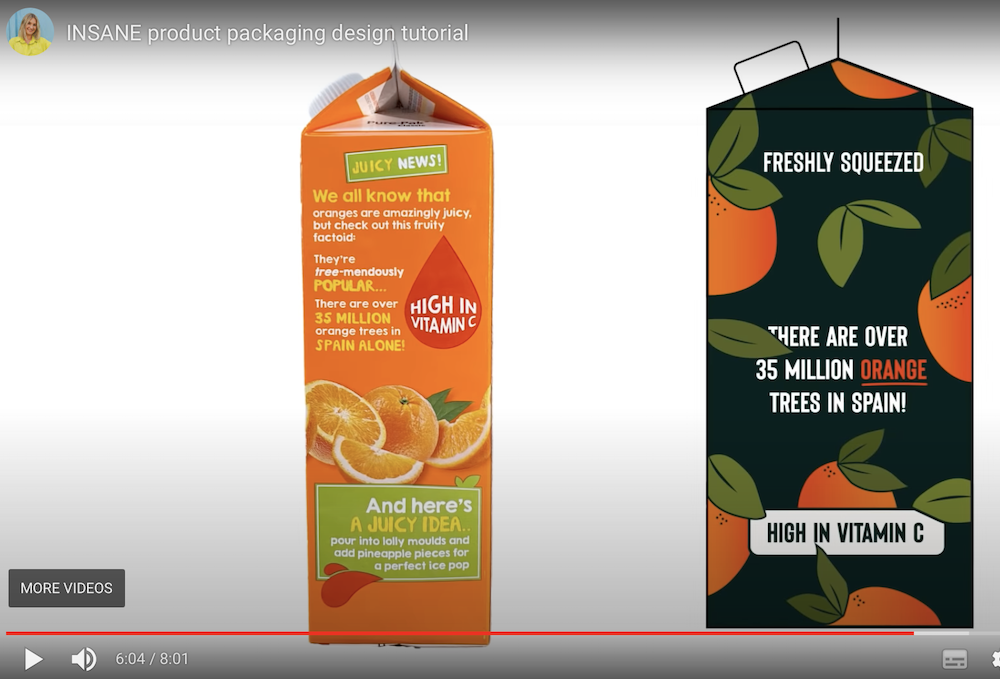
Use the free to access “Talking Points: Food Packaging” resource to explore food packaging. Use the questions on the resource to stimulate conversation.
You may also like to take in food packaging of favourite foods and invite children to talk about the colours and design of the boxes etc.
Use the “Making Visual Notes” resource to give children the opportunity to note down things that they notice during the exploration.
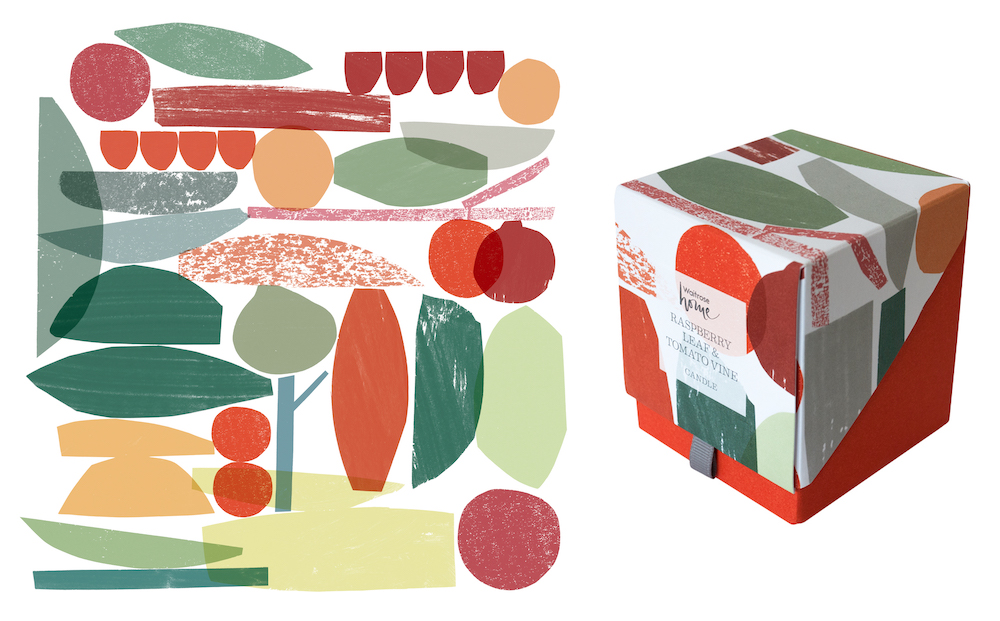
You could also look at “Which Artists: Claire Harrup” to see how an artist working for one of the big supermarkets designs her work.
-
Option 2: Week 2, 3, 4, 5: Draw, Paint, Make
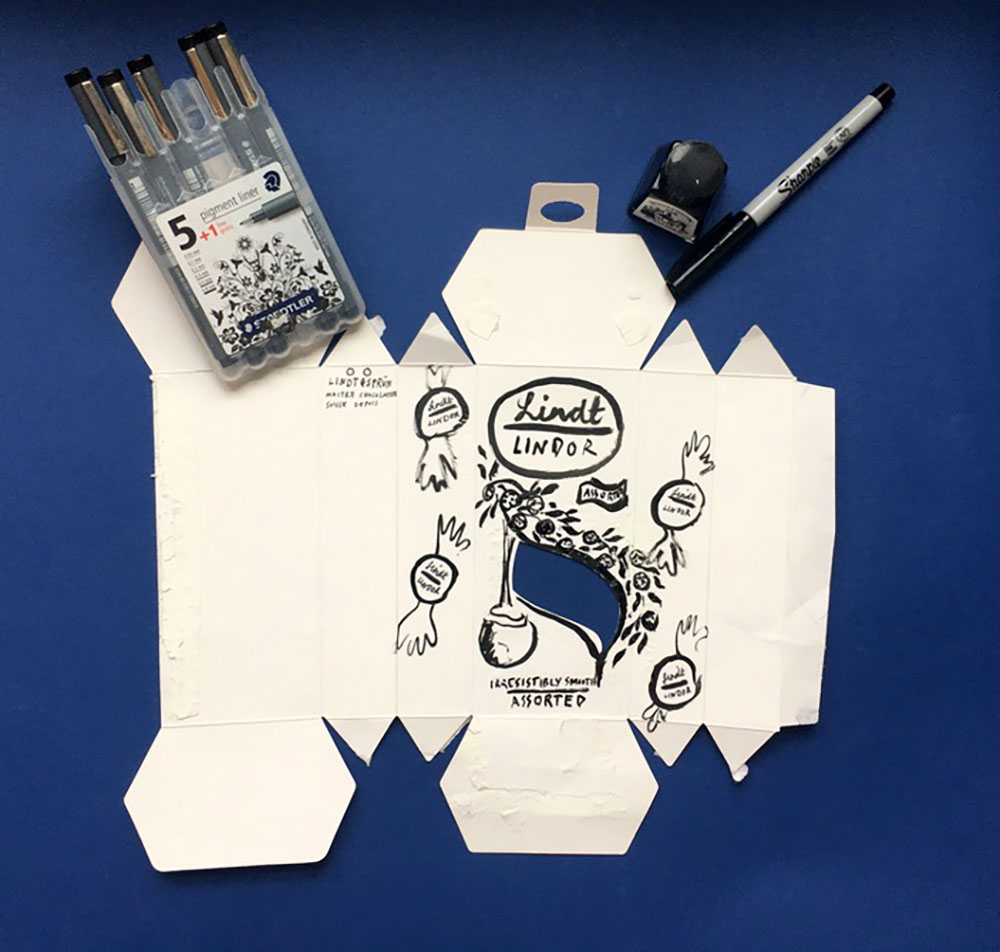
Explore Packaging Design
Use the “Redesigning Food Packaging” resource to design your own food packaging.
You might like to start the project by watching the third video on the “Talking Points: Food Packaging” resource if you didn’t watch it last week. The process you will follow is slightly different but it gives a nice insight into how a designer might approach a similar project.
You may also like to visit the free to access “Talking Points: What is Typography?” resource if you would like to remind children how they can think creatively about lettering.
Throughout the project, use sketchbooks to test ideas and reflections.
-
Week 6 (both options)
Share, Reflect, Discuss
Time to see the work which has been made, talk about intention and outcome.
Invite children to display the work in a clear space and walk around the work as if they are in a gallery. Have sketchbook work present too. Give the work the respect it deserves. Remind the children of their hard work.
If you have class cameras or tablets, invite the children to document their work, working in pairs or teams. Explore how children can take high quality photographs of 3d artwork with this resource.
Use the resource here to help you run a class “crit” to finish the project.
See This Pathway Used In Schools


If You Use AccessArt Resources... You might like to...
Join our Facebook Group


Lauren C
May 24, 2023 @ 8:43 pm
How would they record the big projects in their sketch books? For example the sculpture pathway. They would only have the artist visual notes in there. Do we record anything in there to show the project they completed?
Trevor Horsewood
May 28, 2023 @ 11:57 am
Hi Lauren
Thanks for your question about recording big projects in sketchbooks.
They could test out the grid method on a small scale first in sketchbooks and record their decisions about the animal they choose and why.
They can test layering the collage pieces in their sketchbooks to explore how to create depth / areas of interest as well as using sharpies over it to create mark-making observations that they can take through to their final designs.
Also drawing diagrams and writing notes about how they’ve constructed the elements to get the sculptures to stand. Lots of photos too!
Trevor Horsewood
May 30, 2023 @ 9:45 am
Additionally…
For the Food Packaging option within the pathway (2D Drawing to 3D Making) they can test out some of the design elements such as colours, mark-making, type and composition by sticking in / drawing test pieces in sketchbooks experimenting with materials they might consider using ie. collaged coloured paper shapes.
They can make observational drawings of the ingredients linked to the packaging to help them create their final compositions.
They can annotate about their decision making – why they choose to take one design idea forward and not the other.
They can draw diagrams of the net with notes about how to reconstruct it once it’s been designed (they might stick to the original form or rebuild their own). Annotations about how they might attach it back together for example with tape, yarn…and photos of final product x