
DrawAble: Making Layered Portraits by Mike Barrett Part Three


By Mike Barrett
Mike is an artist, digital creative and photographer whose work combines words, drawings, photographs, music and sound. This resource finalises the work started in Step 1 and Step 2, and shows young learners how to combine their portraits with their collage backgrounds.
What is the aim of this exercise?
This resource offers children and teenagers an opportunity to build on the work done in Part 1 and Part 2, and put finishing touches on their autobiographical portraits. Inspired by a wide range of materials and media, learners are encouraged to continue their creative journeys.
What age can this exercise be used with?
This resource can be used with ages 6 and upwards. Is particularly suitable for secondary-age learners (ages 11-16).
What materials will the learners need?
For this activity, the learners will need watered-down ink/acrylic/watercolour paint, a paintbrush, a pot of water, bubble wrap, glue sticks or PVA glue. You can also use any materials you may already have, such as Posca pens, Biros, markers, etc.
How long does this exercise take?
This exercise will take between 20 minutes and an hour.
How do I measure success?
Success will be measured by the children’s enjoyment and engagement with the activity.
More able or engaged learners may show a better grasp of techniques learned from previous videos. They may be more keen to try new materials and add to their portraits.
Encourage children to experiment with the media, and change things if they want to, showing support for their creative choices.
What can we try after this exercise?
Life Drawing: Drawing the Head by Hester Berry
Sketchbook warm ups by Jo Blaker
Explore another medium to create a decorative profile of a head using lettering in Clay Art Medals
Explore creating abstract portrait drawings taking inspiration from Abstract Face – Relief Sculptures
Introducing drawing materials and mark making
Graffiti art and ‘Missing You’ pavement art
Try other DrawAble exercises and projects.
Which artists might we look at?
SNUB23 street art
John Wentz and Ann Gale paint fractured surfaces integrating the figure
Ed Fairburn integrates the figure with maps and start charts
Julie Mehretu layer architectural drawings, plans, charts and maps with intense mark making on a large scale but ideas could easily be adapted for portrait backgrounds
You may also want to look at Mike’s other projects.
To Begin
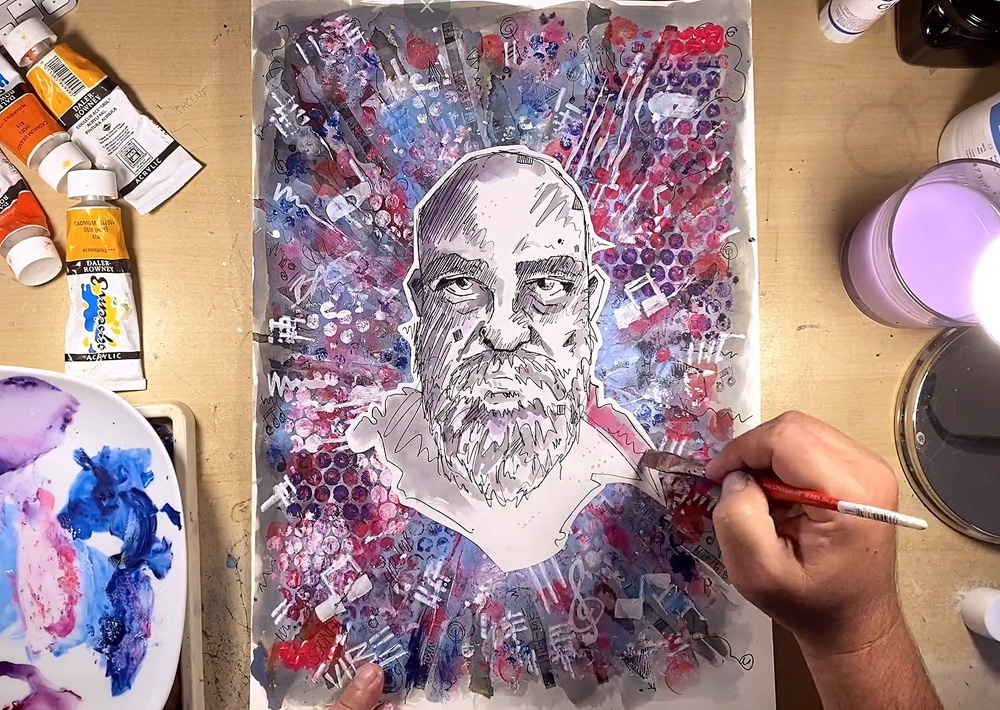
In this session, we’re going to add our portrait illustration to our background image and bring all elements together. By adding more textural detail or more colour elements, we will see all the work come together as one final piece of artwork. So, Step 3 – the merging of images in the final detail!
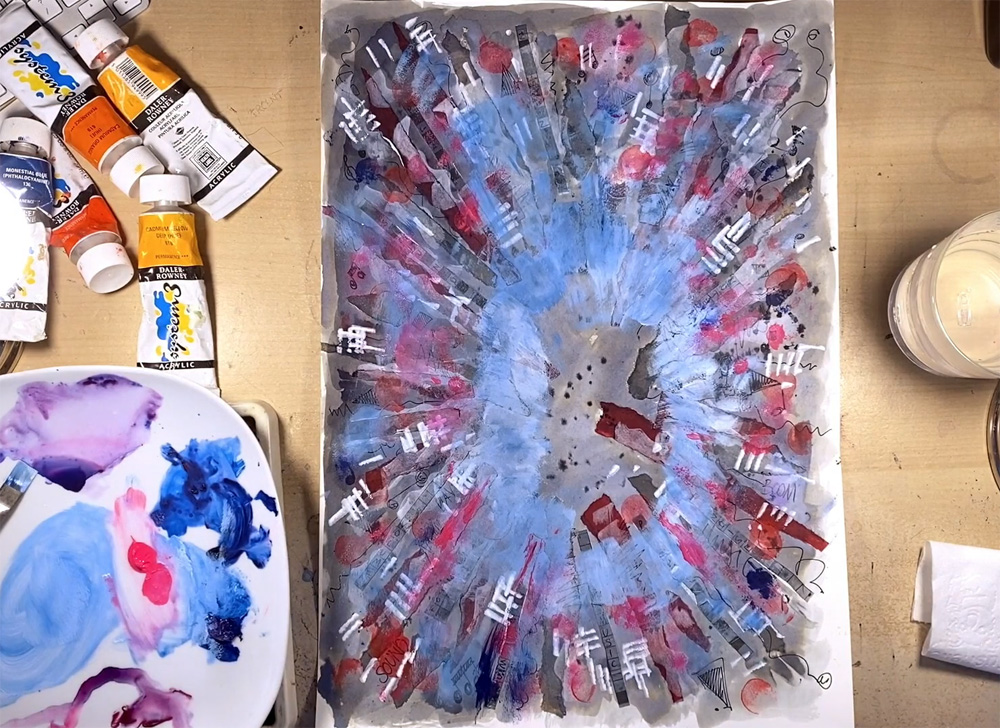
In the previous video, I said that I’d chosen a warm colour palette, and I was going to use a limited colour palette – but I’ve changed my mind. There was something about the way that the black ink watered down and gave some bluish tones, as there’s a lot of blue in the black ink. So I decided that this worked quite well with the warm colour, and they work well against each other – the cold and the warm. You can change your mind with artwork whenever you want. And a lot of the time it’s usually because you’re informed by the artwork, which is exactly what’s happened here – which is great!
So I’m using acrylic paint on this area. I’m sponging it down as well. I want to work all that beautiful paint into the relief of the collage so that it becomes part of the texture.
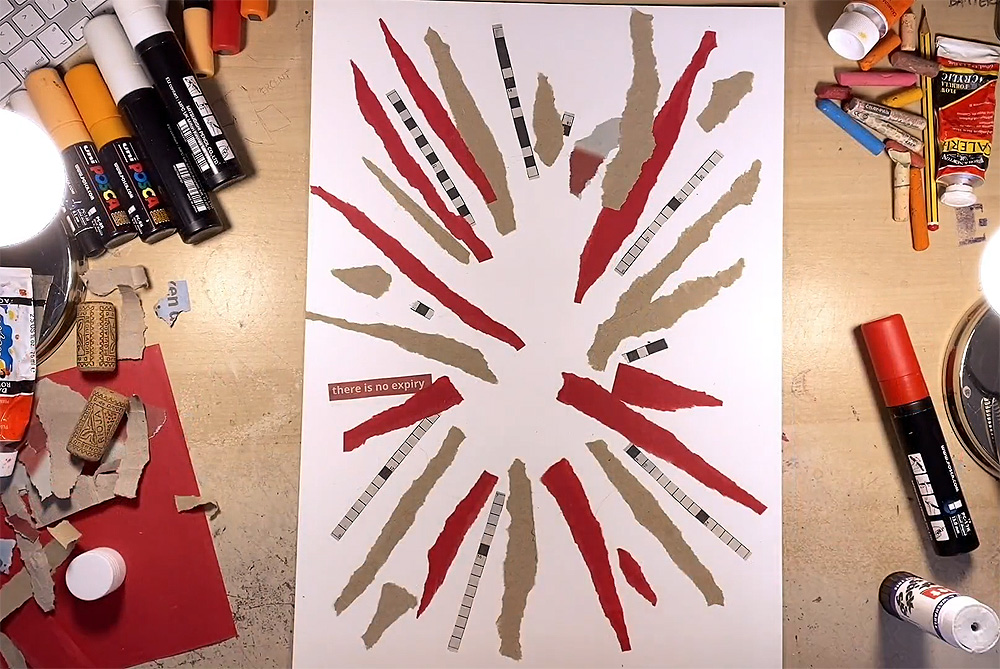
Here I’m using bubble wrap. I’m going to cut a strip out and paint it with some pink and blue acrylic paint. I’m going to mix the paint on the actual bubble wrap itself and spin it over, then print it on the top right corner. Press it down firmly, and you get a great texture from it.
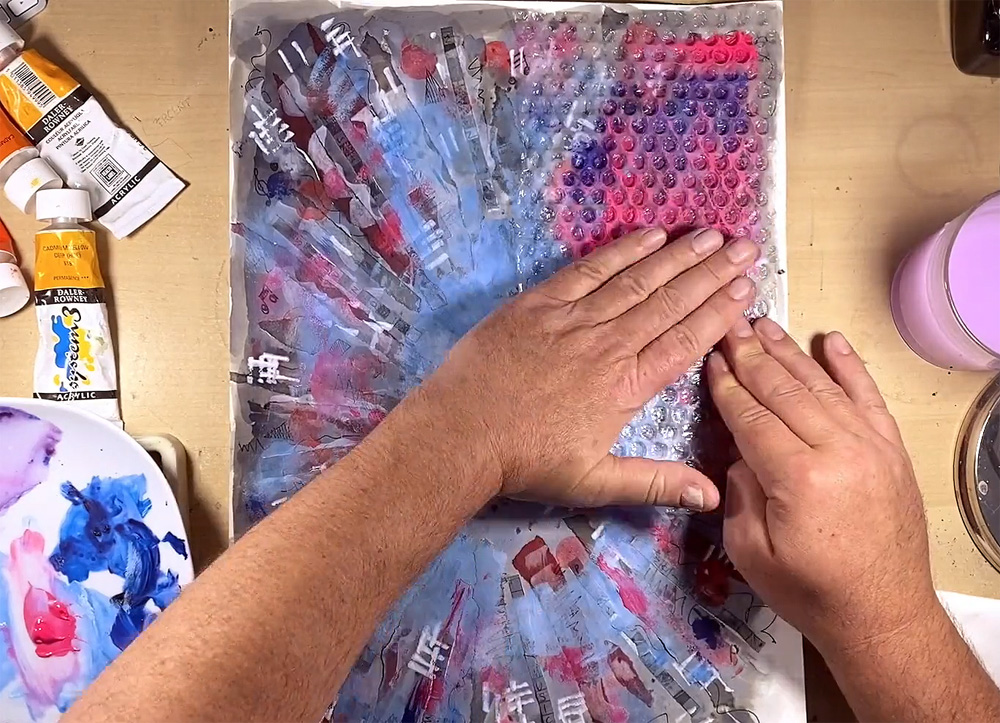
I’m going to use the same piece again, but introduce some white paint this time just to get some tonal difference, and print that to the bottom left. With the excess paint on it, I’m just going to print it a few more times in different areas on the page and get some more texture in there. (If you screw it up and use it like a sponge, you can actually get bits of bubble wrap texture in other areas of the canvas as well.)
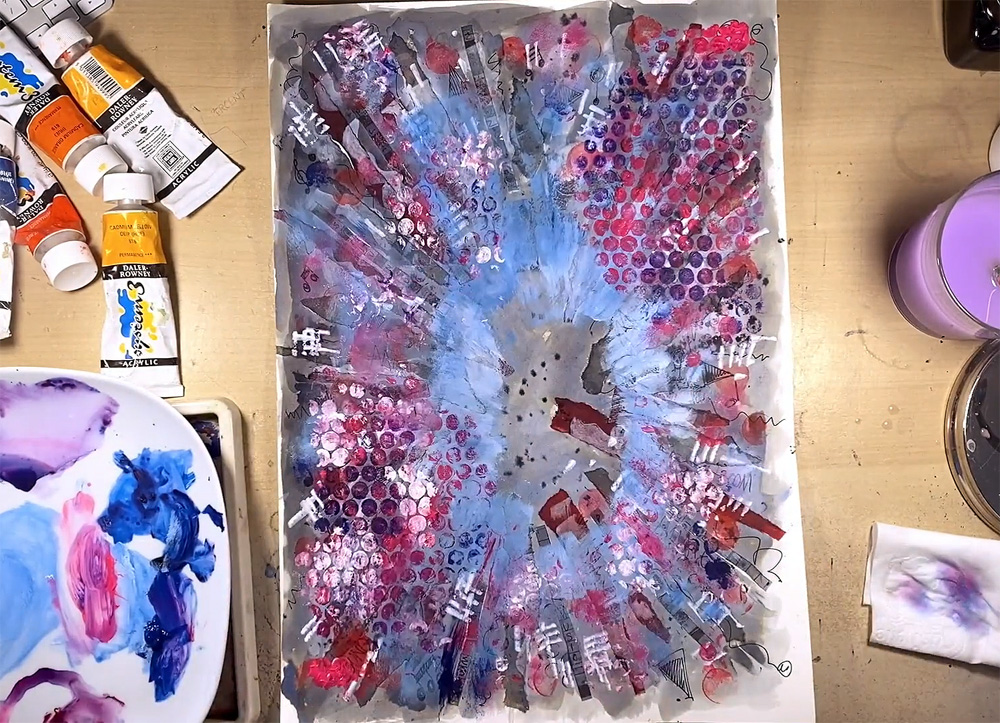
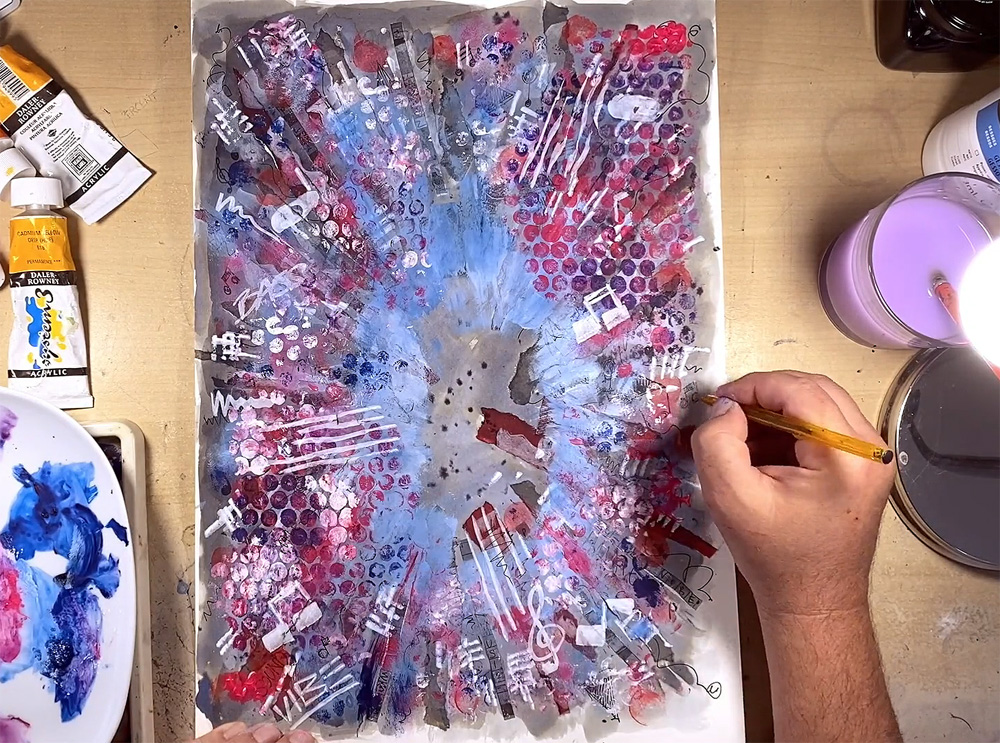
I am also using a Posca Pen doing some musical notes, just adding detail here and there, words and lettering and little elements to do with music. I am adding small elemental details in a Biro pen, and then some splats and splashes of watered-down acrylic paint.
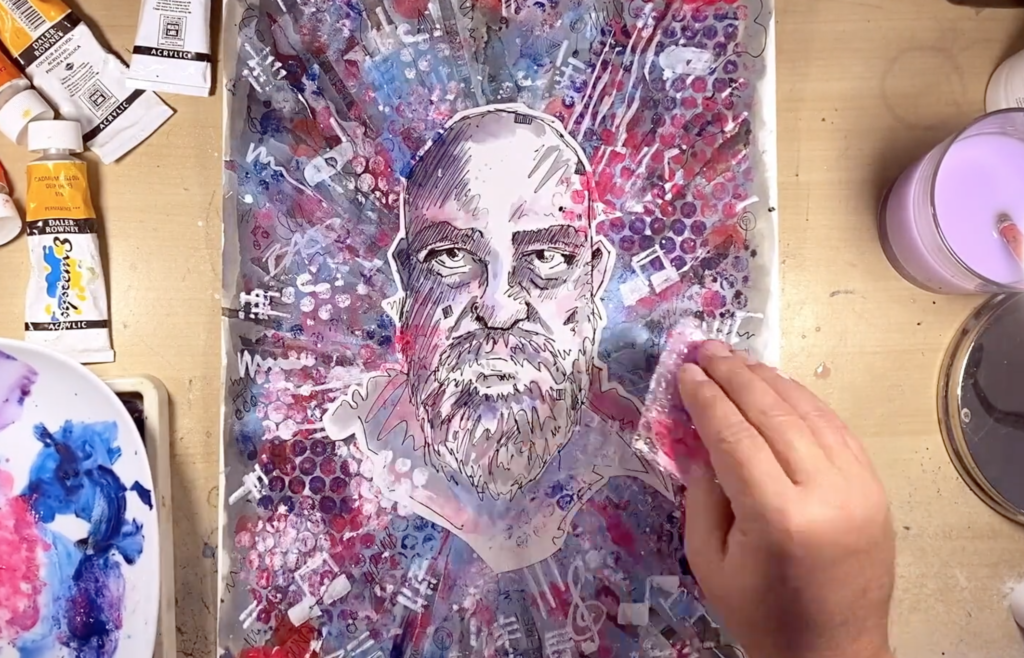
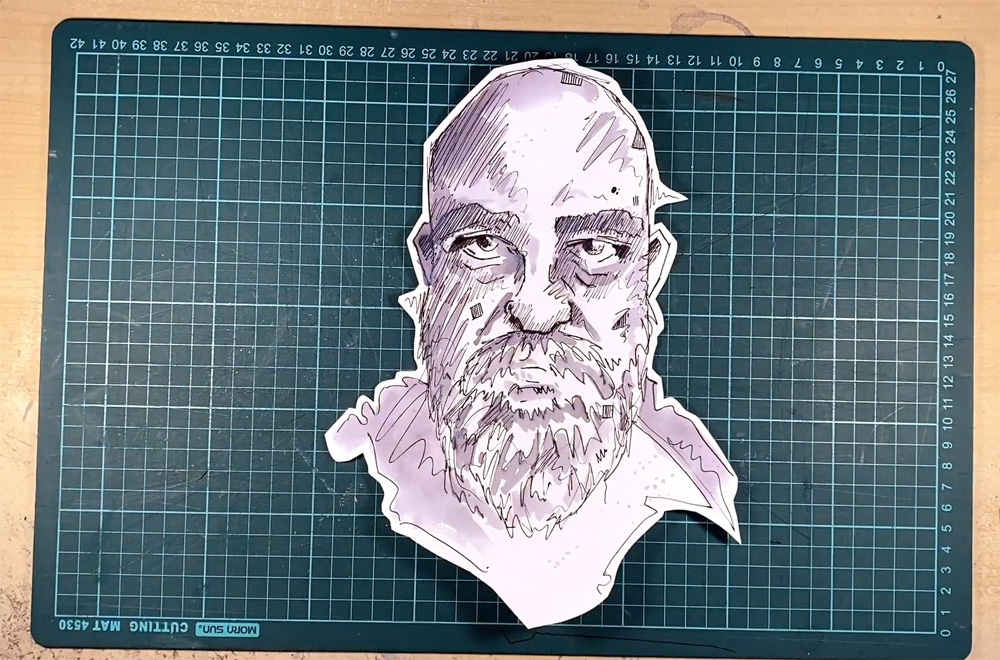
Then I’m going to take my portrait, glue it well at the back, and then firmly press it down in the middle of the picture and make sure it’s stuck properly.
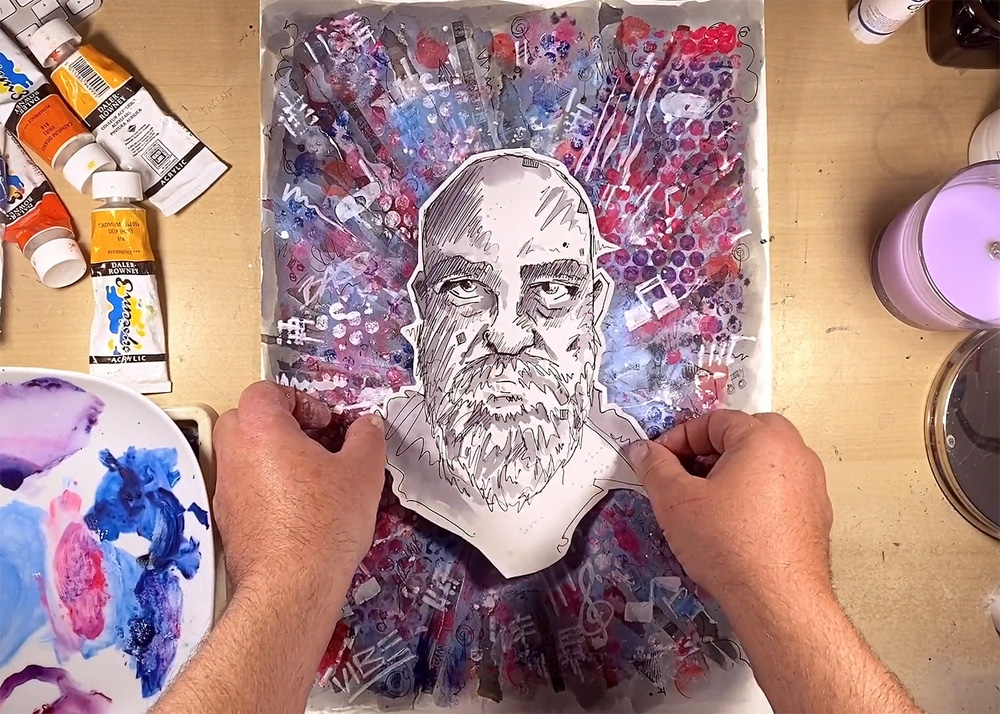
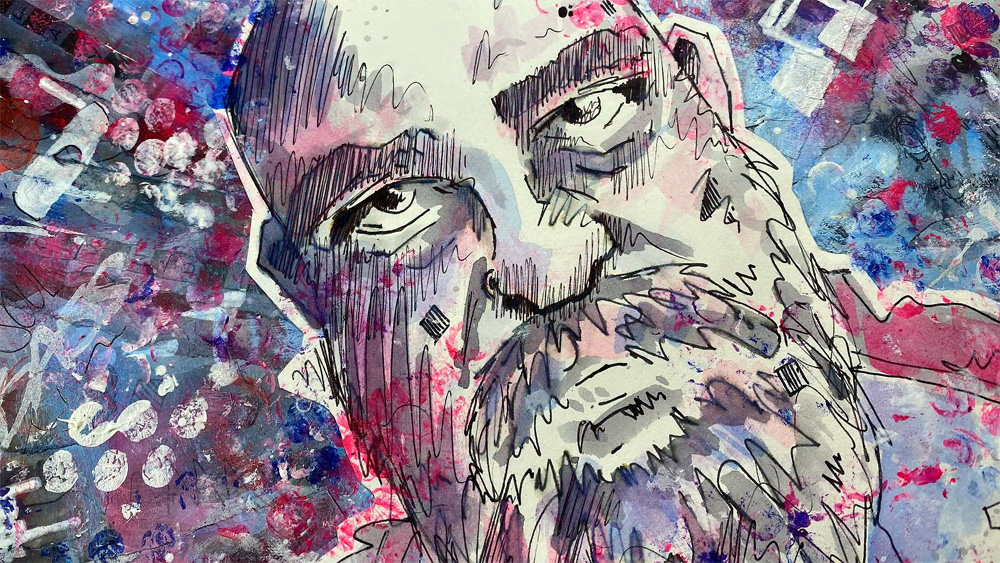
And I’m just going to wash some watered down acrylic into the face to match the tones of the colours that I’ve used – pinks, purples, and some blues. I’m following the shade and the lines that I’ve already created within the portrait illustration. I don’t want to do too much because I don’t want to lose the image. You can also use the bubble wrap again, taking bits of paint off the plate and using it like a sponge, overlapping the texture into the portrait illustration, and really bringing the image together.
So there we have it, our illustration portrait canvas with a subtle narrative hidden within the texture. An energetic picture, great detail, some lovely texture in there. Super colour, really shouts at you and explodes from the canvas!
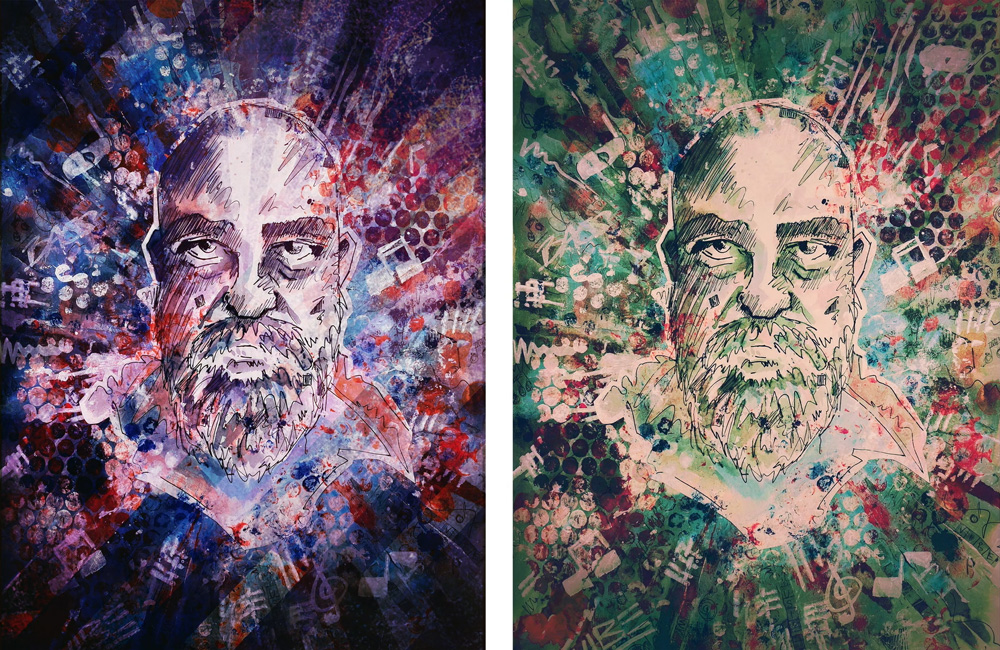
Every person has a story to tell and every picture tells a story. And of course, if you’ve got a smartphone or a tablet, you can photograph this picture and run it through various apps that you can get for those devices, and do variations much like these ones. There is literally no end to the creative process.
I really hope you enjoyed this process. It’s great to see all that work come together and all that energy, colour, texture and detail as a final piece of artwork. I hope you’ve been inspired by this process to create some interesting artwork of your own!
This is a sample of a resource created by UK Charity AccessArt. We have over 1500 resources to help develop and inspire your creative thinking, practice and teaching.
AccessArt welcomes artists, educators, teachers and parents both in the UK and overseas.
We believe everyone has the right to be creative and by working together and sharing ideas we can enable everyone to reach their creative potential.
See This Resource Used In Schools...


You May Also Like...

Talking Points: Njideka Akunyili Crosby

Talking Points: Yinka Shonibare

Julia J
May 28, 2023 @ 11:39 am
Thank you Mike Barratt for this fantastic resource. Year 5 pupils loved this and produced some exceptional work.