
DrawAble: Making Layered Portraits by Mike Barrett Part One
By Mike Barrett
Mike is an artist, digital creative and photographer whose work combines words, drawings, photographs, music and sound. In this resource, Mike shows young learners how to create a layered autobiographical portrait.
Notes for Teachers
What is the aim of this exercise?
This activity demonstrates a fresh creative technique that would help children and teenagers create expressive portraits/self-portraits. The resource introduces a variety of artistic techniques that make portrait drawing enjoyable.
What age can this exercise be used with?
This resource can be used with ages 6 and upwards. Is particularly suitable for secondary-age learners (ages 11-16).
What materials will the learners need?
For this activity, the learners will need paper, a pencil, a selection of pens (you can use fineliners, fountain pens, and/or biros), a paintbrush, a pot of water, and a pair of scissors. Some watered-down ink is optional; you can swap ink for any type of watered-down paint.
How long does this exercise take?
This exercise will take between 20 minutes and an hour. A maximum time limit of an hour is recommended, to allow for progression to Step 2 and Step 3 of layered portrait creation.
How do I measure success?
Success will be measured by the children’s engagement with the activity. The children’s portraits may not be about the “likeness” to the person, but more about expressiveness and energy contained in their images.
More able or engaged learners may apply a variety of mark-making and shading techniques in their drawings. They may be more open to experimentation and the use of a variety of materials.
Encourage creative play and experimentation by offering your learners different materials to try out. For example, you may want to offer 2-3 types of pens, or prompt the learners to use watered-down acrylic or watercolour.
What can we try after this exercise?
Life Drawing: Drawing the Head by Hester Berry
Sketchbook warm ups by Jo Blaker
Explore another medium to create a decorative profile of a head using lettering in Clay Art Medals
Explore creating abstract portrait drawings taking inspiration from Abstract Face – Relief Sculptures
Introducing drawing materials and mark making
Graffiti art and ‘Missing You’ pavement art
Try other DrawAble exercises and projects.
Which artists might we look at?
SNUB23 street art
John Wentz and Ann Gale paint fractured surfaces integrating the figure
Ed Fairburn integrates the figure with maps and start charts
Julie Mehretu layer architectural drawings, plans, charts and maps with intense mark making on a large scale but ideas could easily be adapted for portrait backgrounds
You may also want to look at Mike’s other projects.
Introduction
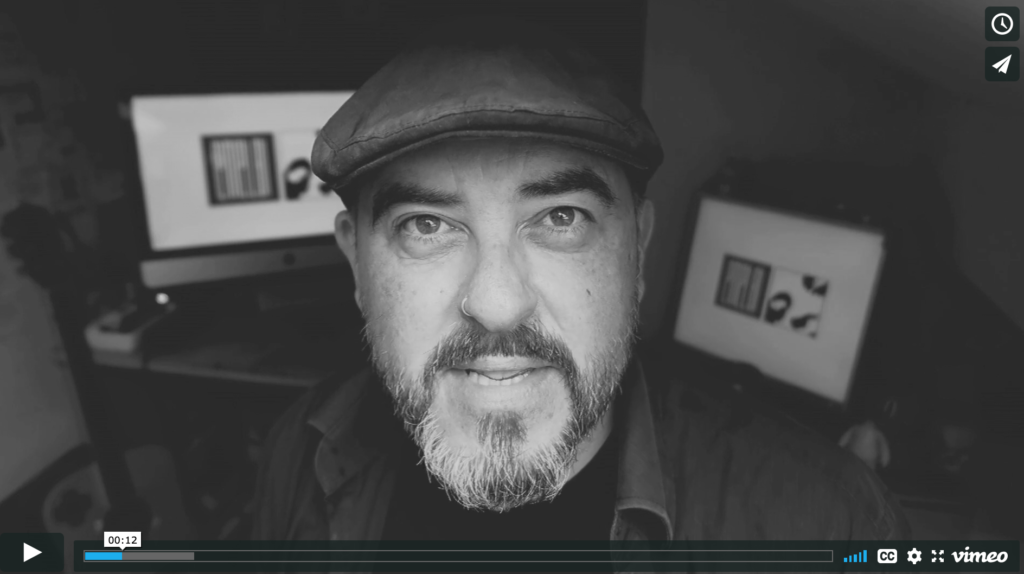
We’re going to be looking at building an artwork with a subtle narrative based around a portrait illustration, where the whole process starts with a drawing. So, here’s Step 1 – the drawing!
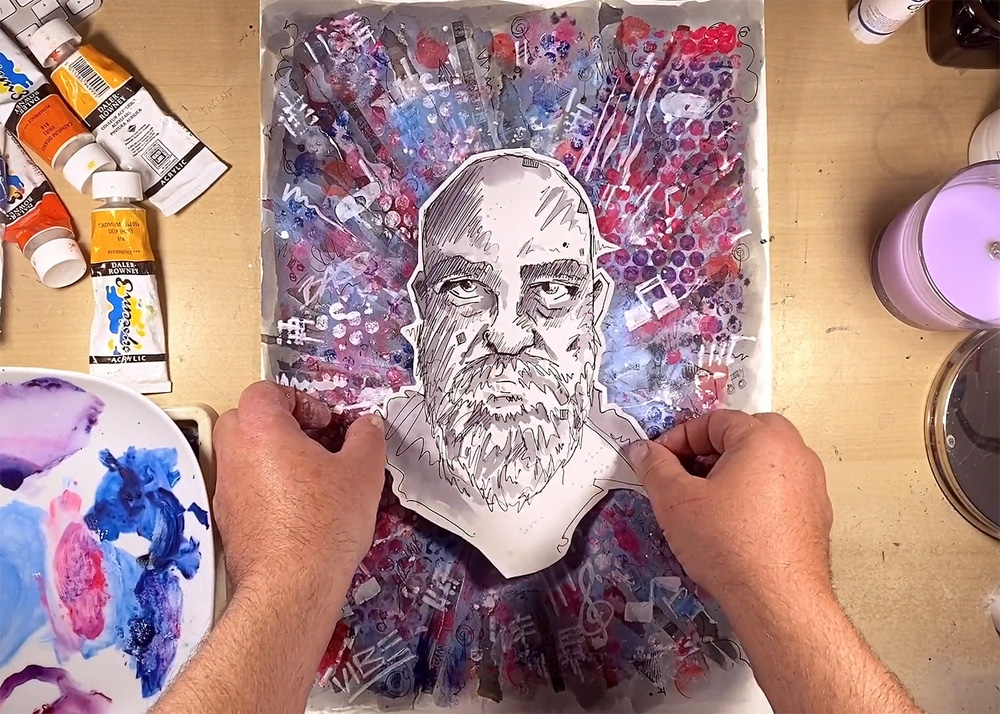
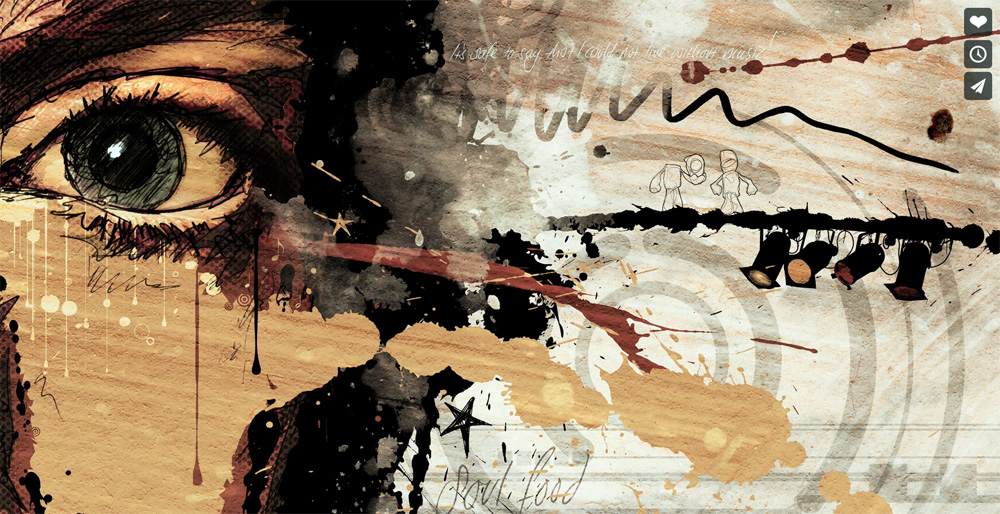
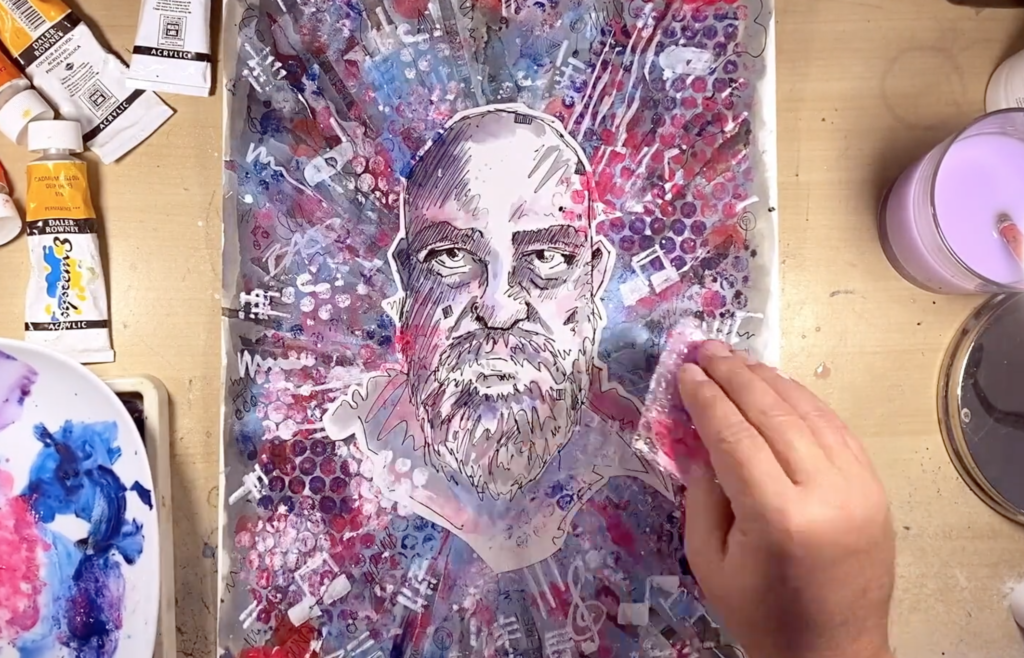
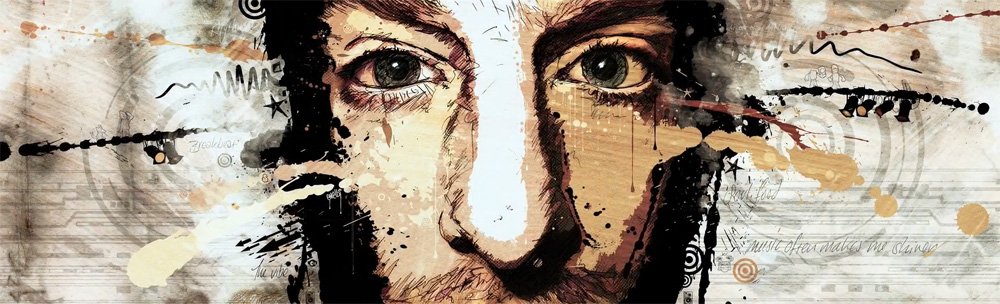 In much of my portrait illustration work, I build loose but purposeful narratives running through the images. This image is based around a very good musician. And as you can see, I’ve placed imagery within the artwork that relates to that musicianship – gelled lights that you might find on a stage setting, words and texts that relate to music. This musician had a dog he was very fond of, so I’ve put that in the imagery. There are also symbols relating to music, like musical notes, treble clefs and bass clefs buried in the imagery.
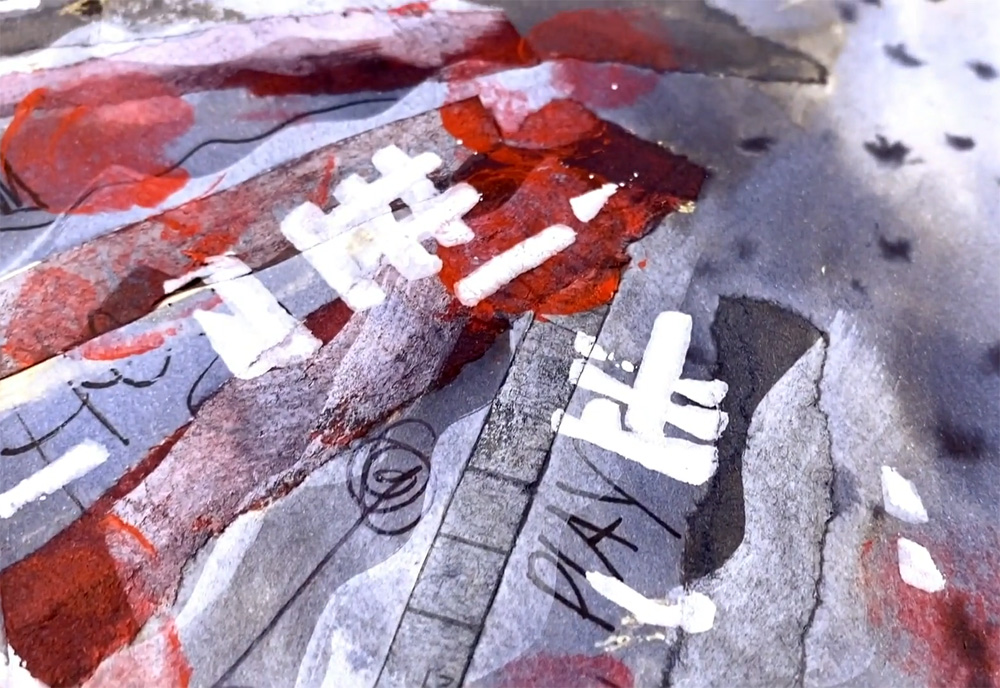
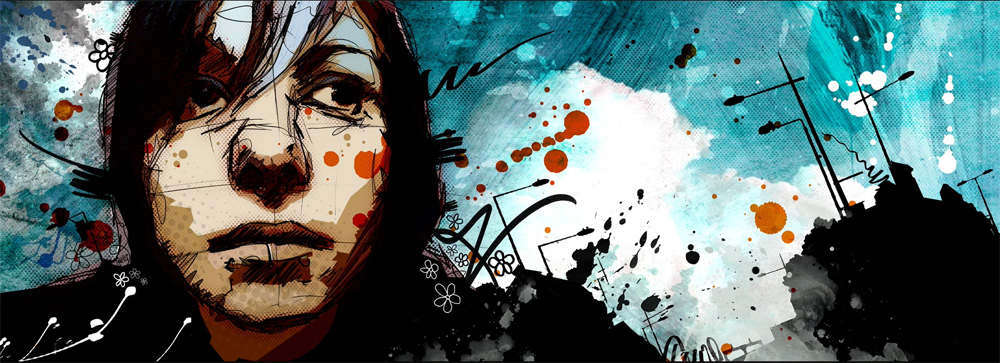
I also use a lot of textures like paint splotch marks and different things I can find to build into the imagery to give it energy, and depth, and interest – as you can see in this illustration of this lady:
To Begin
Of course, these images have been assembled digitally using Photoshop. But we’re going to look at making a similar style image using pens, paint, and collage. And it all starts with a drawing!
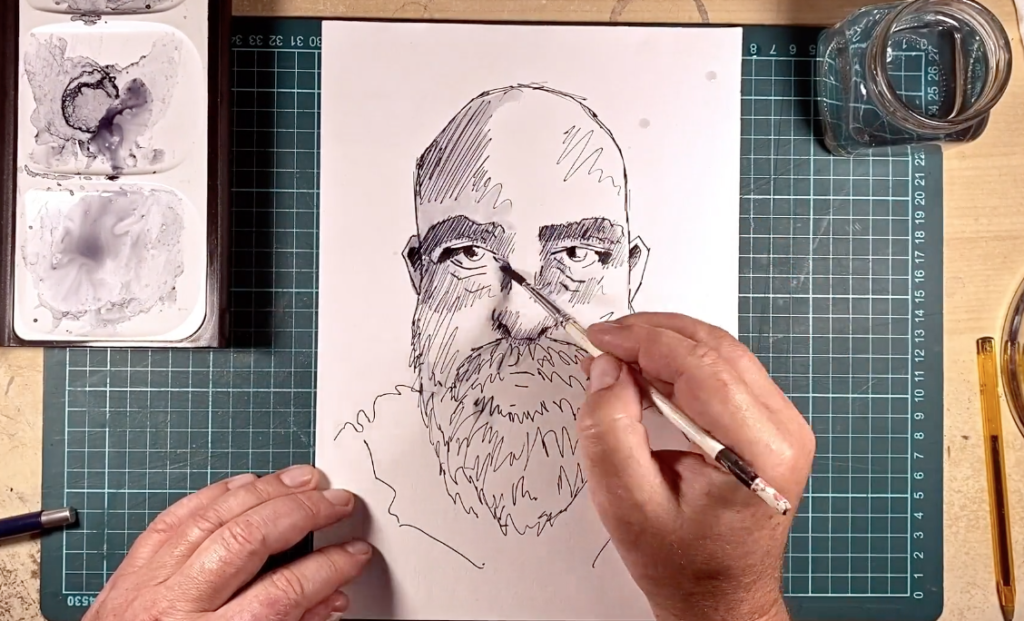
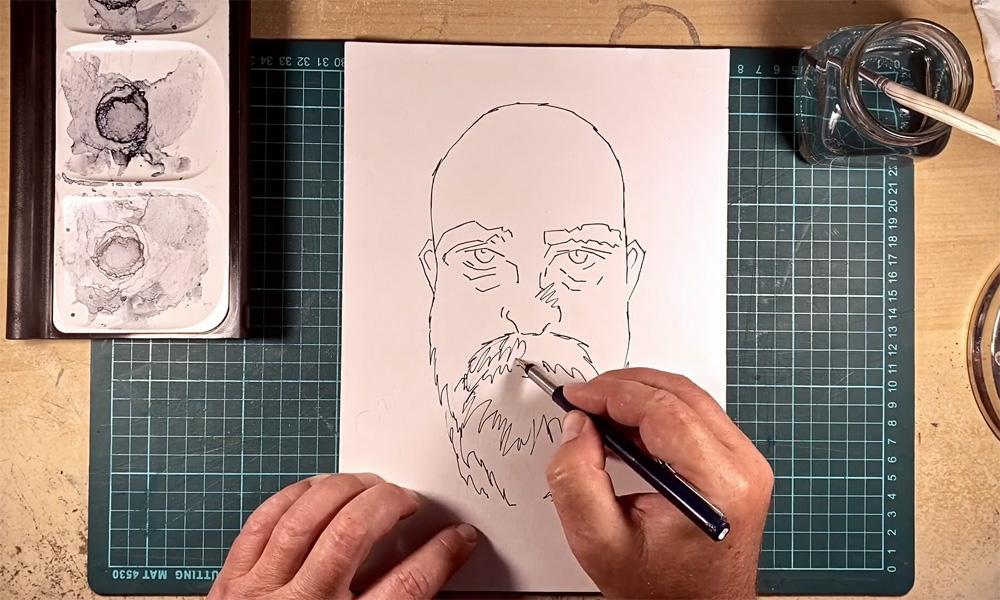
I’ve chosen to do a self-portrait. So I’m going to start with the features of the face. I’m just going to mark out the dominant features. I have an A4 piece of paper, and I am using a fountain pen to mark out the lines of my face.
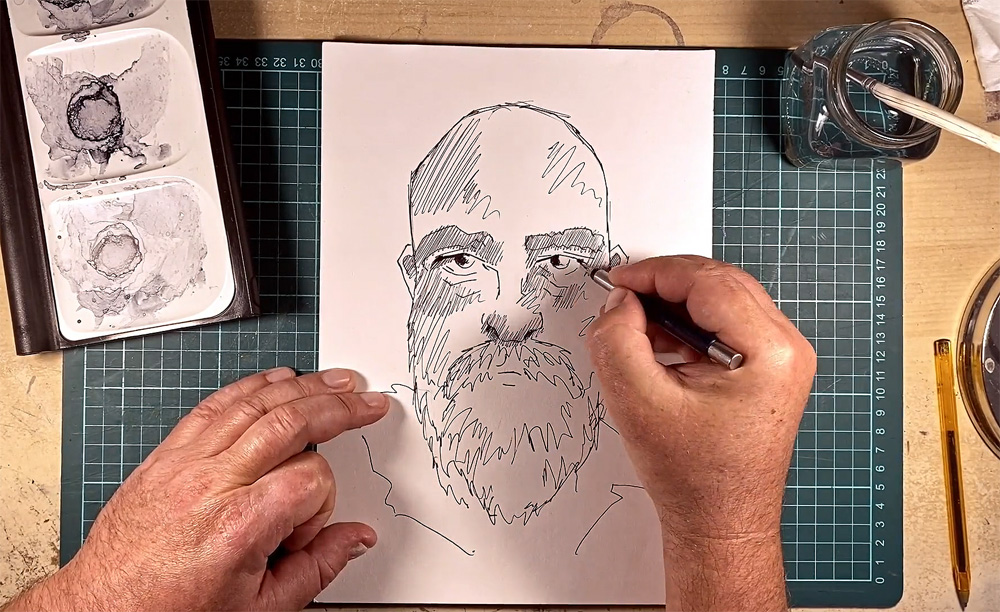
Then, using a Biro pen, I’m going to use a crosshatching technique to put some texture and shade into the face. I very much look for dominant lines that make up the features of the face. I also like to be very loose and work quite quickly. This puts a lot of energy into the illustration, I find.
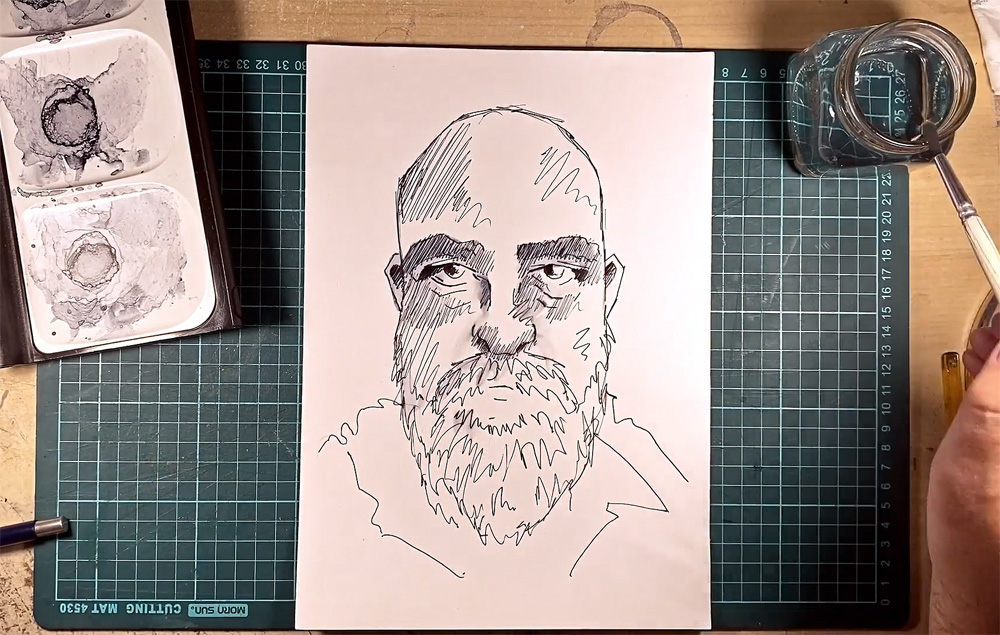
Then, I go over certain aspects of the image with a fountain pen, which is an ink that better reacts to water. And then I’m using a smudge pen – a water pen that you fill with water just to smudge parts of the ink in. Ad I’m also using a brush and watered down ink on a pallet – using a brush and just putting detail and texture into our image, and building up bit by bit, and making decisions as I go.
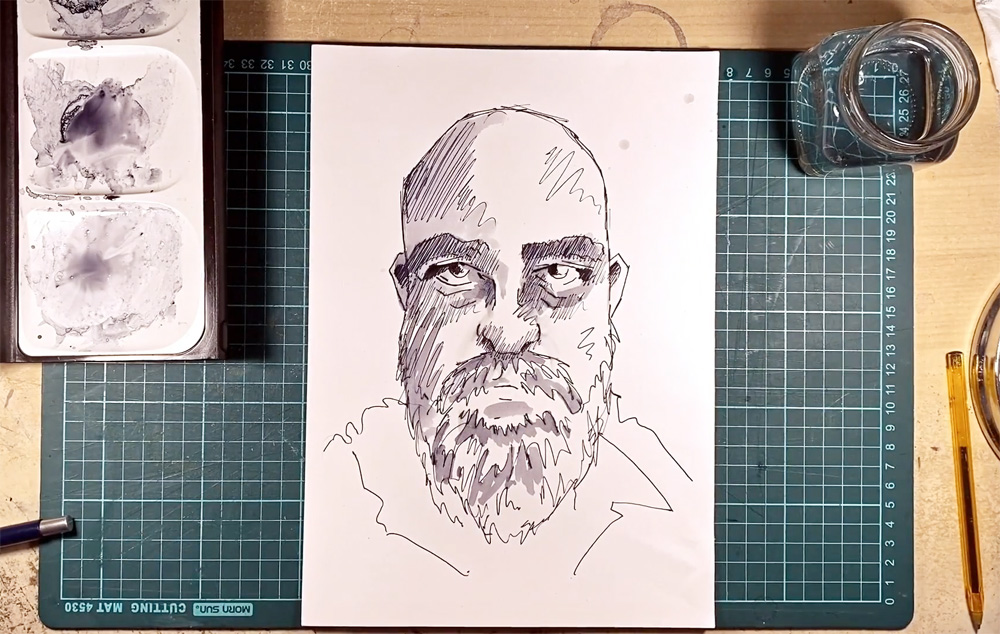
I’m looking for something with energy, something that has strong lines. I also put a lot of detail in that, that wouldn’t be there in the image that I’m referencing. So, if I’m working off a photo, I tend to put in graphic incidents that aren’t there initially – little boxes with lines going through them, little squiggles, and all sorts of other things. This helps build up the layers and the textures, so hopefully I’ll end up with something quite energetic, and a strong image to take to the next stage.
Finally, just to finish off this first step I take my portrait, and very carefully (with a pair of scissors) cut round it, leaving about a centimetre between the edge of the illustration, so it leaves a border all the way around. One of the reasons I do this is that it just makes the graphic pop out slightly, which will be interesting moving forward.
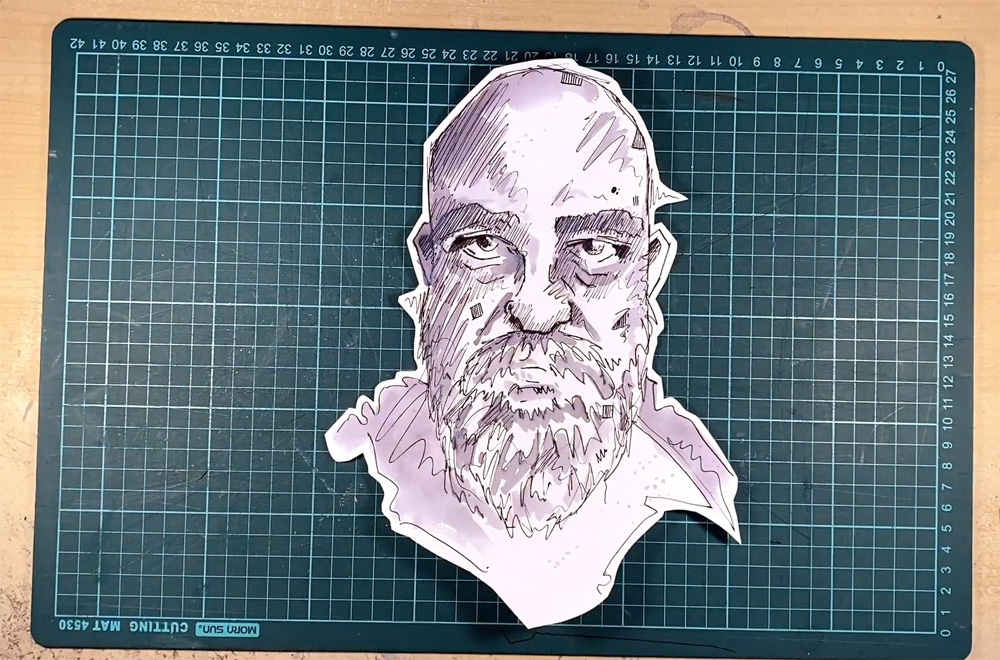
Now this illustration is ready – and we’re ready to move on to the next stage, Step 2, which is preparing our background. You can make your portrait however you want. Look for dominant lines in the face, experiment with textures, maybe use some crosshatching, or even some watered-down inks, as I have in mine. It’s absolutely up to you – experiment, and have fun.
This is a sample of a resource created by UK Charity AccessArt. We have over 1500 resources to help develop and inspire your creative thinking, practice and teaching.
AccessArt welcomes artists, educators, teachers and parents both in the UK and overseas.
We believe everyone has the right to be creative and by working together and sharing ideas we can enable everyone to reach their creative potential.
See This Resource Used in Schools...
