Introduction to Watercolour

This resource forms Part One of “Exploring Watercolour at the Fitzwilliam Museum Cambridge with AccessArt

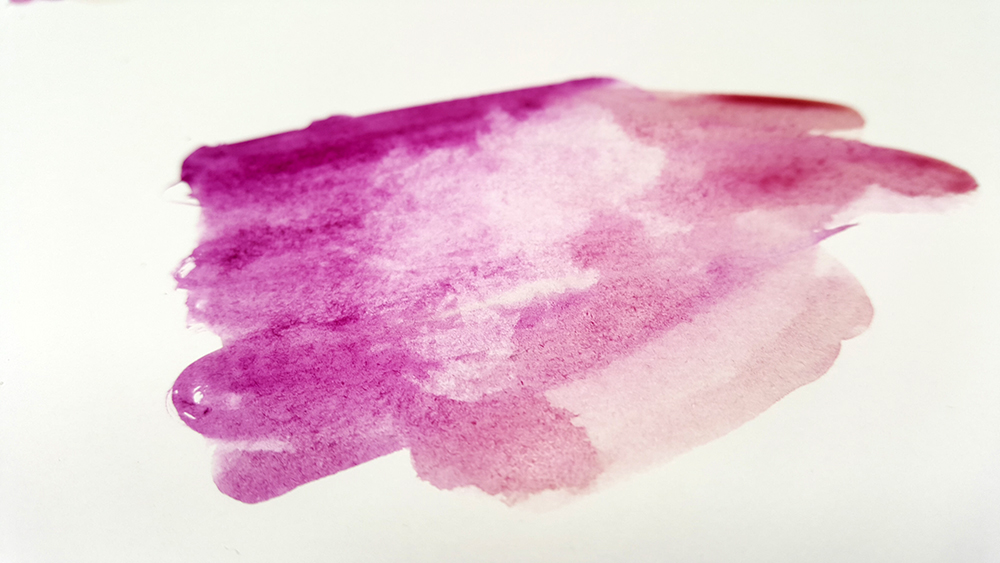
The resource describes and demonstrates individual watercolour techniques, and then shows examples of these techniques in paintings from the Fitzwilliam Collection. The images can be printed and used in the classroom, making this resource a useful tool for teachers to use either in their own professional development, or in a classroom context.

Introduction

This post shares simple watercolour techniques which can be adapted for use in the classroom and with all ages of pupils.

Whilst using better quality watercolours and higher quality watercolour paper will give better results, this resource acknowledges that budgets in schools are limited. With this in mind, we recommend the following materials:

Watercolours

In this session we used school quality watercolour palettes as supplied by Reeves. Use plenty of water to get the paint to “give up” its pigment.

Paper

Whilst using stretched paper or watercolour pads will stop paper from wrinkling, we appreciate this is probably not soemthing most schools can run to. Instead use the thickest cartridge paper you can afford.

Brushes

Have a variety of round and flat brushes. Synthetic brushes are generally the cheapest.

Water!

Remember that water is a key element when using watercolours! When starting out, many people try to control the watercolour too much, when perhaps the opposite is a better approach. Use plenty of water and enjoy the fluidity and spontaneity of watercolour.

Creating a Wash

Creating a watercolour wash


Please note: You can create a watercolour wash on paper which is slightly damp (this encourages the pigment to spread more easily). However as schools are likely to be working on unstretched cartridge paper, we would recommend working on dry paper to prevent the paper wrinkling too much, and to prevent the surface of the paper being too stressed.

To create a watercolour wash, have your paper at an angle (use a board or piece of cardboard and rest it against the table/knee. Make sure you have easy access to watercolour paint / palette and water (i.e. if you are right handed have it on your right side). Start by mixing a watery colour, and with a thick brush and plenty of liquid, make a single line from left to right (if you are right handed) at the top of your sheet.

As the water forms at the bottom of the line, use your brush to make another line just under the first, collecting the liquid from the first brush stroke as you go. Keep the paint fluid with water (this is a wash!), and decide as you continue when you need to replenish your brush with more paint/water.

Creating a watercolour wash


In the wash below, water has been added to dilute the paint as the wash has continued down the page.

Creating a watercolour wash


It’s up to you how consistent (flat) or how spontaneous you allow the wash to be. Making a flat wash is quite a skill. Equally, a less “accomplished” wash can communicate a great deal of energy – a wash with areas where pigment has puddled, or white has been left on the page, can be useful to portray a stormy/cloudy sky…

The wash below has been created in a similar way, although the artist, Philip Wilson Steer, has created the wash “around” a cloud (i.e. rather than draw the brush across the entire page).

Detail: "Chalk-pits, Painswick" by Philip Wilson Steer, 1915. Fitzwilliam Museum Cambridge
Detail: “Chalk-pits, Painswick” by Philip Wilson Steer, 1915. Fitzwilliam Museum Cambridge


Wet on Dry

Working wet on dry simply means using water colour paint on dry paper.

Wet on dry
Wet on dry


Working “wet on dry” means that the paint will dry in clean lines or shapes against the paper.

You can also mix colour using “wet on dry”. In the case below, the artist waited until the orange paint was dry, and then added a yellow wash over the top.

Wet on dry - colour mixing
Wet on dry – colour mixing


The detail below shows how Joseph Mallord William Turner used “wet on dry” – in this instance he would have had relatively little watercolour on his brush. The effect is to almost skim the paint across the page leaving the white of the page to come through:

Detail: "Shakespeare Cliff, Dover" by Joseph Mallord William Turner, circa 1825, Fitzwilliam Museum Cambridge
Detail: “Shakespeare Cliff, Dover” by Joseph Mallord William Turner, circa 1825, Fitzwilliam Museum Cambridge


Wet on Wet

“Wet on wet” means using wet paint over wet paper. The paper can either be wet because it has had a wash painted on it which has not dried, or the artist has made the paper wet using just water, or the paper is wet from previous watercolour brush marks.

Whatever the reason, the wet on wet technique can lead to some really dynamic watercolour marks as the paint pigments bleed into each other.  As with wet on dry, you can also use wet on wet for colour mixing directly on the page.

Working wet on wet
Working wet on wet


Dropping water on paint


"Wet on wet" when dry
“Wet on wet” when dry


Tips for working wet on wet:

  • Try not to be too controlling! Let accidents happen. You will learn from watching what happens, and the fluidity is all part of the process.
  • Be brave and let the paint “puddle”. The paint will dry lighter, but you will still get more variation in “dark and light” than if you pat away all the liquid with a tissue (which is tempting!).

The image below by Philip Wilson Steer was created in the most part by working wet on wet: you can see the colours bleeding into each other.

Detail: "Sunset" by Philip Wilson Steer, 1915, Fitzwilliam Museum Cambridge
Detail: “Sunset” by Philip Wilson Steer, 1915, Fitzwilliam Museum Cambridge


Combination of Wet on Dry and Wet on Wet

Of course most watercolour paintings are a mixture of the two techniques. The image below by John Sell Cotman shows areas painted wet on wet (for example the colours in the bush on the left hand side) and then other areas painted wet on dry (for example the mast of the boat in the foregound).

Detail: “Postwick Grove” by John Sell Cotman, circa 1835-40, Fitzwilliam Museum Cambridge


Mark Making with Brushes

Experiment with a variety of brushes. Remember that almost all brushes can be used in a variety of ways, depending on how you hold the brush. For example you can draw the bristles to a point or line, and use the very tip, or you hold the brush with the bristles flat to the page and make a broad line. Turning a brush in your fingers can result in a varied, calligraphic line.

Exploring the anatomy of the brush and how it affects the marks the brush can make


Exploring the anatomy of the brush and how it affects the marks the brush can make


Combining with Pen and Pencil

Watercolour painting often (but not always) uses drawing to underpin the composition. Experiment with using a soft or hard pencil in a rough or precise way might change the quality of the watercolour you then lay on top. Remember this does not mean you have to work towards a “tight” or precise outcome – you can still keep the watercolour fluid and full of water.

Rough pencil drawing


Watercolour wash over pencil


You can also experiment with pen under the watercolour – if the pen is watersoluble you can also get some interesting effects.

Watercolour over pen


In the image below by Francis Towne, pencil has been used as an under sketch in the hills on the right, whilst pen has been used over watercolour to help define the quality of foliage in the trees on the left.

Detail: "Lough Rigg, Ambleside" by Francis Towne, 1786, Fitzwilliam Museum Cambridge
Detail: “Lough Rigg, Ambleside” by Francis Towne, 1786, Fitzwilliam Museum Cambridge


In the image below by Samuel Palmer, you can see both under and over drawing.

Detail: "The Magic Apple Tree", by Samuel Palmer, 1830, Fitzwilliam Museum Cambridge
Detail: “The Magic Apple Tree”, by Samuel Palmer, 1830, Fitzwilliam Museum Cambridge


In the painting below by Paul Cézanne, graphite was used as part of the mark making, together with the watercolour:

Detail: "Les Bois, Aix-en-Provence" by Paul Cézanne, circa 1890, Fitzwilliam Museum Cambridge
Detail: “Les Bois, Aix-en-Provence” by Paul Cézanne, circa 1890, Fitzwilliam Museum Cambridge


Other Mark Making Techniques

It is worth experimenting with how the energy of your mark making will influence the outcome of your watercolour painting. Slow, precise, controlled lines made with a small brush and a steady hand will give a very different outcome to fast, sketchy marks made using your whole arm. Neither is wrong or right – but you’ll want to explore both extremes, and everything in between, to help you understand the potential of watercolour.

Energetic mark making


Try using other ways to make marks, for example splattering…

Making splatter marks


And there are lots of ways to preserve the white of the paper, which can help stop the end result from feeling “flat”. One is to use masking fluid…

Using masking fluid
Using masking fluid


Peel or rub off the masking fluid when the paint (and masking fluid) is dry.

Peeling away the masking fluid


White paper revealed


A cheaper option is to use salt on wet paint. The salt absorbs the pigment leaving whiter areas (though these don’t have the definition of the masking fluid).

Using salt on wet paint


And an old favourite is to use white wax crayon, white oil pastel, or even candle fat to create areas of resist…

Using wax resist
Using wax resist


Finally always have paper towels nearby to remove or lighten any areas of pigment (though remember letting pigment “puddle” and dry naturally often creates more dynamic results).

Using paper towels to remove paint

Many thanks to Kate Noble, Amy Marquis and the Fitzwilliam Museum Cambridge,  Andrea Butler from AccessArt and the teachers who attended the session.
Fitzwilliam logo

UK Charity AccessArt created this resource in collaboration with the Fitzwilliam Museum, Cambridge. 

AccessArt has over 850 resources to help develop and inspire your creative thinking, practice and teaching.

AccessArt welcomes artists, educators, teachers and parents both in the UK and overseas.

We believe everyone has the right to be creative and by working together and sharing ideas we can enable everyone to reach their creative potential.

See how we used all the above techniques in the practical studio session at the Fitzwilliam Museum, Cambridge, in Part two of this resource.

After having studied watercolour paintings at the Fitzwilliam Museum Cambridge with AccessArt, teachers were invited to undertake their own exploration of working with watercolour, including colour mixing, paint techniques, and intention. This resource shares the processes and outcomes of the practical studio session.

Collection of Landscape Resources by Hester Berry

Painting the Storm at Bourn Primary School by Paula Briggs

You May Also Like....

image_pdfimage_print