
Steampunk Robots: A Kitbash Sculpture Unit


By Esmé Dawson
This resource shows the processes students went through to create a robot sculpture that could live in a steampunk world. The main technique used was ‘kitbashing’. Kitbashing is the art of making a sculpture by taking bits out of broken plastic toys or using found and recycled objects.
Materials
• Masking tape
• Pencils and paper
• Cardboard
• Hot glue guns
• Black spray paint
• Metallic paint
• Wire
• Pliers and scissors
• Found recycled materials sourced from second hand shops/ local recycling centres/ or old plastic toys students can gather from home
Part 1: Research, Draw, Design
Explore and begin an inquiry into steampunk.
Here are some ideas to get started:
• Look at movies in this genre such as ‘Steam boy’, ‘Hugo’ and ‘20,000 Leagues under The Sea’. Watch a short snippet from one of these movies.
• Look at steampunk fashion and see how Victorian clothing plays a role in its aesthetics.
• Find out if there are any local steampunk museums or shows in your area.
• Look at the artists Nemo Gould, Greg Broadmore and the jewellery from Jules Vine.
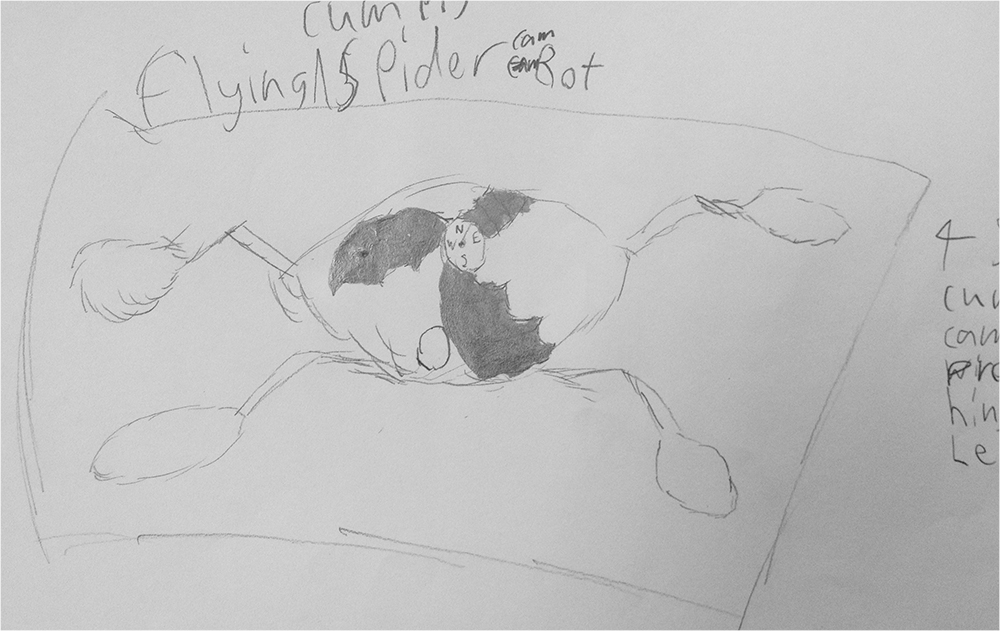
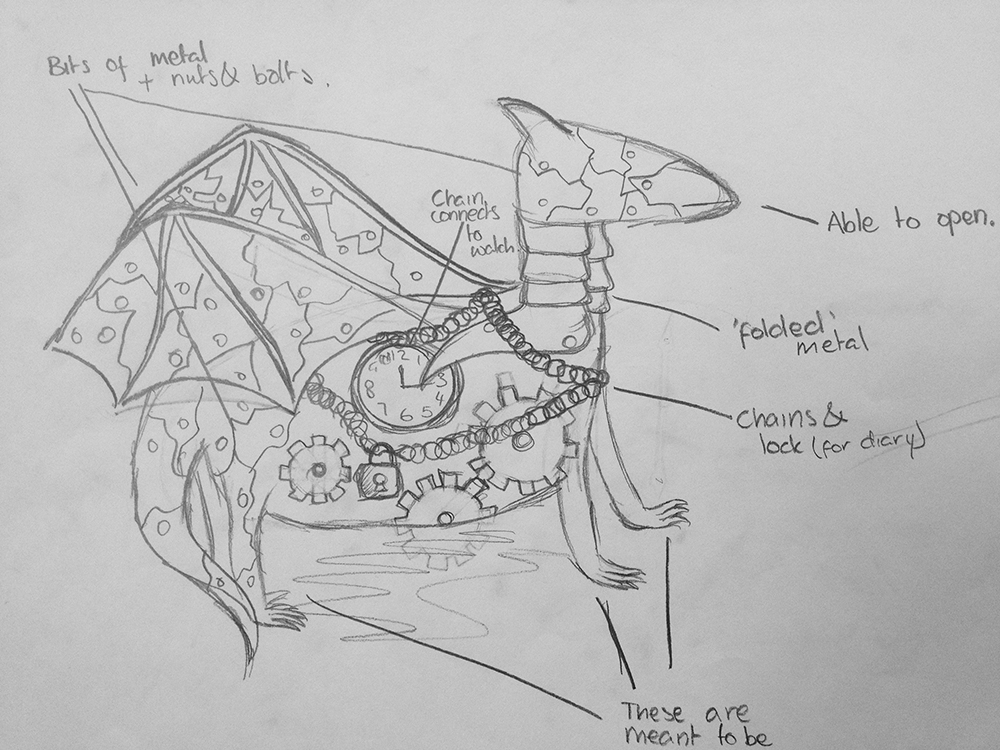
Draw and Design your own steampunk robot:
Play a drawing game to start generating ideas. Find a range of steampunk related objects or pictures from magazines, e.g. irons, teapots, top hats, monograms, steam trains, cogs etc. Pick two items to include/mash into your drawing of a robot. Draw at least three different robot designs on paper.
Refine drawings:
Decide on which robot drawing you will extend into a sculpture.
Add metallic colouring in pencils or paint to the chosen final robot for that finishing robotic touch.
Part Two: Armature and Kit Bashing
Watch the amazing Pukeko Picture’s video below on how they made the miniature sets for the ‘Thunderbirds Are Go’ TV series. This will introduce you to how kitbashing can be used as an art form. Follow the link which explains how old parts of washing machines were used for the space caves, and household items like lemon squeezers for rockets!
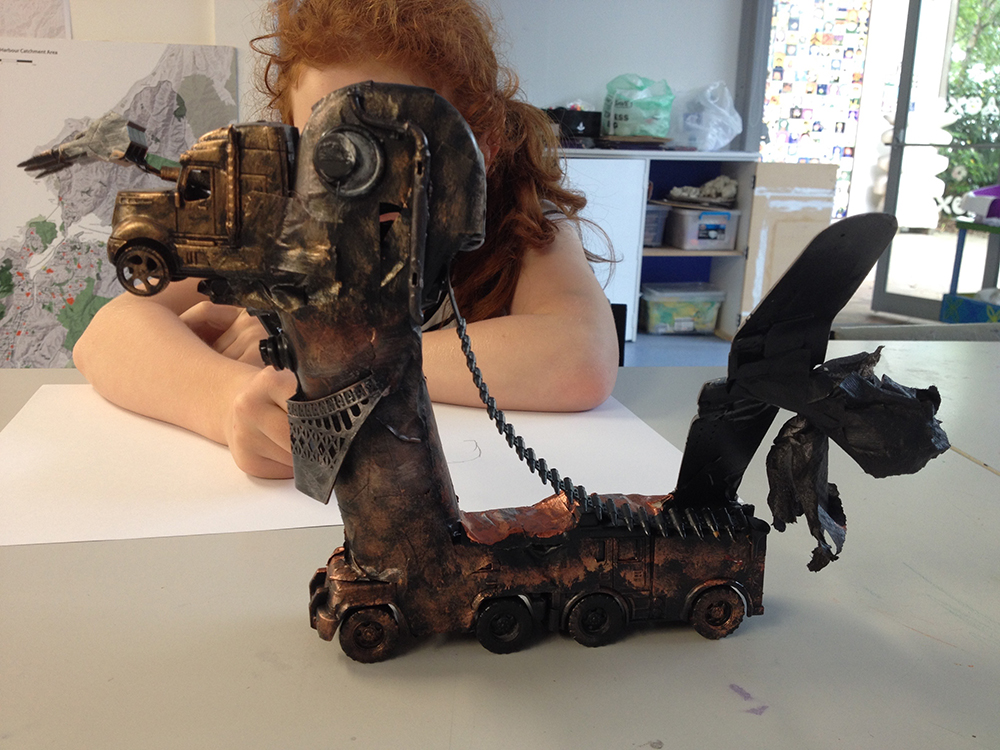
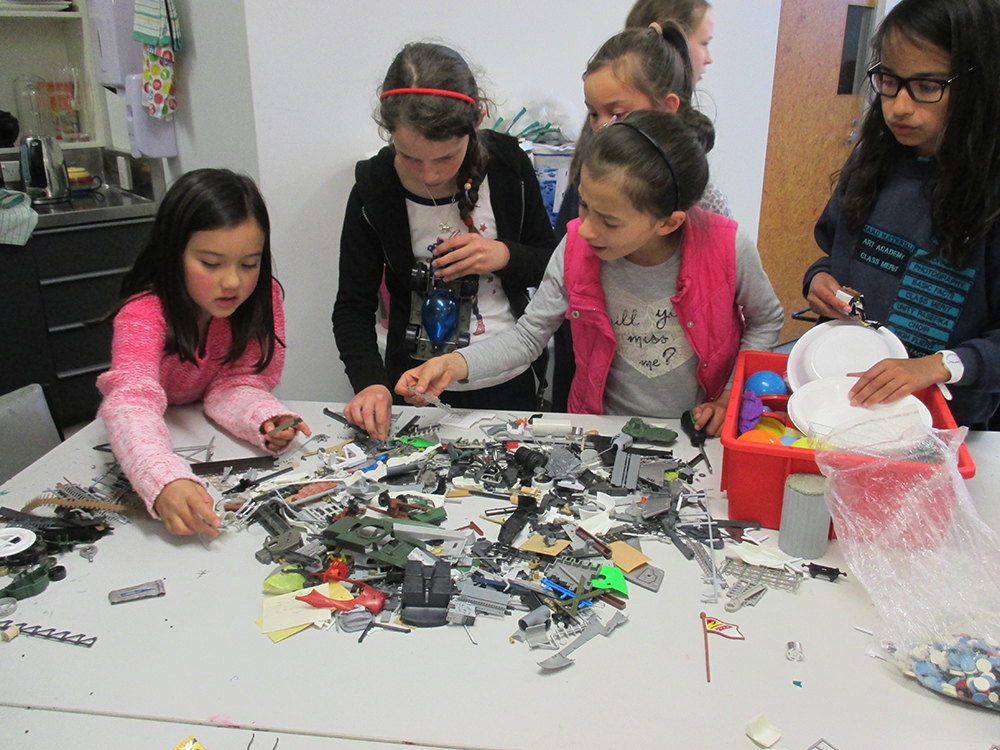
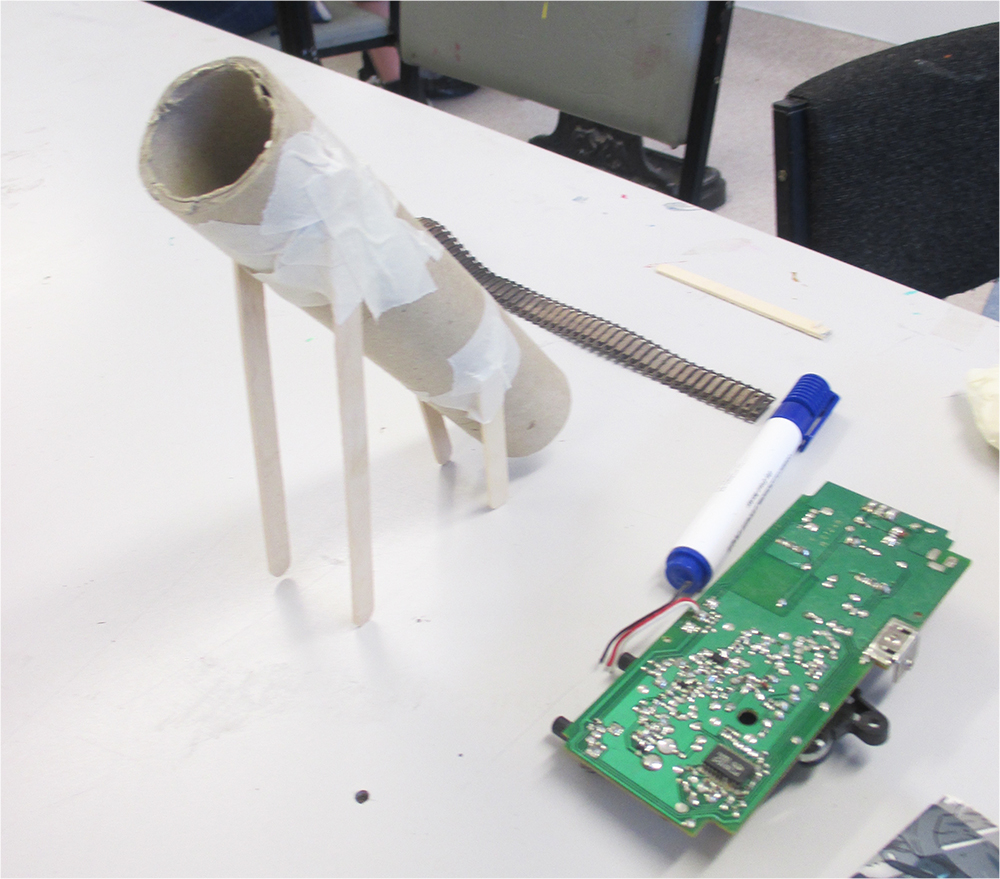
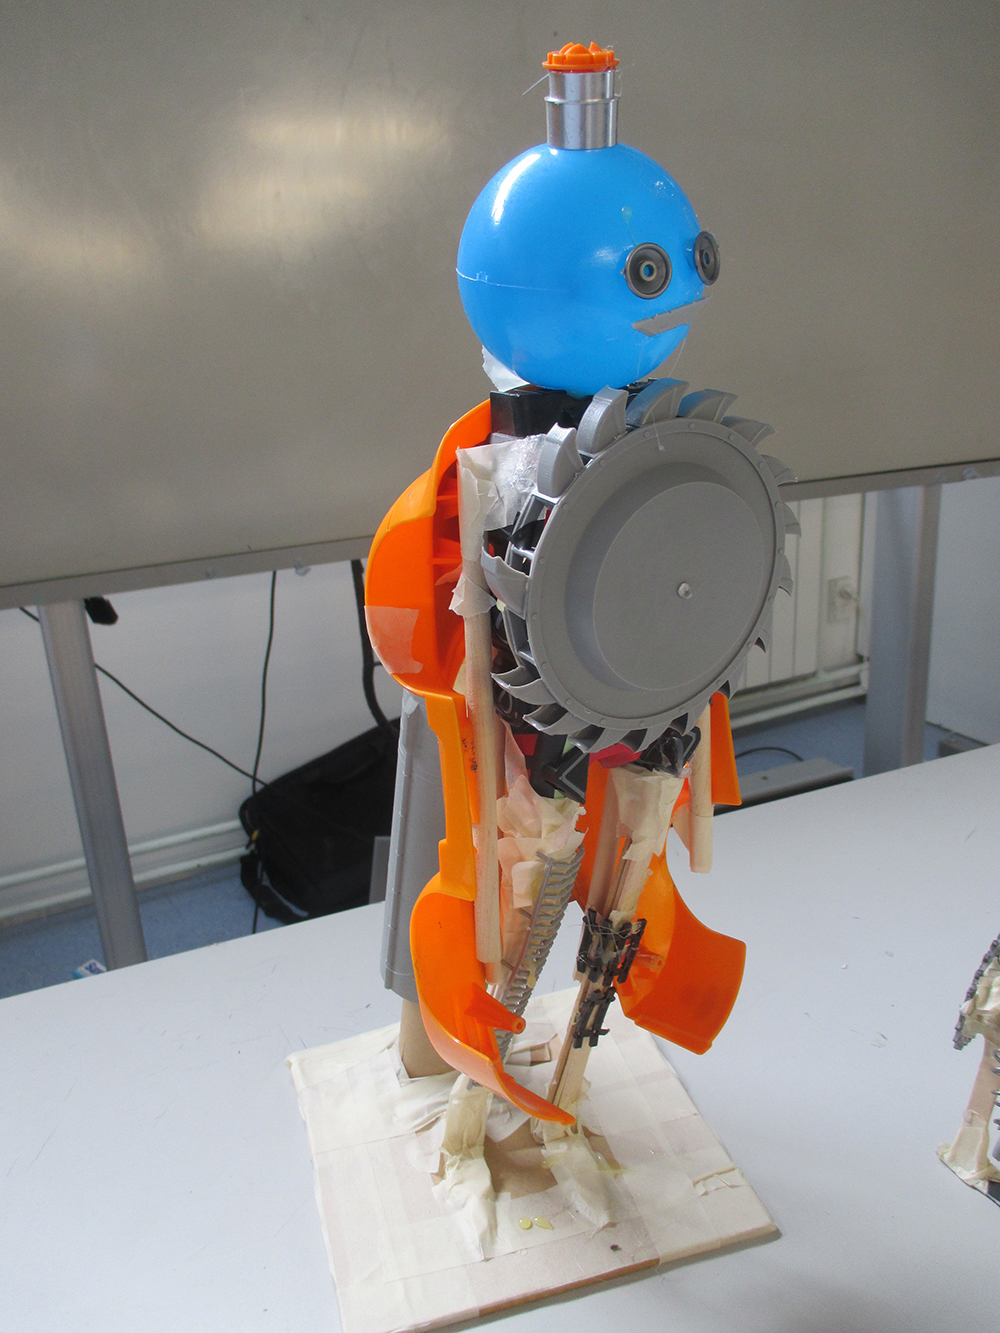
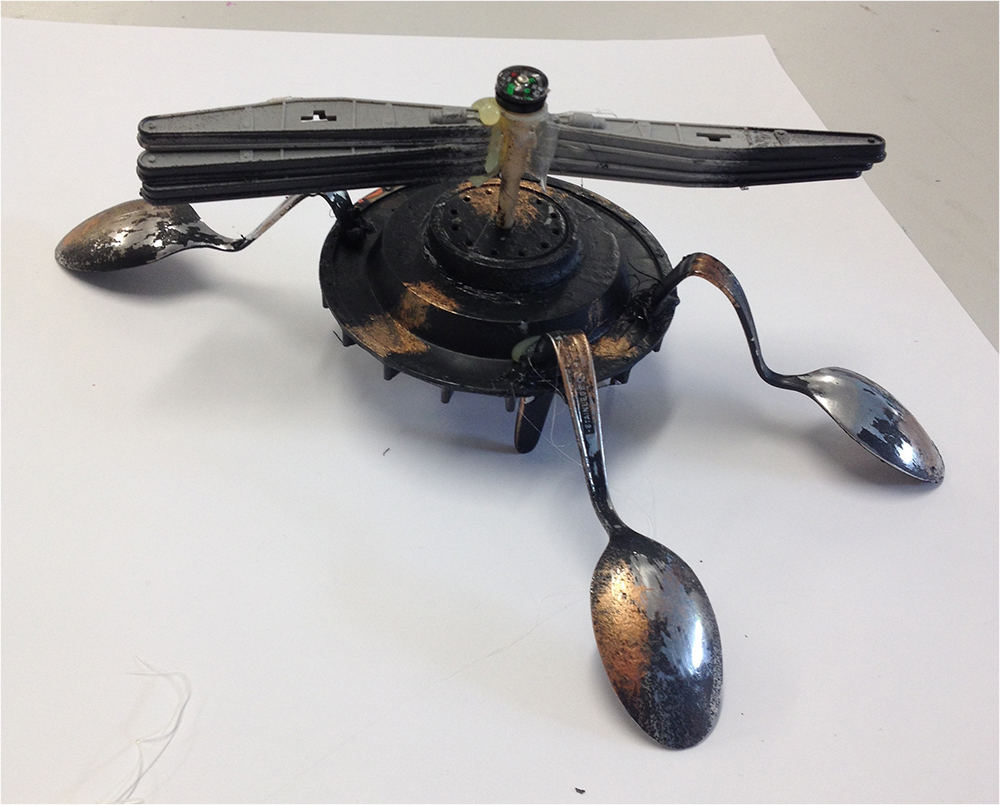
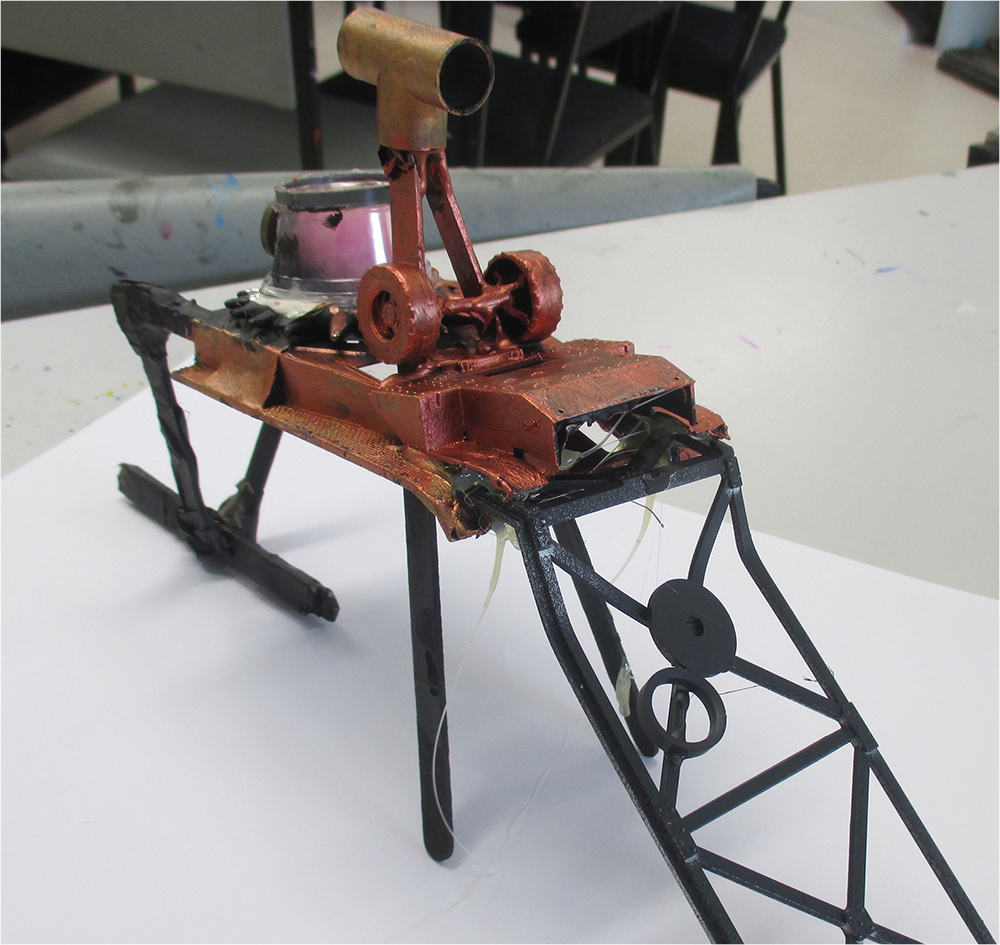
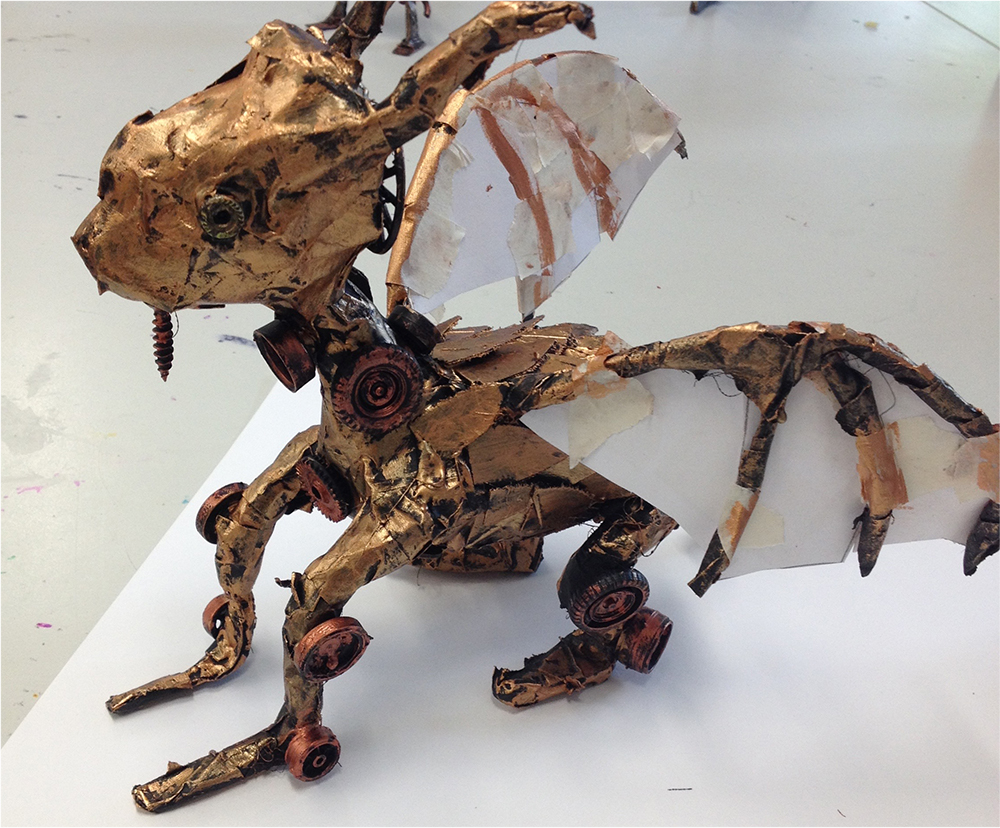
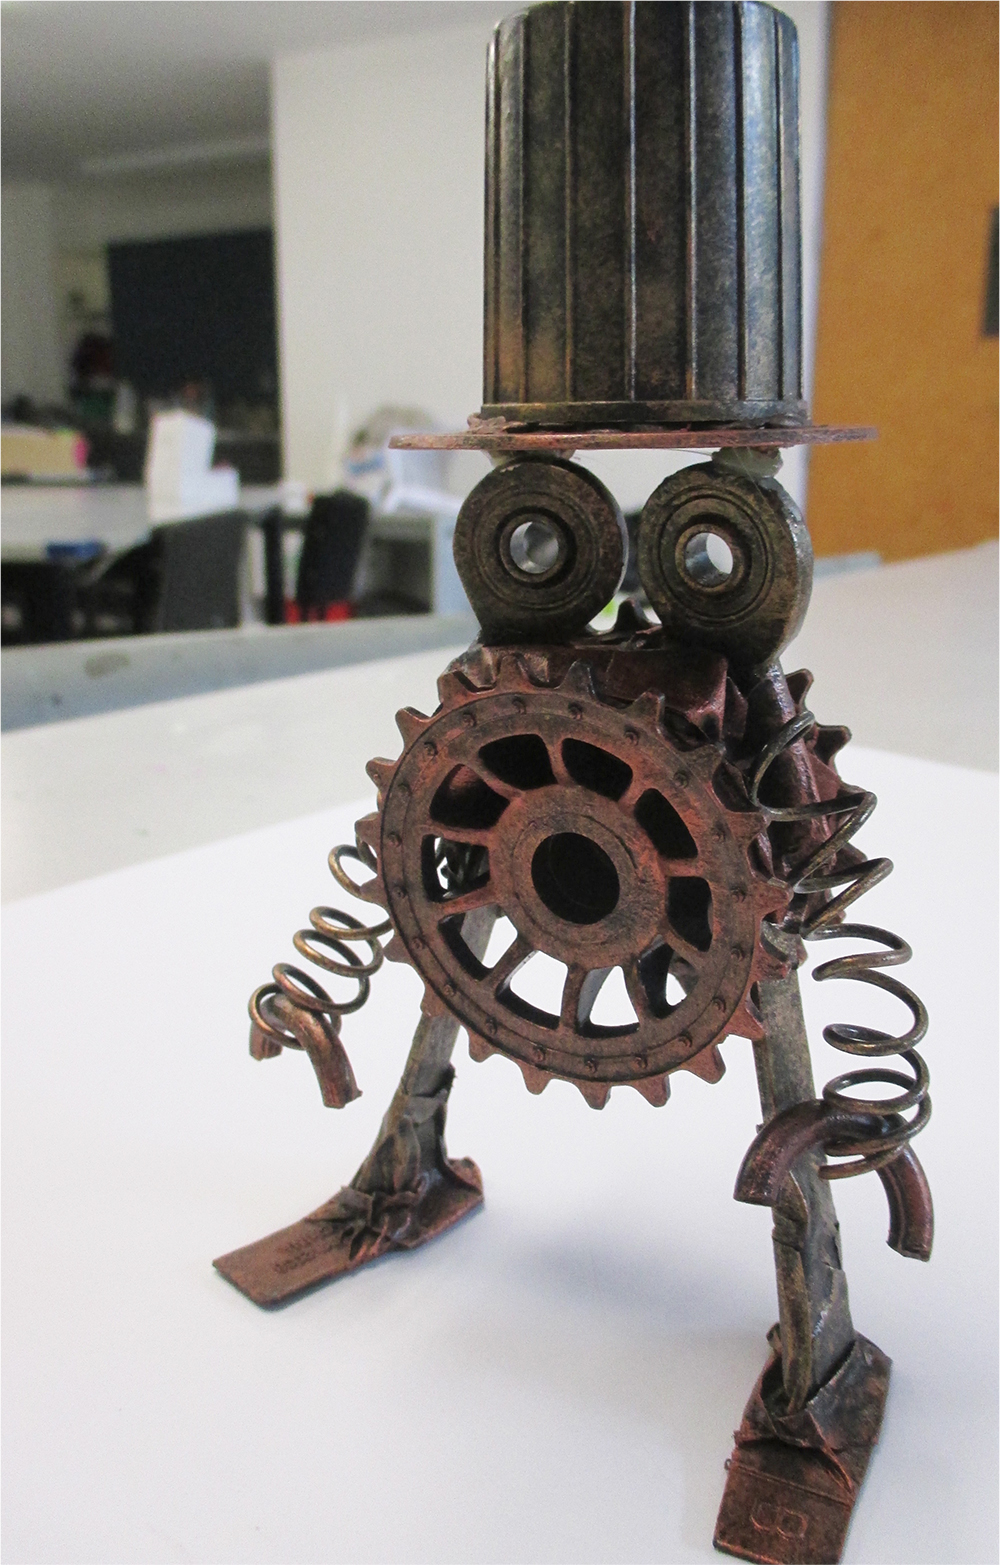
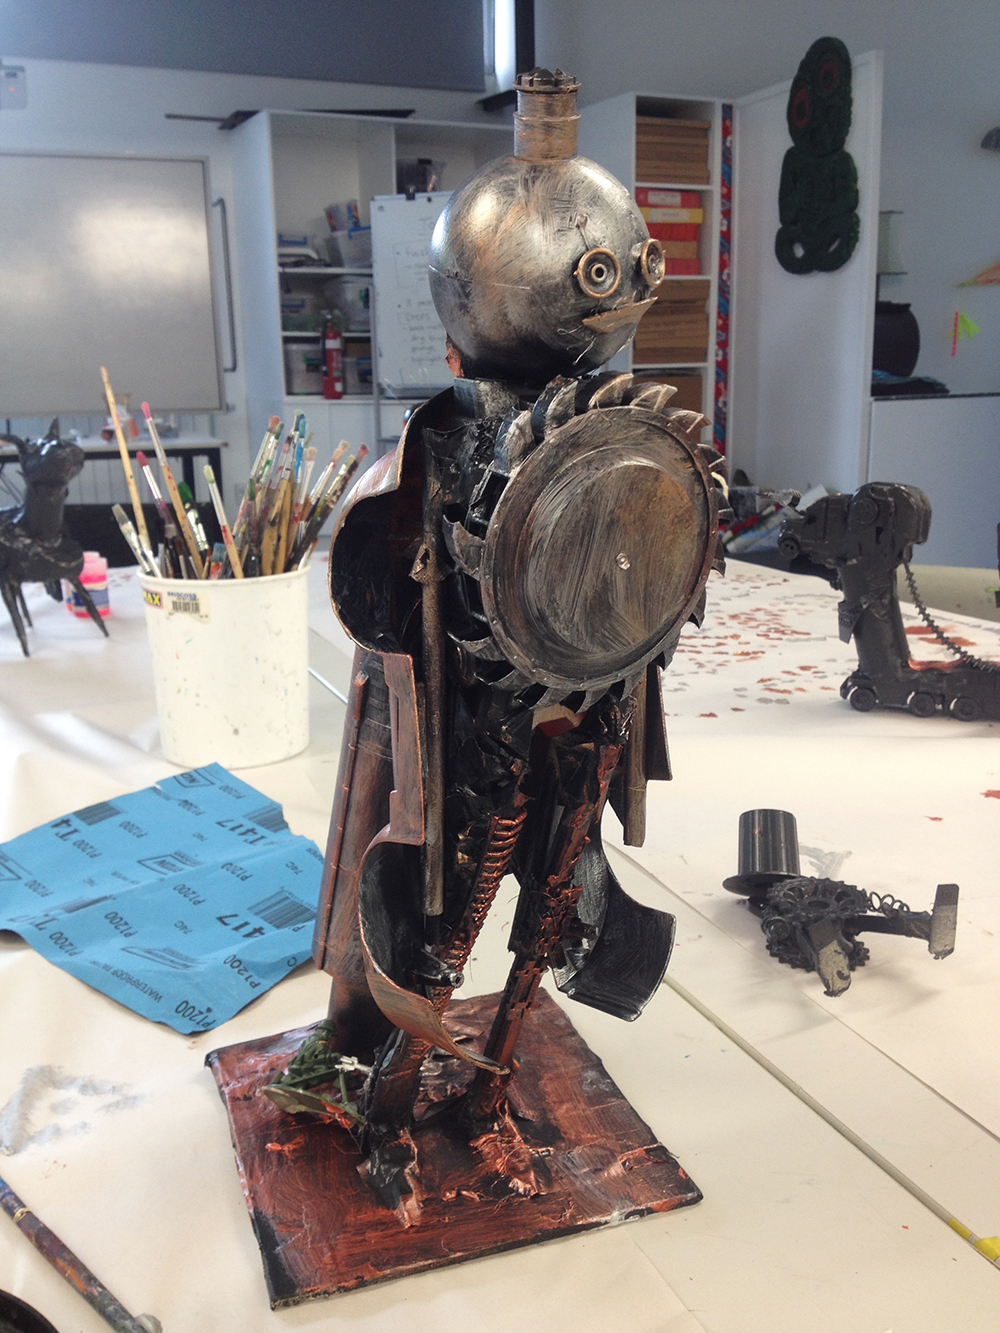
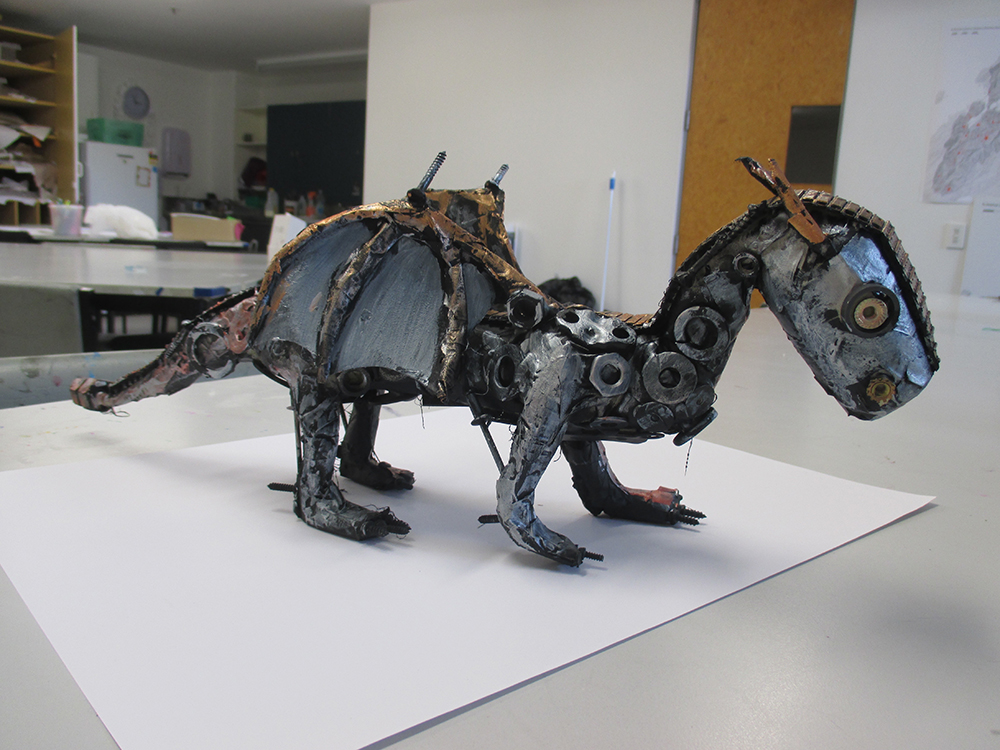
To make your robot you will use pieces from old smashed up toys and recycled materials from second hand shops and recycling centres, such as plastic milk bottle tops and cardboard rolls. At first they may look like they are made out of rubbish but at the end you will spray paint them to look metallic.
Make an armature out of cardboard and masking tape – this is a very simple basic skeleton structure that all the recycled bits will stick to. It has to be really strong. Look at the robot in your drawing and try to make a base structure that looks like that robot, e.g. if your robot has four legs your armature will have to stand on four legs.
Tip: I can’t stress the importance of the armature enough – if you make a weak flimsy armature you will struggle with the next stage. We need strong sturdy armatures!
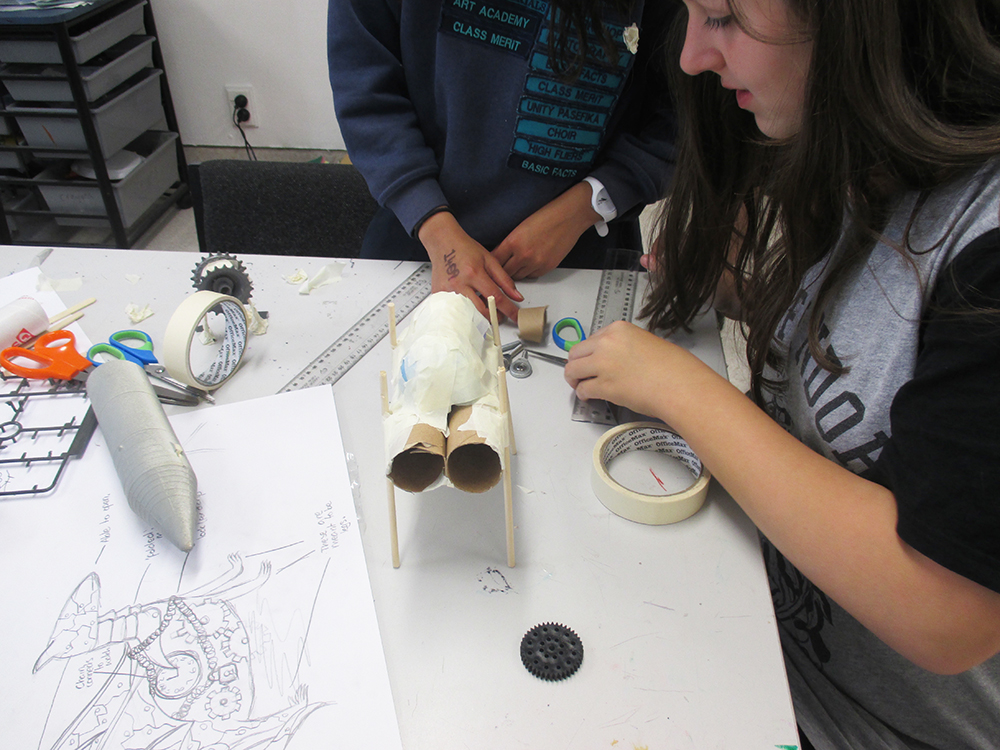
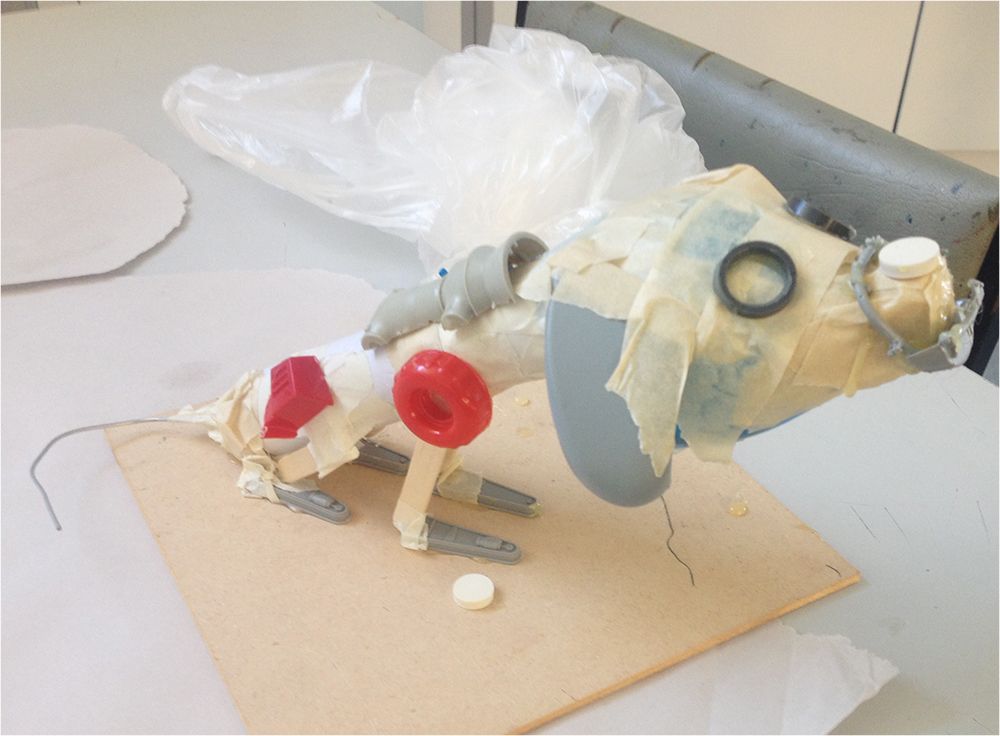
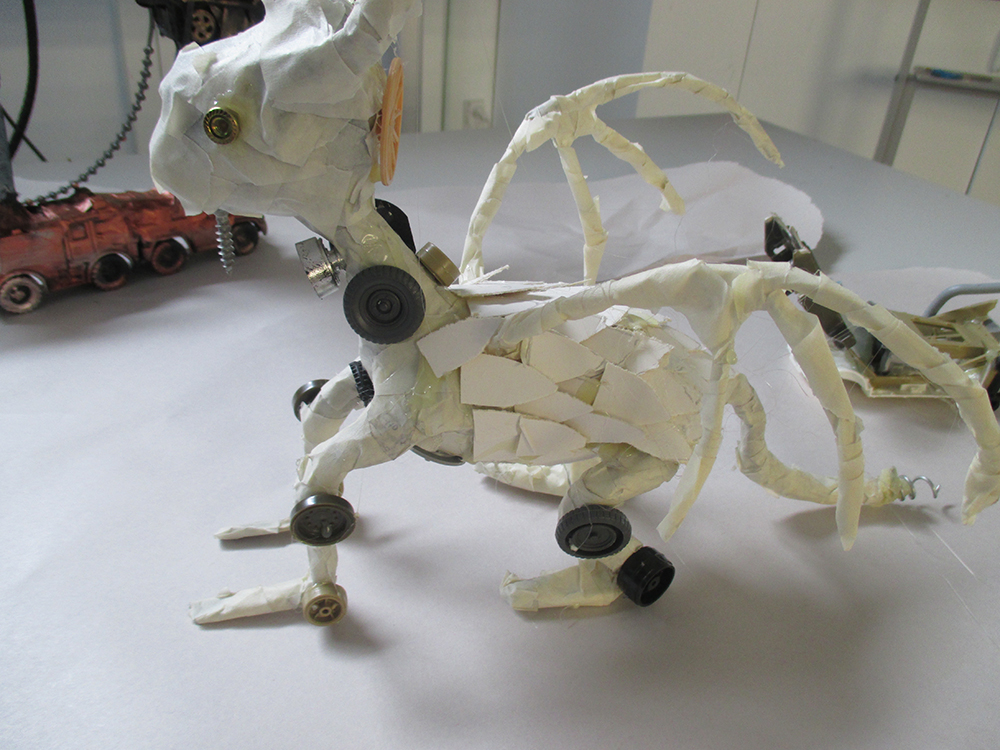
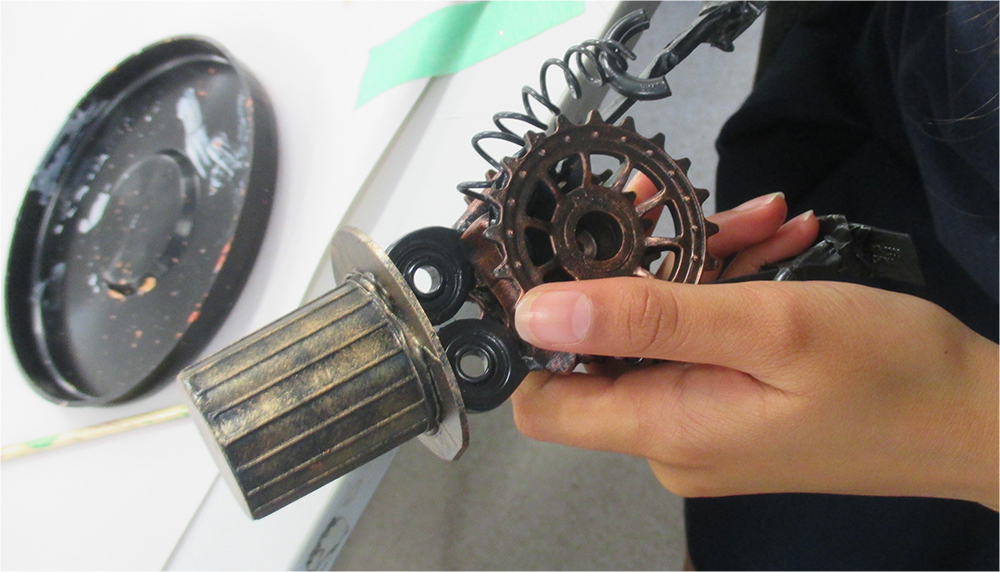
Rummage through the collected recycled materials and gather objects that will suit your robot. Think of your robot like a puzzle and find pieces that fit well together. Stick the outer shell of your robot on with hot glue guns.
Tip: The crazier you are the better the robot will look! Remember robots have lots of little buttons, cogs, screws and quirks! Make it a believable robot!
Part Three: Spray Paint and Dry Brushing
Add finishing touches to your robot, check everything is stuck down and secure.
If you are finished, is there anything else you can add? Perhaps pieces of clothing like a top hat or a weapon?
Spray robot black and let it dry.
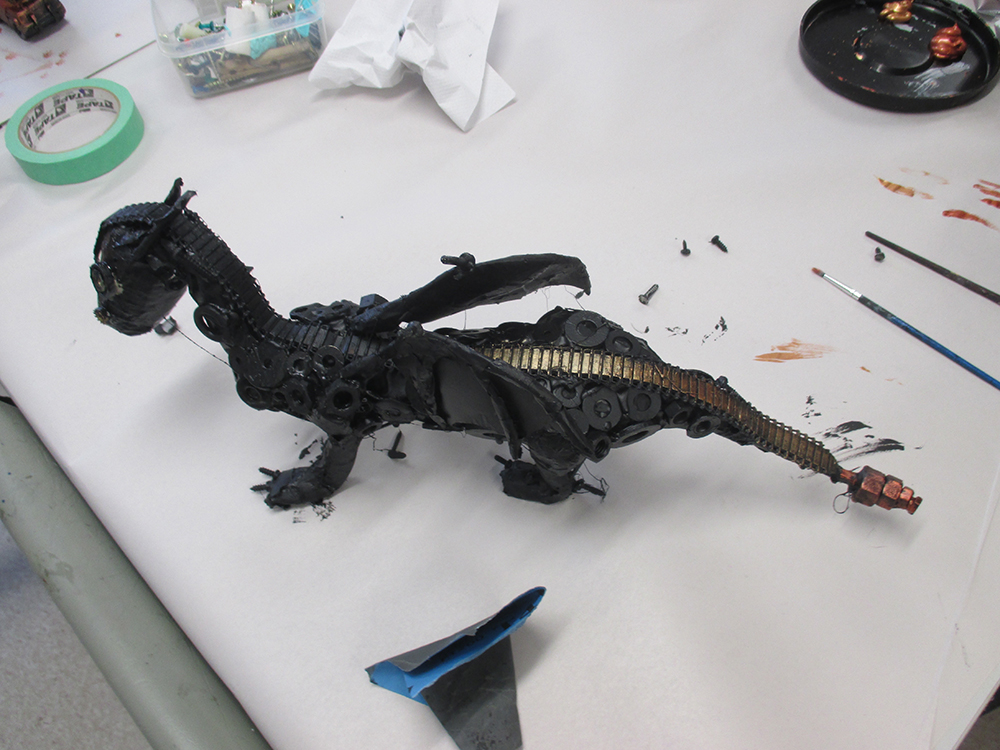
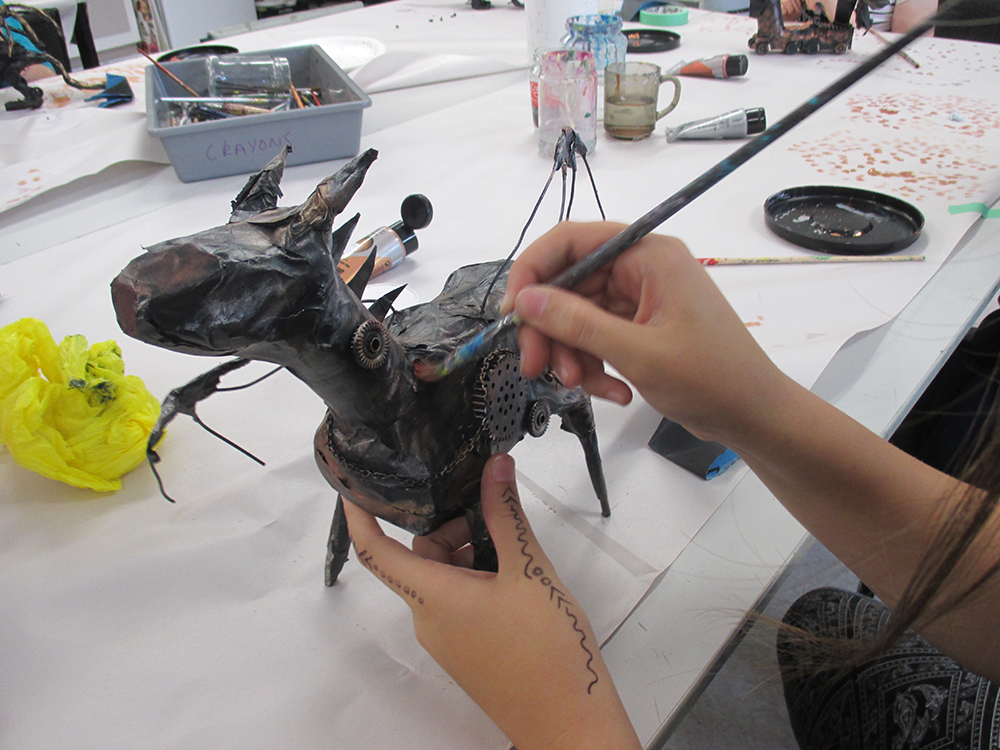
Practice how to dry brush (Dry brushing is a painting technique which uses a dry, bristle brush. The paint is applied lightly, dusting the surface to create brush strokes that have a scratchy appearance). After your robot has dried, dry brush the metallic paint over the spray painted robot. Build layers slowly. This will give your robot the illusion that it is made from rusty metal.
Finally, stand back and marvel at your completed steampunk robot!
You May Also Like...
Visual Arts Planning Collections: Toys, puppets, dolls

Rook – Transforming Materials

modelling monsters
