
Modelling the Head in Clay Part 1 – Armature


This series of resources shows work done by teenagers in the weekly class over the course of a term in which we modelled the head in clay. There are four resources in this series, beginning with constructing an armature and making preparatory drawings, then studying the bone structure of the skull before moving on to features.
The work was done over 8 sessions of 75 minutes each, but could be adapted to two or three longer sessions. The clay we used is regular firing stoneware clay, which has a much better texture and is vastly easier to work than the fibre mixed ‘air drying’ clay. The clay does not have to be fired, but can be simply air dried and will sit for years on shelf without deteriorating or crumbling.
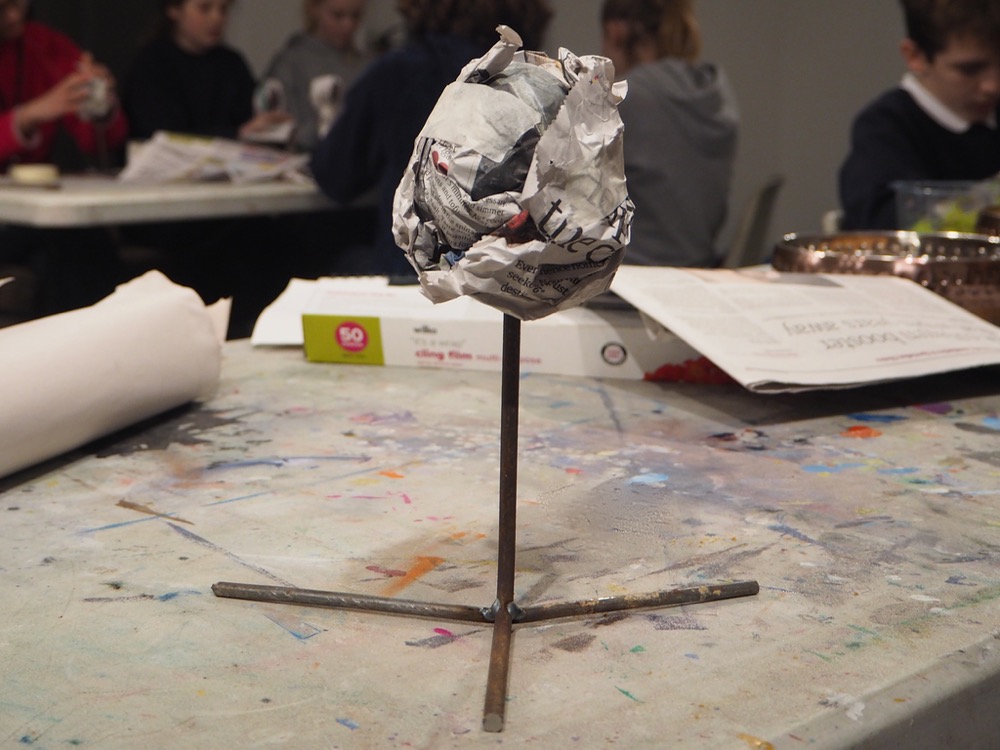
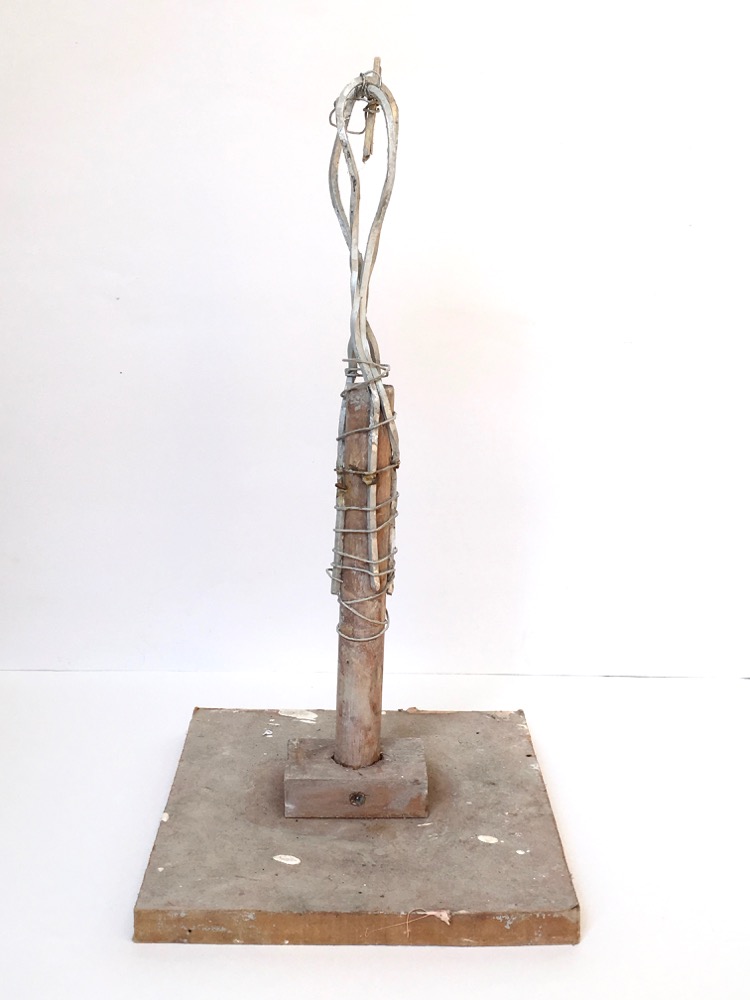
Making a Steel or Wood Armature
It is much easier and less problematic making a clay head if you first construct a sturdy armature. An armature with a strong, stable base prevents the work from tipping over. The upright post will help support the head so that the narrow neck does not compress under the weight of the clay. Though you might be tempted to skip this step, I highly encourage you take the time to make a good armature, to prevent the frustration of sagging or unstable clay.
For this class, I welded simple armatures from steel, but another option which I’ve used in the past is to screw a wooden post or dowel to a square wooden base, or even a roll of cardboard taped to a base.
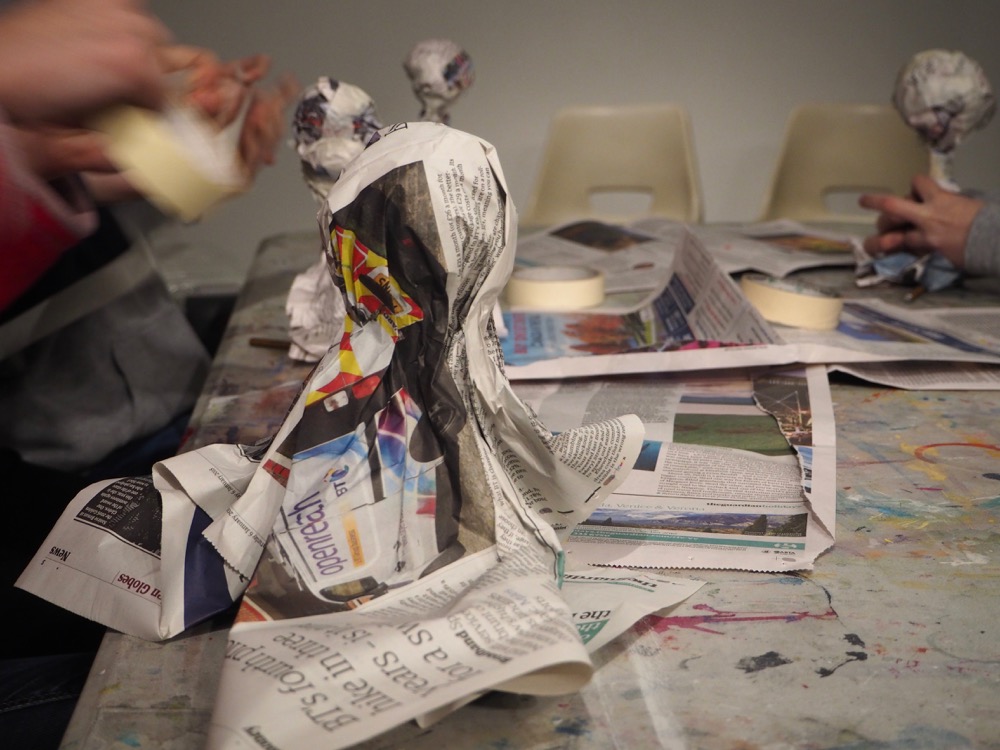
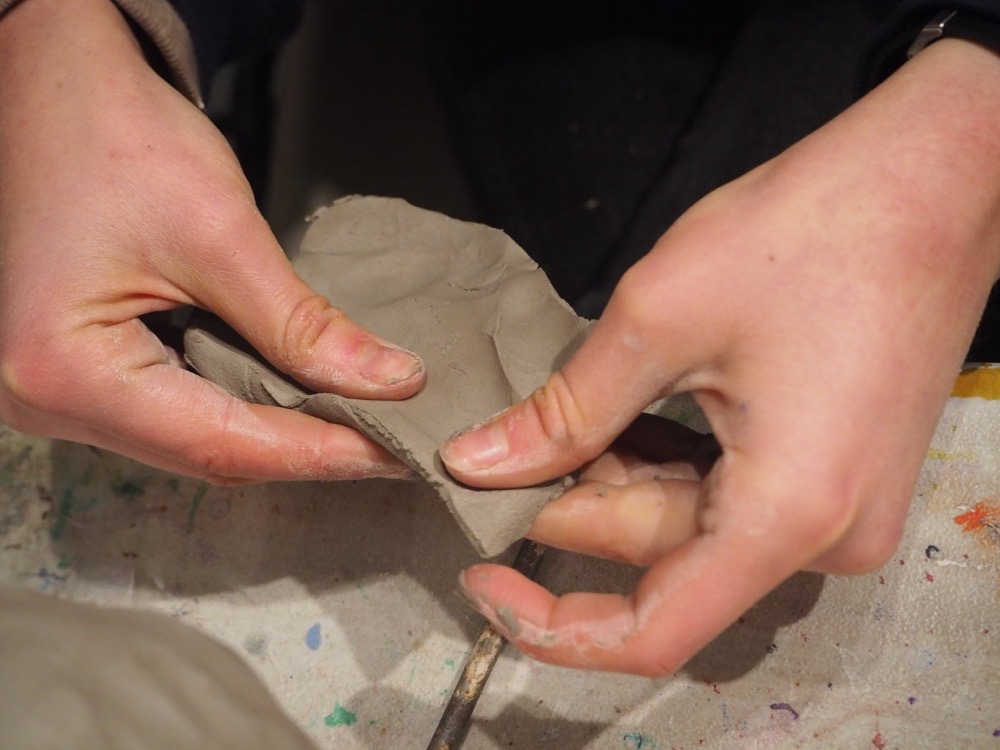
Cardboard Armature
Make a cardboard armature by first taping a tube of cardboard to a firm surface and bulking out the form with newspaper. Then cover the armature with a 1/2- 1 inch layer of clay and allow the clay to dry to leather hard before adding more bulk. Stabilise the head and neck by building shoulders, so the top-heavy form doesn’t tip over. Take extra care to ensure that the neck can still support the work as you add more wet clay, by allowing time for it to harden, otherwise the work might suddenly slump.
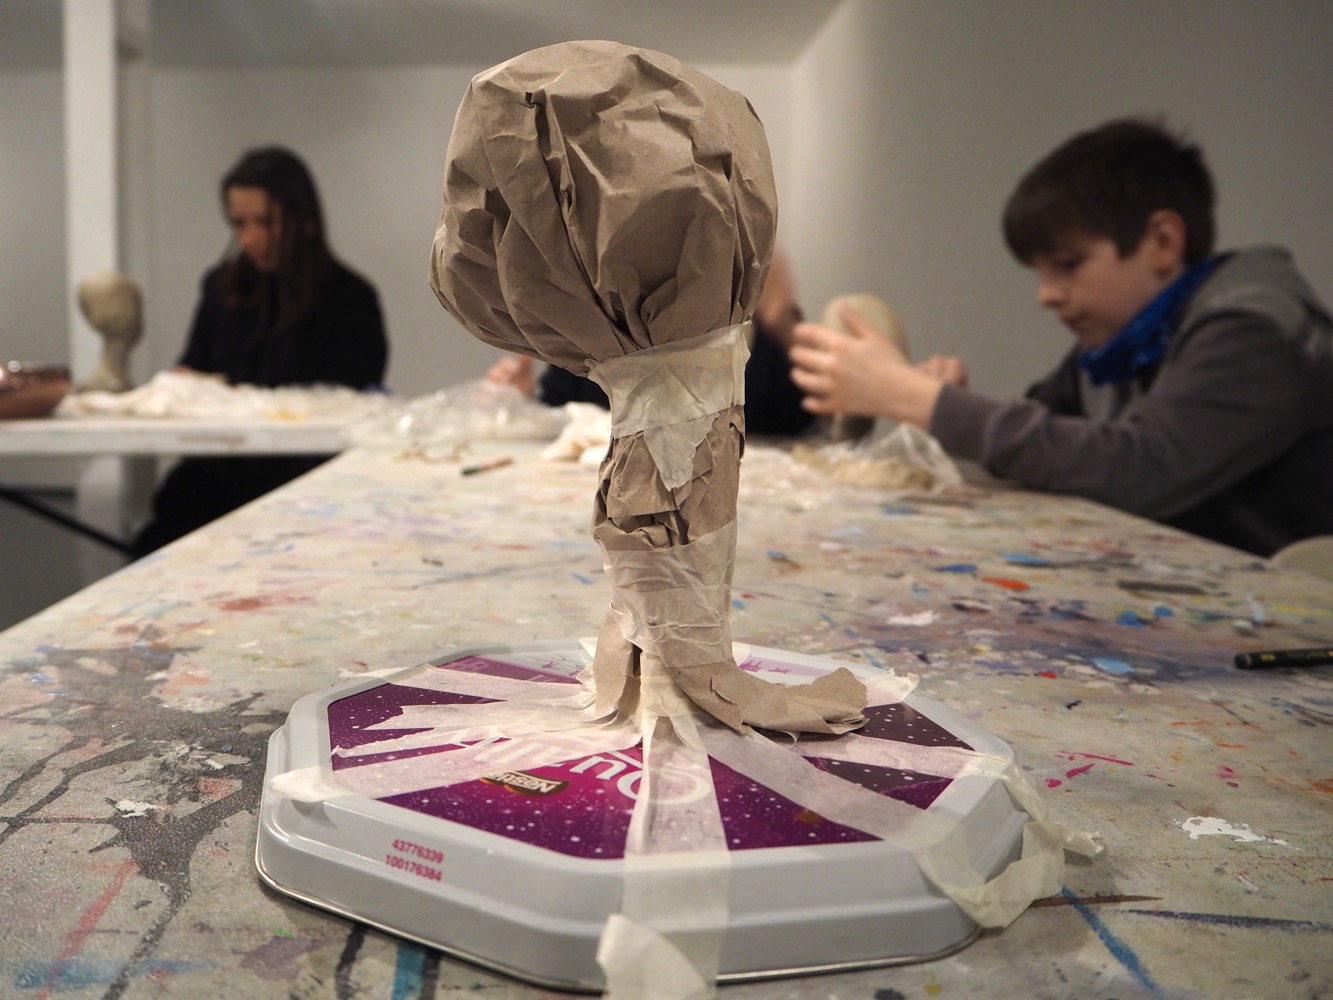

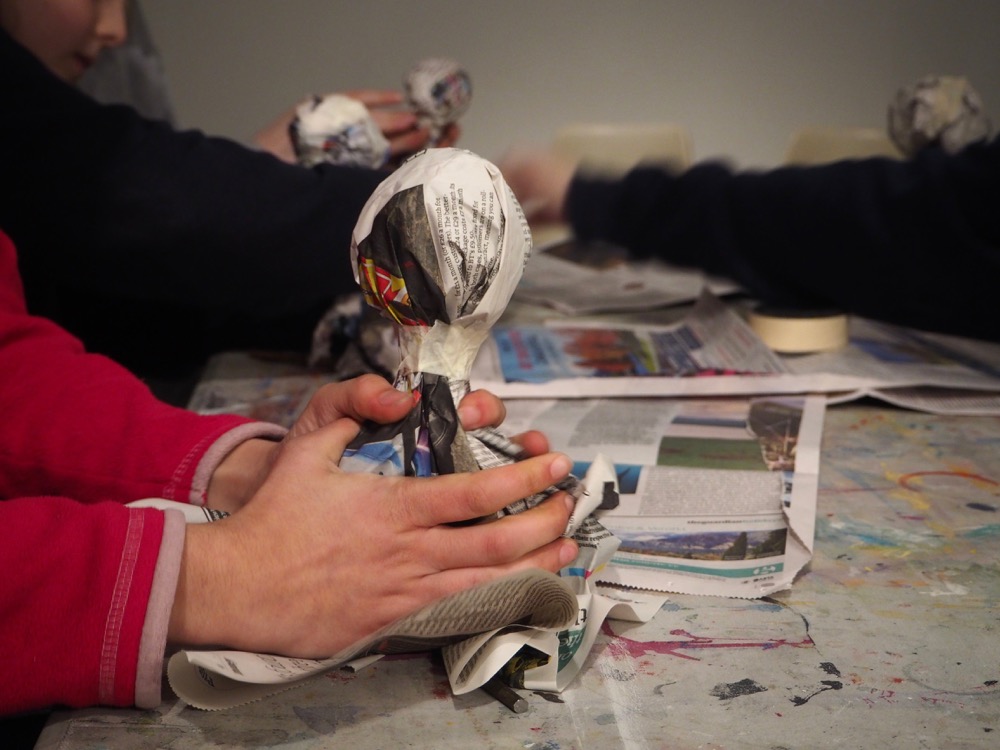
Bulking out the form using paper
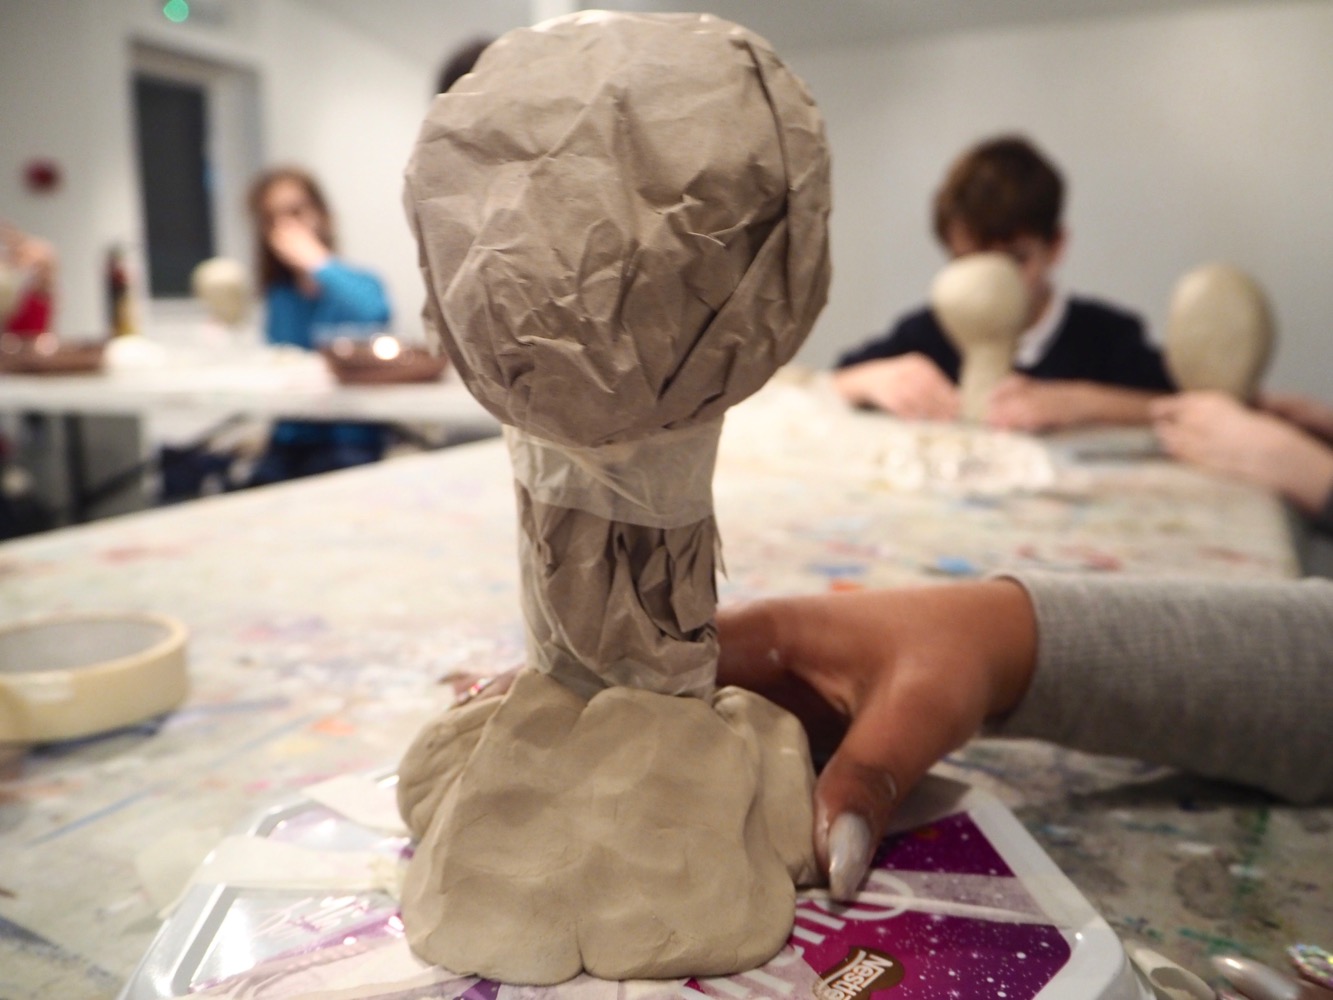
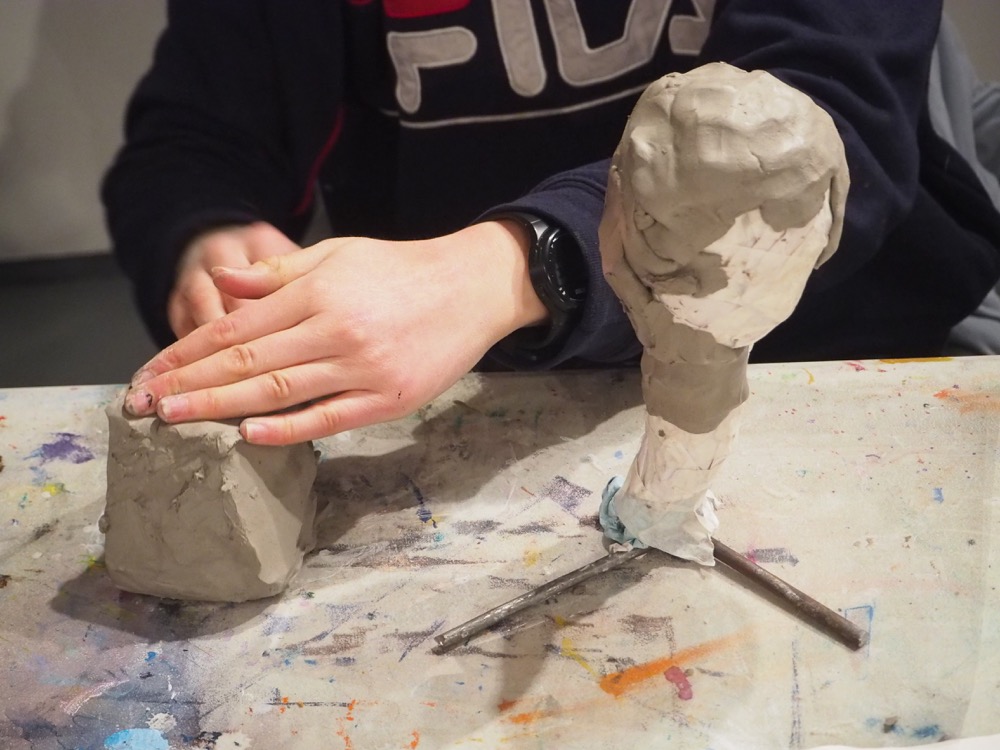
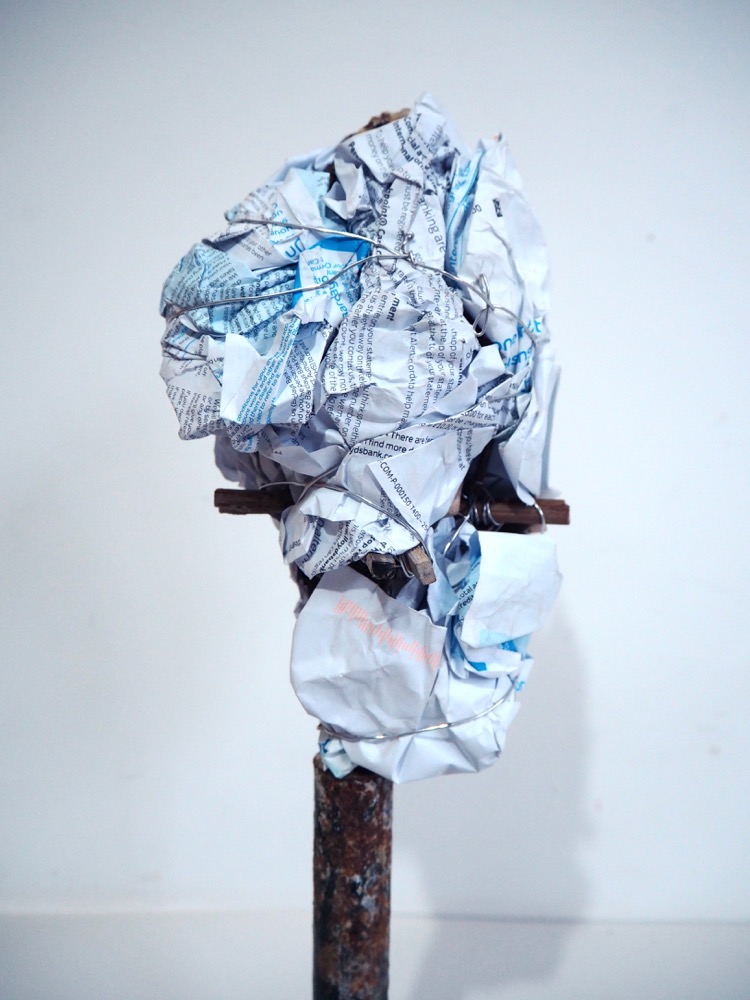
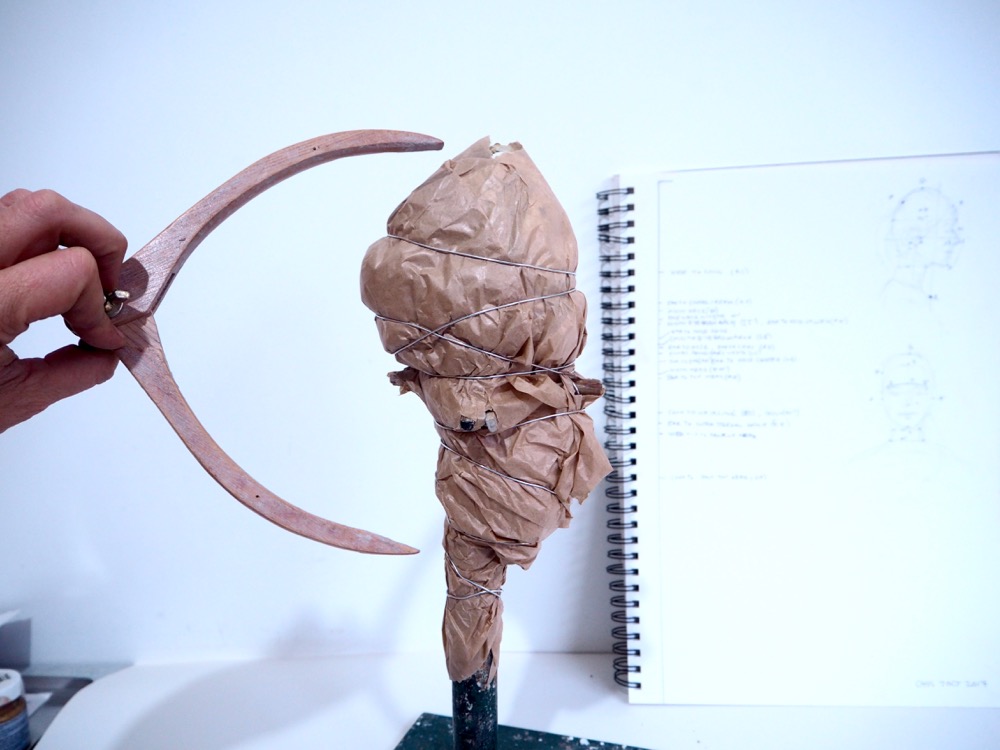
Begin by bulking out the form using scrunched newspaper and masking tape. Create a dense, round ball for the cranium, add paper for the neck, and for the shoulders if needed. Ensure that the paper is scrunched very tightly to provide a firm surface to work on. We use paper for several reasons. It allows you to use less clay, so the work is lighter, and there is less chance of the weight of the clay causing the form to slump. The second reason is that the dry paper will draw out some of the moisture of the wet clay, allowing the initial form to harden up a bit, and provide a stable structure to begin to add features to. Working this way also give you an option of leaving the clay on the armatures, as we did. As the clay dries, it shrinks, and would crack if the clay were built directly onto a rigid armature. A final advantage of working this way is that if you wish to fire the work, it is easy to cut the form in half, pull out the newspaper and hollow the clay before pressing it back together.
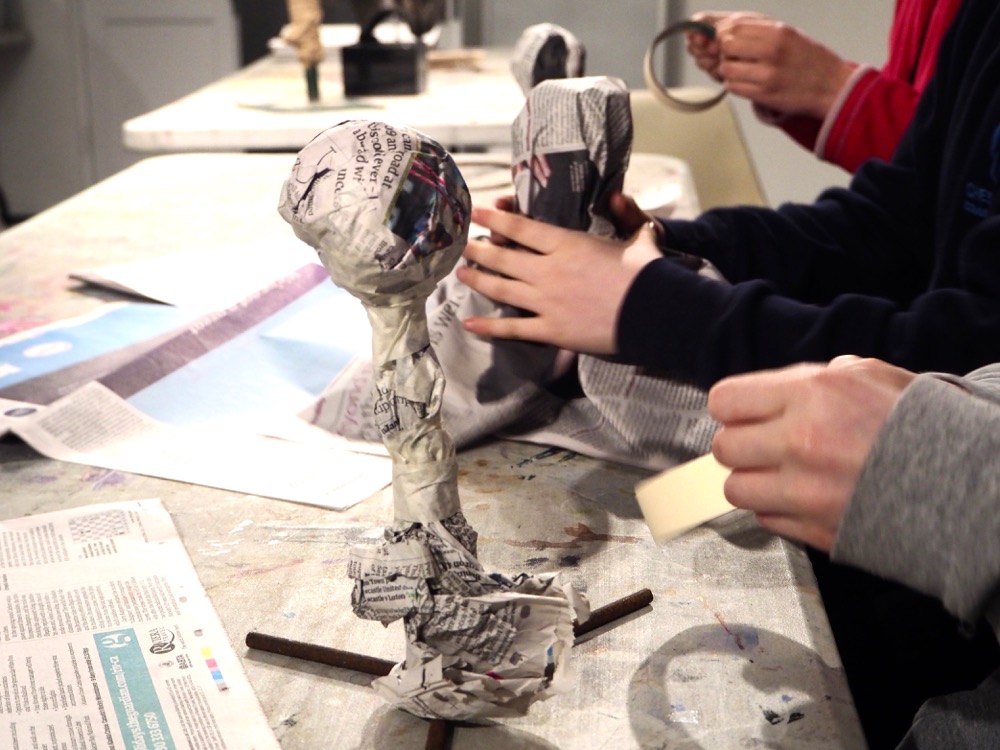
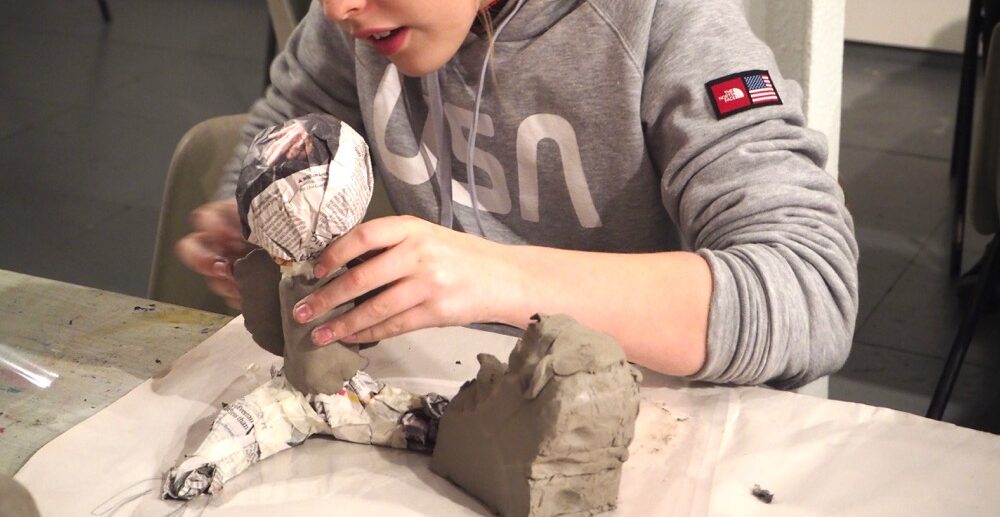
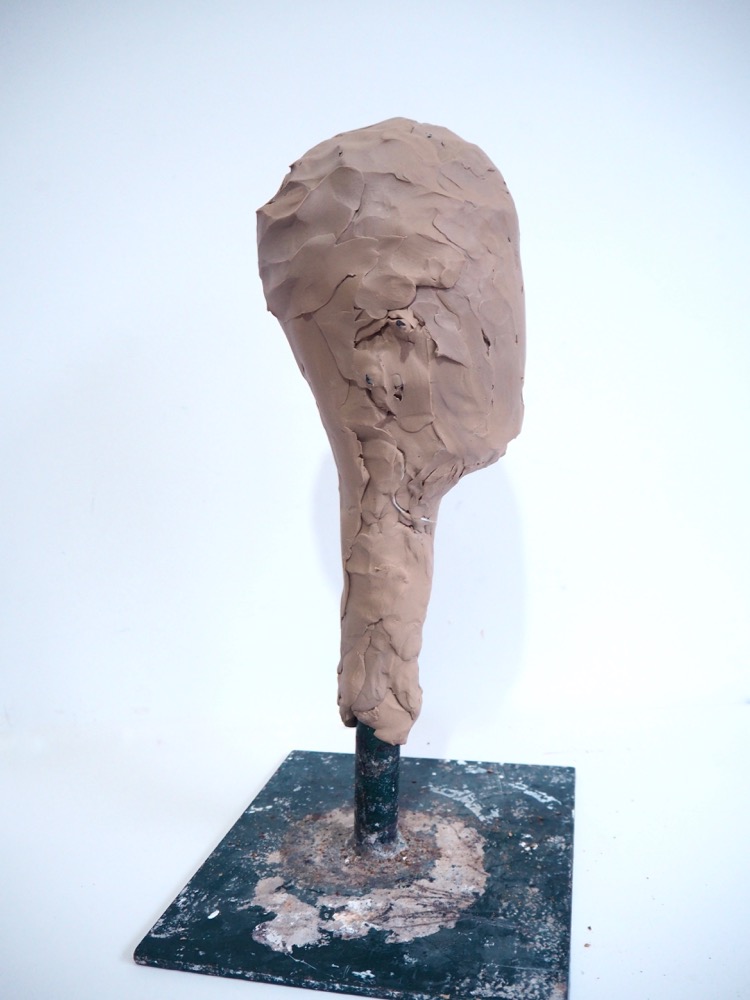
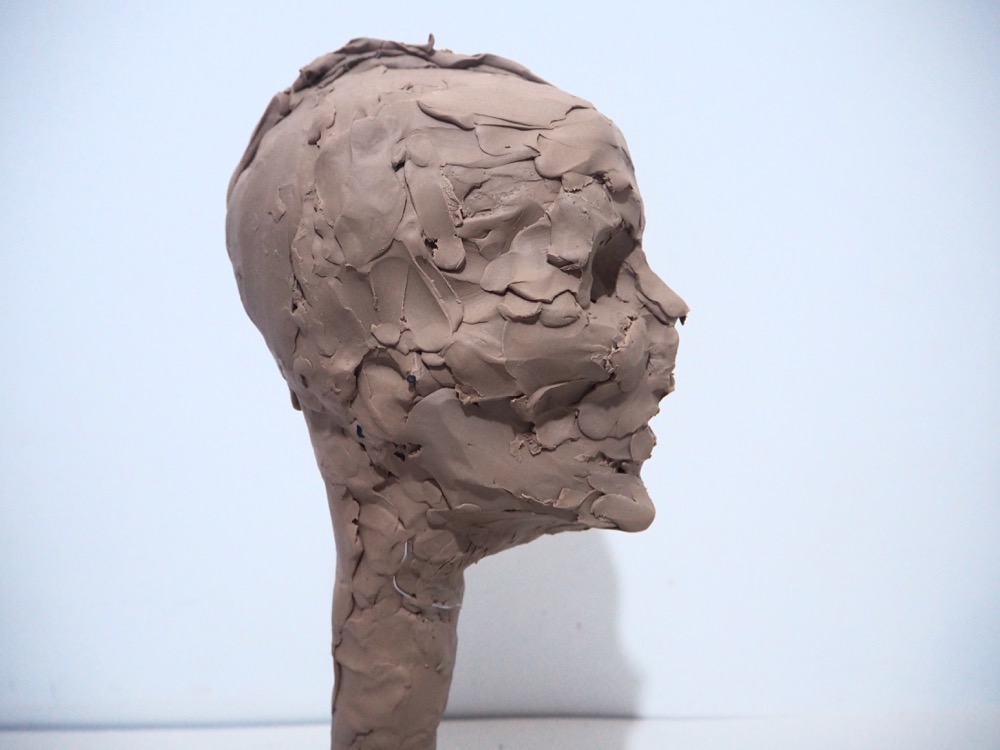
Covering with a layer of clay
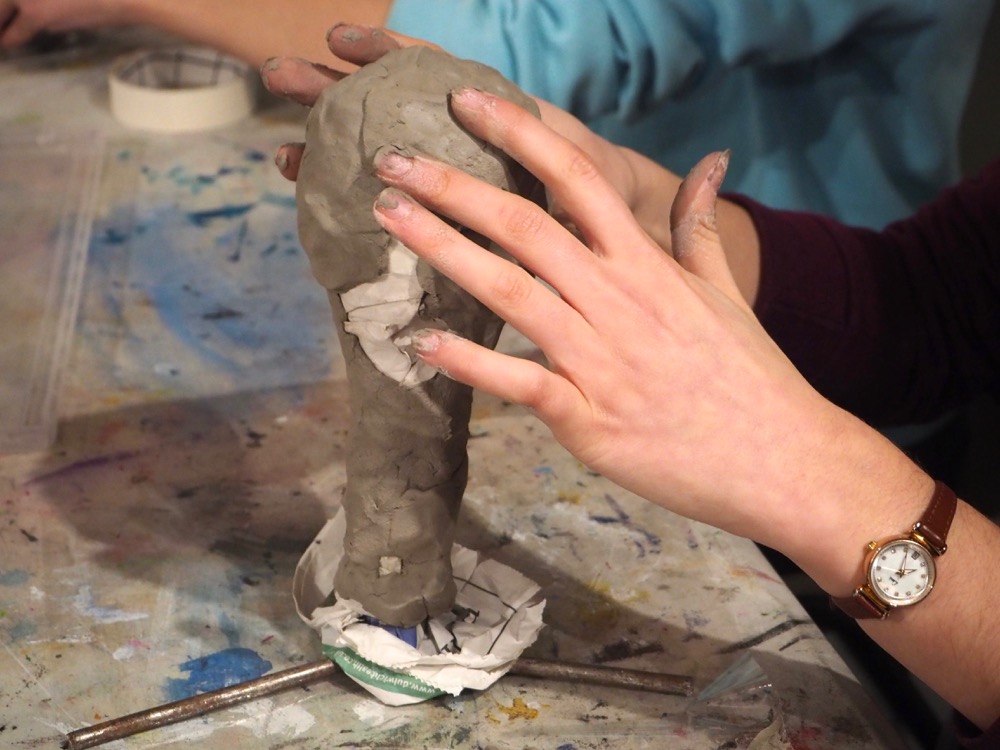
Once the newspaper form is secure, cover the entire form with a 1/2 – 1 inch thick layer of clay. An easy way to do this is to press lumps of clay into thin pancakes, then lay these over the surface and smoosh the masses of clay together. Focus on creating a firm and secure surface to work on with a secure base. The armature should be right at the centre of the neck and the head centred on top.
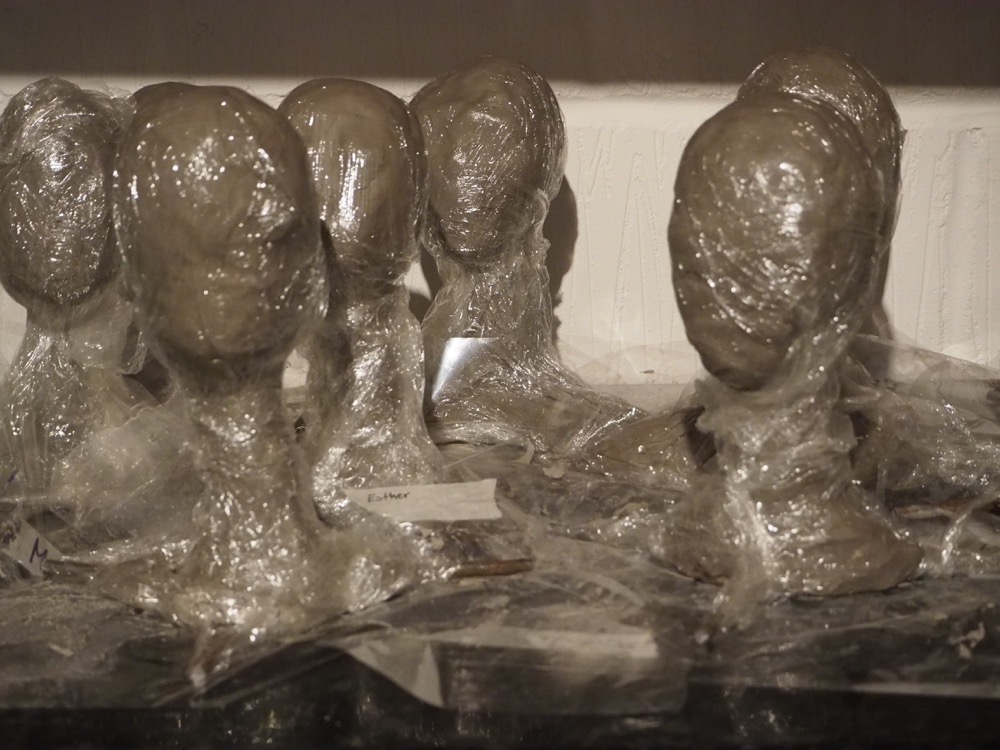
Once you are satisfied that you have a secure form, it’s time to let the clay dry out a bit and stiffen up. You can do this by leaving out for several hours (the time depends on the room temperature and humidity) before wrapping directly with cling film. For our evening class, we didn’t have time to leave the works out, and so wrapped them in cling film and put them away for a week, and let the newspaper draw the moisture of the clay out.
We worked on stiff sheets of plastic so that the clay didn’t stick to the tables, and these also allowed us to store the works without loosing moisture from the base.
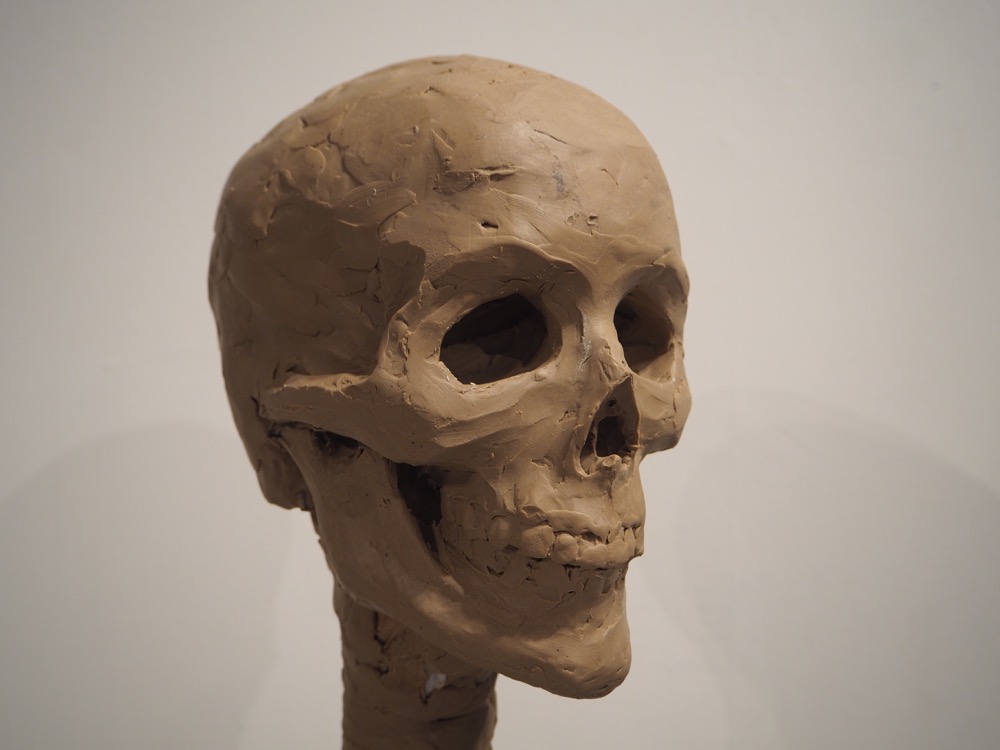
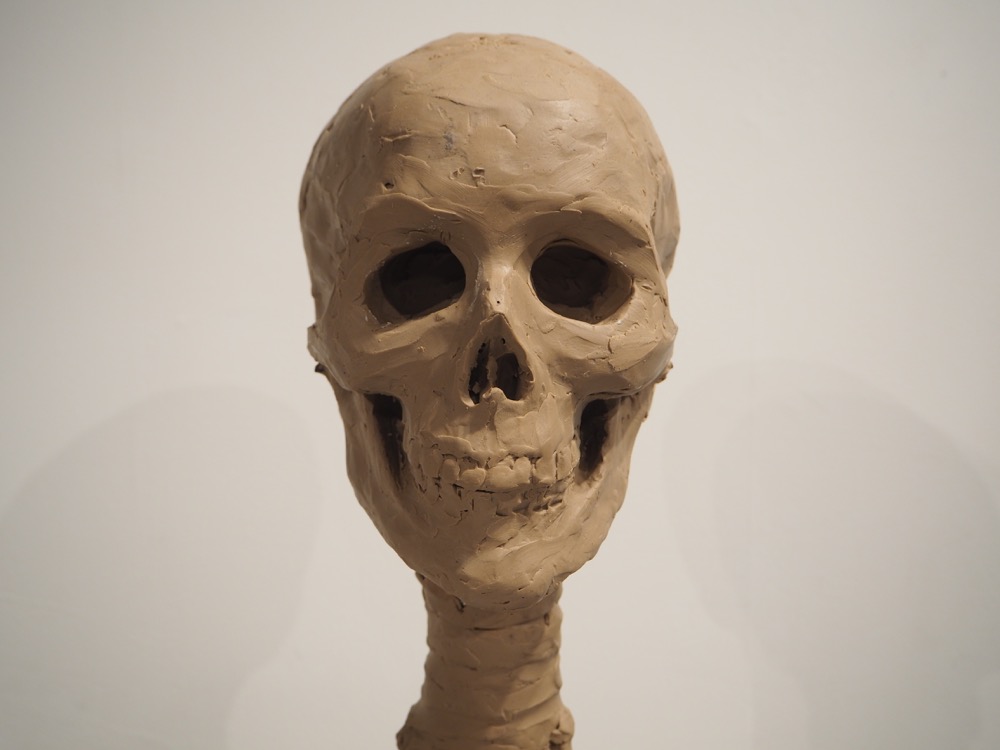
The Skull
Last term we made life drawings from a skull I made at home, and for this workshop we used this skull again as a model. You can see images of the process of construction in the resource for the Day of the Dead workshop . Below are images of the process of construction to compare with the process above.
See all resources in this series here: Modelling the Head in Clay – by Melissa Pierce Murray
Mia Mercado
July 24, 2022 @ 8:47 am
thank you for sharing this, greatly appriciated!
🙂
Iuliia
November 12, 2023 @ 4:10 am
How to remove paper from inside of a sculpter?
Rachel
November 13, 2023 @ 10:47 am
Hi Luliia, in this case, the paper remains inside the clay and doesn’t need to be removed. Many thanks!
Morgan McDonald
November 4, 2025 @ 9:47 pm
How long is the dowel for the armature?
Rachel
November 5, 2025 @ 9:33 am
Hi Morgan, thanks for your questions. The exact measurements aren’t given, but looking at the photos, and knowing it should’t be too top heavy, I’d say approx 20 cm would be sufficient. That leaves enough space to work with, but wouldn’t be too tall that it topples over. I hope this helps!