
Spotting Potential and Nurturing a Young Talent


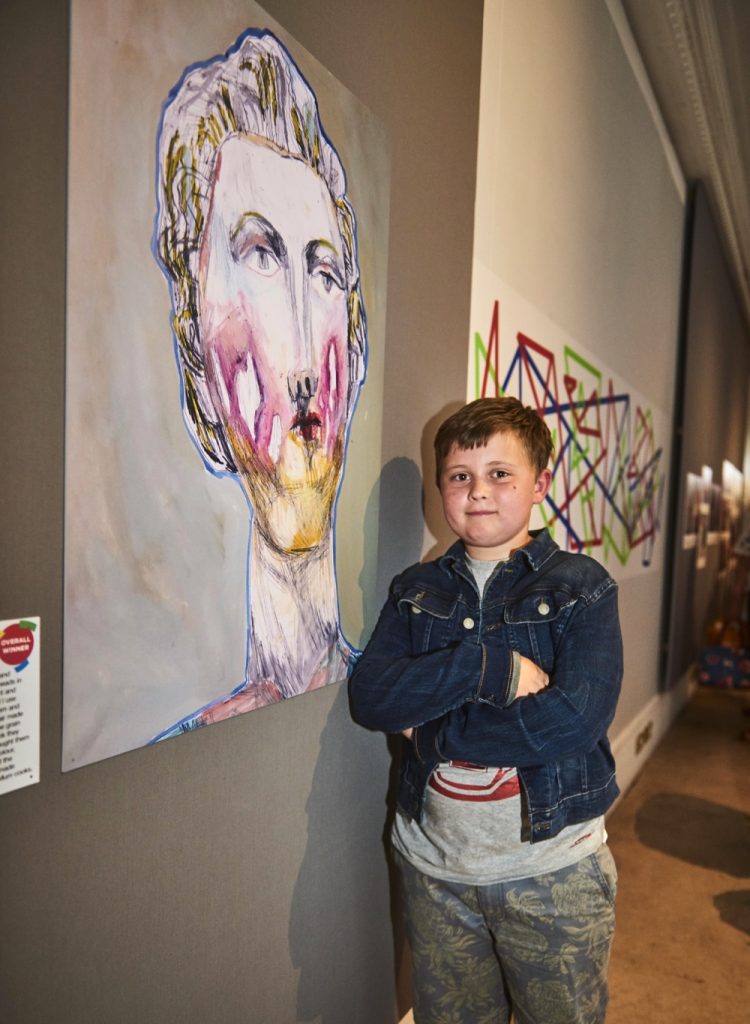
In this resource, Jan Miller discusses the work of a Year Four pupil who approached a class project on drawing Roman portraits in his own unique way. The project proved to be the catalyst that revealed his talent, leading to an exhibition, success in a prestigious art competition and requests to purchase his work.
Jan Miller shares a whole year’s worth of teaching for ages 7 to 8 in a collection of resources for AccessArt: Teaching Art to Year Three
Context
How do we react when a child responds to a task in a very different way to their peers? Do we stop them, remind them of our expectations and demonstrate again, watching them carefully as they continue? I find myself excited to see an anomaly in those viewing the world, and the challenge, differently. But then what – do we stand back and give them space and opportunity to grow? What if that anomaly is due to an exceptionally accomplished response?
This article comes about from drawing Roman portraits with Year 4. There were two of these such anomalies when viewing the outcomes. One concentrated for the entire hour session, filling his page with a glorious array of washes of inks, so the results didn’t identify as a face to viewers but he was very pleased with his ‘portrait’ and was keen to explain the features; it was an accomplished ‘colour study’. These children are not going through the motions, trying to please, jumping through hoops or fulfilling assessment criteria. Unlike other areas of the curriculum, we have a duty to appreciate that these children are making progress.
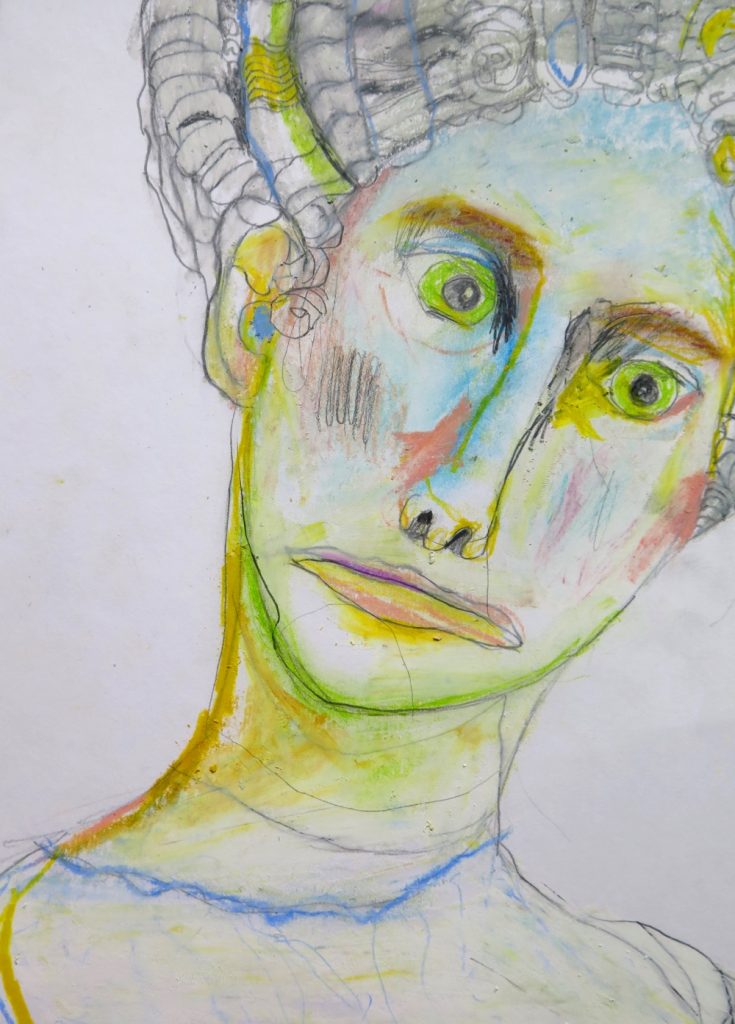
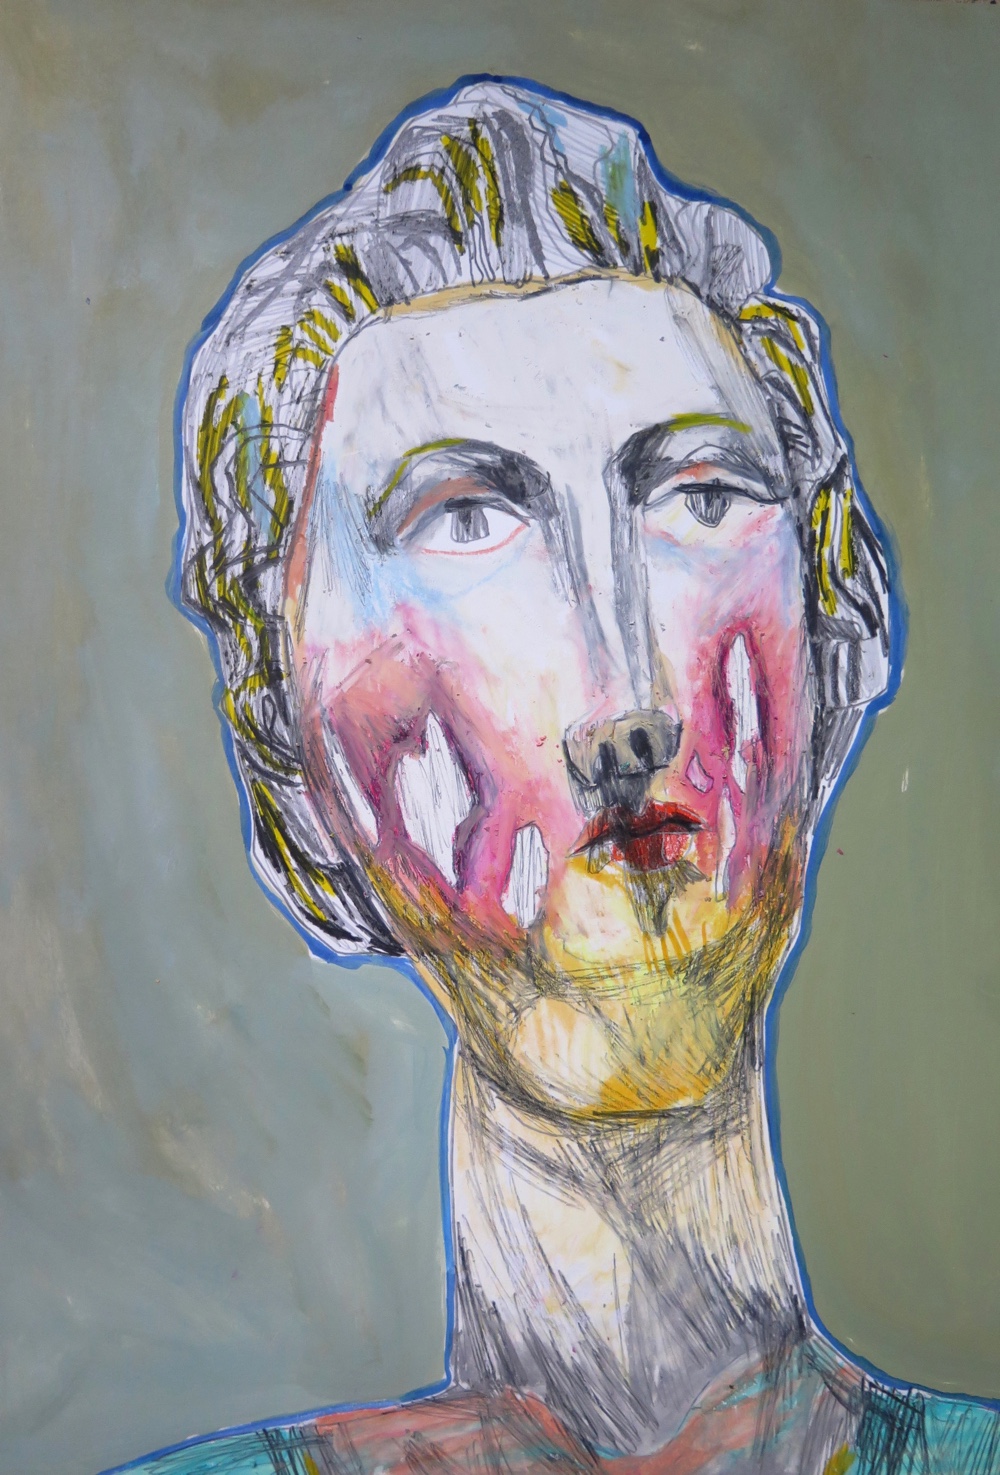
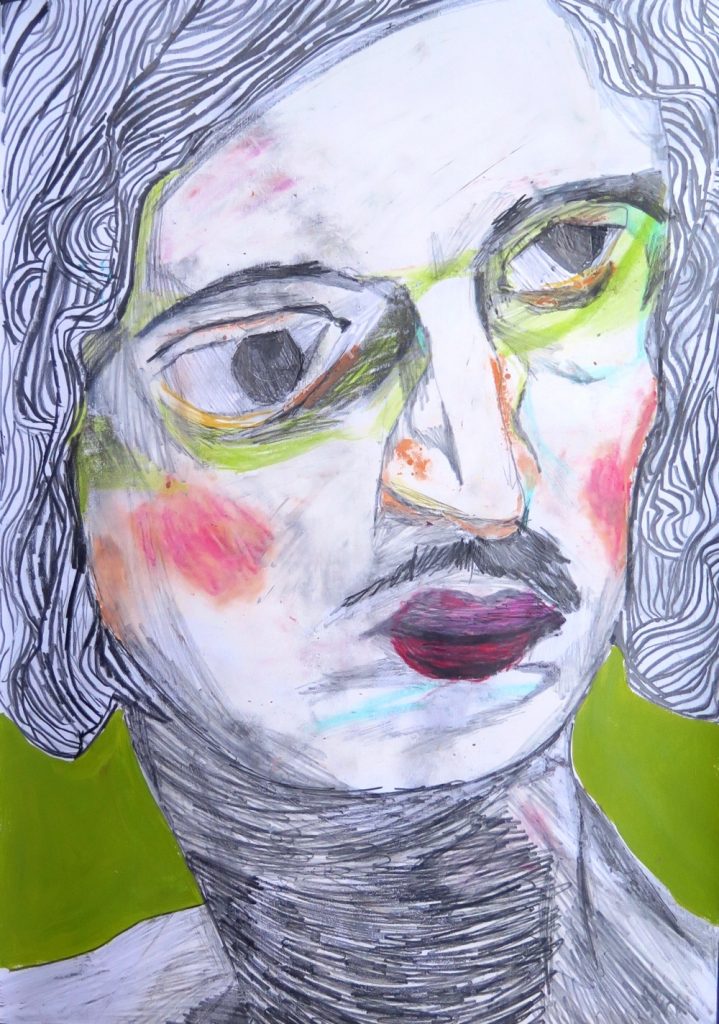
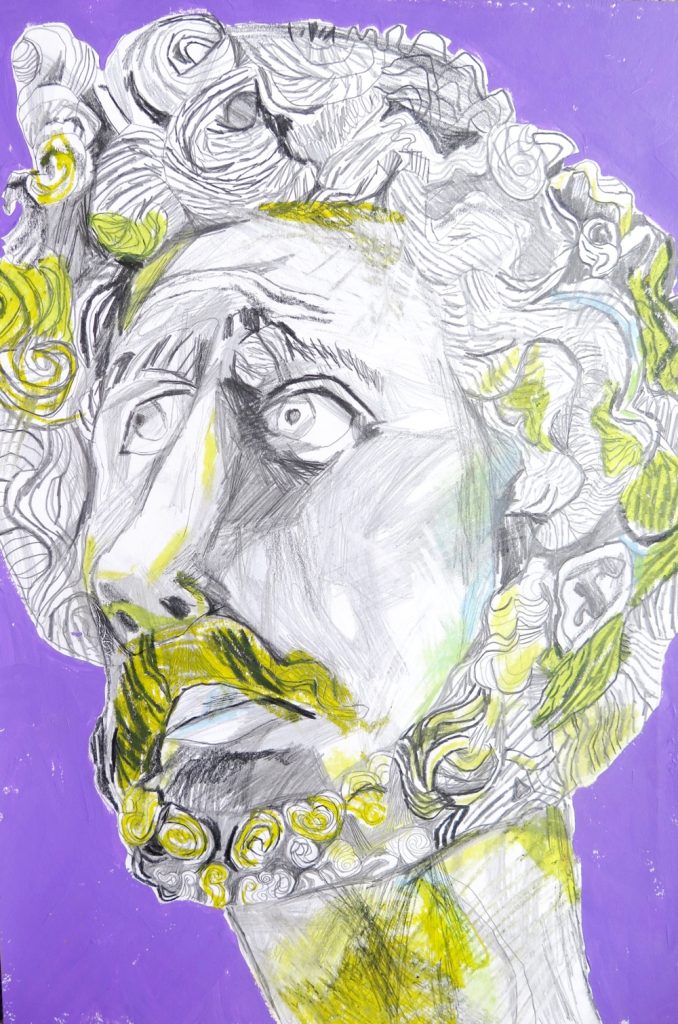
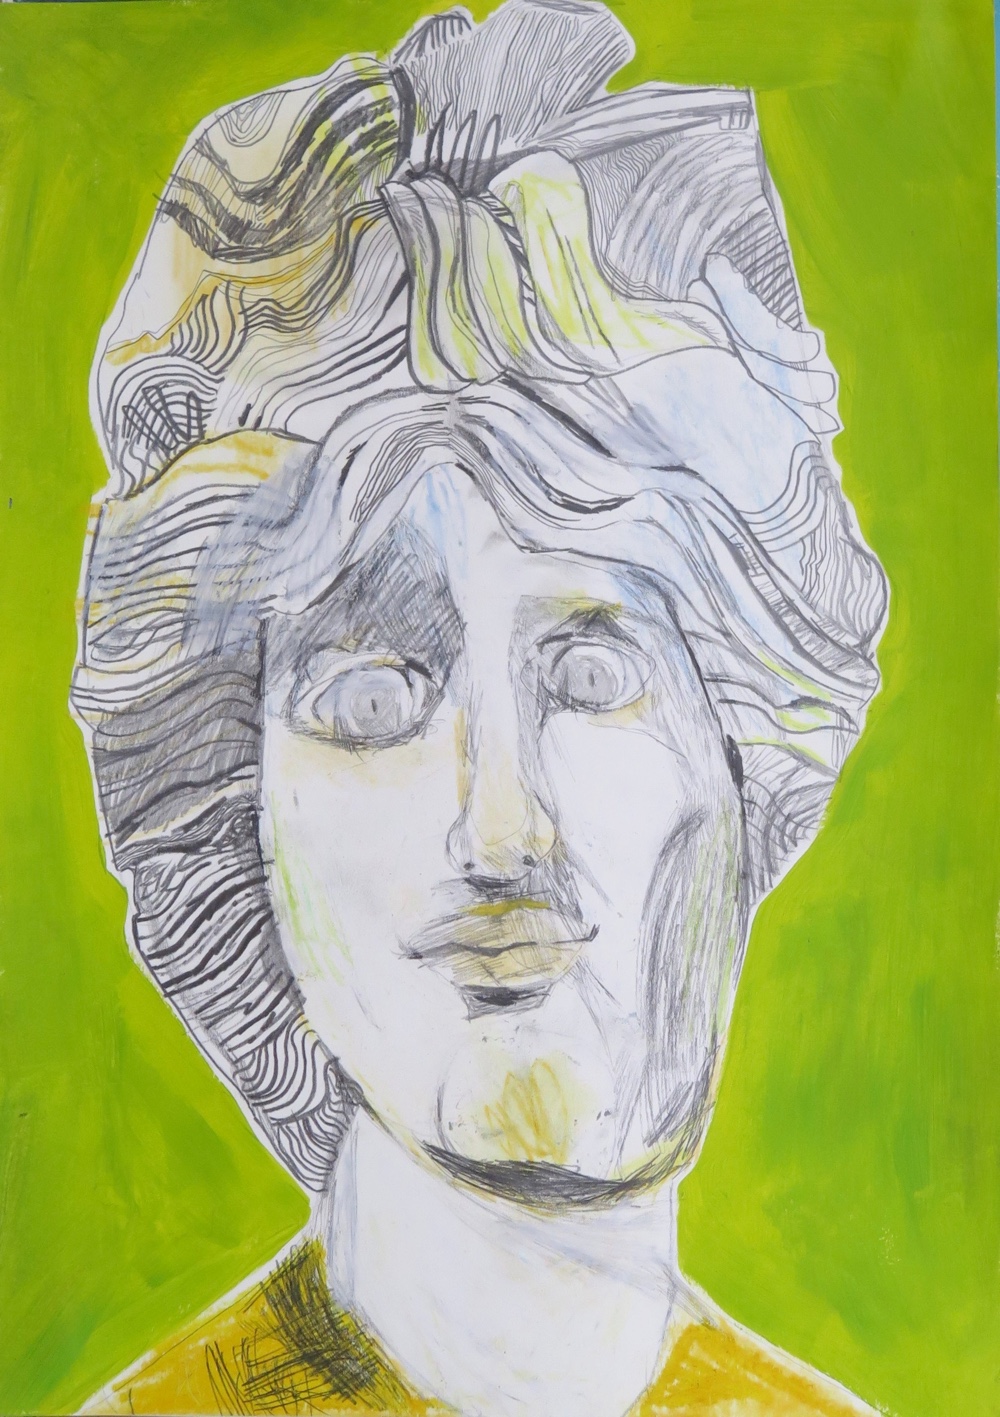
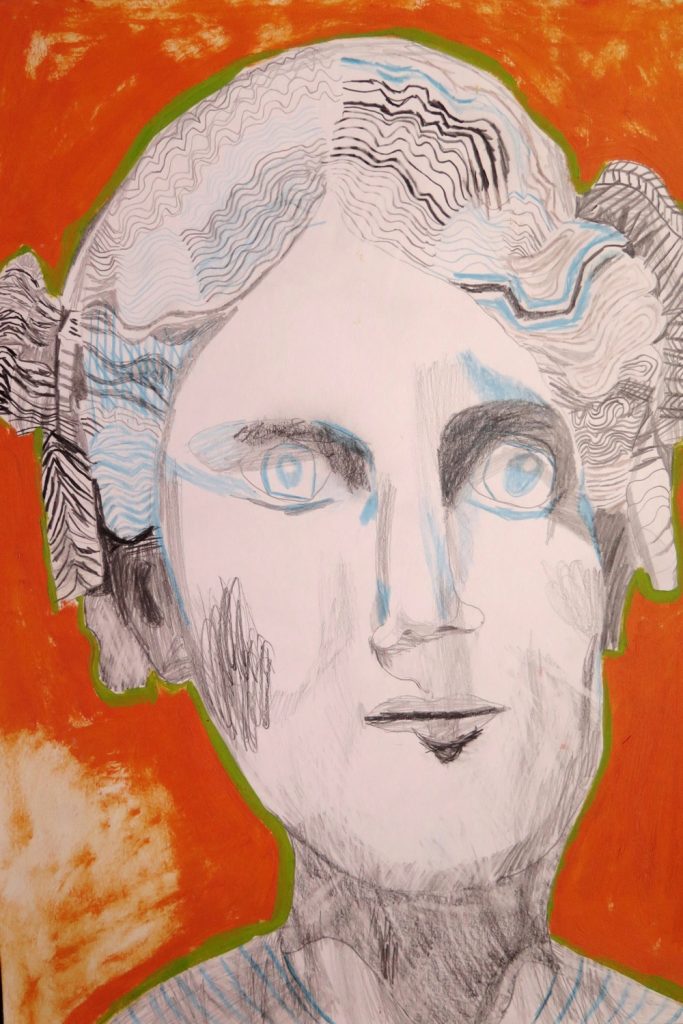
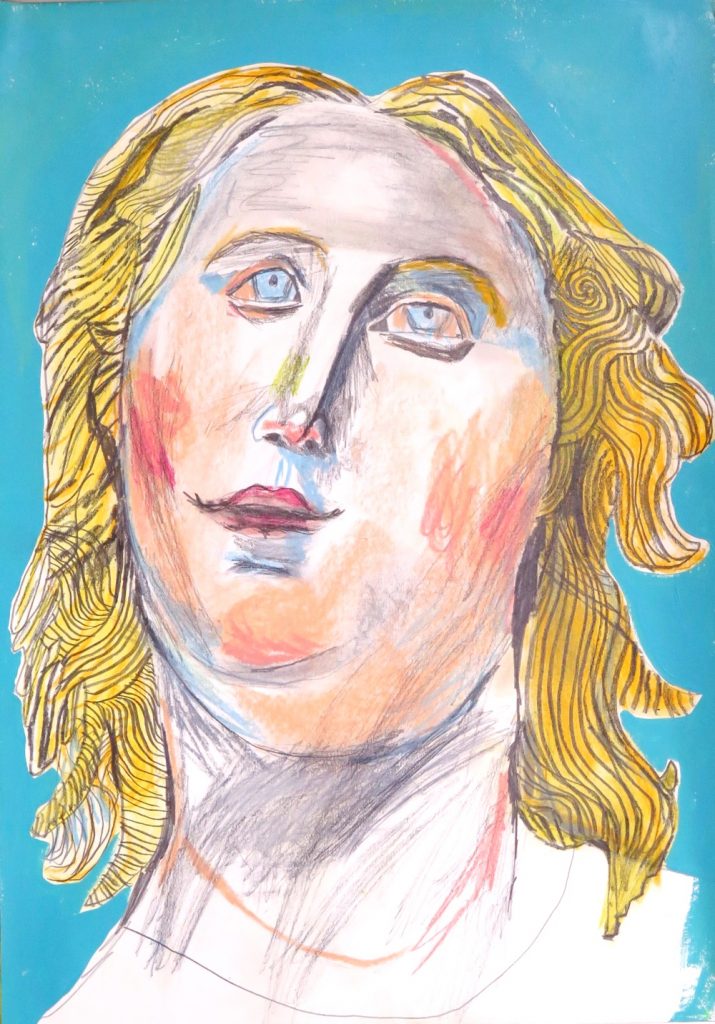
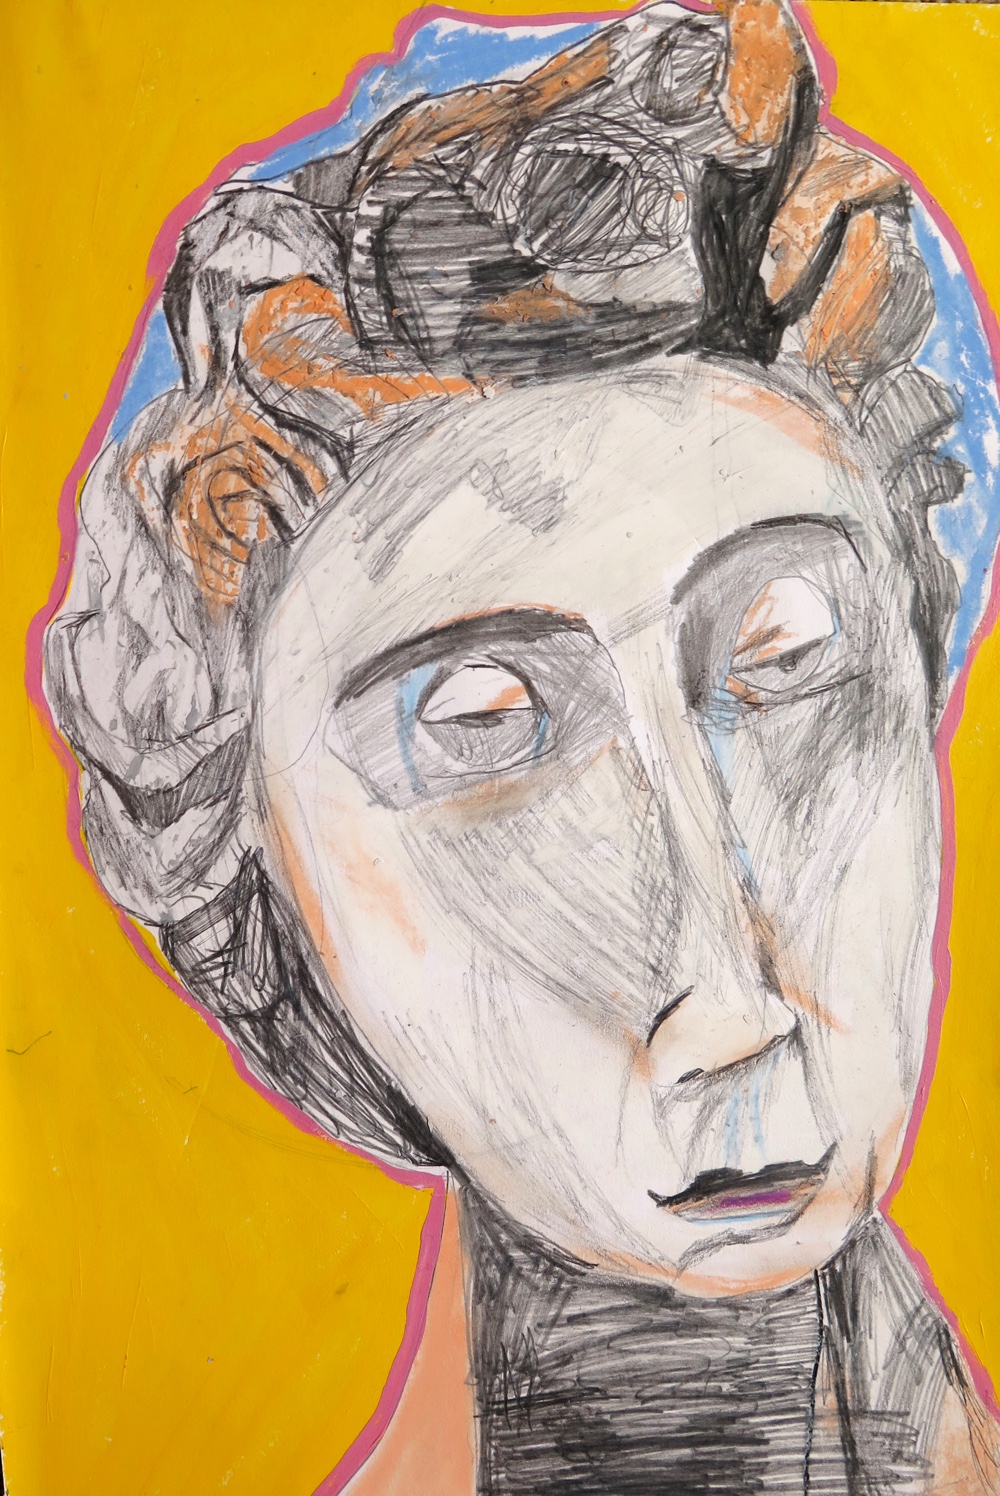
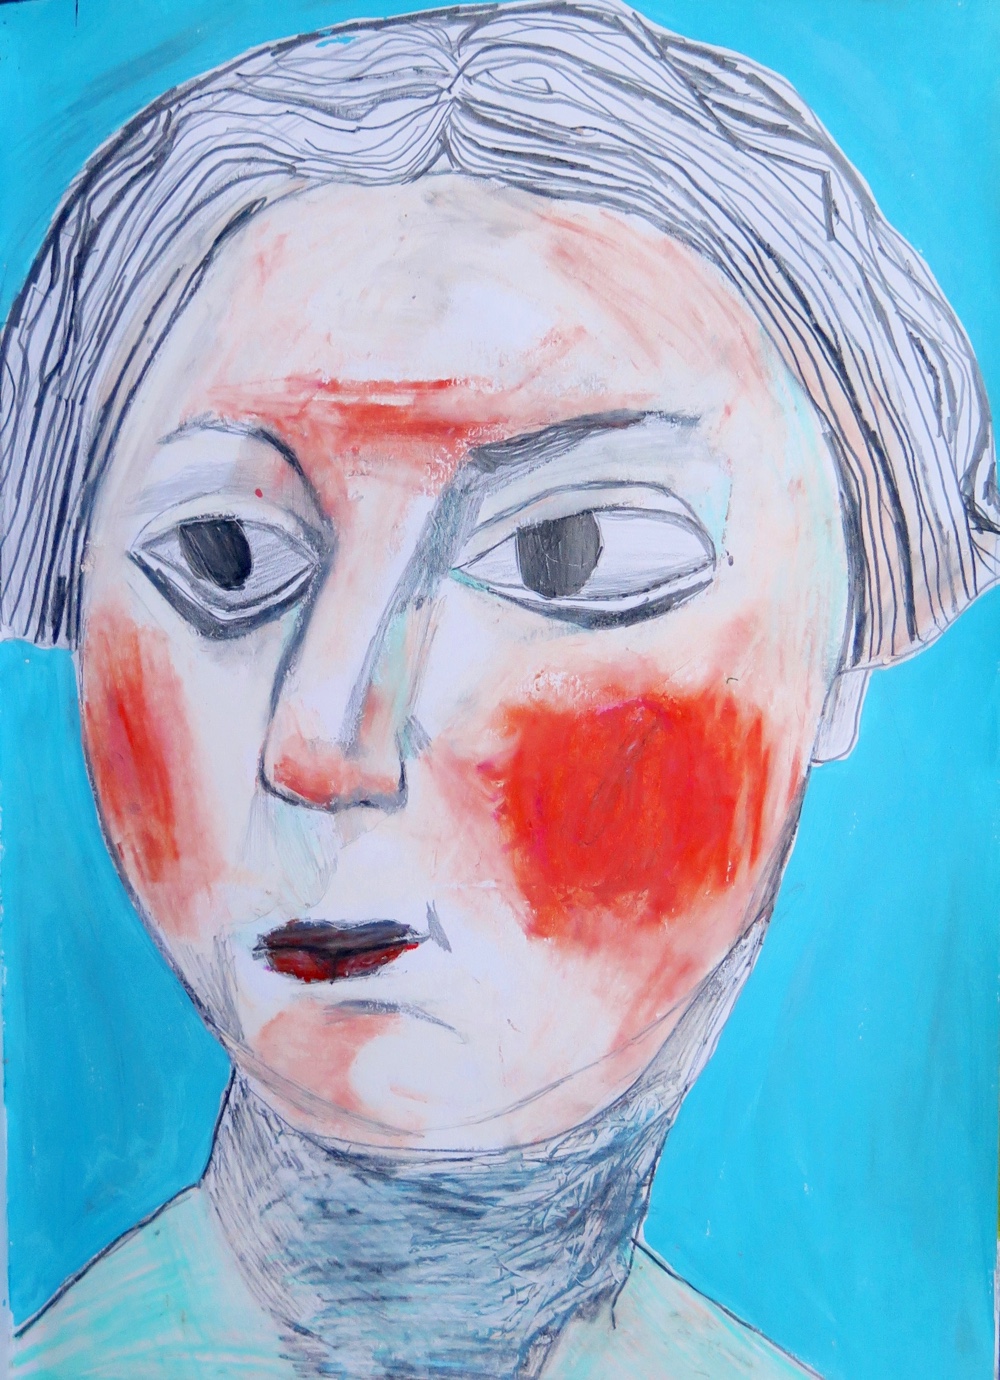
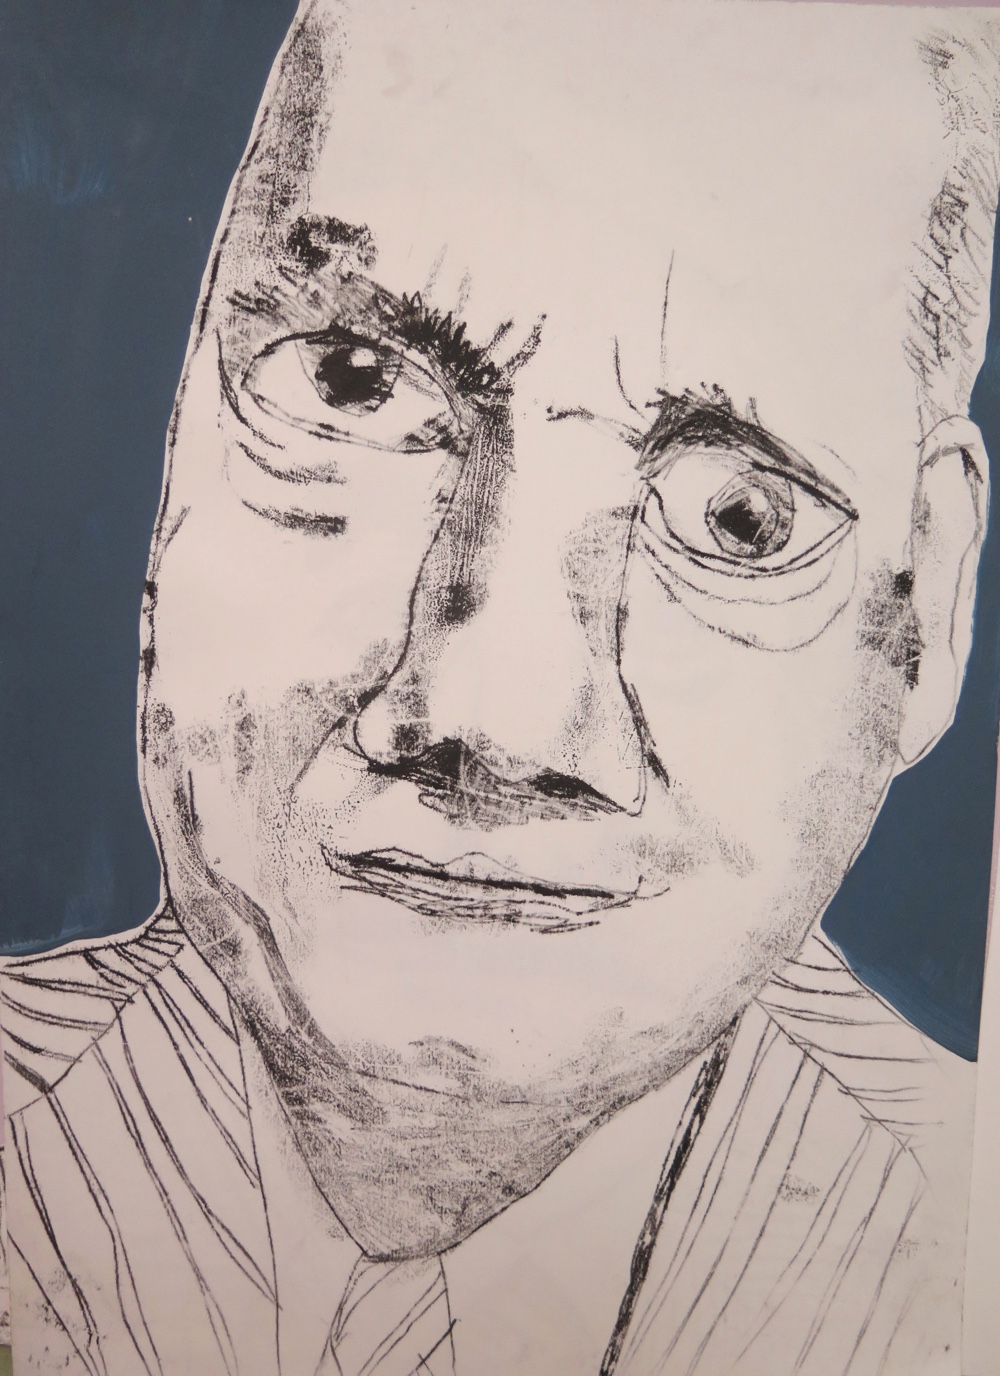
In this article I will focus on the other child who was equally engaged and also used a vibrant palette. He proved himself to be at the other end of the spectrum however, as a very proficient portrait artist. He intuitively used interesting marks and accurate proportion and was able to capture the essence of the image as he conveyed control of a variety of materials. The Roman portrait was used as a reference but he worked quickly to stamp his own style all over it. He demonstrated a subtle alchemy – a magical process of creation that happens with some children in our art lessons.
In a fortunate stroke of serendipity, he has discovered a theme that has shone a light on his talent in using a ‘happy chance’ range of marks to produce almost 100 portraits and still only aged 10. His artwork had many positive reviews leading to a solo exhibition at a Museum, offers of sales and first prize in a prestigious Museum competition open to students aged 19.
Aims
- Explore the possibilities when combining materials, techniques and processes.
- Learn by repeating work on the same theme
- Produce an individual tactile response
- Develop drawing and mark-making skills
- Develop observation skills and proportion
- Engage pupils in topic – develop a project in which all abilities can feel a sense of achievement.
- Encourage children to continually make decisions and to strive for ‘correct answers’ and expected responses.
- Learn from each other’s response
- Learn to respond creatively and with expression and emotion.
Who are the sessions aimed at?
The sessions were run with a child aged 9. But the portraiture can be adapted to suit any age.
Which areas of exploration are covered?
- Portraiture
- Mark-making
- Colour blending, mixing and controlling of colour.
- Confident in handling materials
- Learning through play and experimentation.
- Appreciation of culture
- Working spontaneously.
- Informed and independent material choices.
How much time is needed?
The session was approx. 2 hours for each portrait – some took less time. They all follow similar stages to build up the image. A mixed box of materials was used.
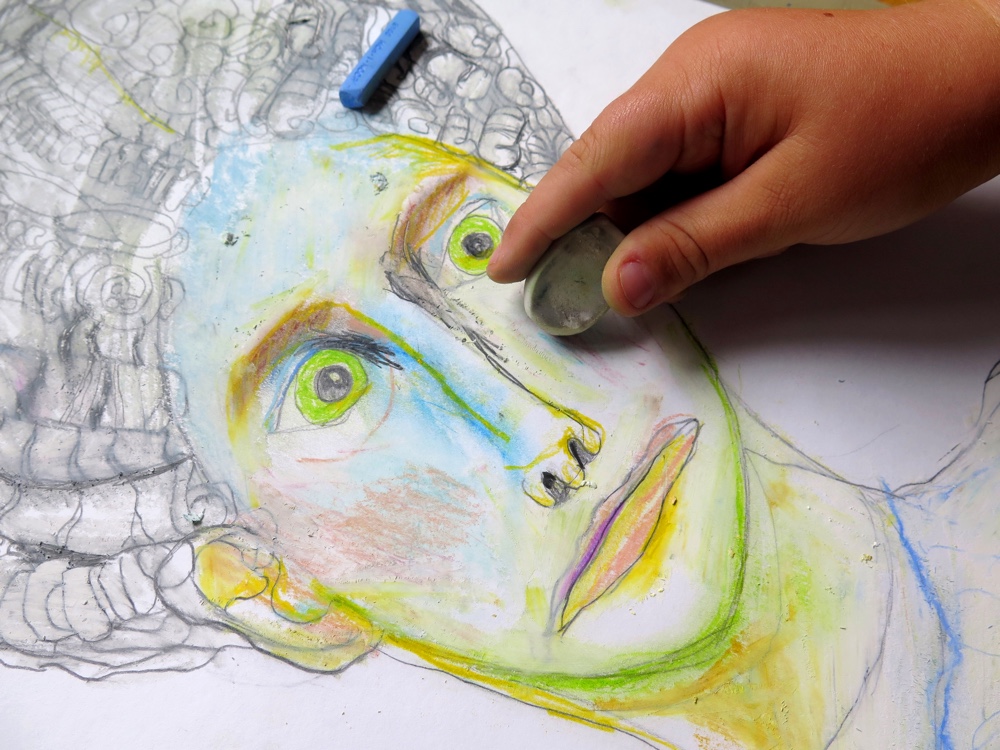
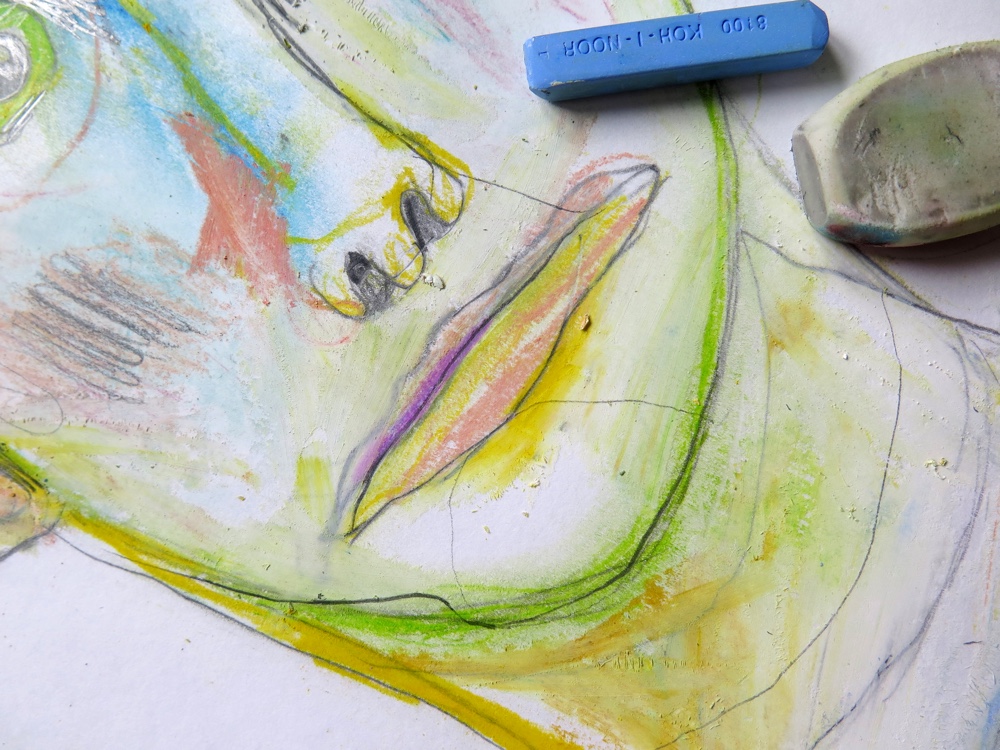
The lesson used three materials – chalk, pencil and oil pastel progressively building on each other as well as concurrently. As each portrait is made, he is developing knowledge and understanding of process and materials. If you follow the stages and processes, you would produce this style of portraits and cover the areas of exploration listed.
Extension ideas
- Each child could produce a selfie. Produce images of characters from history. Draw members of their family. Each begins a portrait and others work on it by adding to it, to extend the variation in marks and handling of materials.
- Ask children to make marks as warm ups in their sketchbook and use these in their portrait – the teacher can describe textures to aid them.
- They could add imaginative colour to black and white photographs of faces as a starting exercise.
- Look at portraits by artists such as Picasso, Wylie etc who use strong colour, minimal lines and do not strive for realism.
- Taking an image, changing it and making it their own becomes more difficult as children grow, so giving these opportunities is vital.
TIP
Don’t be precious about materials- a mixed box gives options and choices – thinking about the colour as well as the material each time, encouraging layering rather than just colouring in.
A3 is a perfect size to complete in one or two sessions and is the right size to add interesting marks.
Where might the sessions be used?
- Classrooms (as part of art lessons or workshop)
- After-school art club or AG&T group.
- Community groups (i.e. Scouts and Guides)
- Gallery, Museum or Art Organisation workshop.
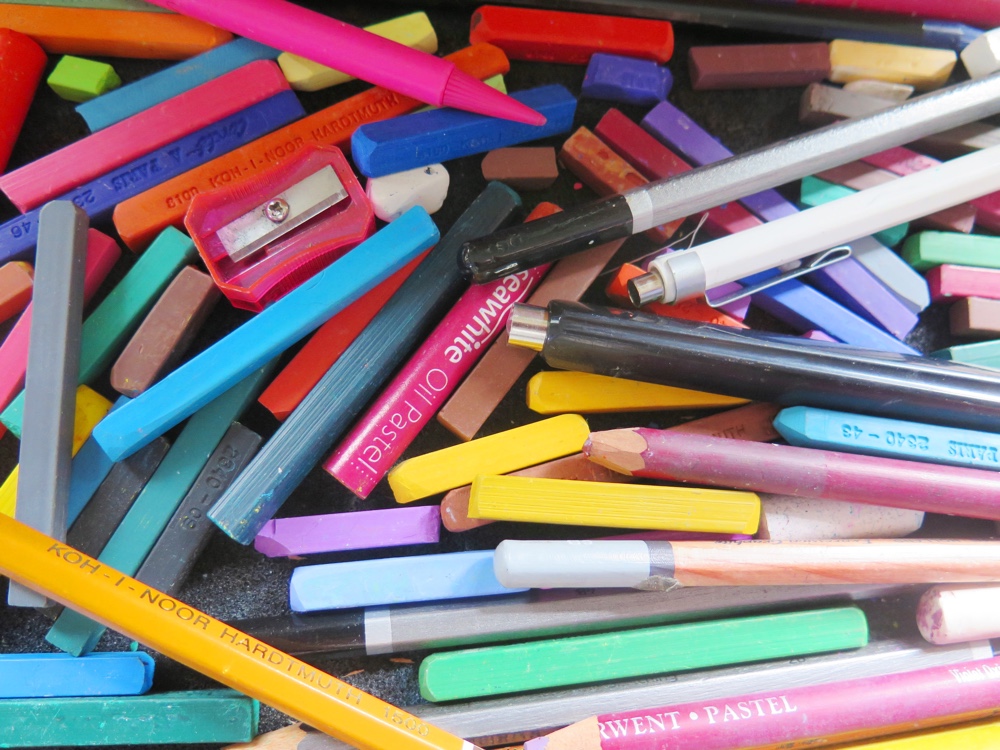
Materials and Equipment
- A3 paper
- Pencils- H HB 2B 4B 8B graphite stick
- Retractable lead pencil
- Sharpener, eraser
- Couple of oil pastels including white
- Conte chalks – thin pastels
- Block printing ink, roller, chopping board
Stages of the Activity Session:
First – the drawing
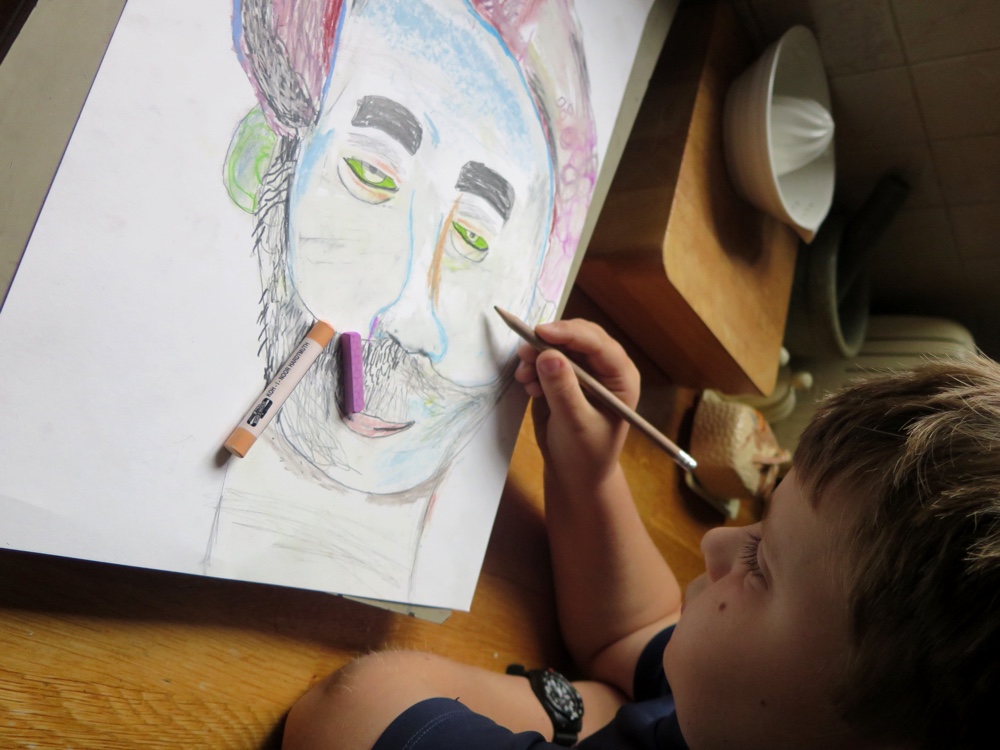
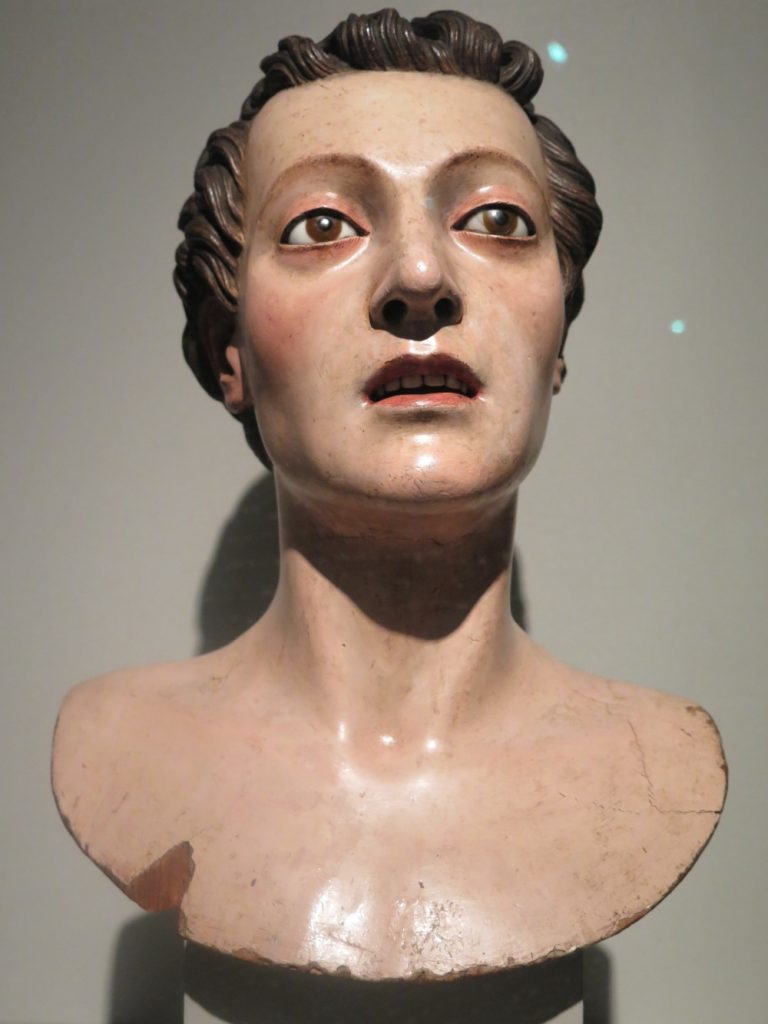
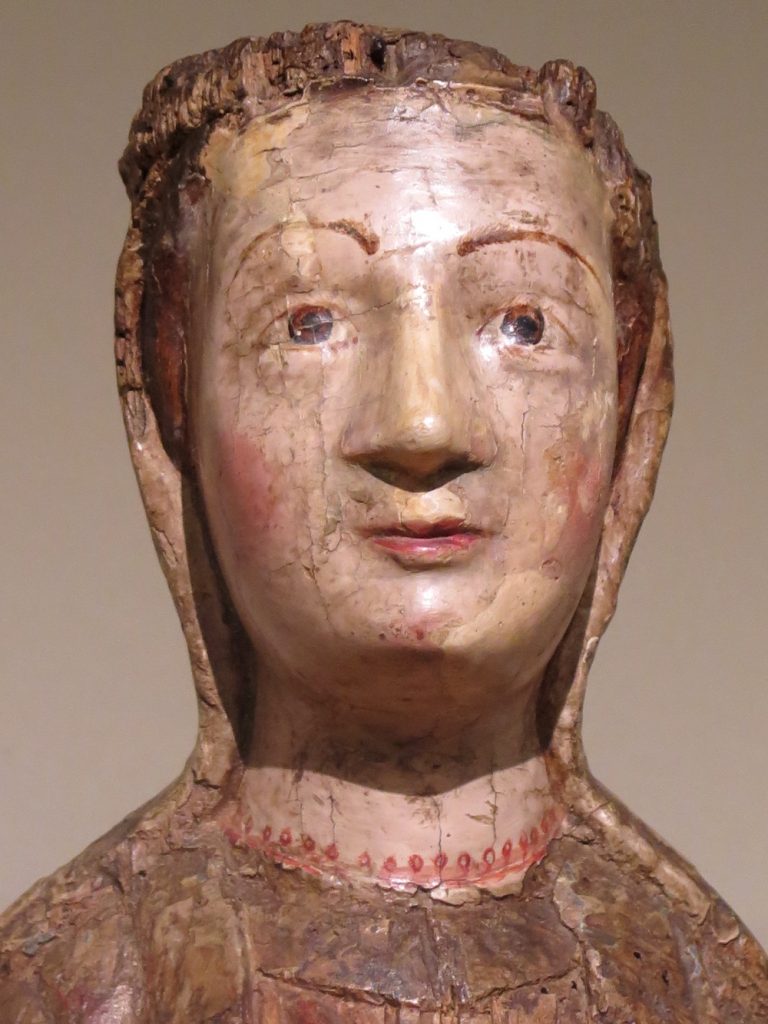
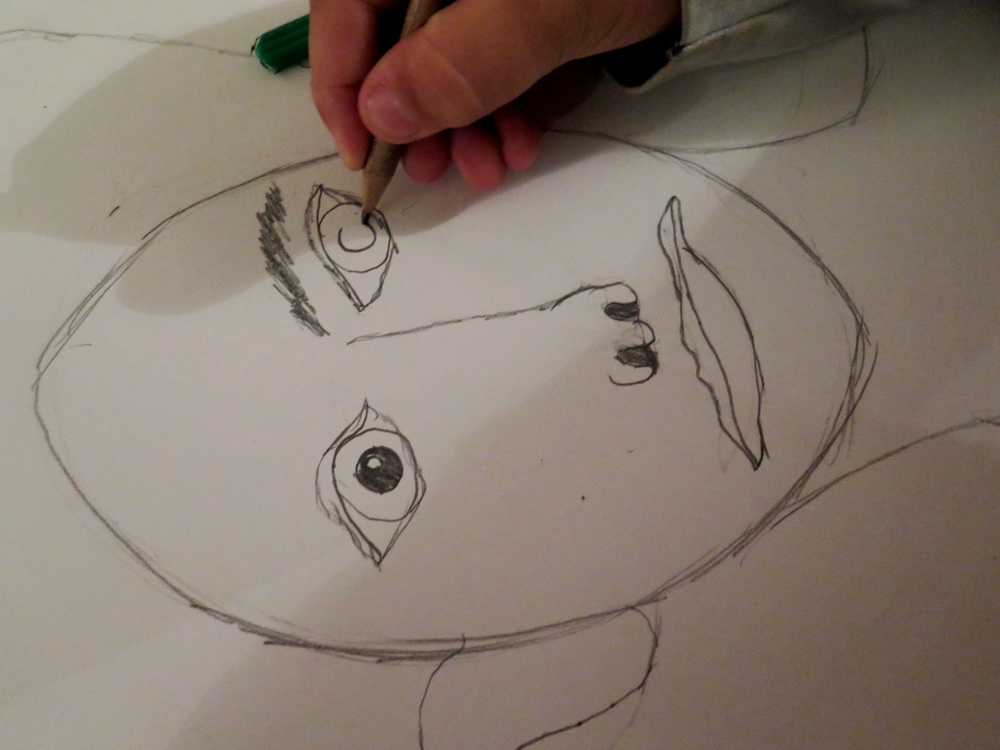
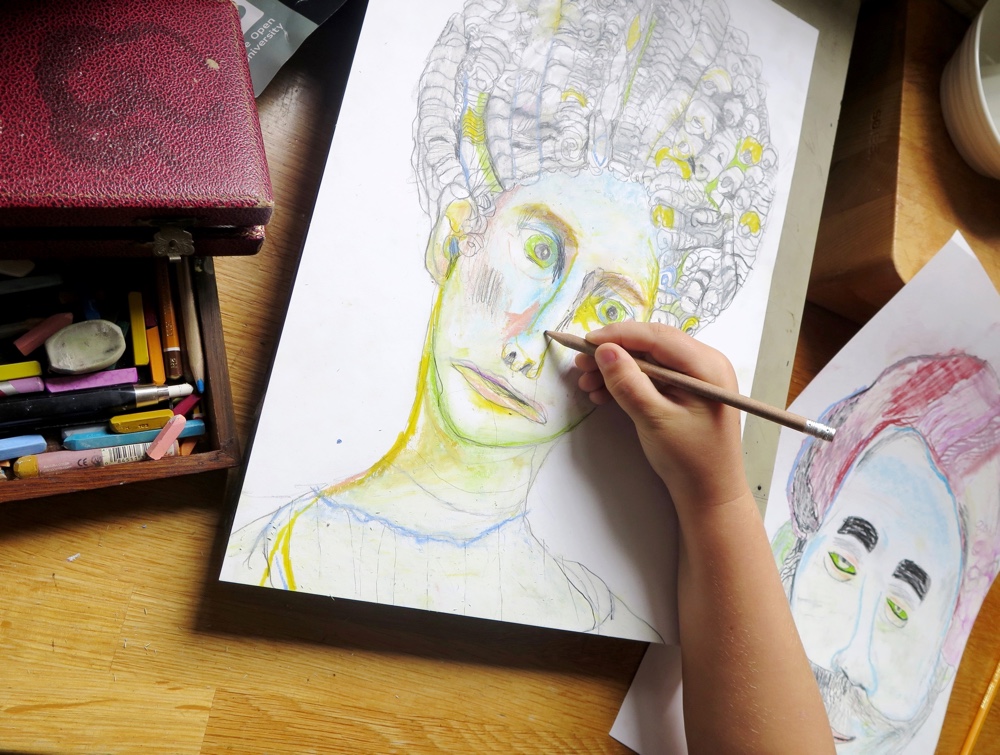
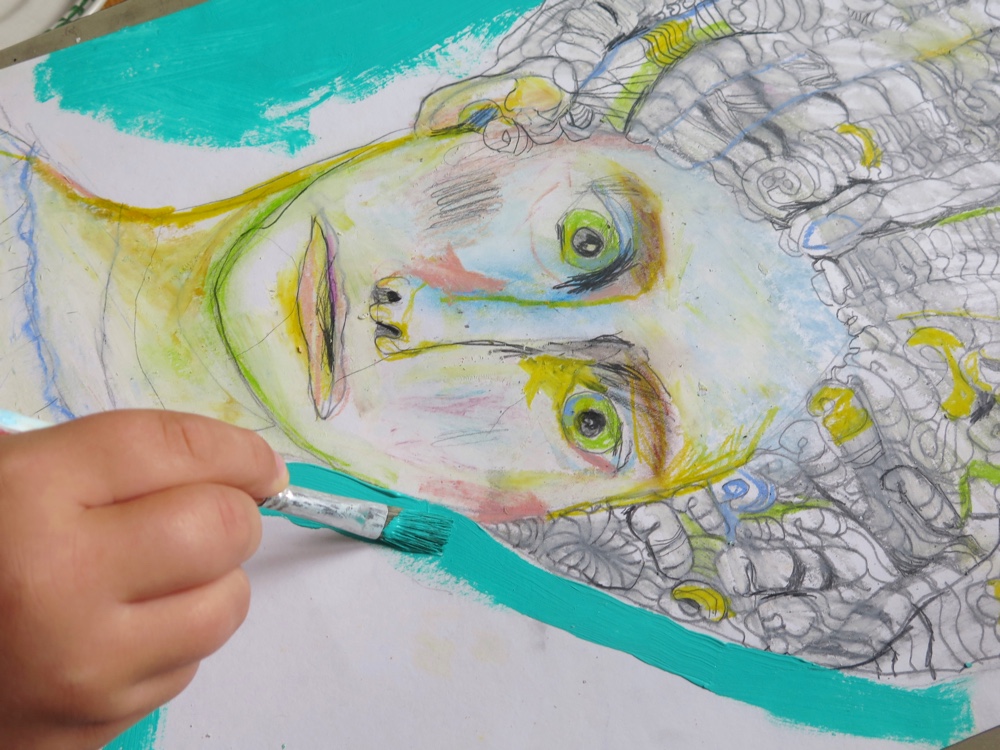
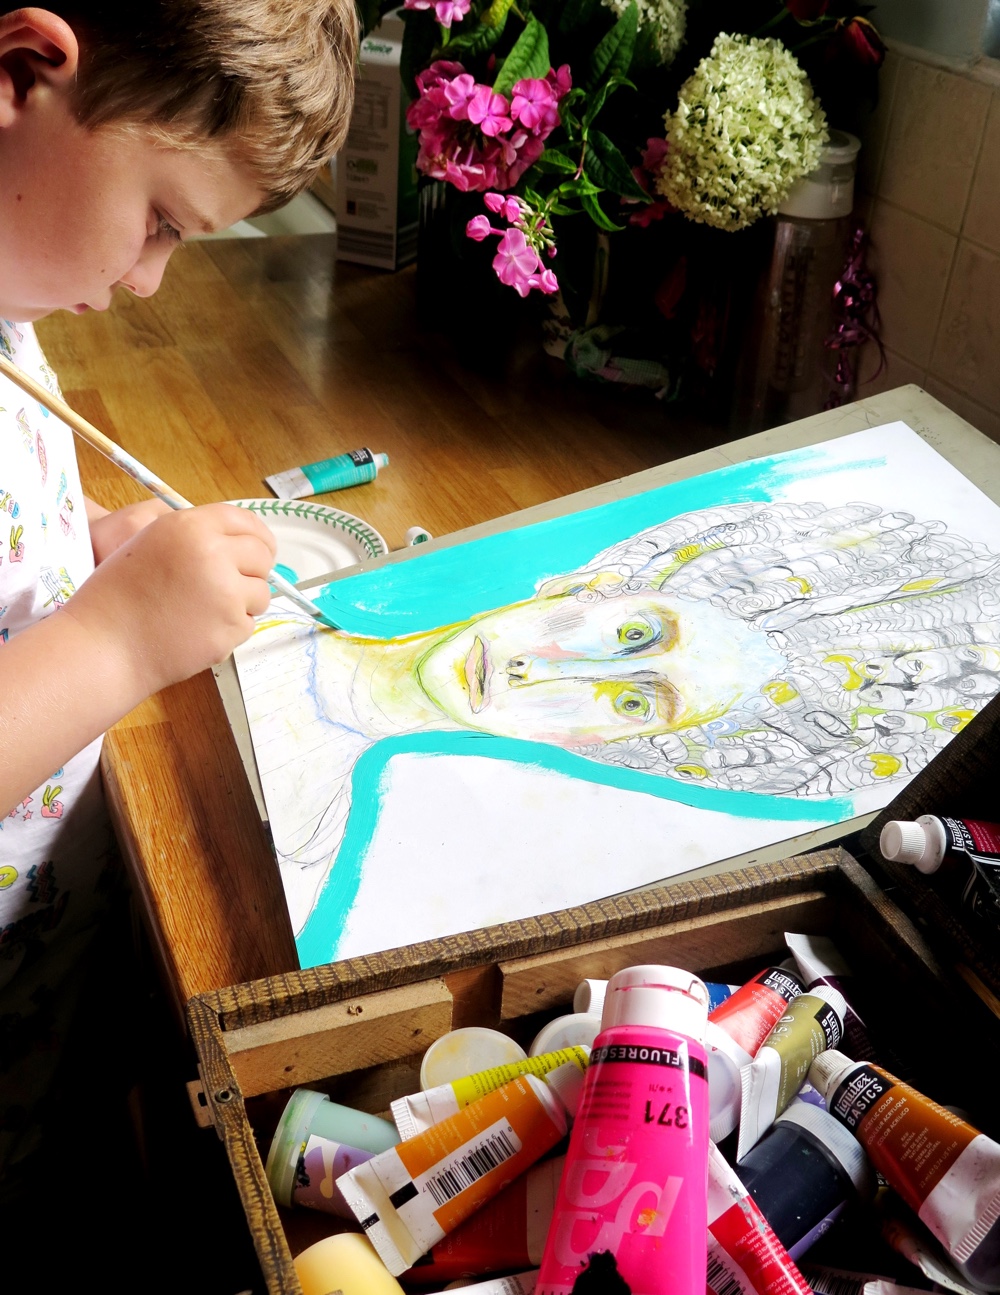
He began by taking photographs of old wooden religious heads and marble busts. He took the images in museums, churches and collected leaflets with images on to work from. An initial quick outline was made on A3 paper to create the angle of head, size of hair, amount of neck and shoulder to fit on. Some stronger lines were made with softer pencils, especially on the hair – erasing and editing when needed.
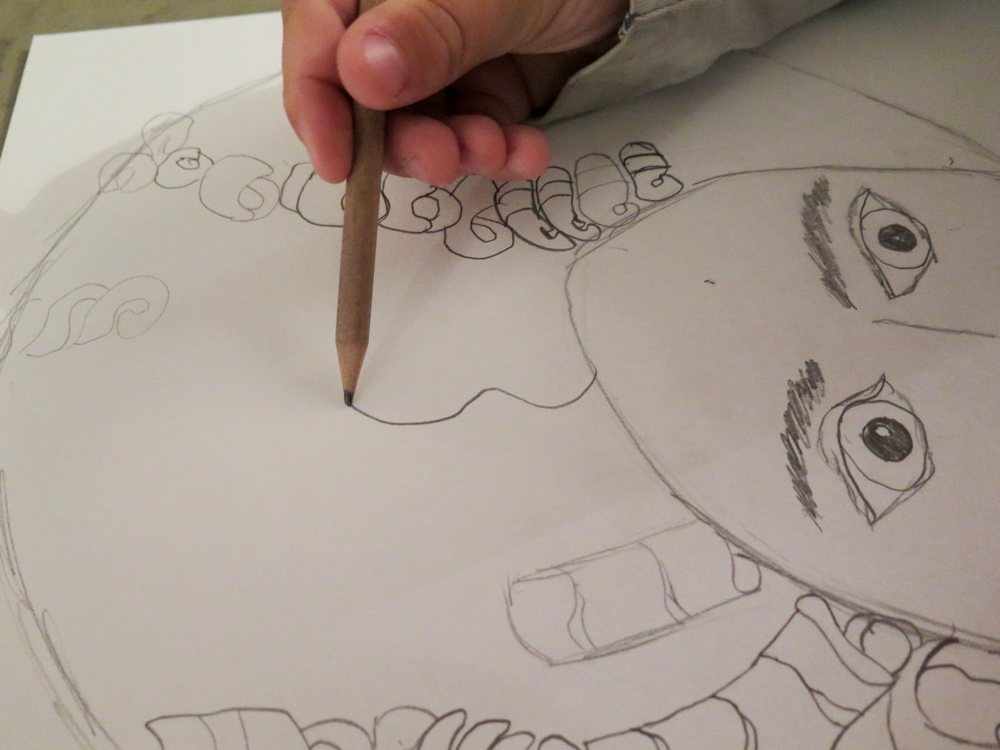
Second – Adding colour
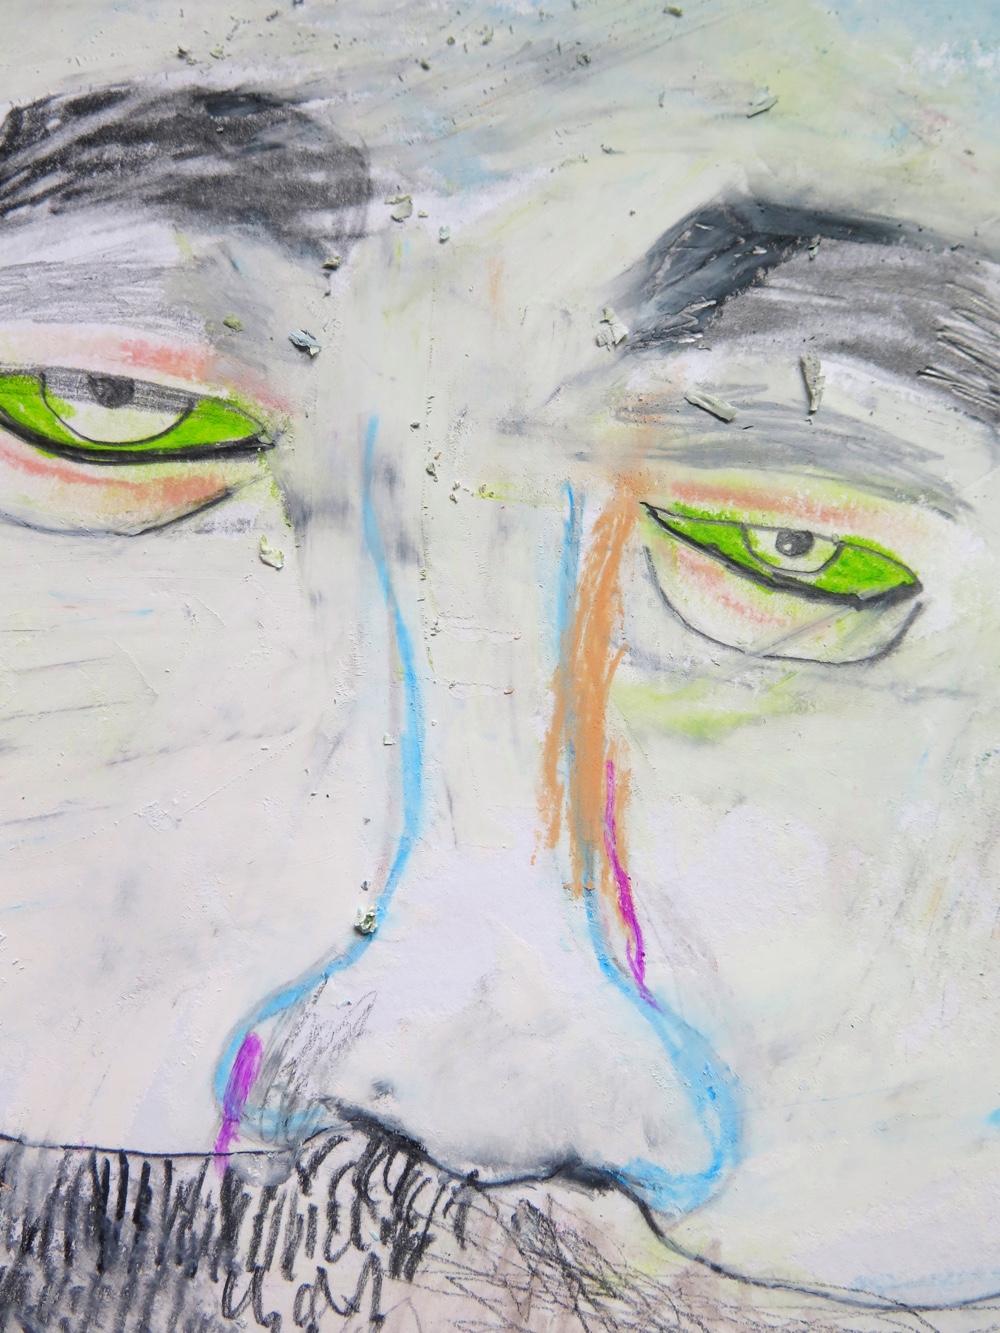
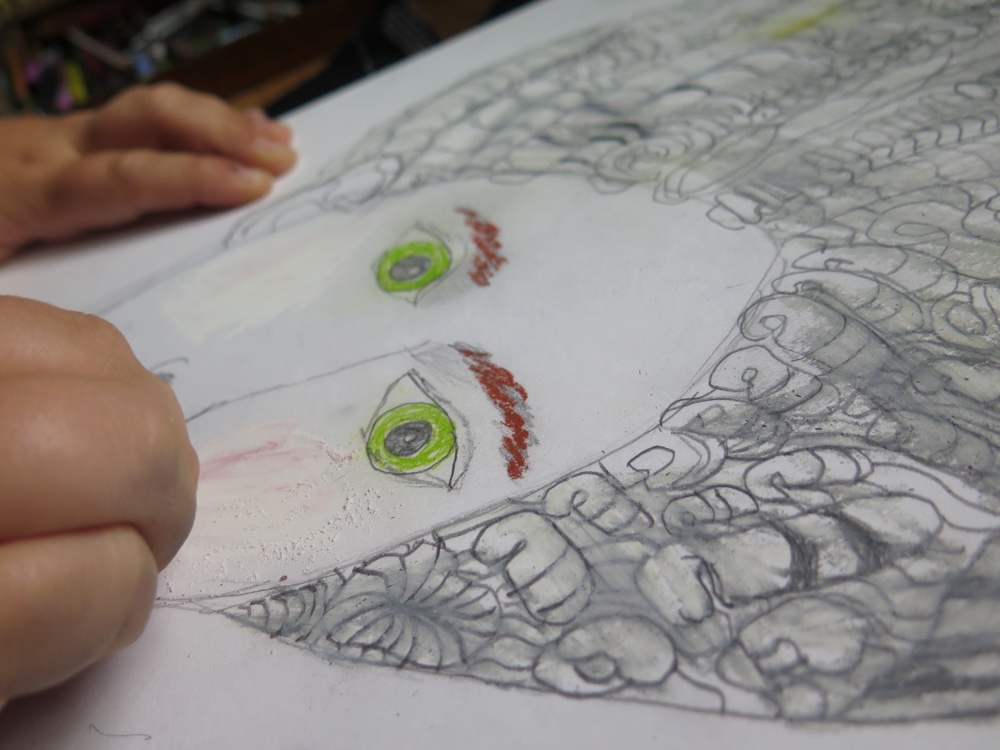
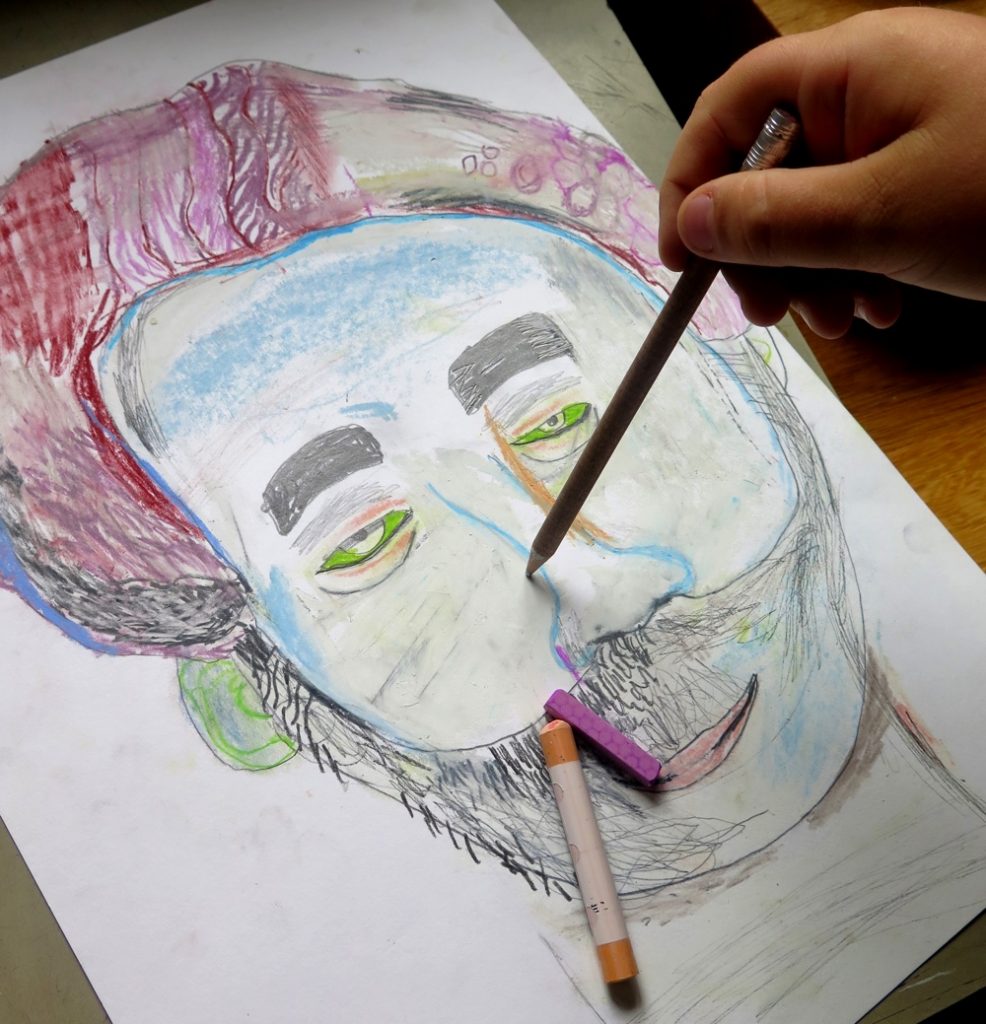
This often began with chalks – deciding on a couple of colours that can be seen, and emphasised, from close observation of the photograph. By using the chalks on the side as well as the sharp edge to create strong lines, then soft and smudging marks were made with his finger.
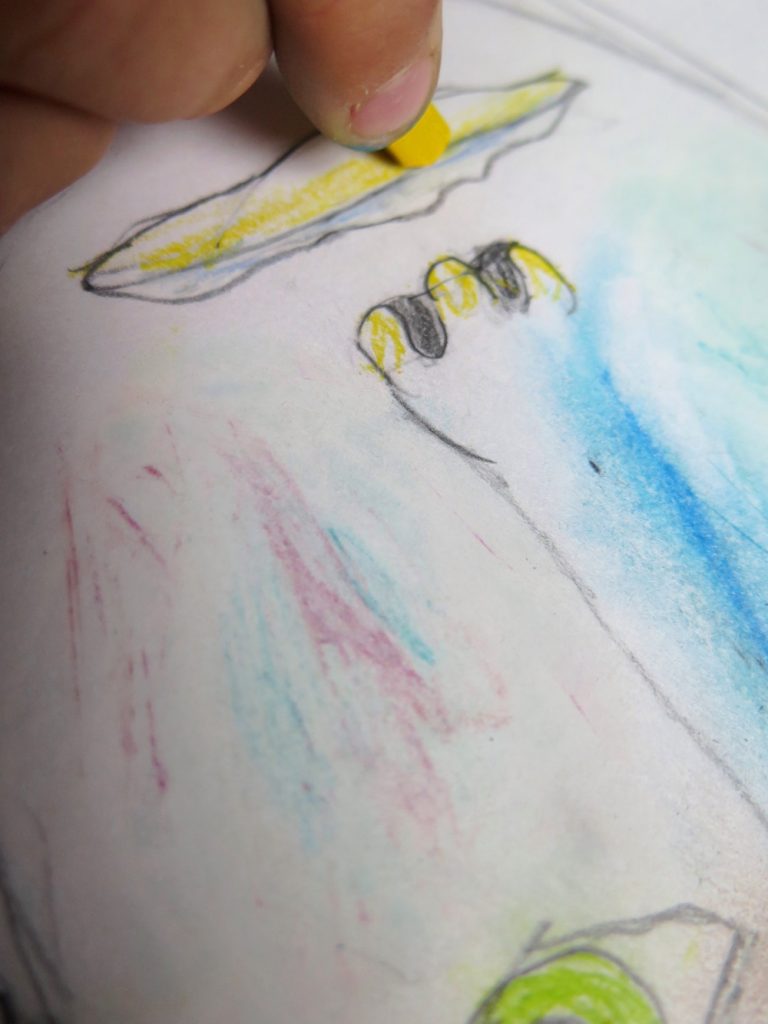
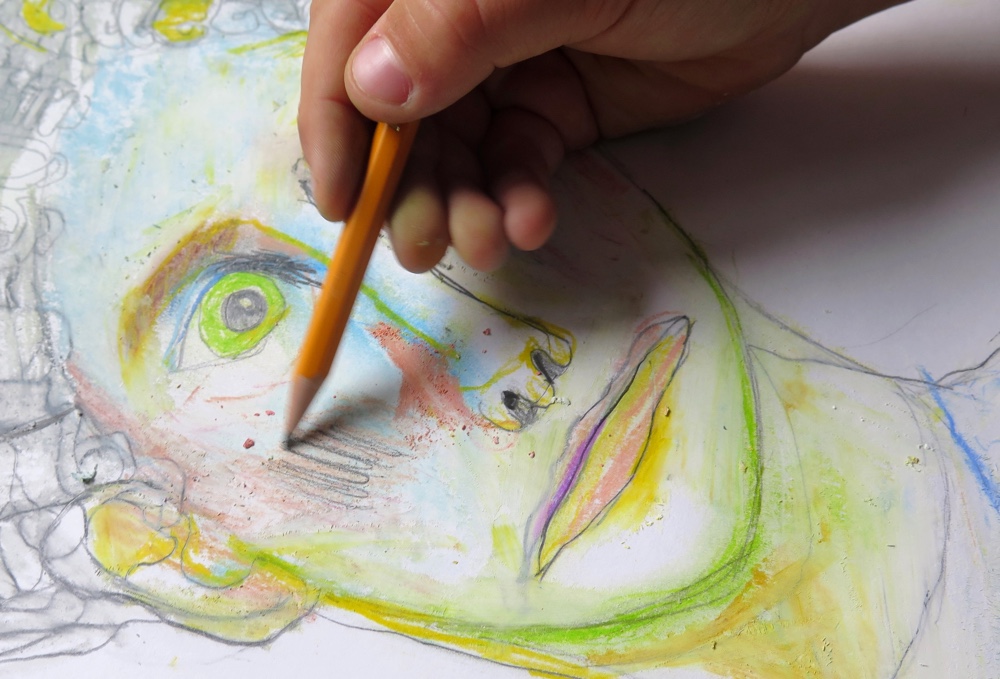
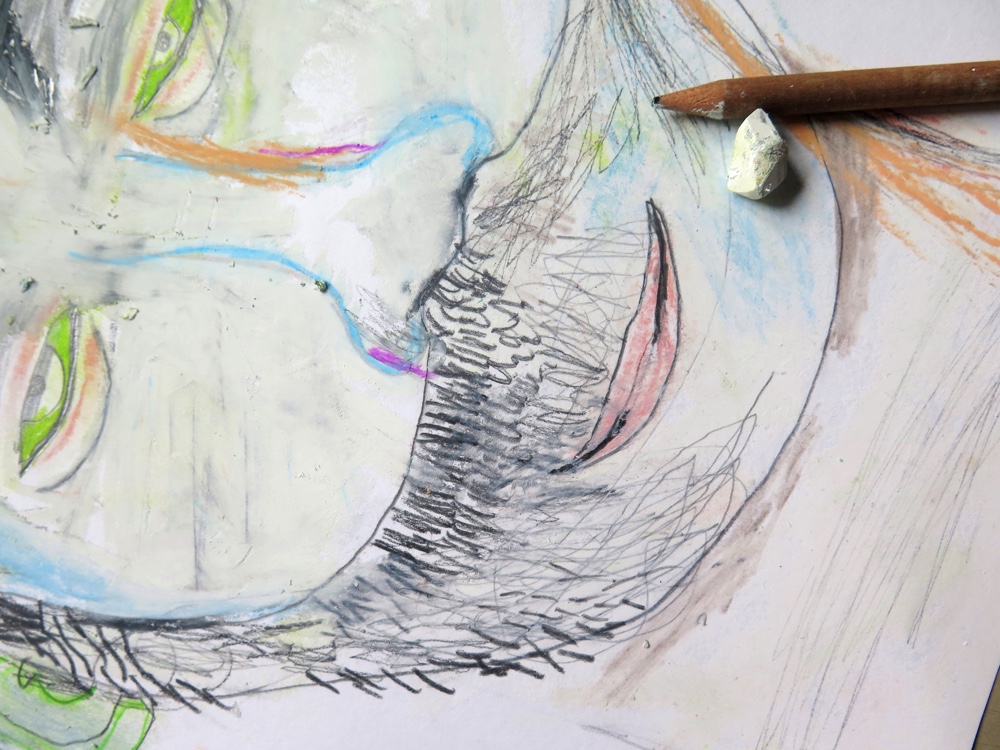
Third – adding white oil pastel
Next, quite rough application of oil pastel was added in areas, as this smudges the pencil lines. More detailed, sharp pencil was added on top created shapes and patterns. Soft, blunt, dark pencil was also used to make areas stand out. Any pencil and coloured pencil on top becomes more intense with the oil pastel base. Erasing into the colour was used to ‘break it up’ rather than deleting. He rapidly moves around the image, holding several materials and turning the image upside down.
Fourth – working a second image at the same time. Often, more than one image is worked concurrently.

Five – Finishing touches: choosing a background colour
He mixed and blended gouache and acrylic paint until the desired colour was created and added as a flat colour to the background. A final outline around the head, of a contrasting vibrant colour, was often added.
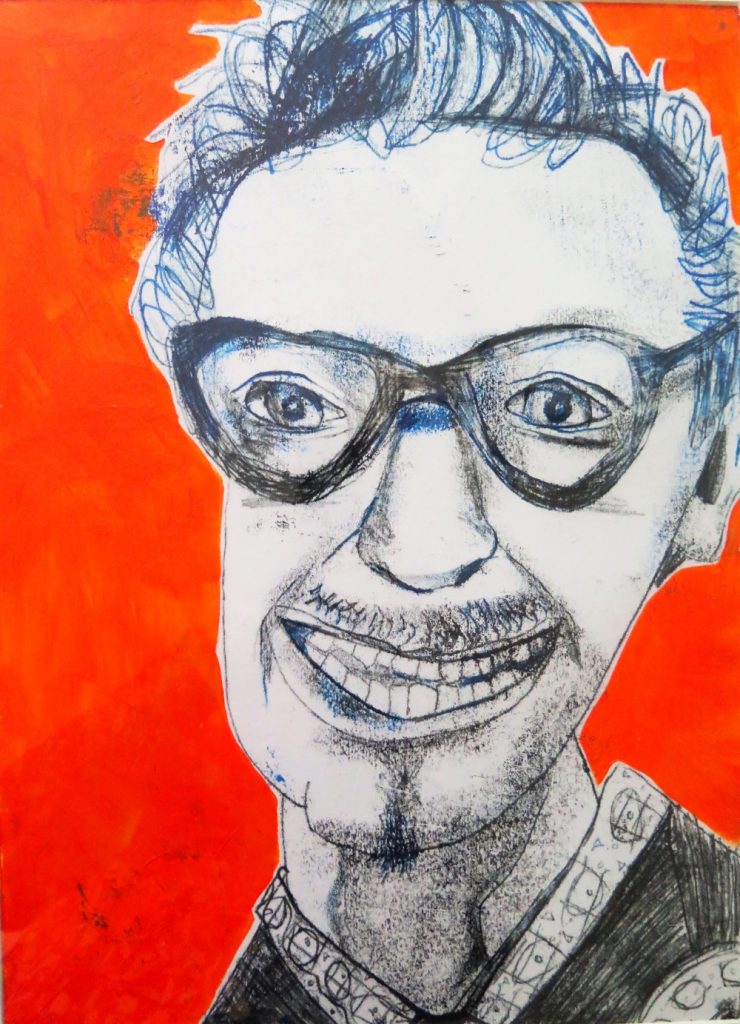
Some of his other portraits:


Context
Alongside the mixed-media portraits he produced more than fifty portraits of politicians, historical figures and local people. These were much quicker to produce, by simply inking up a chopping board with block printing ink before the portraits were drawn on the back of the paper, using a variety of marks and pressures of the pencil. A spoon or finger was used to rub to create some tone on the portrait. If more lines and tone are needed simply add to the image. The big choice was mixing a colour to add the background.
Tips
• You could use images of heads or faces from any source. Self-portraits, photos from home of family members, newspapers, teachers, etc.
Jan Miller shares a whole year’s worth of teaching for ages 7 to 8 in a collection of resources for AccessArt: Teaching Art to Year Three
This is a sample of a resource created by UK Charity AccessArt. We have over 1500 resources to help develop and inspire your creative thinking, practice and teaching.
AccessArt welcomes artists, educators, teachers and parents both in the UK and overseas.
We believe everyone has the right to be creative and by working together and sharing ideas we can enable everyone to reach their creative potential.
You May Also Like...
Visual Arts Planning Collections: Portraits

Assessment & Progression

Lise
January 7, 2019 @ 3:15 pm
These were much quicker to produce, by simply inking up a chopping board with block printing ink
Could you explain in greater detail how to do this, would love to try with a class. Glass or wooden chopping board? How much ink? Thanks!
Andrea Butler
January 9, 2019 @ 4:12 pm
Hello Lise, Jan has sent this reply for you:
To get started you will need a roller, black block printing ink, pencil, paper and a smooth surface. Try working with 1 table of children as you will need to monitor the amount of ink.
I have inked on anything from old tiles to off-cuts of formica if working big. Sometimes we ink up whole tables in the class if they are working big as the ink is water-based and wipes off easily. Individual A4 white boards used in classrooms are perfect and can be stacked too to use another day – likewise, plastic flexible chopping boards from a discount store. Seawhites or your local education supplier are reasonable for ink cost, approx same as a bottle of paint. It comes in a wide range of colours and can be used with other printing methods. It can be easily mixed straight on the board.
Put the ink on the A4 board (about the same amount of ink as you would for butter on bread) Its easily to add more but messy to take off. You want a thin even cover to the edges, and the children like to do this. When they have the right amount, the roller makes a nice noise so get them to listen out! If you have too much ink, put scrap paper, rub and take off until it shows pale. It is quite a trial and error technique, but as the printing is quick, this is part of the process. DROP your paper on the inked board- photocopy paper works well. DO NOT TOUCH THE PAPER, as any pressure will show on the print. Use a sharp pencil or biro to draw, holding the pen at the top. This takes some getting used to as the children want to rest their hand. A wobbly uncontrolled line can be effective though. The print can be lifted and viewed, then placed back down to work on again until the desired effect is created. You can use fingers to rub and add some ‘shading’ or the back of a spoon can be used. Several children can make their print on the same board, each getting lighter, before you will need to re-ink.
Children like the effect of adding colour, and the easiest way is to glue pieces of tissue paper on their paper first. This is effective & is quite random!
They can add a drawing or photocopy on top and trace through.
Tip- have a damp cloth handy for inky fingers and a bin for scrap
Good luck.
Jan Miller
SUKHJOTE KHATRA
January 13, 2024 @ 4:55 pm
Hi my little one is turning 4 soon but loves to sit & draw. We all think she’s talented for her age.
What else can I do to help her?
Rachel
January 16, 2024 @ 11:17 am
There’s lots of resources for younger children on the website, you might like to look at our early years ‘areas of exploration’ here: https://www.accessart.org.uk/accessart-eyfs-exploring-art-in-early-years-settings/. Hope this helps!